HBase Commands – General, Data Definition, & Data Manipulation
In our last HBase tutorial, we discussed HBase Shell. Today, we will see HBase Commands with examples and syntax. Basically, to get familiarized with HBase, we need to learn HBase Commands.
There are several types of HBase commands such as general commands, data definition commands, data manipulation commands. So, in this article, we will learn all these HBase commands in detail.
So, let’s explore HBase commands.
Hbase Commands
There are several types of Commands in HBase. They are-
– General Commands
– Data Definition Commands
– Data Manipulation Commands
– Other HBase Shell Commands
So, let’s learn all these Hbase Commands in detail.
Types of Commands in HBase
There are various types of HBase commands
a. General Commands
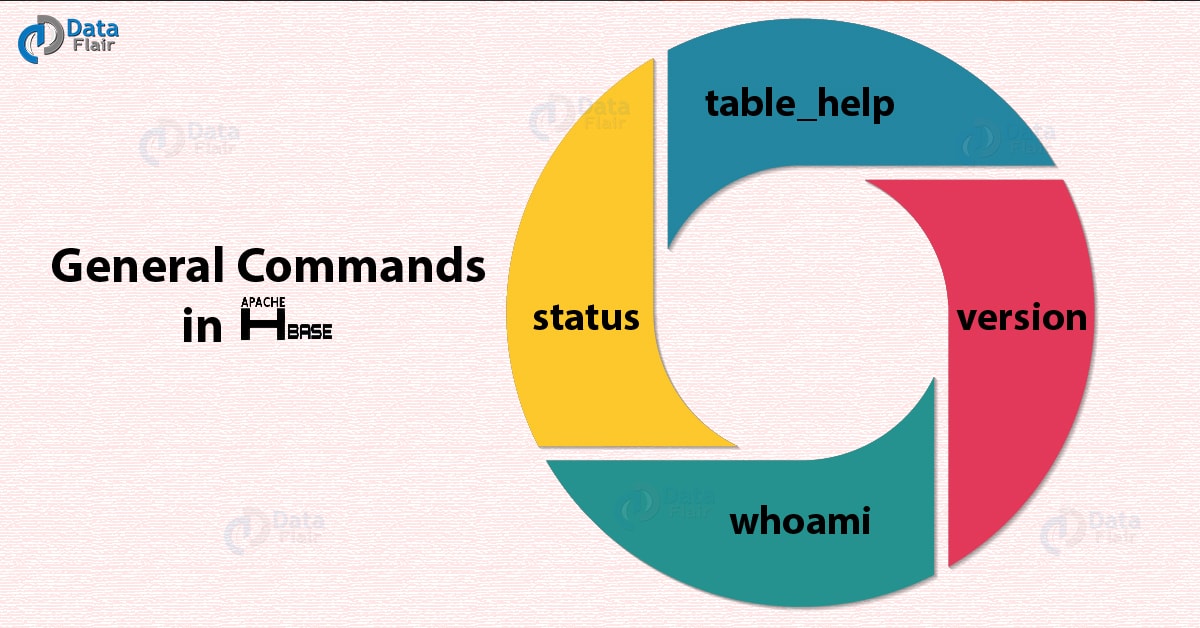
HBase General Commands
Below we are discussing some general HBase commands:
i. Status
It shows the status of the cluster.
A Syntax for Status-
hbase(main):009:0> status
ii. table_help
This command helps on Table reference commands, such as scan, put, get, disable, drop etc.
A Syntax for table help –
hbase(main):02:0> table_help
iii. Version
It displays version of HBase.
Version Syntax –
hbase(main):010:0> version
iv. whoami
It displays the current user details of HBase.
Whoami Syntax-
hbase> whoami
b. Data Definition Commands
Following are some Data Definition HBase Commands:
i. alter
We use alter command to add/modify/delete column families, also to change table configuration.
a. Add/Change column family
Let’s see an example, in order to change or add the ‘f1’ column family in table ‘t1’ from the current value to keep a maximum of 5 cell VERSIONS, use this command-
hbase> alter 't1', NAME => 'f1', VERSIONS => 5
Moreover, on several column families, we can operate it:
hbase> alter 't1', 'f1', {NAME => 'f2', IN_MEMORY => true}, {NAME => 'f3', VERSIONS => 5}b. Delete column family
Use one of following to delete the ‘f1’ column family in table ‘ns1:t1’:
hbase> alter 'ns1:t1', NAME => 'f1', METHOD => 'delete'
hbase> alter 'ns1:t1', 'delete' => 'f1'
c. Alter Table Properties
Also, it is possible to change table-scope attributes such as MAX_FILESIZE, READONLY, MEMSTORE_FLUSHSIZE, DEFERRED_LOG_FLUSH, etc. we can put these at the end;
for example:
Now, in order to change the max size of a region to 128MB, use this command:
hbase> alter 't1', MAX_FILESIZE => '134217728'
ii. alter_async
Only one difference between alter command and alter_async is, alter_async does not wait for all regions to receive the schema changes.
iii. alter_status
Alter_status command gets the status of the alter command. Moreover, it indicates the number of regions of the table which have received the updated schema.
For Example:
hbase> alter_status 't1'
hbase> alter_status 'ns1:t1'
iv. Create
For Creating tables, we use it. Also, we can Pass a table name, and a set of column family specifications (at least one), and, optionally, table configuration as arguments.
For Examples:
a. Create a table;
Along with the namespace=ns1 and table qualifier/name=t1
hbase> create 'ns1:t1', {NAME => 'f1', VERSIONS => 5}b. Create a table;
Along with namespace=default and table qualifier=t1
hbase> create 't1', {NAME => 'f1'}, {NAME => 'f2'}, {NAME => 'f3'}
hbase> # The above in shorthand would be the following:
hbase> create 't1', 'f1', 'f2', 'f3'
hbase> create 't1', {NAME => 'f1', VERSIONS => 1, TTL => 2592000, BLOCKCACHE => true}
hbase> create 't1', {NAME => 'f1', CONFIGURATION => {'hbase.hstore.blockingStoreFiles' => '10'}}
c. Table configuration options can be put at the end.
hbase> create 'ns1:t1', 'f1', SPLITS => ['10', '20', '30', '40']
hbase> create 't1', 'f1', SPLITS => ['10', '20', '30', '40']
hbase> create 't1', 'f1', SPLITS_FILE => 'splits.txt', OWNER => 'johndoe'
hbase> create 't1', {NAME => 'f1', VERSIONS => 5}, METADATA => { 'mykey' => 'myvalue' }
hbase> # Optionally pre-split the table into NUMREGIONS, using
hbase> # SPLITALGO ("HexStringSplit", "UniformSplit" or classname)
hbase> create 't1', 'f1', {NUMREGIONS => 15, SPLITALGO => 'HexStringSplit'}
hbase> create 't1', 'f1', {NUMREGIONS => 15, SPLITALGO => 'HexStringSplit', CONFIGURATION => {'hbase.hregion.scan.loadColumnFamiliesOnDemand' => 'true'}}
d. Also, it is possible to keep around a reference to the created table.
hbase> t1 = create 't1', 'f1'
Which gives a reference to the table named ‘t1’, on which we can then call methods t1.scan, t1.get.
v. disable
The “disable” command, disables an existing HBase table. However, the tables which are disabled, will not be deleted from HBase, only they are not available for regular access.
And we can not run any other command except either enable or drop commands on disabled tables because this table is excluded from the list command. In simple words, Disabling means to delete the tables temporarily.
hbase> disable 't1'
hbase> disable 'ns1:t1'
vi. disable_all
By matching the given regex, it disable all of tables:
hbase> disable_all 't.*'
hbase> disable_all 'ns:t.*'
hbase> disable_all 'ns:.*'
vii. drop
It simply means deleting the tables permanently. But make sure, to drop a table we need to disable it first.
hbase> drop 't1'
hbase> drop 'ns1:t1'
viii. drop_all
By matching the given regex, it drops all of the tables:
hbase> drop_all 't.*'
hbase> drop_all 'ns:t.*'
hbase> drop_all 'ns:.*'
ix. enable
In order to enable a table which might be currently disabled, we use enable command.
hbase> enable 't1'
hbase> enable 'ns1:t1'
x. enable_all
By matching the given regex, it enables all of the tables :
hbase> enable_all 't.*'
hbase> enable_all 'ns:t.*'
hbase> enable_all 'ns:.*'
xi. exists
We use “Exists” to check the existence of an HBase Table
hbase> exists 't1'
hbase> exists 'ns1:t1'
xii. get_table
“Get_table” gets the given table name and also return it as an actual object to be manipulated by the user.
hbase(main):014:0> t1 = get_table 'blog'
0 row(s) in 0.0130 seconds
=> Hbase::Table - blog
hbase(main):015:0>
xiii. is_disabled
We use this command to know whether an HBase table is disabled or not.
hbase> is_disabled 't1'
hbase> is_disabled 'ns1:t1'
xiv. is_enabled
“Is_enabled” command helps to know whether an HBase table is enabled or not.
hbase> is_enabled 't1'
hbase> is_enabled 'ns1:t1'
xv. list
We use this command to list all tables in hbase. Moreover, to filter the output, optional regular expression parameter could be used.
For example:
hbase> list
hbase> list 'abc.*'
hbase> list 'ns:abc.*'
hbase> list 'ns:.*'
xvi. show_filters
This command shows all the filters in Hbase.
For example:
hbase> show_filters
ColumnPrefixFilter
TimestampsFilter
PageFilter
.....
KeyOnlyFilter
c. DML Commands
There are some Data Manipulation HBase Commands:
i. append
“append” command appends a cell ‘value’ at specified table/row/column coordinates.
hbase> append 't1', 'r1', 'c1', 'value', ATTRIBUTES=>{'mykey'=>'myvalue'}
hbase> append 't1', 'r1', 'c1', 'value', {VISIBILITY=>'PRIVATE|SECRET'}
ii. count
This command counts the number of rows in a table and here return value is the number of rows.
For example:
hbase> count 'ns1:t1'
hbase> count 't1'
hbase> count 't1', INTERVAL => 100000
hbase> count 't1', CACHE => 1000
hbase> count 't1', INTERVAL => 10, CACHE => 1000
iii. delete
“Delete” command, puts a delete cell value at specified table/row/column and optionally timestamp coordinates.
hbase> delete 'ns1:t1', 'r1', 'c1', ts1
hbase> delete 't1', 'r1', 'c1', ts1
hbase> delete 't1', 'r1', 'c1', ts1, {VISIBILITY=>'PRIVATE|SECRET'}
iv. deleteall
This command deletes all cells in a given row; pass a table name, row, and optionally a column and timestamp.
For Example:
hbase> deleteall 'ns1:t1', 'r1'
hbase> deleteall 't1', 'r1'
hbase> deleteall 't1', 'r1', 'c1'
hbase> deleteall 't1', 'r1', 'c1', ts1
hbase> deleteall 't1', 'r1', 'c1', ts1, {VISIBILITY=>'PRIVATE|SECRET'}
v. get
A Get command, get a row or cell contents; pass the table name, row, and optionally a dictionary of column(s), timestamp, timerange, and versions.
For example:
hbase> get 'ns1:t1', 'r1'
hbase> get 't1', 'r1'
hbase> get 't1', 'r1', {TIMERANGE => [ts1, ts2]}
hbase> get 't1', 'r1', {COLUMN => 'c1'}
hbase> get 't1', 'r1', {COLUMN => ['c1', 'c2', 'c3']}
hbase> get 't1', 'r1', {COLUMN => 'c1', TIMESTAMP => ts1}
hbase> get 't1', 'r1', {COLUMN => 'c1', TIMERANGE => [ts1, ts2], VERSIONS => 4}
hbase> get 't1', 'r1', {COLUMN => 'c1', TIMESTAMP => ts1, VERSIONS => 4}
hbase> get 't1', 'r1', {FILTER => "ValueFilter(=, 'binary:abc')"}
hbase> get 't1', 'r1', 'c1'
hbase> get 't1', 'r1', 'c1', 'c2'
hbase> get 't1', 'r1', ['c1', 'c2']
hbsase> get 't1','r1', {COLUMN => 'c1', ATTRIBUTES => {'mykey'=>'myvalue'}}
hbsase> get 't1','r1', {COLUMN => 'c1', AUTHORIZATIONS => ['PRIVATE','SECRET']}
vi. get_counter
This command returns a counter cell value at specified table/row/column coordinates.
hbase> get_counter 'ns1:t1', 'r1', 'c1'
 hbase> get_counter 't1', 'r1', 'c1'
vii. incr
Simply, it increments a cell ‘value’ at specified table/row/column coordinates.
For example,
In order to increment a cell value in table ‘ns1:t1’ or ‘t1’ at row ‘r1’ under column ‘c1’ by 1 (can be omitted) or 10, perform:
hbase> incr 'ns1:t1', 'r1', 'c1'
hbase> incr 't1', 'r1', 'c1'
hbase> incr 't1', 'r1', 'c1', 1
hbase> incr 't1', 'r1', 'c1', 10
hbase> incr 't1', 'r1', 'c1', 10, {ATTRIBUTES=>{'mykey'=>'myvalue'}}
hbase> incr 't1', 'r1', 'c1', {ATTRIBUTES=>{'mykey'=>'myvalue'}}
hbase> incr 't1', 'r1', 'c1', 10, {VISIBILITY=>'PRIVATE|SECRET'}
viii. put
Put command, puts a cell ‘value’ at specified table/row/column and optionally timestamp coordinates.
For Example,
In order to put a cell value into table ‘ns1:t1’ or ‘t1’ at row ‘r1’ under column ‘c1’ marked with the time ‘ts1’, perform:
hbase> put 'ns1:t1', 'r1', 'c1', 'value'
hbase> put 't1', 'r1', 'c1', 'value'
hbase> put 't1', 'r1', 'c1', 'value', ts1
hbase> put 't1', 'r1', 'c1', 'value', {ATTRIBUTES=>{'mykey'=>'myvalue'}}
hbase> put 't1', 'r1', 'c1', 'value', ts1, {ATTRIBUTES=>{'mykey'=>'myvalue'}}
hbase> put 't1', 'r1', 'c1', 'value', ts1, {VISIBILITY=>'PRIVATE|SECRET'}
ix. truncate
This command disables, drops and recreates the specified table. Make sure, the schema will be present but not the records, just after truncate of an HBase table.
x. truncate_preserve
While still maintaining the previous region boundaries, this command disables, drops and recreates the specified table.
Other HBase Commands
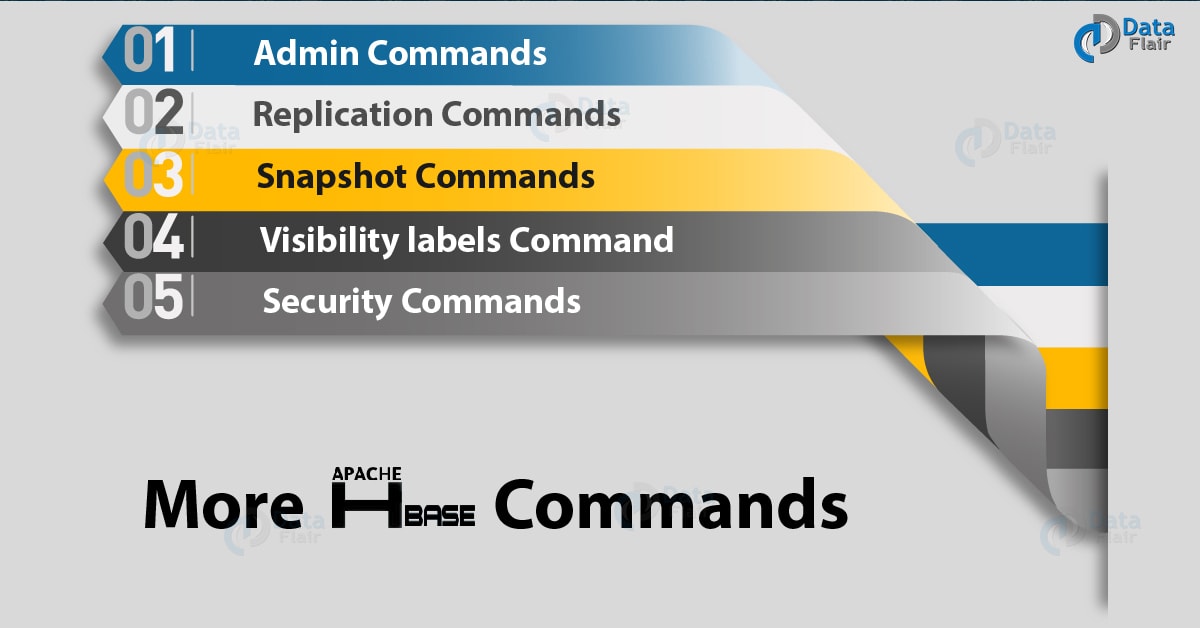
HBase Commands
a. Admin Commands
- assignbalance_switch
- balancer
- catalogjanitor_enabled
- catalogjanitor_run
- catalogjanitor_switch
- close_region
- compact
- flush
- hlog_roll
- major_compact
- merge_region
- move
- split
- trace
- unassign
- zk_dump
b. Replication Commands
- add_peer
- disable_peer
- enable_peer
- list_peers
- list_replicated_tables
- remove_peer
- set_peer_tableCFs
- show_peer_tableCFs
c. Snapshot Commands
- clone_snapshot
- delete_snapshot
- list_snapshots
- rename_snapshot
- restore_snapshot
- snapshot
d. Visibility Labels Commands
A. add_labels
B. clear_auths
- get_auths
- set_auths
- set_visibility
e. Security Commands
A. grant
This command, grant users specific rights.
grant <user> <permissions> [<@namespace> [<table> [<column family> [<column qualifier>]]]
However, make sure, permissions is either zero or more letters from the set “RWXCA”.
READ(‘R’), WRITE(‘W’), EXEC(‘X’), CREATE(‘C’), ADMIN(‘A’)
Note: It is must that a namespace always precede with ‘@’ character.
hbase> grant 'bobsmith', 'RWXCA'
hbase> grant 'bobsmith', 'RWXCA', '@ns1'
hbase> grant 'bobsmith', 'RW', 't1', 'f1', 'col1'
hbase> grant 'bobsmith', 'RW', 'ns1:t1', 'f1', 'col1'
B. revoke
Revoke command, revokes a user’s access rights.
revoke <user> [<table> [<column family> [<column qualifier>]]
hbase> revoke 'bobsmith'
hbase> revoke 'bobsmith', 't1', 'f1', 'col1'
hbase> revoke 'bobsmith', 'ns1:t1', 'f1', 'col1'
C. user_permission
This command shows all permissions for the particular user.
The syntax of User Permission:
user_permission <table>
hbase> user_permission
hbase> user_permission 'table1'
hbase> user_permission 'namespace1:table1'
hbase> user_permission '.*'
hbase> user_permission '^[A-C].*'
So, this was all about HBase commands. Hope you like our explanation.
Conclusion: HBase Commands
Hence, in this HBase tutorial, we have seen all the HBase commands. Also, we discussed HBase commands with examples as well as syntax. Hope these will help you to get familiarize with HBase well. Still, if any doubt regarding HBase commands, ask in the comment tab.
Your opinion matters
Please write your valuable feedback about DataFlair on Google


Hi i have seen a mistake in the beginning of the topic. Look at objective where it says “In our last tutorial we discussed about the shell command” but the next topic is shell command. I have also seen this mistake in features also.
Thank you