Rotate and Resize Image using OpenCV
Machine Learning courses with 100+ Real-time projects Start Now!!
Hey there, image enthusiasts! Are you ready to unlock the secrets of transforming and beautifying your images? If you’ve ever wondered how to magically resize or elegantly rotate your pictures, you’ve come to the right place! In this exciting adventure, we’ll explore the wonders of OpenCV, your trusty companion for image processing.
Imagine being able to resize your images effortlessly, adjusting their dimensions to suit any project, be it a stunning website, an artful presentation, or a captivating computer vision application. Plus, we’ll show you how to gracefully rotate your images, giving them a whole new perspective with just a few lines of code!
So, grab your favorite cup of coffee and get ready to dive into the fascinating world of image rotation and resizing with OpenCV. It’s time to add that extra touch of magic to your visual creations! Let’s get started!
What’s the need to resize?
Imagine you’re building a sleek website, and you want your images to fit comfortably into their designated spots without stretching or squishing them. Or perhaps you’re working on a top-notch computer vision project, and you need all your images to have a consistent size for smooth analysis.
Image resizing is the process of adjusting an image’s dimensions, either increasing or decreasing them, while preserving the original aspect ratio. This powerful technique allows you to tailor your images to fit specific requirements, ensuring a seamless visual experience for your audience. Some of the main advantages of image resizing are as follows –
1. Memory and Storage Optimization: Resizing reduces file sizes, saving memory and storage space.
2. Faster Processing: Smaller images lead to quicker processing in computer vision and deep learning tasks.
3. Aspect Ratio Preservation: Resizing maintains image proportions, avoiding distortion.
4. Enhanced User Experience: Properly resized images improve loading times and user experience.
5. Uniform Data: Consistent image sizes ensure uniformity for analysis and accurate results.
Let’s Know about Interpolation
Interpolation, in the context of image processing and resizing, refers to the technique used to estimate new pixel values when transforming an image to a different size or orientation. When resizing an image, the number of pixels needs to be adjusted to fit the new dimensions, which may result in either an increase or a decrease in the number of pixels. The choice of interpolation method affects the visual quality of the resized image, as different techniques have varying levels of accuracy and computational complexity.
1. Pixel Resampling :
When resizing an image, the process involves changing the size of the image grid, which means new pixel positions need to be calculated. Interpolation is used to determine the color or intensity values of these new pixels based on the existing pixel values in the original image.
2. Mathematical Estimation :
Interpolation algorithms use mathematical functions to estimate the values of pixels at non-integer coordinates, as the original image’s pixels are typically defined at integer coordinates (e.g., (1, 2), (3, 4), etc.).
3. Smooth Transitions :
Interpolation ensures that the resized image appears smooth and continuous without introducing noticeable artefacts or jagged edges. It helps to avoid aliasing, which is the distortion or loss of high-frequency information during resizing.
4. Interpolation Methods :
There are various interpolation methods, and the choice of method depends on the application and the desired output quality. Common methods include:
- Nearest Neighbor: Simplest but least accurate; assigns the value of the nearest pixel to the new location.
- Bilinear: Uses a weighted average of four surrounding pixels to estimate the new pixel value; provides smoother results than the nearest neighbor.
- Bicubic: Uses a weighted average of 16 neighbouring pixels to estimate the new pixel value; offers better quality but higher computational complexity.
- Lanczos: Based on a sinc function windowed by the Lanczos window, it provides excellent quality but can be computationally expensive.
5. Upscaling and Downscaling :
Interpolation methods are used for both upscaling (increasing the image size) and downscaling (decreasing the image size) operations. When downscaling, interpolation helps to maintain details and avoid pixelation.
6. Image Rotation :
Interpolation is also employed when rotating an image at non-integer angles. It ensures that rotated images appear smooth and visually accurate.
7. Subpixel Accuracy :
Interpolation allows for subpixel accuracy, meaning that pixel values can be estimated at fractional coordinates, enabling more precise transformations.
8. Trade-off :
There is a trade-off between computational efficiency and image quality when choosing an interpolation method. More advanced methods tend to yield better results but may require more processing time.
Resizing an Image using OpenCV
Image resizing is like giving your visuals a makeover, adjusting their dimensions to create a seamless fit for any project or application. Whether you’re designing a website, delving into computer vision, or working on a creative project, achieving the perfect size for your images is crucial.
Thankfully, OpenCV, the exceptional open-source image processing library, comes to the rescue with its simple yet robust image resizing capabilities. In this article, we’ll explore how OpenCV can effortlessly transform your images and bring out their full potential.
In OpenCV, you can resize an image using the cv2.resize() function. The syntax for the resize function is as follows:
resized_image = cv2.resize(src, dsize[, dst[, fx[, fy[, interpolation]]]])
- src: it’s the source image that you want to resize.
- dsize: It’s a tuple (width, height) specifying the desired width and height of the resized image.
- dst (optional): It’s the output image. If not specified, a new image will be created.
- fx (optional): It is the scaling factor along the horizontal axis. If fx is specified, dsize is ignored for the horizontal dimension.
- fy (optional): It defines the scaling factor along the vertical axis. If fy is specified, dsize is ignored for the vertical dimension.
Interpolation:
It is the interpolation method to be used during resizing. It can take one of the following values:
- cv2.INTER_NEAREST: Nearest-neighbor interpolation.
- cv2.INTER_LINEAR: Bilinear interpolation (default).
- cv2.INTER_CUBIC: Bicubic interpolation over 4×4 pixel neighborhood.
- cv2.INTER_LANCZOS: Lanczos interpolation over 8×8 pixel neighborhood.
We’ve further discussed all the above processes one by one.
Normal Resizing (Bilinear Interpolation):
Normal resizing with bilinear interpolation is the default method used in OpenCV when resizing an image. Bilinear interpolation is a technique that estimates new pixel values by considering the weighted average of the nearest four pixels surrounding the target position.
import cv2

# Load the image
image = cv2.imread(r"C:\Users\sanji\Desktop\DataFlair\OpenCV resize image, image rotation\dog-with-ball.jpg")

# Define the new width and height for the resized image
new_width, new_height = 800, 600

# Resize the image
resized_image = cv2.resize(image, (new_width, new_height))
In this example, we loaded an image using cv2.imread(), defined the desired width and height as new_width and new_height, respectively, and then used cv2.resize() to resize the image to the specified dimensions.
Nearest-neighbor interpolation :
Nearest-neighbor interpolation is a simple yet effective method for resizing images in OpenCV. Unlike bilinear interpolation, which considers the weighted average of surrounding pixels, nearest-neighbor interpolation selects the pixel value of the nearest neighbor to fill in the new pixels during resizing.
Let’s explore how to resize an image using nearest-neighbor interpolation in OpenCV:
import cv2

# Load the image
image = cv2.imread(r"C:\Users\sanji\Desktop\DataFlair\OpenCV resize image, image rotation\dog-with-ball.jpg")

# Define the new width and height for the resized image
new_width, new_height = 800, 600

# Resize using nearest-neighbor interpolation
resized_image = cv2.resize(image, (new_width, new_height), interpolation=cv2.INTER_NEAREST)
In this code snippet, we loaded the image with cv2.imread() and specified the desired dimensions for the resized image using new_width and new_height. Then, we utilized the cv2.resize() function, passing cv2.INTER_NEAREST as the interpolation argument to perform the resizing with nearest-neighbor interpolation.
import cv2

# Load the original image
original_image = cv2.imread(r"C:\Users\sanji\Desktop\DataFlair\OpenCV resize image, image rotation\dog-with-ball.jpg")
new_width, new_height = 640, 480

resized_image = cv2.resize(original_image, (new_width, new_height), interpolation=cv2.INTER_NEAREST)
cv2.imshow('Original Image', original_image)

cv2.imshow('Resized Image', resized_image)

cv2.waitKey(0)
cv2.destroyAllWindows()
In this code, we first load the original image using cv2.imread() and then perform resizing using cv2.resize() with nearest-neighbor interpolation. We then display both the original and resized images using cv2.imshow(). The cv2.waitKey(0) function waits for a key press, and cv2.destroyAllWindows() closes the display windows when any key is pressed.
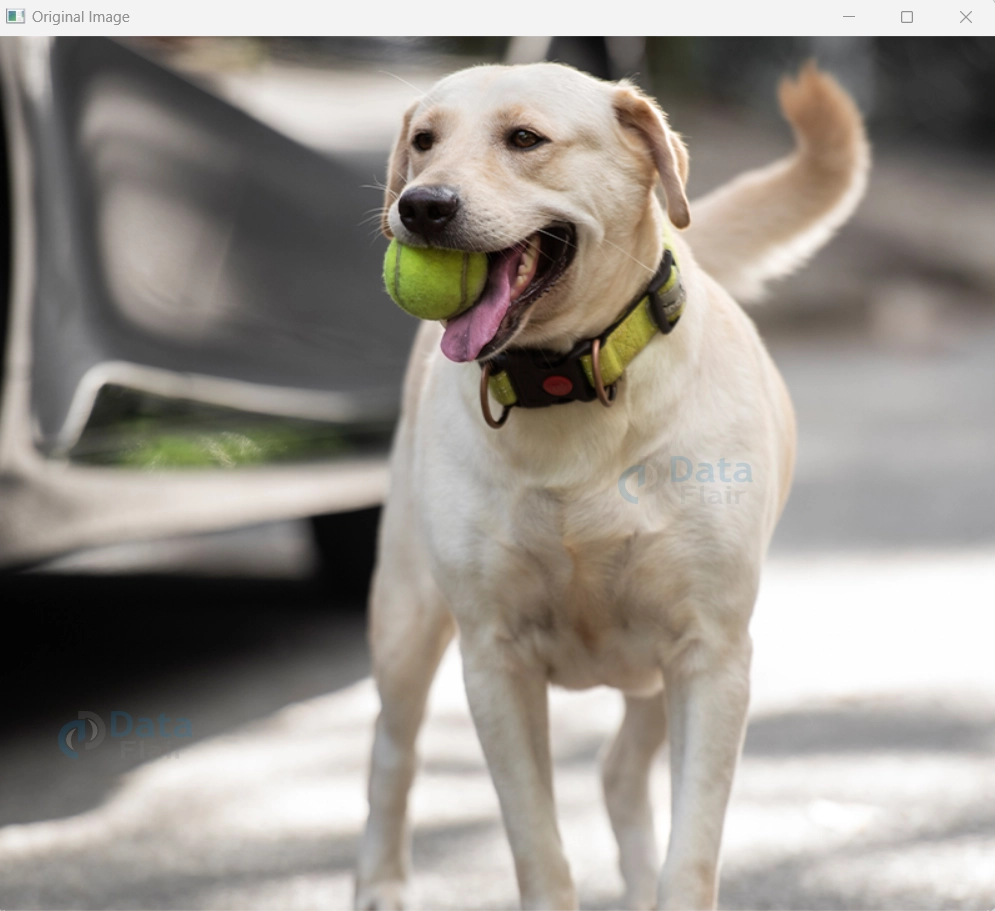
Original Image :
Resized Image :
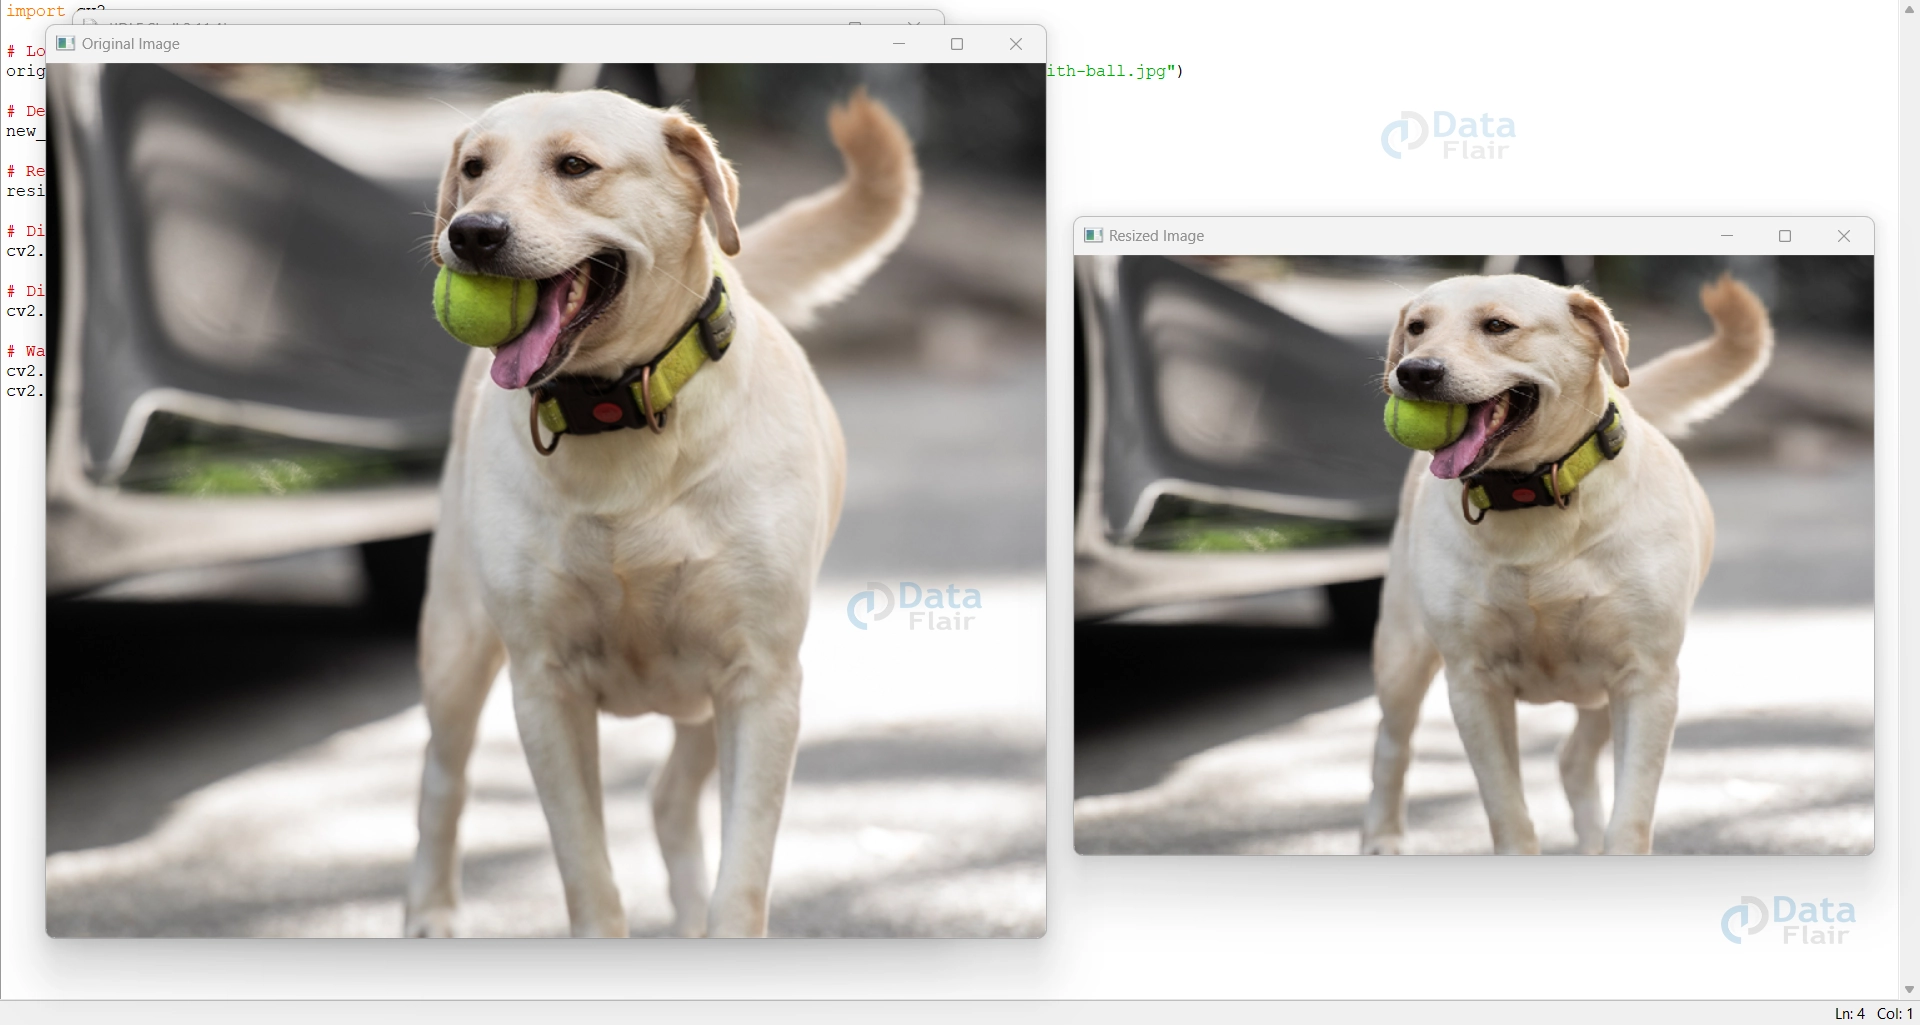
In the above output, there are two windows where one displays the original image and the other one is the required resized image.
Lanczos interpolation :
Lanczos interpolation is an advanced interpolation method used in image processing, particularly for image resizing. It provides high-quality results by using sin functions (sin(x)/x) to compute pixel values.
Lanczos interpolation is especially effective for preserving sharp edges and fine details in images, making it a popular choice in computer graphics and computer vision tasks.
import cv2

image = cv2.imread(r"C:\Users\sanji\Desktop\DataFlair\OpenCV resize image, image rotation\dog-with-ball.jpg")

new_width, new_height = 640, 480

resized_image = cv2.resize(image, (new_width, new_height), interpolation=cv2.INTER_LANCZOS4)

cv2.imshow('Resized Image with Lanczos Interpolation', resized_image)

cv2.waitKey(0)
cv2.destroyAllWindows()
Original Image :

Resized Image :
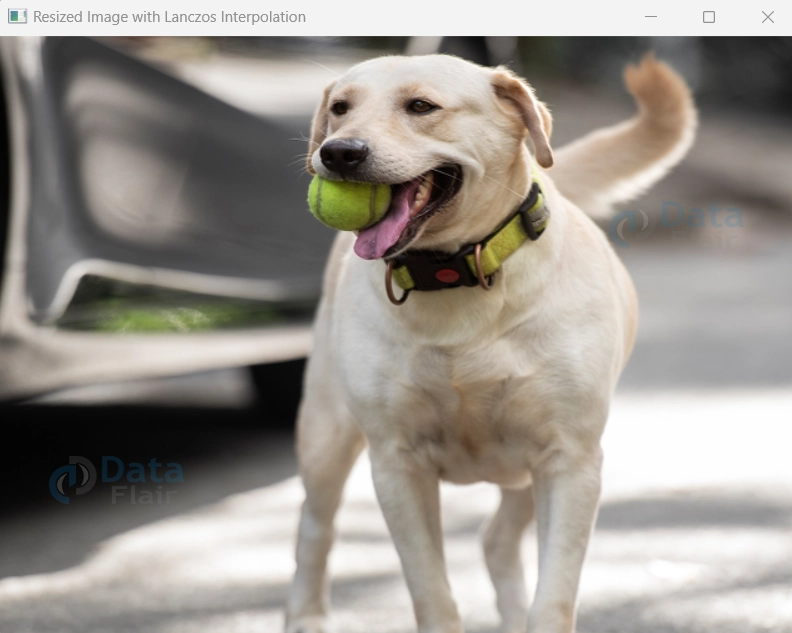
In this code, we load the image using cv2.imread() and define the desired dimensions for the resized image using new_width and new_height. We then utilize the cv2.resize() function with cv2.INTER_LANCZOS4 as the interpolation method to perform the resizing with Lanczos interpolation.
Bicubic Interpolation :
Imagine you have a favorite photograph that you want to resize without losing its stunning details. Enter bicubic interpolation, the magical sorcerer that works wonders on your images!
Like an artist with a keen eye for beauty, bicubic interpolation uses cubic polynomials to perform image resizing with grace and finesse.
It considers not just four neighboring pixels, but a full 4×4 grid, making it incredibly smooth and accurate. The result? A masterpiece that retains the finest nuances of your original image, whether you’re making it bigger or smaller. So say goodbye to pixelated mess and hello to a world of visual splendour, all thanks to bicubic interpolation!
Now, let’s see how to apply bicubic interpolation using OpenCV:
import cv2

image = cv2.imread(r"C:\Users\sanji\Desktop\DataFlair\OpenCV resize image, image rotation\dog-with-ball.jpg")
if image is not None:
     desired_width = 640
    desired_height = 480
 resized_image = cv2.resize(image, (desired_width, desired_height), interpolation=cv2.INTER_CUBIC)
cv2.imshow('Original Image', image)
cv2.imshow('Resized Image', resized_image)

 cv2.waitKey(0)
    cv2.destroyAllWindows()
else:
    print("Failed to load the image.")
Original Image :

Resized Image :

In this example, we load an image using cv2.imread() and then perform bicubic interpolation for resizing using cv2.resize() with the cv2.INTER_CUBIC flag. The resized image is displayed alongside the original image using cv2.imshow(). Running this code will showcase the enchanting effect of bicubic interpolation, preserving the image’s intricate details and delivering an extraordinary visual experience.
Area Based Interpolation :
cv2.INTER_AREA is used in “area-based” interpolation. It is specifically designed for downscaling (reducing the size) of images. When you need to shrink an image while preserving as much detail as possible, cv2.INTER_AREA comes to the rescue.
This interpolation method is ideal for creating thumbnails, optimizing web images, or any scenario where you need to maintain the sharpness and quality of downsized images. It works by considering pixel area relations, ensuring that each pixel in the new image represents the area of multiple pixels in the original image. This way, cv2.INTER_AREA helps us in avoiding the introduction of unwanted artefacts and maintain image quality at a smaller scale.
import cv2
image = cv2.imread(r"C:\Users\sanji\Desktop\DataFlair\OpenCV resize image, image rotation\dog-with-ball.jpg")
if image is not None:
    desired_width = 400
    desired_height = 300
 downsized_image = cv2.resize(image, (desired_width, desired_height), interpolation=cv2.INTER_AREA)

    cv2.imshow('Original Image', image)
    cv2.imshow('Downsized Image', downsized_image)

    cv2.waitKey(0)
    cv2.destroyAllWindows()
else:
    print("Failed to load the image.")
Original Image :

Downsized Image :
In this example, we load an image using cv2.imread() and then use cv2.INTER_AREA with cv2.resize() for downsizing. The downsized image is displayed alongside the original image using cv2.imshow(). Running this code will reveal the artistry of cv2.INTER_AREA, presents a downsized image that maintains sharpness and detail.
Rotating an Image using OpenCV
Have you ever wanted to look at an image from a different angle or correct its orientation effortlessly? Image rotation is the key to achieving these transformations and adding a touch of creativity to your visual projects. With OpenCV, the versatile image processing library, rotating images becomes an intuitive and enjoyable experience.
Image rotation is the process of changing the orientation of an image by a certain angle. It allows you to turn images clockwise or counterclockwise to create new perspectives, correct misaligned visuals, or prepare data for various computer vision tasks.
Advantages of Rotating an image using OpenCV:
- Correcting Image Orientation: Rotate images to the desired direction for proper alignment.
- Data Augmentation in ML/DL: Rotate images to increase dataset diversity and improve model performance.
- Image Registration: Align multiple images or frames for seamless blending and better quality.
- Viewpoint Transformation: Visualize objects or scenes from different angles to enhance model robustness.
- Creating Panoramas: Stitch overlapping images together to form wide-angle compositions.
- Image Analysis Simplification: Rotate images for better line, edge, or shape detection.
- Image Presentation and Display: Ensure consistent and user-friendly image orientation for presentation.
- Visual Effect and Aesthetics: Add artistic effects or dynamic elements to enhance visual appeal.
In OpenCV, you can rotate an image using the cv2.rotate() function. The syntax for the rotate function is as follows:
rotated_image = cv2.rotate(src, rotateCode)
- src: It represents the source image that you want to rotate.
- rotateCode: It’s an integer representing the rotation direction. It can take one of the following values:
- cv2.ROTATE_90_CLOCKWISE: It helps the user to rotate the image 90 degrees clockwise.
- cv2.ROTATE_180: It helps the user to rotate the image 180 degrees.
- cv2.ROTATE_90_COUNTERCLOCKWISE: It helps the user to rotate the image 90 degrees counterclockwise.
Here’s the code to rotate an image (90 degrees clockwise) using OpenCV :
import cv2

image = cv2.imread(r"C:\Users\sanji\Desktop\DataFlair\OpenCV resize image, image rotation\dog-with-ball.jpg")

new_width, new_height = 640, 480

resized_image = cv2.resize(image, (new_width, new_height))

# Rotate the resized image clockwise by 90 degrees
rotated_image = cv2.rotate(resized_image, cv2.ROTATE_90_CLOCKWISE)

# Display the original and rotated image
cv2.imshow('Original Image', image)

cv2.imshow('Rotated Image', rotated_image)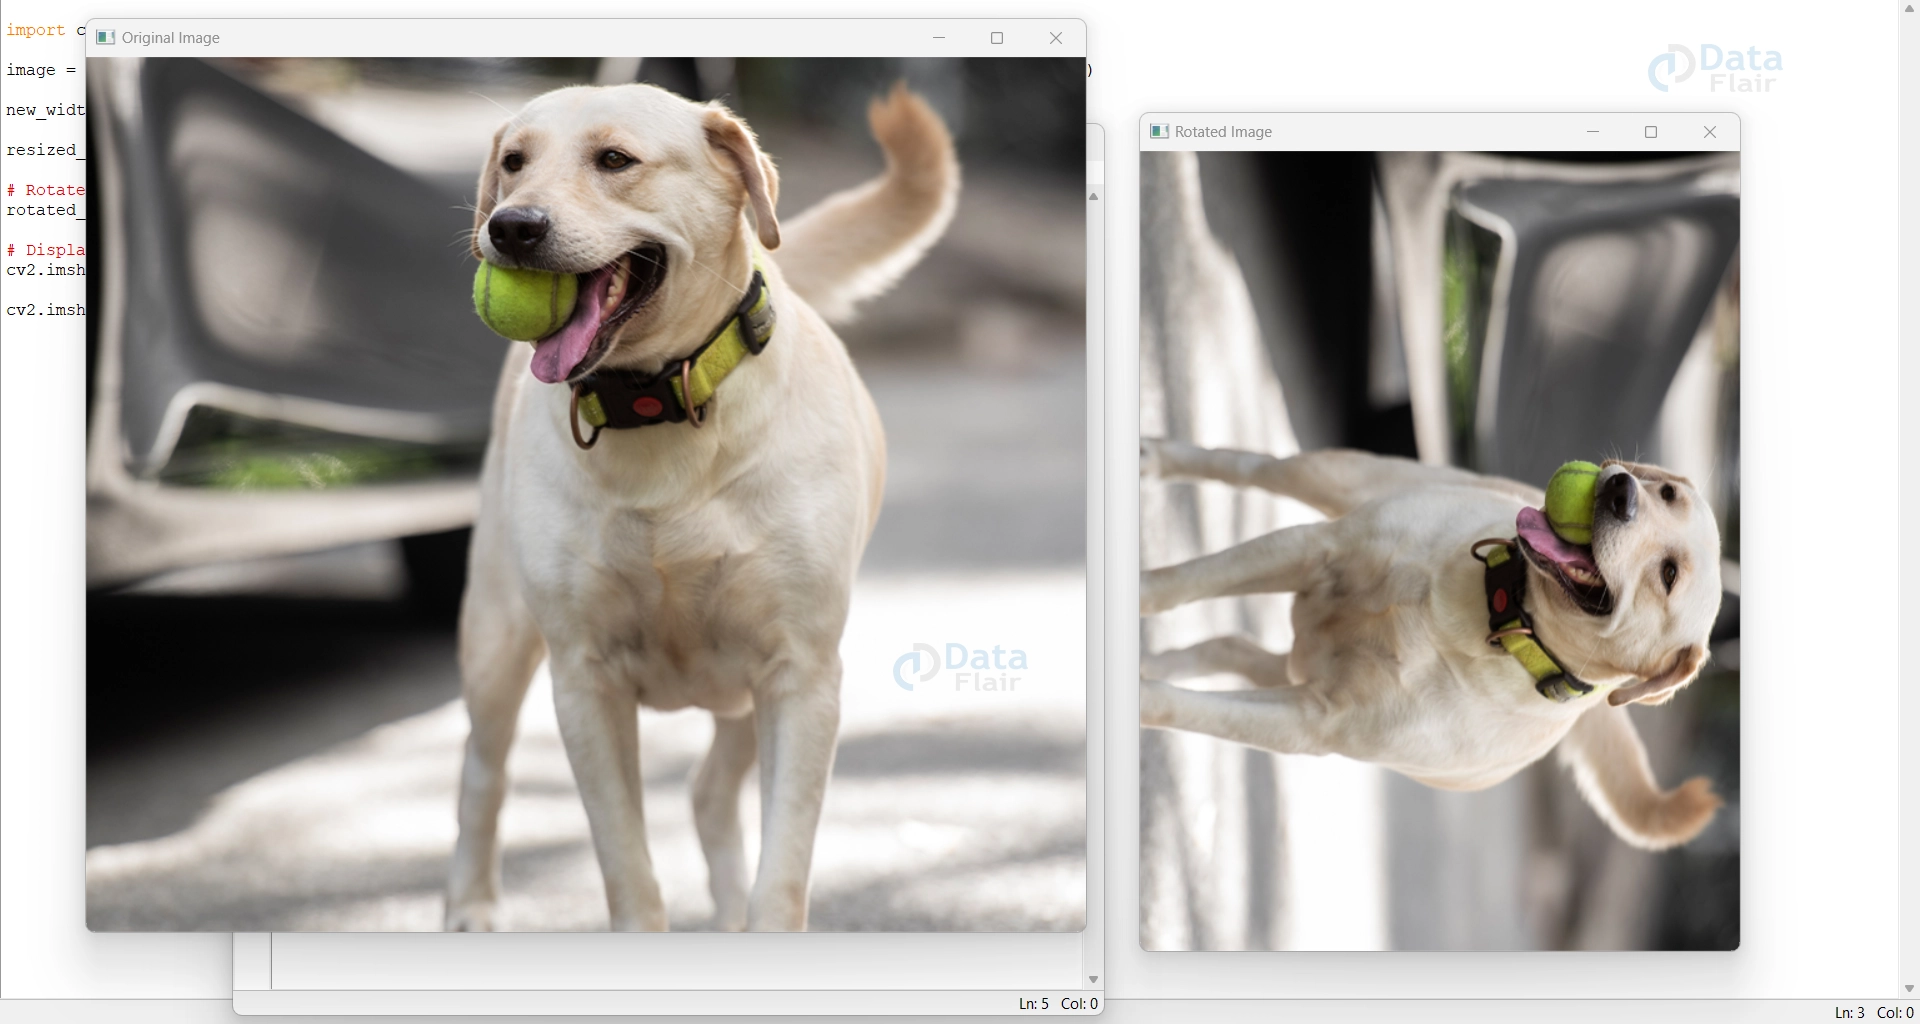
In this code, we load the image using cv2.imread() and then resize it using cv2.resize() with the desired dimensions new_width and new_height. Next, we rotate the resized image clockwise by 90 degrees using cv2.rotate() with the cv2.ROTATE_90_CLOCKWISE rotation code.
Here’s one more code to rotate an image (180 degrees) using OpenCV :
import cv2

image = cv2.imread(r"C:\Users\sanji\Desktop\DataFlair\OpenCV resize image, image rotation\dog-with-ball.jpg")

new_width, new_height = 640, 480

resized_image = cv2.resize(image, (new_width, new_height))
rotated_image = cv2.rotate(resized_image, cv2.ROTATE_180)

cv2.imshow('Original Image', image)
cv2.imshow('Rotated Image', rotated_image)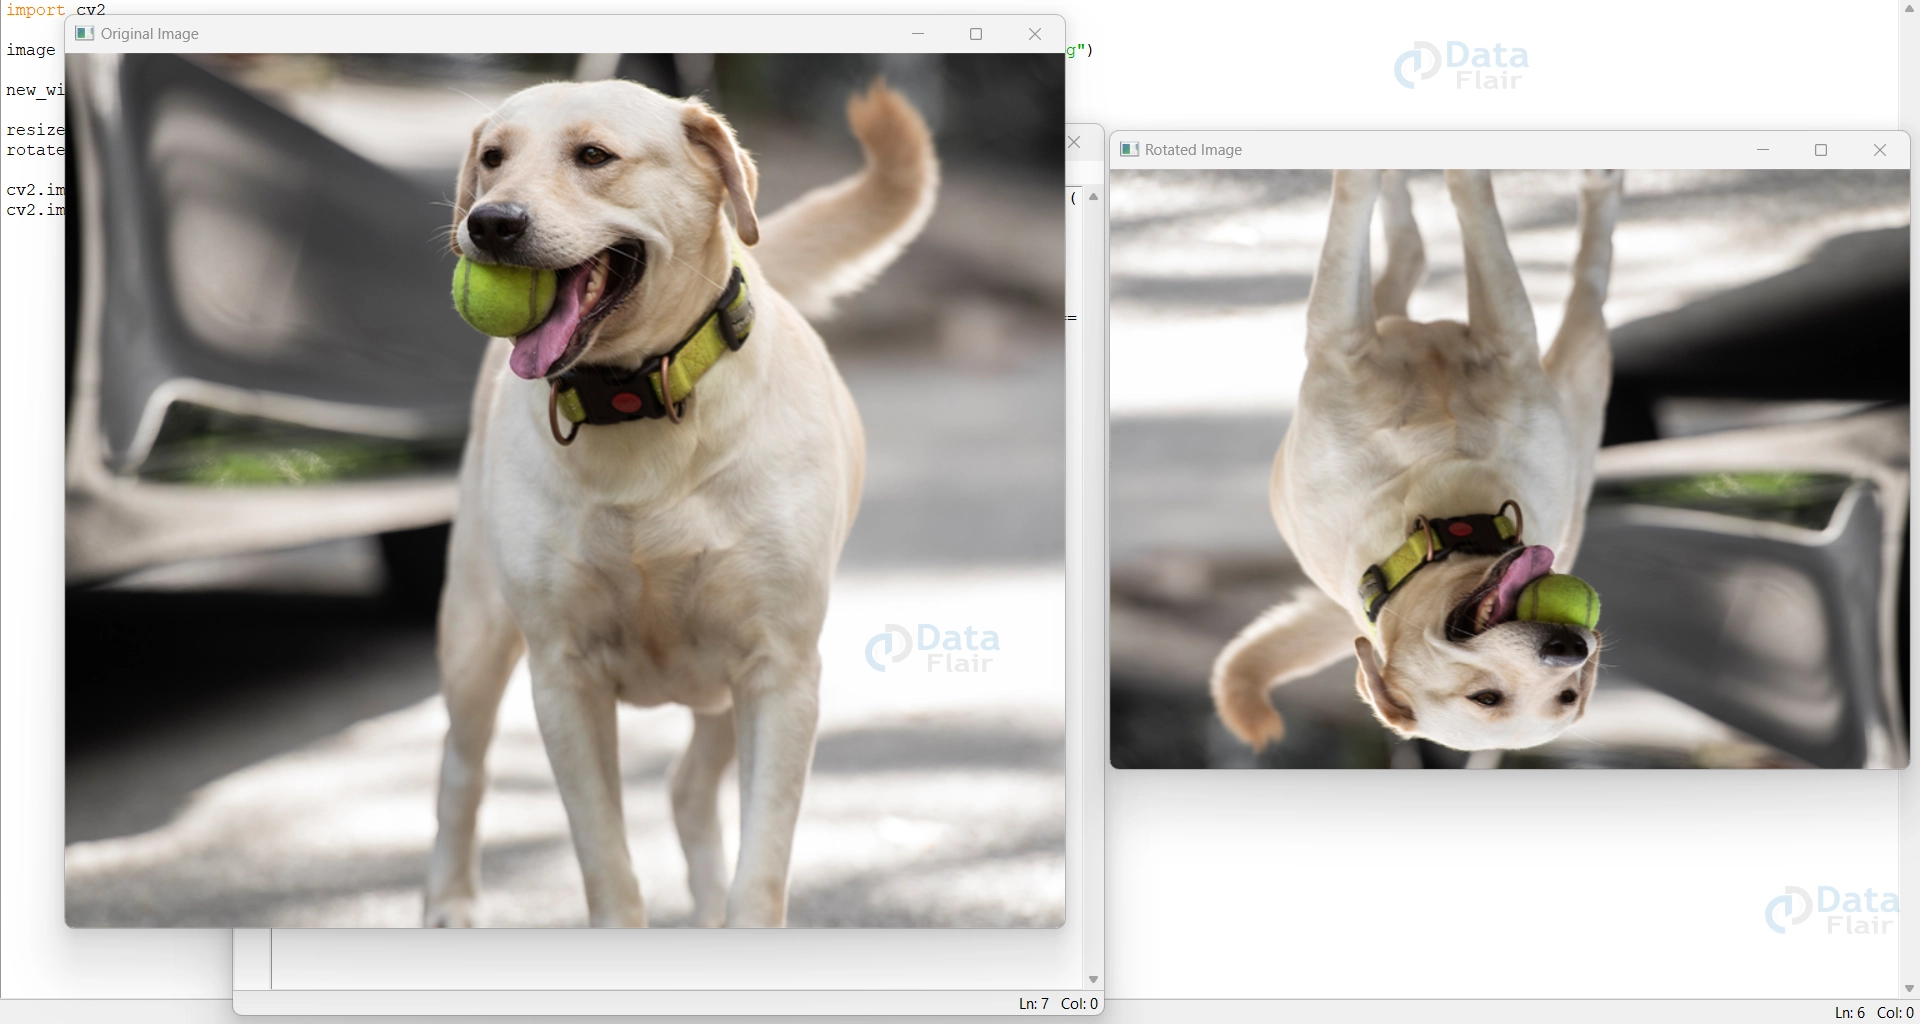
Summary
In conclusion, OpenCV’s image resize and rotation capabilities have proven to be powerful tools, enabling effortless alterations to image dimensions and orientations. The process has optimized visuals and allowed for the exploration of fresh perspectives. With each rotation, image manipulation reaches new levels of creativity and precision, making OpenCV an essential asset in the field. Its versatility and user-friendly functions make it a reliable companion in the realm of image processing, empowering artistic vision and captivating audiences with its remarkable results.
Did we exceed your expectations?
If Yes, share your valuable feedback on Google


