Top OpenCV Interview Questions and Answers
Machine Learning courses with 100+ Real-time projects Start Now!!
Unlocking the realm of pixels and patterns, OpenCV stands as the key to deciphering the language of images. As we delve into the world of computer vision, this article serves as your guiding light, unraveling the top OpenCV interview questions.
From the fundamentals that paint the canvas of images to the advanced algorithms that breathe life into applications, join us on a journey through the lens of OpenCV expertise.
1. How can you read an image using OpenCV in Python?
The cv2.imread() method in Python can be used to read an image using OpenCV. This function returns a numpy array that represents the image and the path to the image file as arguments. For instance:
import cv2
image = cv2.imread(r"C:\Users\sanji\Desktop\DataFlair\Working With Images in OpenCV\wildlife-tiger.jpg")

cv2.imshow('DataFlair @satchit', image)


cv2.waitKey(0)
cv2.destroyAllWindows()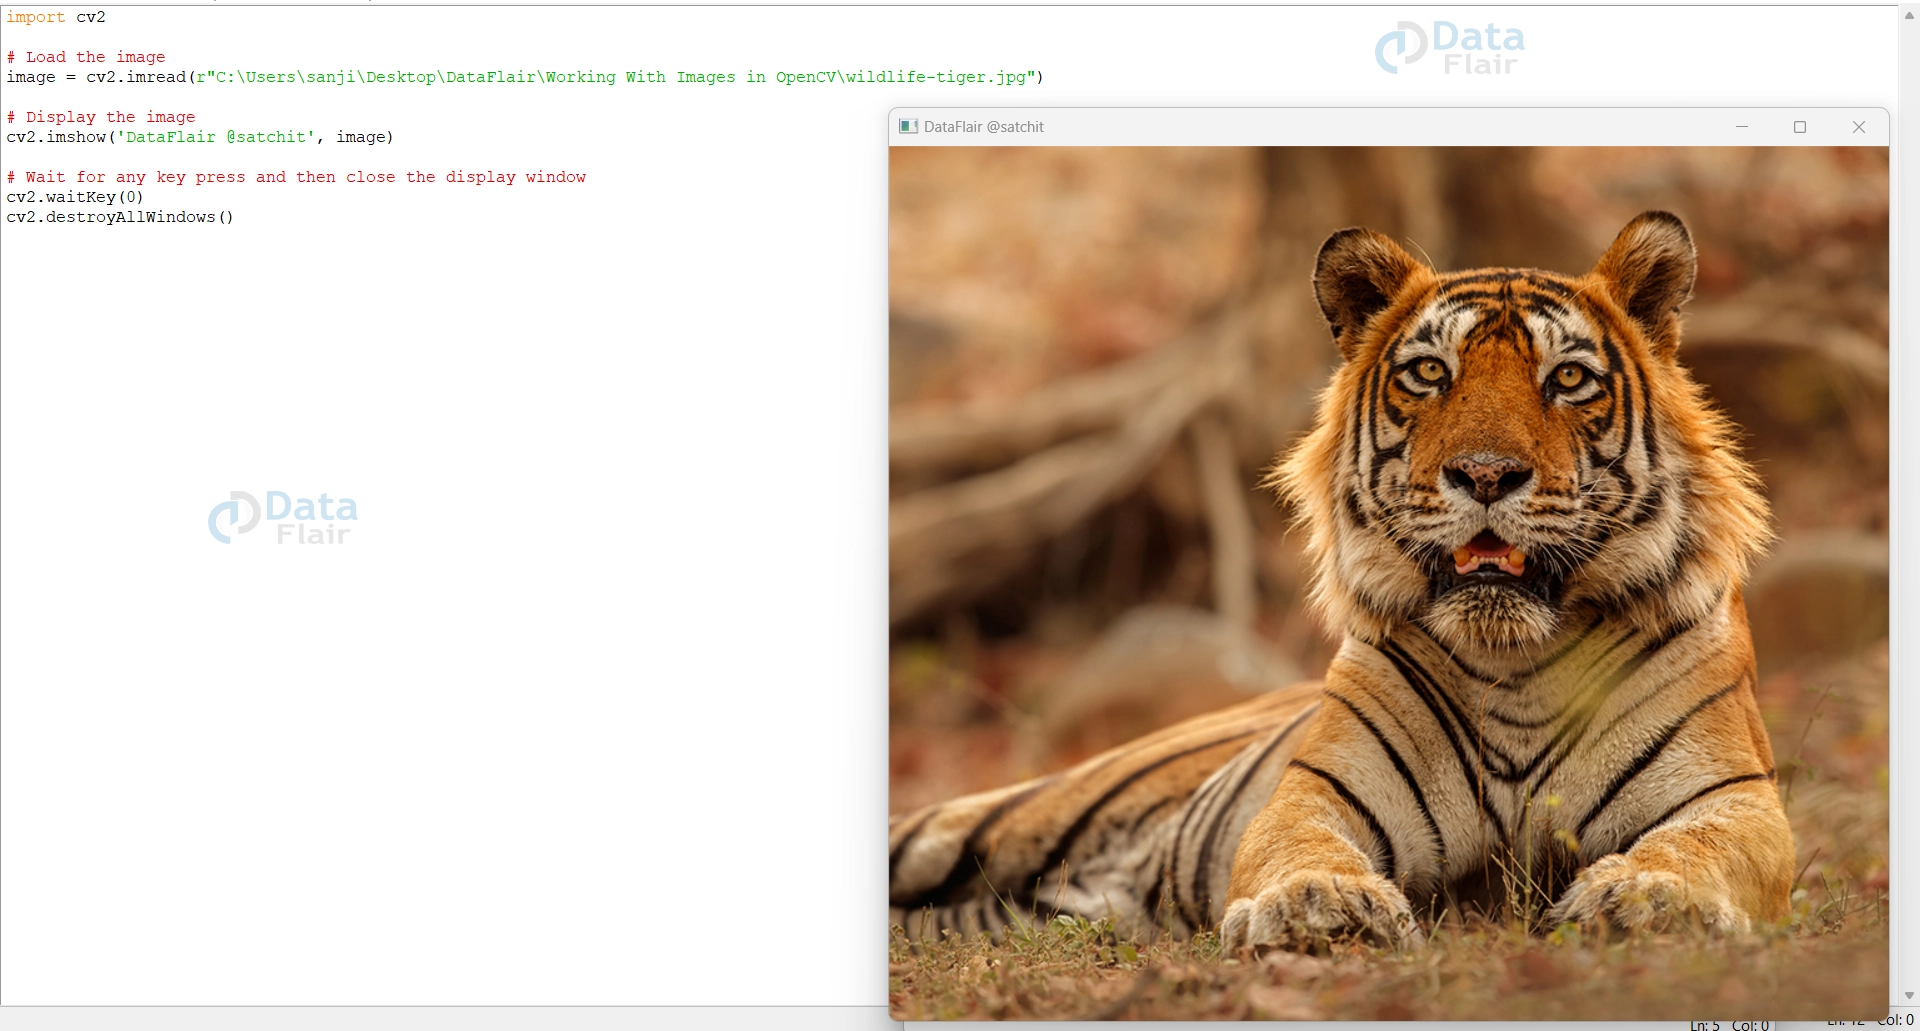
Keep in mind that cv2.imread() reads the image in the BGR color format by default. If you’re working with color images and want to display them correctly, you might need to convert the color channels to RGB using cv2.cvtColor().
2. What’s the difference between color and grayscale images?
Color images contain information about the color of each pixel using three color channels: red, green, and blue (RGB). Grayscale images, on the other hand, only convey the brightness of each pixel without color information. Grayscale images are simpler and use a single channel, while color images have richer visual detail due to their three-color channel representation. In interviews, understanding this distinction showcases knowledge about image types and their data representation.
3. How is an image represented in OpenCV?
In OpenCV, an image is represented as a two-dimensional (grayscale) or three-dimensional (color) array. This array is essentially a matrix of pixel values. For color images, each pixel has three values corresponding to the intensity of the red, green, and blue color channels (RGB). Grayscale images have a single intensity value per pixel.
In Python, OpenCV uses the numpy library to manage these arrays efficiently. The dimensions of the array correspond to the height and width of the image, and the third dimension (for color images) represents the color channels.
For example, a color image with dimensions 300×200 pixels would have an array of shape (300, 200, 3), while a grayscale image of the same size would have an array of shape (300, 200).
4. How is an image represented in OpenCV?
Images are represented as arrays of numeric values in OpenCV. Each entry in a 2D array used to represent grayscale images is a pixel’s intensity. Color images are represented as 3D arrays where each element contains color channel values (e.g., red, green, blue). This array-based representation allows for efficient manipulation and processing of images using various techniques provided by the OpenCV library.
5. Explain pixel intensity
Pixel intensity is a measure of the brightness or color value of a specific pixel in an image. In a grayscale image, pixel intensity is usually represented by a single numerical value that signifies the shade of gray for that pixel. This value ranges from 0 (black) to 255 (white), with shades of gray in between.
Pixel intensity grows more complex in color images. Red, green, and blue (RGB) color channels’ relative intensities are represented by three values that make up each pixel. By combining these three values, a wide array of colors can be formed. For instance, an RGB value of (255, 0, 0) indicates pure red, (0, 255, 0) is pure green, and (0, 0, 255) is pure blue.
Understanding pixel intensity is crucial for image analysis, manipulation, and processing tasks, as it’s the foundation for visual information within an image.
6. What’s the purpose of Gaussian blur?
Gaussian blur is a technique used in image processing to reduce noise and detail in an image. It’s particularly effective at removing high-frequency noise while preserving the overall structure of the image. This is achieved by convolving the image with a Gaussian kernel, which is a weighted matrix that gives more importance to the central pixels and less to the surrounding ones. The result is a smoother version of the original image.
In OpenCV, the cv2.GaussianBlur() function is used to apply Gaussian blur to an image.
blurred_image = cv2.GaussianBlur(src, ksize, sigmaX)
- src: The source image.
- ksize: The size of the Gaussian kernel. It should be a positive odd number (e.g., 3, 5, 7, …).
- sigmaX: The standard deviation of the Gaussian distribution along the x-axis.
For example, let’s say you have an image image, and you want to apply Gaussian blur with a kernel size of 5×5 and a standard deviation of 0.8 along the x-axis:
image = cv2.imread(r"C:\Users\sanji\Desktop\DataFlair\blur in opencv\wildlife-baby-foxes.jpg")

# Define the kernel size and sigma for Gaussian Blur
ksize = (5, 5)
sigmaX = 0

# Apply Gaussian Blur
blurred_image = cv2.GaussianBlur(image, ksize, sigmaX)

# Display the original and blurred images side by side
side_by_side = cv2.hconcat([image, blurred_image])
cv2.imshow('Original vs. Gaussian Blur', side_by_side)

cv2.waitKey(0)
cv2.destroyAllWindows()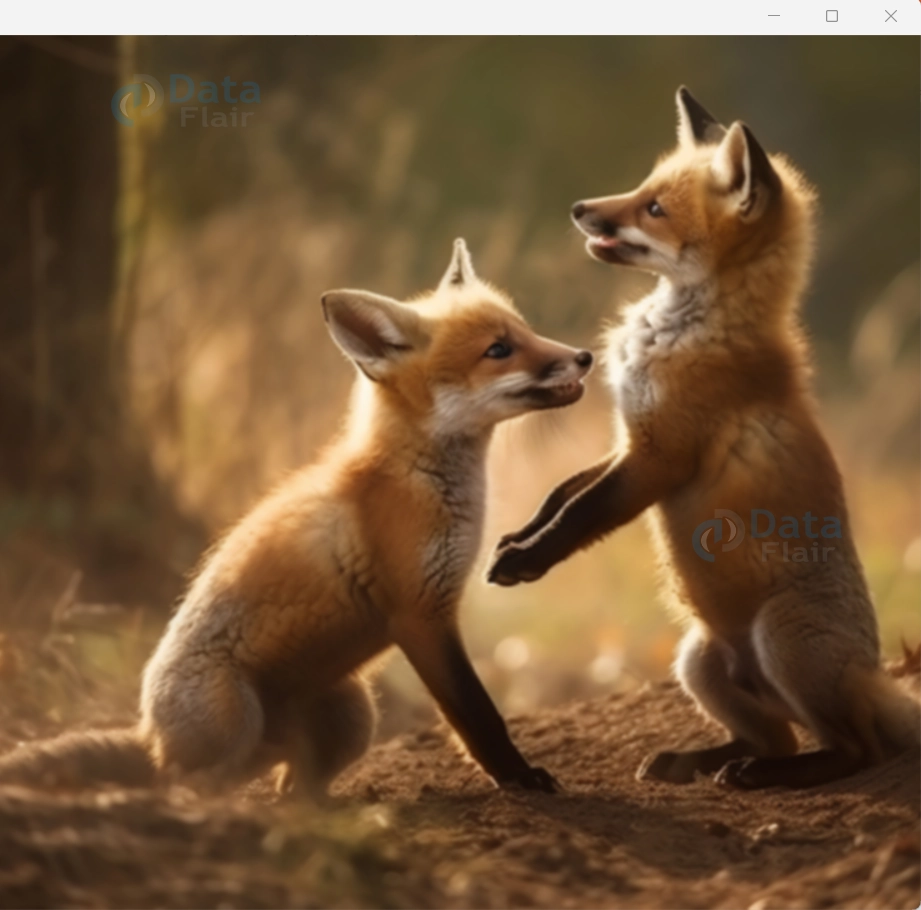
In this case, blurred_image will contain the smoothed version of the `image` with reduced noise and finer details. The ksize parameter determines the size of the kernel used for convolution, and sigmaX controls the spread of the Gaussian distribution. Adjusting these parameters allows you to control the strength of the blur effect.
7. What is histogram equalization used for?
The contrast of an image is improved by histogram equalization. Histogram equalization’s main objective is to disperse an image’s intensity values over a larger range, which boosts overall contrast and gives the image a more lively appearance.
In an image’s histogram, certain intensity levels may be overly dominant, causing some regions to appear too dark or too bright. Histogram equalization redistributes these intensity levels to achieve a more balanced and evenly distributed histogram. This results in an image where the full range of intensities is better utilized, leading to enhanced visual clarity and detail.
Histogram equalization is particularly effective for images with poor contrast or uneven lighting conditions. It’s a common pre-processing step in image analysis, computer vision, and digital image enhancement tasks.
8. How is edge detection done using the Canny algorithm?
The Canny edge detection algorithm is a multi-stage process that involves detecting areas of rapid intensity change, which often correspond to edges in an image. The algorithm performs several steps, including noise reduction, gradient computation, non-maximum suppression, and edge tracking by hysteresis.
In OpenCV, you can apply the Canny edge detection algorithm using the `cv2.Canny()` function:
edges = cv2.Canny(image, threshold1, threshold2)
- image: The input grayscale image.
- threshold1 and threshold2: The lower and upper thresholds for edge detection. Edges with intensity gradient values above `threshold2` are considered strong edges, and those between `threshold` and `threshold2` are considered weak edges.
1. Noise Reduction: Apply Gaussian blur to the image to reduce noise and detail, which helps prevent spurious edges.
2. Gradient Computation: Compute the gradient magnitude and direction at each pixel. This helps identify areas of rapid intensity change, which correspond to potential edges.
3. Non-Maximum Suppression: Suppress non-maximum edges to thin out the edges. This involves identifying local maxima in gradient magnitude along the direction of the gradient.
4. Edge Tracking by Hysteresis: Finalize the edge map by linking edges based on gradient values. Pixels with gradient values above threshold2 are considered strong edges, while those between threshold and threshold2 are considered weak edges. Weak edges are included as part of the edge map if they are connected to strong edges.
9. Define morphological operations
Morphological operations in image processing resemble sculpting with simple tools. By using structured patterns called kernels, these operations modify the shapes and structures within an image. Erosion chips away at object boundaries, while dilation adds to them. Combining these operations, like opening and closing, aids in tasks such as noise reduction, feature extraction, and contour enhancement. Morphological operations are like the chisel and brush of digital image refinement.
10. What is the purpose of image thresholding?
Image thresholding is used to transform a grayscale image into a binary image, in which pixels are divided into two groups according to their intensity values. Thresholding simplifies image analysis by segmenting objects from the background or highlighting specific regions of interest. It’s a fundamental technique used in various applications, such as object detection, image segmentation, and feature extraction.
Thresholding helps in emphasizing relevant information while filtering out noise and non-essential details. By setting appropriate threshold values, you can effectively separate objects with distinct intensity characteristics, making subsequent image-processing tasks more focused and efficient.
11. Explain perspective transformation.
Perspective transformation is a geometric transformation applied to an image to change its perspective, as if it’s being viewed from a different angle. This transformation is particularly useful when you need to correct distortions caused by the angle of view or to warp an image to match a different perspective.
In perspective transformation, a quadrilateral (usually a rectangle) in the source image is mapped to another quadrilateral in the output image. This process involves defining the corresponding points in both images and then using mathematical calculations to transform the points in a way that preserves lines and straight edges.
The transformation is performed using a perspective transformation matrix, also known as a homography matrix. This matrix is derived from the corresponding points and is used to warp the source image to match the desired perspective.
12. How can you rotate an image using OpenCV?
To rotate an image using OpenCV, you can employ the cv2.getRotationMatrix2D() function. This function generates a rotation matrix based on the rotation angle and center you provide. Subsequently, the rotation can be applied to the image using the cv2.warpAffine() function. This function utilizes the rotation matrix to transform the image pixels, effectively rotating the image while preserving its original dimensions.
cv2.getRotationMatrix2D(center, angle, scale): This function constructs a 2D rotation matrix for a given rotation angle around a specified center. The scale parameter is optional and determines if scaling should be applied.
cv2.warpAffine(image, rotation_matrix, output_size) : This function applies the transformation represented by the rotation_matrix to the image. The output_size parameter defines the dimensions of the resulting rotated image. It essentially remaps the image pixels based on the transformation matrix, achieving the desired rotation effect.
13. What are homography matrices?
Homography matrices, often referred to as perspective transformation matrices, are essential tools in computer vision. They represent the transformation required to map points from one plane or coordinate system to another, particularly when dealing with perspective changes or distortions. Homography matrices are pivotal for tasks like image stitching to create panoramas, augmented reality to overlay virtual objects on real scenes, and more. They enable precise alignment and transformation between different viewpoints, making them valuable for various image manipulation and analysis applications.
14. Describe the concept of affine transformation.
Affine transformation is a geometric transformation that keeps proportions of distances between points and parallel lines. It encompasses translation, rotation, scaling, and shearing as its fundamental components. Affine transformations are represented by a matrix that combines these operations into a single transformation. This type of transformation is widely used in computer graphics and image processing to alter the shape, position, and orientation of objects while maintaining their overall structure. Affine transformations are valuable for tasks like image registration, correction of distortions, and aligning images for analysis or visualization.
15. What are keypoints and descriptors?
Keypoints and descriptors are fundamental concepts in computer vision and image processing.
Keypoints are recognisable areas in an image that depict distinct and recognisable patterns. They are also known as interest points or feature points.
They serve as reference points for analyzing and comparing images. Keypoints can correspond to corners, edges, blobs, or other salient structures.
Descriptors are numerical representations of the local image region surrounding a keypoint. They capture the information about the appearance and structure of the area around the keypoint. Descriptors are used to describe the visual characteristics of keypoints, enabling comparison and matching between different images.
In many computer vision applications, including object detection, picture matching, image stitching, and others, keypoints and descriptors are essential.
They enable algorithms to identify and understand specific features within images, allowing for robust and accurate analysis and manipulation.
16. How does the SIFT algorithm work?
The Scale-Invariant Feature Transform (SIFT) algorithm detects and describes keypoints in an image. It’s invariant to scale and rotation and partially invariant to changes in illumination and viewpoint.
import cv2

# Load the image
image = cv2.imread("image.jpg", cv2.IMREAD_GRAYSCALE)

# Create a SIFT object
sift = cv2.SIFT_create()

# Detect keypoints and compute descriptors
keypoints, descriptors = sift.detectAndCompute(image, None)- Image: The input grayscale image.
- cv2.SIFT_create(): Create a SIFT object.
- KeyPoints: List of keypoints detected in the image.
- Descriptors: Computed descriptors corresponding to the keypoints.
The keypoints represent the distinctive points in the image, and descriptors capture their visual characteristics. SIFT keypoints and descriptors are valuable for tasks like object recognition, image stitching, and more.
17. Explain the RANSAC algorithmA?
When estimating model parameters, the RANSAC (Random Sample Consensus) algorithm is a potent tool for addressing noisy and outlier-filled datasets. It addresses scenarios where traditional methods might fail due to the presence of erroneous data points. RANSAC iteratively identifies inliers that conform to a hypothesized model within a certain threshold. By fitting models to these inliers, RANSAC robustly estimates model parameters. This iterative process enables the algorithm to focus on the most consistent data even in the presence of significant noise or outliers, yielding precise parameter estimates.
18. What is feature matching?
Feature matching is a key concept in computer vision that involves finding corresponding points or regions between two or more images. These corresponding features could be distinctive keypoints, corners, edges, or any visually significant parts of an image. The goal of feature matching is to establish associations between similar features in different images, which is essential for various tasks such as image stitching, object recognition, 3D reconstruction, and more.
In feature matching, the idea is to identify pairs of features that represent the same object or scene element across different images, even when the images might have undergone changes due to variations in perspective, lighting, or scale. This is achieved by extracting descriptors (numerical representations) of features and then comparing these descriptors to find the best matches.
Feature matching is a foundational step in many computer vision applications, as it enables the alignment and comparison of images to derive meaningful insights and information from visual data.
19. How does the Har Cascade algorithm work?
The Haar Cascade algorithm utilizes a sequence of simple rectangular features called Haar-like features to identify objects within images. These features focus on variations in pixel intensities. During training, the algorithm learns to differentiate between positive and negative samples through a cascade of classifiers. Each stage of the cascade employs progressively more complex classifiers to filter out non-object regions efficiently.
When applied to an image, the algorithm slides a window of varying sizes across the image, calculating the response of the cascade’s classifiers at each position and scale. Promising regions are evaluated more deeply, while non-object regions are rejected quickly. To address duplicate detections, non-maximum suppression is employed to retain only the most relevant ones.
The Haar Cascade algorithm is widely used for real-time object detection, such as detecting faces in images and videos. Its strength lies in its efficiency and the ability to handle complex scenes while maintaining rapid performance, making it suitable for applications where speed is crucial.
20. What is the HOG (Histogram of Oriented Gradients) method?
The Histogram of Oriented Gradients (HOG) method is a widely used technique in computer vision for object detection. It involves computing gradients to capture intensity changes in an image. These gradients’ magnitudes and orientations are then organized into histograms within small cells, which are further grouped into blocks. These blocks are normalized to create feature vectors that represent the image’s structure. HOG features are particularly useful for detecting objects with distinctive edge patterns, making them valuable for tasks like pedestrian and object detection in images and videos.
21. How can you integrate deep learning models with OpenCV for object detection?
You can integrate deep learning models with OpenCV for object detection by following these steps:
1. Model Conversion: Convert the trained deep learning model to a format compatible with OpenCV, such as TensorFlow’s `.pb` or PyTorch’s `.pth`.
2. Load Model: Use OpenCV’s `cv2.dnn` module to load the converted model.
3. Preprocess Images: Prepare input images by resizing and normalization to match the model’s requirements.
4. Perform Inference: Pass preprocessed images through the loaded model to get detection results.
5. Post-process Results: Interpret and refine the detection results, applying techniques like non-maximum suppression.
6. Visualization: Display the images with detected objects using OpenCV’s functions.
By combining deep learning models with OpenCV’s tools, you can efficiently perform object detection in various applications.
22. What are Convolutional Neural Networks (CNNs) and their role in computer vision?
Convolutional Neural Networks (CNNs) are specialized deep learning models designed for computer vision tasks. They excel at automatically learning and extracting features from images through convolutional layers. Their role includes:
- Feature Extraction: Automatically learning relevant features from raw pixel data.
- Hierarchy of Features: Capturing both basic and complex image features in multiple layers.
- Object Recognition: Accurately classifying and localizing objects in images.
- Translation Invariance: Being robust to object position changes.
- Segmentation and Detection: Identifying object boundaries and locating multiple objects.
- Transfer Learning: Utilizing pre-trained models for various vision tasks.
In computer vision, CNNs have become the foundation for advanced image analysis, contributing to fields like medical imaging, surveillance, and autonomous systems.
23. Define image segmentation.
A computer vision task called image segmentation includes splitting an image into numerous significant and semantically coherent sections or segments. Each section in the image refers to a different object, area, or area of interest. The objective of picture segmentation is to separate the segments while grouping pixels or regions that have similar visual characteristics, such as color, texture, or intensity.
In order to provide a more in-depth comprehension of the information, picture segmentation divides an image into sections that correspond to relevant items or structures.
This technique is essential for various applications, including object detection, image editing, medical imaging, autonomous driving, and more, where isolating and analyzing individual components within an image is necessary.
24. Explain the watershed algorithm in image segmentation
The watershed algorithm is an image segmentation technique inspired by hydrology and watershed lines. It’s particularly useful for segmenting objects that are close together or touching each other in an image. The algorithm views pixel intensities as elevation levels in a topographical map and simulates flooding from multiple “markers” placed in the image.
Here’s how the watershed algorithm works:
1. Marker Placement: Start by marking the regions of interest in the image. These markers could be manually placed by users or obtained through other segmentation methods.
2. Gradient Computation: Compute the gradient magnitude of the image, which represents how rapidly pixel intensities change. The gradient serves as an analogy to the slope of a landscape.
3. Flood Simulation: Simulate flooding from the markers. The pixels with the lowest gradient magnitudes are initially flooded, creating basins of “water.” As the water level rises, it accumulates in valleys and flows towards higher gradient regions.
4. Watershed Lines: As the water levels from different markers converge, they create watershed lines that separate different regions. These lines represent the boundaries between segments.
5. Labeling Segments: Label the segmented regions based on the markers. Pixels that are reached by the same flooding process (from the same marker) are grouped into the same segment.
25. What is semantic segmentation?
Classifying each pixel in a picture into a particular category or class is the task of semantic segmentation, a computer vision task. Unlike instance segmentation, which distinguishes individual instances of objects, semantic segmentation focuses on labeling each pixel with a class label that represents the type of object or material it belongs to. This technique allows for a more detailed understanding of the scene’s composition and content.
In semantic segmentation, every pixel is assigned to one of several predefined classes, such as “car,” “tree,” “building,” “road,” etc. The goal is to produce a pixel-wise labeling that accurately represents the various objects and regions present in the image. Semantic segmentation has numerous applications, including autonomous driving, scene understanding, medical image analysis, and more, where precise object identification and localization are critical.
26. Why is camera calibration necessary in computer vision?
Camera calibration is a fundamental process in computer vision that rectifies the discrepancies between the real world and the image captured by a camera. Cameras introduce distortions due to lens imperfections and sensor misalignments. Calibration corrects these distortions, enabling accurate measurements, precise object localization, and consistent image analysis.
It plays a pivotal role in various applications:
- 3D Reconstruction: Calibrated cameras ensure accurate mapping of 2D image points to 3D world coordinates, leading to precise 3D scene reconstruction.
- Object Localization: Accurate calibration is crucial for correctly localizing objects in images, which is essential for tasks like object tracking and navigation.
- Robotics and AR: In robotics and augmented reality, calibrated cameras ensure reliable scene perception and precise interaction with the environment.
By calibrating cameras, computer vision systems achieve accuracy, reliability, and consistency, ensuring that visual information aligns with real-world dimensions and relationships.
27. How can you perform camera calibration using OpenCV?
Performing camera calibration using OpenCV involves capturing a set of images of a known calibration pattern (e.g., checkerboard) from different angles and then using these images to calculate the camera’s intrinsic and extrinsic parameters.
Here’s a summary of the steps with the corresponding syntax:
1. Prepare Calibration Pattern: Choose a known calibration pattern, like a checkerboard, and capture images of it from various angles.
2. Identifying Calibration Points: To identify the corners of each calibration pattern in an image, use OpenCV’s cv2.findChessboardCorners() function.
3. Object and Image Points: Prepare arrays of 3D object points (coordinates of the corners in the real world) and corresponding 2D image points (detected corners’ pixel coordinates).
4. Calibration: Use cv2.calibrateCamera() to compute the camera’s intrinsic matrix, distortion coefficients, and optional extrinsic parameters.
5. Undistortion: After calibration, you can use the `cv2.undistort()` function to remove distortions from images captured by the calibrated camera.
import cv2

# Capture images of calibration pattern
calibration_images = [...]  # List of calibration images

# Define the size of the calibration pattern
pattern_size = (num_horizontal_corners, num_vertical_corners)

# Arrays to store object points and image points
object_points = []  # 3D coordinates of corners
image_points = []   # 2D coordinates of detected corners

# Loop through calibration images and detect corners
for img in calibration_images:
    gray_img = cv2.cvtColor(img, cv2.COLOR_BGR2GRAY)
    found, corners = cv2.findChessboardCorners(gray_img, pattern_size, None)
    if found:
        # Append object and image points
        object_points.append(...)  # Define 3D coordinates of corners
        image_points.append(corners)

# Calibrate the camera
ret, camera_matrix, distortion_coeffs, rvecs, tvecs = cv2.calibrateCamera(object_points, image_points, image_size, None, None)

# Undistort an image using the calibrated camera
undistorted_img = cv2.undistort(image, camera_matrix, distortion_coeffs)

# Save the camera matrix and distortion coefficients for future use
Remember to replace placeholders with actual values and handle the syntax accordingly. The provided syntax gives you an overview of the steps involved in camera calibration using OpenCV.
28. How can you optimize OpenCV code for better performance?
Optimizing OpenCV code for better performance is essential to achieve faster execution and efficient resource usage.
Here are some tips to optimize your OpenCV code:
1. Use NumPy: Utilize NumPy arrays for data manipulation as they are optimized for numerical operations.
2. Avoid Loops: Whenever possible, use vectorized operations instead of explicit loops for better performance.
3. Batch Processing: Process multiple images or frames together using OpenCV functions to take advantage of parallelism.
4. Use Built-in Functions: Leverage OpenCV’s built-in functions for common operations like blurring, thresholding, and morphological operations.
5. Memory Management: Release memory explicitly when you’re done with data using functions like cv2.release().
6. Avoid Unnecessary Copies: Be mindful of copying data unnecessarily between CPU and GPU memory.
29. Provide examples of real-time applications of OpenCV.
OpenCV finds applications in various real-time scenarios where fast and accurate image processing is crucial.
Here are some examples:
1. Object Detection and Tracking: OpenCV is used for real-time object detection and tracking in surveillance systems, robotics, and self-driving cars.
2. Facial Recognition: OpenCV powers real-time face detection and recognition in security systems, access control, and social media apps.
3. Augmented Reality (AR): OpenCV is used to overlay virtual objects on real-world images, enhancing gaming, marketing, and education applications.
4. Gesture Recognition: Real-time hand gesture recognition is used in gaming, sign language translation, and human-computer interaction.
5. Camera Calibration: OpenCV calibrates cameras in real-time for accurate measurements and spatial understanding in robotics and AR.
6. Image Stitching: OpenCV enables real-time stitching of images to create panoramic views and immersive experiences.
7. Background Subtraction: Used in real-time video surveillance to detect moving objects by subtracting the static background.
30. What are some recent advancements or trends in the field of OpenCV?
1. Deep Learning Integration: OpenCV has been increasingly integrating deep learning capabilities, making it easier to use and deploy deep neural networks for various computer vision tasks.
2. ONNX Support: OpenCV has been working on improving compatibility with the Open Neural Network Exchange (ONNX) format, allowing seamless integration of models from various deep learning frameworks.
3. Real-Time Applications: There’s a growing emphasis on real-time computer vision applications, such as object detection, tracking, and gesture recognition, driven by advancements in hardware and the need for real-time decision-making.
4. Embedded Systems and IoT: OpenCV is being adapted for use in resource-constrained environments like embedded systems and Internet of Things (IoT) devices, enabling on-device image processing and analysis.
5. Camera Calibration and AR: As augmented reality gains popularity, OpenCV continues to advance its camera calibration techniques, facilitating accurate AR experiences.
6. Efficiency and Parallel Processing: Optimizations for multi-core CPUs and GPU acceleration are becoming more prominent, enabling faster and more efficient image processing.
Summary
In conclusion, this article delved into a comprehensive array of OpenCV interview questions, covering topics from the basics to advanced concepts. We explored fundamental concepts such as image reading, representation, and pixel intensity, progressing to more advanced areas like image transformations, segmentation, and deep learning integration.
By addressing these questions, readers can solidify their understanding of OpenCV’s capabilities, its role in computer vision, and its application in real-world scenarios. Armed with this knowledge, you’re well-equipped to confidently navigate OpenCV-related interviews and contribute effectively to image processing and analysis endeavors.
You give me 15 seconds I promise you best tutorials
Please share your happy experience on Google