MongoDB Backup and Restore Options & MongoDB Deployment
FREE Online Courses: Knowledge Awaits – Click for Free Access!
In the last tutorial, we had learned about Indexing in MongoDB. Here, we will explore what are the options available for the “MongoDB Backup and Restore Data”. Along with this, we will study MongoDB Deployment.
MongoDB Backup Option
In case if you feel that you want to take a backup of your files and folders in MongoDB then it provides an option for the same. For creating a backup you should use the mongodump command. By using this command, all the data of your server into dump directory.
MongoDB Backup can be done in many ways, by which you can limit the amount of data as per requirement. Also, there are many ways by which you can create a backup of your remote server.
The syntax for the command is as follows:
>mongodump
Now we will take an example to understand it better.
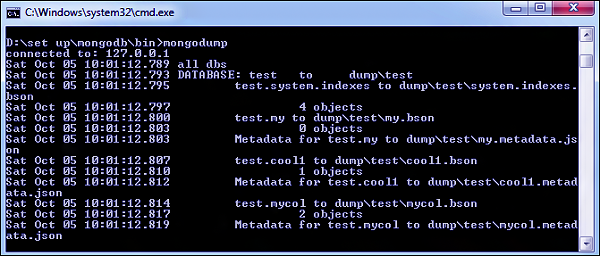
For this, we will have to start our server. You should start it on localhost and port number 27017. Now go on your command prompt or terminal and type mongodump.
You will get to see like this on your screen. This command will connect to a server running at 127.0.0.1 and port 27017 and back all data of the server to directory bin/dump/.
There are some options available while using the mongodump command:
Command -1
Syntax
mongodump --host HOST_NAME --port PORT_NUMBER
It will backup all databases of specified instance.
Example
mongodump --host data-flair.training --port 27017
Command – 2
Syntax –
mongodump --dbpath DB_PATH --out BACKUP_DIRECTORY
It will backup only specific database at a specific location.
Example
mongodump --dbpath /data/db/ --out /data/backup/
Command – 3
Syntax –
mongodump --collection COLLECTION --db DB_NAME
It will be used to back up a collection out of the database.
Example –
mongodump --collection example --db test
MongoDB Restore Data
After taking MongoDB backup, now you want to restore all the data. Here, we can use a mongorestore command. It will restore all the data from the backup directory.
The syntax for the command is as follows:
>mongorestore
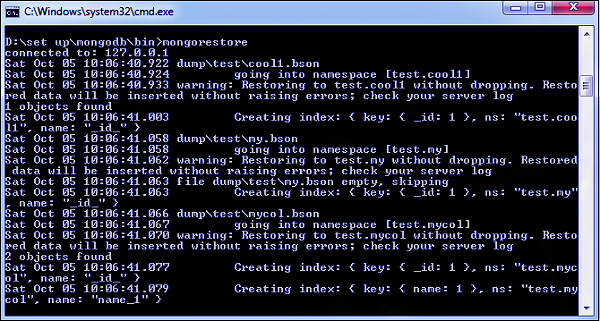
Once you run mongorestore command, an output for the same is being displayed over here.
MongoDB Deployment
Before we start MongoDB deployment, you should know how your application is going to hold up in production. It is good to always keep an idea about your deployment environment. So that when you are production phase you don’t get much errors or surprises.
The best approach is to prototype your set up, conduct load test, monitoring key metrics and use that information to scale up your setup.
So to keep an eye on the deployment phase, MongoDB provides some commands for the same.
- mongostat
- mongotop
i. mongostat
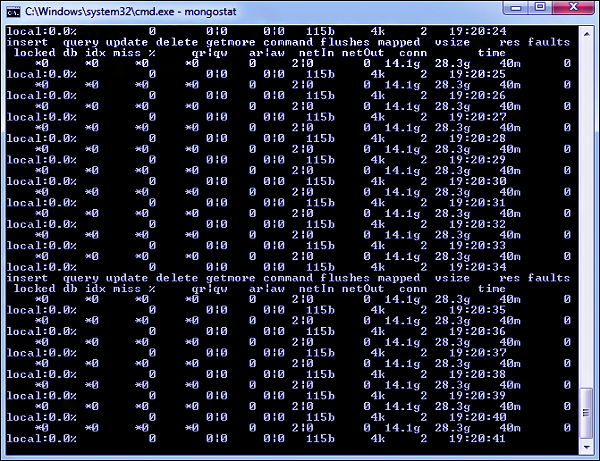
It is used to check the status of all the running instances. It also returns counters (insert, query, update, delete and cursor) of database operations. This command also shows when you’re hitting page faults and also showcase lock percentage.
To run this command, open mongod instance. Open another command prompt and go to bin of your MongoDB installation and type mongostat.
D:\set up\mongodb\bin>mongostat
This will be the output for the following command.
ii. mongotop
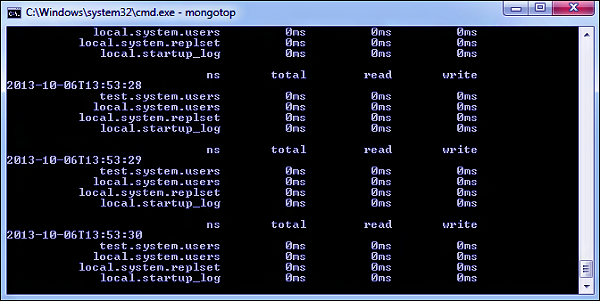
It keeps tracks and reports of reading and writes activity of MongoDB instance on collection basis. This command returns information every second but it can be changed accordingly.
To run this command, open mongod instance. Open another command prompt and go to bin of your MongoDB installation and type mongotop.
D:\set up\mongodb\bin>mongotop
To change the frequency of information being displayed, type this command as follows
D:\set up\mongodb\bin>mongotop 30
Now, it will return values after completion of every 30 seconds.
So, this was all about MongoDB Backup and Restore Data. Hope you liked our explanation.
Summary
Hence, with the help of mongodump command, we can take backup of our data in MongoDB. On the other hand, a mongorestore command is used for restore the data.
Atlast, we discussed mongostat and mongotop commands for MongoDB deployment. Furthermore, if you have any query, feel free to ask in the comment section.
Did we exceed your expectations?
If Yes, share your valuable feedback on Google


