JSP Environment Setup – Step by Step Process of JSP Installation
We offer you a brighter future with industry-ready online courses - Start Now!!
Making dynamic pages requires an environment in order to develop and run the applications that are created using JSP. Environment, as in literal terms, contains all the tools and requirements to create dynamic web pages in JSP. Thus in order to create, test, and run them as client-server mechanisms, we need such an environment. Let us learn step by step process of environment setup in JSP.
JSP Environment Setup
To begin with JSP programming, the detailed steps to install and set up the environment are as follows. The environment setup for JSP consists of the following :
- Setting up the JDK (Java Development Kit)
- Setting up the web server (Tomcat).
- Starting tomcat server.
These steps are discussed in detail in this article.
1. Java Development Kit
To run JSP, we surely need Java Platform. It involves downloading JDK, i.e., Java Software Development Kit (SDK). Later we will set the PATH environment variable. It is better to have the latest version of Java.
JDK can be downloaded from Java SE Download. After downloading, we need to configure and setup Java.
Once you download your Java implementation, follow the given instructions to install and configure the setup. Set the PATH and JAVA_HOME environment variables. This path will refer to the destination where java/javac are there. It typically can be java_install_dir/bin.
For Windows:
set PATH = C:\jdk 14.0.1\bin;%PATH%
set JAVA_HOME = C:\jdk 14.0.1
2. Installing and Setting up Tomcat: Web Server
There are many web servers that support JSP and servlets. Out of all these web servers available, Apache Tomcat can be downloaded for free.
Apache Tomcat is an open-source implementation for JSP and servlets. It acts as a standalone server for JSP and servlets. It can be easily used with the Apache Web server.
Steps to set up Tomcat are:
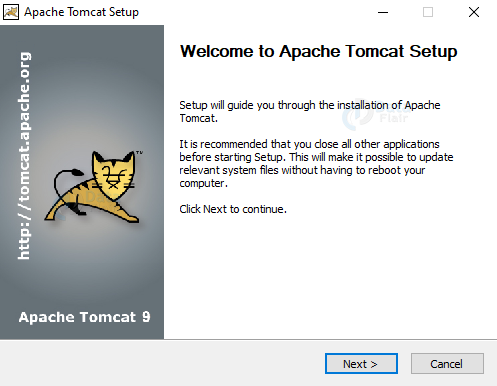
Download Apache Tomcat latest version.
You will then follow these seven steps for the installation of the Tomcat server.
1: Click Next to install Tomcat.
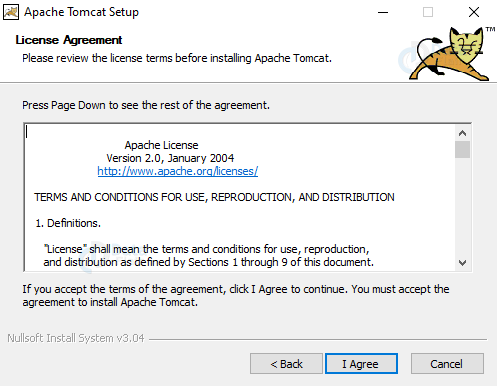
2: Agree to the terms and conditions in order to proceed further.
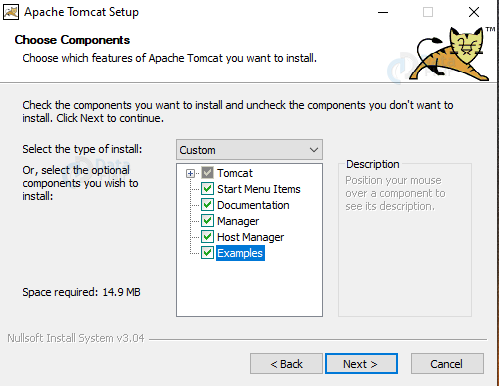
3: In this step, you will select the normal or full installation of Tomcat. For newbies, it is better to have full installation as it contains examples as well.
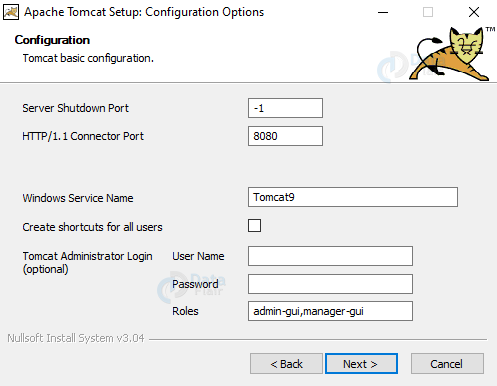
4: Set up the ports, admin, and password to run your server.
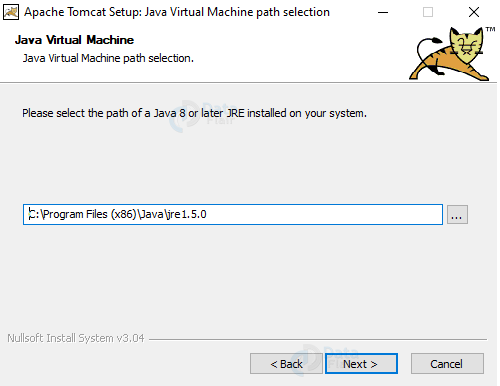
5: You will see that JVM asks to select the path. If Java JDK is in program files, then Tomcat should be in the same location.
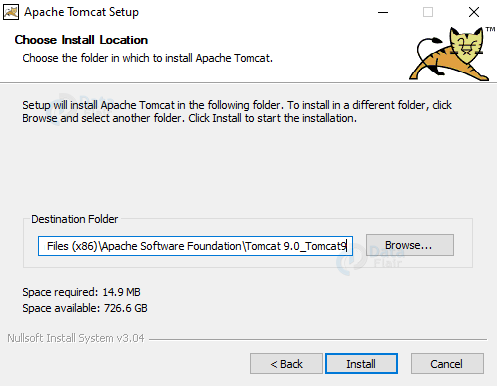
6: Set up the path for your Tomcat server.
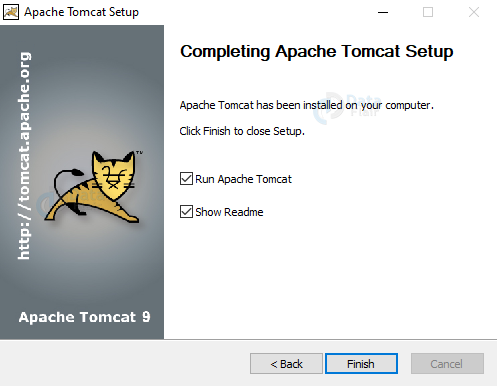
7: Click on the finish button, and you are all done with installing the Tomcat server.
Once you install, it then unpacks the binary distribution to a suitable location. It is preferable to select the location where your Java is. For example, if Java is in c drive, then Tomcat should be in c drive as well. For example as C:\apache-tomcat-9.0.34
Make CATALINA_HOME environment variable and point it to this location.
3. Starting and Stopping Tomcat
If you want to start Tomcat as service, then use the following command-
%CATALINA_HOME%\bin\startup.bat
or
C:\apache-tomcat-9.0.34\bin\startup.bat
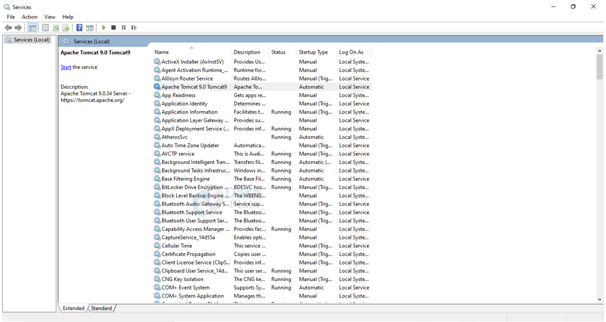
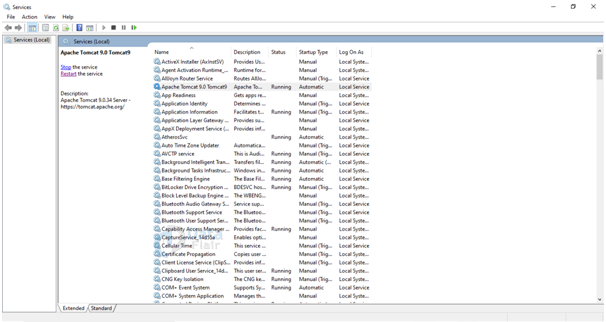
Either you can search services on your pc and start the tomcat server there.
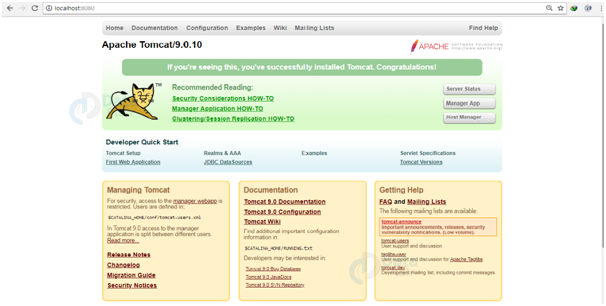
If the setup is pulled off successfully, type http://localhost:8080/ on browser. You will receive output on successful execution −Tomcat Home page
To stop tomcat, use the following command
%CATALINA_HOME%\bin\shutdown
or
C:\apache-tomcat-9.0.34\bin\shutdown
Or you can stop the service as you started it like below-
Setting up CLASSPATH in JSP
For Windows, put the following in your C:\autoexec.bat file.
set CATALINA = C:\apache-tomcat-9.0.34
set CLASSPATH = %CATALINA%\common\lib\jsp-api.jar;%CLASSPATH%
Conclusion
In this article, we learned how to-
- Install and set up Java JDK.
- Installation and setup of Apache Tomcat server in order to run our JSP programs over the browser.
- Starting and stopping the JSP server.
- Setting the classpath for the tomcat server in JSP.
We learned all the steps of setup and configuration so that we can implement the JSP programming as a client server mechanism.
Your opinion matters
Please write your valuable feedback about DataFlair on Google


http/1.1 connexion port: 8080
If 8080 is mandatory, why must it be supplied, and if not, what doest another value implies?
No indication of the purpose of the port is given.