JSP Directives – Page, Include and Taglib Directives
Placement-ready Courses: Enroll Now, Thank us Later!
Welcome to DataFlair JSP Directives Tutorial. This article discusses the directives used in JSP. It tells about the attribute used in detail along with their syntax. So let us start!!!

JSP Directives
A page must contain every single line of code necessary for processing the request. But that is not all. Some instructions need to be given to the compiler on how to execute that written code. For this what we require is directives.
Directives are written in these <%@__%> tags. Directives gives the information about the complete JSP page. JSP gets converted to servlet code during the translation phase, and these directives are messages or instructions to that JSP container on how to handle the request generated.
Syntax:
<%@ directive attribute=" "%>
where these attributes are key value pairs. Multiple attributes can be there under a directive.
Syntax:
<%@ directive name [attribute=”value”attribute=”value”…..]%>;
Classification of JSP Directives
Classification of directives in three categories is as follows:
- page directive
- include directive
- taglib directive
Let’s discuss each branch of directives in detail.
A. Page Directive in JSP
Page directive contains the instructions that are a means of setting the attributes of the page. They determine interpretation and execution of the page. It applies all the page related attributes to the JSP page and in which it is physically present. It gives instructions to the web container for that JSP page.
Syntax:
<%@ page attribute=”value” attribute=”value”…%>
Page directive contains of following attributes:
- language=”scripting language”
- extends=”className”
- import=”importList”
- session=”true|false”
- buffer=”none|sizekb”
- autoFlush=”true|false”
- isThreadSafe=”true|false”
- info=”info_text”
- contentType=”ctinfo”
- errorPage=”error_url”
- isErrorPage=”true|false”
- pageEncoding= “value”
- isELignored= “true|false”
There can be more than one page directive tag in a program. The ordering of the attributes is not important. However, one attribute can only be defined once except the import attribute.
**The page directive attributes won’t show any output as they just set off the start for our JSP code. Thus there won’t be any outputs for page directive.
To understand the functionality of each and every attribute, it’s important to discuss them in detail:
1. Language attribute in JSP
JSP architecture allows it to be extended as a framework for server-side scripting. Page directive thus supports language attribute. Java is the default language for this attribute. It is applied to all declarations, expressions, and scriptlets present under the translation including files mentioned in an include directive.
Earlier JSP 1.1 supported none other than java for the language attribute. Although JSP engines individually allow other languages or so.
Newer versions allow the usage of other languages only with some restrictions imposed. The language used as the value for language attribute must support the JRE so that it allows access to the implicit objects, to access get and set methods of JavaBeans, and to use public methods of Java classes. For e.g. JRun 3.0 supports Java as well as JavaScript.
Syntax:
<%@ page language=“value” %>
When Java is the value of language attribute—the code gets copied to the auto generated servlet the way it is.
<% int k = 10;
 %>
k =
 <%= k %>
then the generated servlet includes the statements,
out.print("\r\n");
 int k = 10;
out.print("\r\nk = ");
 out.print(k);
out.print("\r\n\r\n");
which treats k as a Java variable,
When the language is javascript—the code is not as it is. Instead, a servlet engine gets initialized that reads and interprets
<%@ page language="javascript" %>
 <%
 var k = 10;
 %>
 k = <%= k %>
A scripting engine specific to JRE will generate following code:
if (scriptEngine == null)
{
try { scriptEngine = ScriptEngineFactory.getScriptEngine("javascript"); scriptEngine.init(pageContext);
}
 catch (Exception e)
{
      throw new ServletException ("Error initializing scripting engine.", e);
 }
      if (request.getAttribute(SCRIPT_KEY) != null)
 {
scriptEngine.init( pageContext, (String) request.getAttribute(SCRIPT_KEY), (String) request.getAttribute(DECLARATION_KEY));
}
scriptEngine.evaluate(pageContext);
For Example:
<%@ page language = “java” contentType = “text/html” pageEncoding = “ISO-8859-1” isErrorPage = “false”%>
Explanation:
In this example, the page language is Java. Java Compiler will compile all the code under expression tags.
2. extends in JSP
The page directive specification allows one to extend the functionalities of a class(parent) to subclass. We need to specify the full name of the class in the extends attribute. Without explicitly coding one can add additional behaviour of another class in a JSP page.
However take some cautions while extending a class because it may affect factors like vendor-specific performance and reliability of a JSP page.
Syntax:
<%@ page extends="value" %>
For Example:
<%@ page language = “java” contentType = “text/html” pageEncoding = “ISO-8859-1” %>
<%@ extends = “pack.firstclass”%>
Explanation:
The extend tag in this example extends the first class of pack package the class firstclass becomes available to the JSP page.
3. import in JSP
The import describes the qualified names of classes that users might use in the JSP page. You can also import a package but import makes that classes. import the classes by their names rather than package names. Imports in JSP is possible for interfaces, enums etc. It is one of the frequently used attributes under page directive. Import statements will convert to import statements of Java.
The syntax is as follows:
<%@ page import=“value” %>
<%@ page import="java.io.*,java.sql.*,java.util.*" %>
or
<%@ page import="java.io.*" %>
<%@ page import="java.sql.*" %>
<%@ page import="java.util.*" %>
In the auto generated servlet it will convert to following –
import java.io.*;
import java.sql.*;
import java.util.*;
Apart from the import statement, four packages get directly imported. We don’t need to mention them. The list of default import is:
a. java.lang
b. javax.servlet
c. javax.servlet.http
d. javax.servlet.jsp
For Example:
<%@ page language=“java” contentType=“text/html” pageEncoding= “ISO-8859-1” isErrorPage = “false” import=“java.util.Calender.Date” %>
Explanation:
The code in the above example imports the instance of Date from the util package.
4. session in JSP
The work of session directive is to see if the HTTP sessions are the requirement of your page or not. It can have two values:
a. If the value of session=”true”
This value specifies that the page needs an HTTP session.
By default the value of this attribute is taken true.
b. If the value of session=”false”
This value shows that no HTTP session is required. If this is specified, the implicit variable of the session generation can’t be used if the value of session is false. It causes errors at the time of translation.
It is suggested that if the page doesn’t need a http session then it should be specified to save the memory and CPU cycles.
Syntax:
<%@ page session= “true/false” %>
For Example:
<%@ page language=“java” contentType = “text/html; charset=ISO-8859-1” pageEncoding = “ISO-8859-1” session= “false”%>
Explanation:
The above code suggests that we don’t want to create a session for the particular JSP page.
5. The buffer and autoFlush in JSP
These attributes describe the way the output will be processed. If buffer is set as none, the output gets written to the response directly whereas the output is written to buffer of the specified size. 8kb is the default size of the buffer.
On the other hand autoFlush can have two values. If it is “true” it flushes the output in the buffer if it is full whereas if the value of autoflush is “false” that means it will not work and as soon as the buffer will be filled an exception of buffer overflow occurs.
Syntax:
<%@ page buffer=“value” %>
<%@ autoFlush=“true/false” %>
The following can be the combinations:
| Buffer | autoFlush | Effect |
| None | True | Characters are written to the servlet response output stream as soon as they are generated. |
| None | False | This operation is deemed illegal as, if there is no buffer nothing will be stored and hence autoflush is of no use. |
| 8kb | True | An 8kb of default buffer is initialized. It is flushed automatically if it gets filled. |
| 8kb | False | Again an 8kb size of default buffer is used. As the autoFlush is false, if the buffer an exception occurs. |
| size kb | True | Only the buffer size changes in this. Users can choose any integer. A size times 1,024-byte buffer is used. As autoflush is true, when this buffer is filled, it gets flushed automatically. |
| size kb | False | It is similar to the 4th combination. The only difference is this the size of buffer varies according to the user i.e. A size times 1,024-byte buffer is used. When the buffer fills, an exception occurs.
|
For Example:
<%@ page language=“java” contentType = “text/html; charset=ISO-8859-1” pageEncoding = “ISO-8859-1” buffer=“8kb” autoFlush=“true”%>
Explanation:
For the above example, an 8kb buffer will be generated to map the output and it will automatically get flushed when it gets filled.
6. isThreadSafe in JSP
A servlet engine, by default, uses a lot of threads and loads a solo instance of generated servlet to service one request. This implies that two or even more threads might be executing the same method of servlet simultaneously. The threads thus can collide. This can lead to interference of threads with each other towards the access of the variable.
Thus, to go a way around with this SingleThreadModel, the isThreadSafe attribute of the page directive helps.
If you specify isThreadSafe=”true”, it implies that you take care of any possible thread conflicts. A defined JSP container safely dispatches multiple requests.
If the value is “false”, then SingleThreadModel gets implemented by the JSP container. By default value is taken as “true”.
The Syntax for isThreadSafe is as follows:
<%@ page isThreadSafe="true/false" %>
<%@ page isThreadSafe="true" %>
Class signature is generated as follows :
public class jrun__Chap10__examples__isThreadSafe__ex12ejsp25
extends allaire.jrun.jsp.HttpJSPServlet
implements allaire.jrun.jsp.JRunJspPage

<%@ page isThreadSafe="false" %>
Class signature is:
public class jrun__Chap10__examples__isThreadSafe__ex22ejsp25
extends allaire.jrun.jsp.HttpJSPServlet
implements allaire.jrun.jsp.JRunJspPage, SingleThreadModel
For Example:
<%@ page language=“java” contentType = “text/html; charset=ISO-8859-1” pageEncoding = “ISO-8859-1” isThreadsafe= “true”%>
Explanation:
This code suggests that multiple threads will be used and they will be synchronized avoiding any thread conflict.
7. info in JSP
The info attribute provides the functionality to provide the descriptive info of the JSP page/servlet. A description is useful for an interactive page.
The Syntax for info is as follows:
<%@ page info=“value” %>
<%@ page info="Shopping Cart Checkout Page" %>
This value gets compiled to a class. This is made available using the getServletInfo() method.
For Example:
<%@ page language=“java” contentType = “text/html; charset=ISO-8859-1” pageEncoding = “ISO-8859-1” info= “JSPDirectives_Kajal”%>
Explanation:
The value in the info attribute describes that this page is about Directives and thus using getServletInfo() method, servlet retrieves this value.
8. contentType in JSP
A JSP page normally generates output in HTML output. But this is not always the case. Using contentType, you can specify the type of content according to you. It can be a jpg image or a pdf.
The Syntax for contentType can be:
<%@ page contentType=“value” %>
The character set can be specified in addition to the content type. The default value for contentType is “text/html; charset=ISO-8859-1” until and unless the user defines it. For example:
<%@ page contentType="type/subtype; charset=charset" %>
For Example:
<%@ page language=“java” contentType = “text/html; charset=ISO-8859-1” pageEncoding = “ISO-8859-1” session= “false”%>
Explanation:
contentType sets the type of response as text or html. The character set is specified too for the JSP and response page.
9. errorPage and isErrorPage in JSP
While a JSP page is evaluated and an exception occurs, the servlet engine dumps a stack track. This is not desirable for commercial Web applications. JSP offers a simple and convenient solution. We need two attributes: errorPage and isErrorPage and their synchronization.
What a JSP can do is to indicate that whenever a page throws an exception, then an error page can be displayed.
Syntax can be:
<%@ page errorPage="value" %>
Where error_url is the url of the error page of that JSP page in the same servlet context. Now, if the JSP page is Defined with the attribute isErrorPage then it becomes capable of receiving exceptions of the JSP pages that have error pages. That JSP page generated after error needs to have following described in its page directive:
<%@ page isErrorPage="true/false" %>
Then It may simply report the exception:
<%@ page isErrorPage="true" session="false"%>
<H3>Application Error</H3>
The error message is:
<B><%= exception.getMessage() %></B>
For Example:
<%@ page language=“java” contentType = “text/html; charset=ISO-8859-1” pageEncoding = “ISO-8859-1” isErrorPage=“true” errorPage= “Handleexception.jsp”%>
Explanation:
In this code if the page contains error then it should be referred to the Handle Exception page.
10. pageEncoding in JSP
It is a character encoding in which JSP files are encoded. The default value for page encoding is ISO-8859-1.
It is a character8-bit (single-byte) coded graphic character set. Page encoding is determined as follows:
- Through the value of page encoding in JSP Property group.
- Through the value present in page encoding attribute. A translation error is generated if the page encoding of a JSP page is different from its property groups.
- Through the contentType attribute that has charset value.
The pageEncoding and contentType attribute tells about page encoding of that JSP file in which page directive is physically present.
Syntax:
<%@ pageEncoding= “value” %>
For Example:
<%@ page language=“java” contentType = “text/html; charset=ISO-8859-1” pageEncoding = “ISO-8859-1” session= “false”%>
Explanation: The pageEncoding has been shown in the above example using the default value i.e. ISO-8859-1.
11. isELignored in JSP
The attribute stands for Expression Language ignored.This attribute specifies the inability of an expression to be evaluated. Simply saying that expression will be considered static and will not be evaluated. However the default value of the attribute is false and expressions are evaluated as specified.
Syntax:
<%@ isELignored = “true/false”%>
For Example:
<%@ page language=“java” contentType = “text/html; charset=ISO-8859-1” pageEncoding = “ISO-8859-1” isELignored= “false”%>
Explanation:
For the above example all the expression language statements will be calculated as they were specified.
B. Include Directive in JSP
It works similarly to the #include of the C preprocessor directory. Its work is to merge the contents of another file into .jsp source input stream at the translation phase.
Syntax:
<%@ include…….%>
<%@ include file=”filename”%>
The “filename” can be the absolute name or the relative path name.
For Example:
<%@ include file=”header.html”>
<%@ include file=”sortmethod”>
The include directive however contrasts with the <jsp:include> action. <jsp:include> merges the output of another file at request time into the response output stream unlike include directive. Either of them we can use to include texts, headers, footers etc.
For Example:
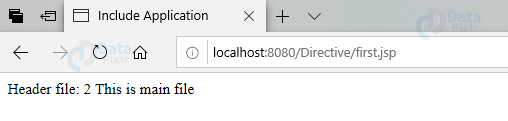
first.jsp
<%@ page language=“java”contentType = “text/html; charset=ISO-8859-1” %>
<%@ include file="second.jsp" %>
<html>
<head><title>Include Application </title></head>
<body>
<a>I am the main including second</a>
</body>
</html>

second.jsp
<%@ page language=“java”contentType = “text/html; charset=ISO-8859-1” %>
<html>
<head></head>
<body>
<a>Header file: </a>
<% int num=1; num++; out.println(num);
%>
</body>
</html>
Explanation:
In the above example, there are two jsp files first and second. First file is the main file that includes the second file (code line@ of first.jsp). As the second file is included first, it gets compiled and executed first and then the mail file is compiled.
C. Taglib Directive in JSP
With the use of tag library this directive makes the custom tags available in the current page. It is useful in a JSP page using the standard tag libraries of JSP. It takes custom tags and finds their location in the library. Once it gets the location it searches for that tag in the JSP page. Thus the tag is available for that page.
Syntax:
<%@ taglib uri=“taglib URI” prefix=“value”%>
The attributes of this directive are:
- tagLibrary URI
- tagPrefix
a. tagLibraryURI
This attribute contains the URL of a Tag Library Descriptor as a value.
b. tagPrefix
It contains unique prefixes for the identification of custom tags.
For Example:
<%@ page language=“java”contentType = “text/html; charset=ISO-8859-1” %>
<%@ taglib prefix=“mytag” uri=“http://www.jsp.com”%>
<html>
<head><title>taglib</title>
<mytag: Hi I am a custom tag/>
</head>
<body>
You are seeing an example of custom tags.
</body>
</html>
Explanation: This is an example of custom tags where mytag is the custom tag prefix and it identifies the concerned tag in the head of the code.
Conclusion
Finally, In reference to this article, we came to know about the detailed description and usage of directives. We learnt that directives are nothing but a set of defined attributes that instructs the interpretation and execution of a JSP page.
Did you know we work 24x7 to provide you best tutorials
Please encourage us - write a review on Google


