Image Filtering in OpenCV
Machine Learning courses with 100+ Real-time projects Start Now!!
Ever wondered how images can be magically transformed? Filters hold the key. In this article, we’ll unravel the world of Filtering in OpenCV. Get ready to discover how simple yet powerful techniques can enhance your images, making them sharper, cleaner, and visually captivating. Let’s dive in!
Let’s know what is filtering in OpenCV:
Filtering in OpenCV is the digital equivalent of refining a photograph. It’s a toolbox of mathematical operations that sweep through an image, pixel by pixel, adjusting them according to predefined patterns. This adjustment, done through filter masks or kernels, can work wonders – from blurring distractions and sharpening edges to unveiling hidden details.
OpenCV’s filtering prowess lets you manipulate images to bring out desired features or enhance their visual appeal, adding an extra touch of magic to the world of computer vision.
Pixel Transformation: Filtering involves altering pixel values within an image using convolution, a mathematical operation. By sliding a filter kernel over each pixel and its neighboring pixels, new pixel values are calculated based on the weights specified in the kernel.
Enhancement and Modification: Filters can be applied to enhance certain aspects of an image or modify its appearance. This includes tasks like blurring for noise reduction, sharpening for edge enhancement, and highlighting specific features.
Kernel Varieties: OpenCV offers a variety of predefined filter kernels tailored to different purposes. Gaussian blur, for instance, uses a Gaussian distribution to create a smoothing effect, while Sobel and Scharr kernels emphasize edges.
A Deep Dive into Kernel Varieties: Crafting Visual Narratives with Filtering in OpenCV
In the vast landscape of image processing, kernels serve as the artisans of transformation, intricately shaping visual narratives by filtering pixel patterns. These small yet powerful matrices are at the heart of filtering techniques, molding images to emphasize features, enhance details, and extract vital information.
OpenCV, with its array of filtering tools, unveils a spectrum of kernel varieties that enable us to craft visual tales with unparalleled precision. In this comprehensive exploration, we delve into the realm of **Kernel Varieties in Filtering in OpenCV**, unveiling the diversity of kernels, their functions, and the transformative magic they wield.
Understanding Kernel Varieties :
1. Smoothing Kernels (Blurring): These kernels, such as the Gaussian and Box filters, usher in a realm of tranquillity by averaging pixel values within a specific window. The result is a softened image, free of noise and disruptions, perfect for highlighting overall structures.
2. Edge Detection Kernels: The likes of Sobel, Prewitt, and Scharr kernels act as cartographers of contours, tracing the outlines of objects and landscapes within images. These kernels emphasize changes in pixel values, enabling edge detection.
3. Sharpening Kernels: Sharpening kernels, including Laplacian and Unsharp masking kernels, unleash the magic of detail enhancement. They illuminate hidden textures and structures by magnifying the differences between adjacent pixels.
4. Embossing Kernels: Embossing kernels are the sculptors of illusion, adding depth and dimension by emphasizing directional variations between pixels. They bring images to life, creating an illusion of relief.
5. Custom Kernels: The canvas of custom kernels allows us to sculpt transformations that are tailored to our creative vision. With these, we can craft unique effects, amplify specific features, or even distort reality in captivating ways.
Incorporating Kernels with OpenCV :
OpenCV opens the door to this kaleidoscope of kernel varieties, offering tools that effortlessly integrate kernels into our image-processing endeavors. Using functions like `cv2.filter2D()`, we apply these kernels to our images, initiating transformations that breathe new life into visual content.
Kernel varieties in filtering form an intricate tapestry that weaves together pixels, patterns, and narratives. From smoothing the edges of reality to sharpening the focus of detail, each kernel type contributes a unique brushstroke to the canvas of image processing.
OpenCV’s filtering capabilities empower us to harness the potential of these kernels, allowing us to sculpt visual masterpieces that resonate with precision, depth, and creative expression. As we delve into the realm of kernel varieties, we venture beyond pixels, immersing ourselves in the art of transformation that breathes life into images and enriches our connection with the visual world.
The most common filtering methods available in OpenCV
Let’s check out the various methods which are used to apply filtering techniques to a target image.
Filter2D in OpenCV: Harnessing Customized Image Transformations
At the heart of image processing lies the need to mold raw visuals into striking masterpieces. OpenCV’s cv2.filter2D() function is the brush that empowers you to create customized transformations, infusing images with your artistic vision. This section delves into the art and science of cv2.filter2D(), unveiling its syntax, parameters, and a practical code example.
Syntax:
dst = cv2.filter2D(src, ddepth, kernel)
Parameters:
- Src: The source image to be transformed.
- Ddepth: Desired depth of the destination image (typically -1, indicating that the output depth matches the input depth).
- Kernel: The custom convolution kernel, a numpy array defining the transformation.
Example: Enhancing Edges with a Custom Kernel
Suppose you wish to emphasize edges by using a custom kernel that highlights differences in pixel intensity.
Here’s how you can achieve this using cv2.filter2D() :
import cv2
import numpy as np

# Read the input image
image =cv2.imread(r"C:\Users\vichu\OneDrive\Desktop\OpenCV Data Flair\Flitering Using OpenCV\deer-wildlife.jpg")


# Define a custom edge-enhancing kernel
kernel = np.array([[-1, -1, -1],
                   [-1,  8, -1],
                   [-1, -1, -1]])

# Apply the custom kernel using cv2.filter2D()
edge_enhanced_image = cv2.filter2D(image, -1, kernel)

# Display the original and edge-enhanced images
cv2.imshow('Original Image', image)
cv2.imshow('Edge-Enhanced Image', edge_enhanced_image)
cv2.waitKey(0)
cv2.destroyAllWindows()
Explanation:
- The custom kernel is defined as a numpy array. In this example, the kernel enhances edges by emphasizing differences in pixel intensity.
- The cv2.filter2D() function takes the source image, the desired output depth (-1 preserves the input depth), and the custom kernel as parameters.
- The result is a new image where edges are enhanced, creating a visually striking effect.
Original Image :

Filtered Image :

With cv2.filter2D(), you have the power to craft transformations that breathe life into your images. From edge detection to texture enhancement, this function empowers you to explore a world of creative possibilities.
Bilateral Filter in OpenCV: Preserving Edges while Smoothing Images
In the realm of image processing, the bilateral filter emerges as a versatile tool that strikes a balance between noise reduction and edge preservation. OpenCV’s cv2.bilateralFilter() function is your passport to achieving this delicate equilibrium. This section unveils the syntax, parameters, and a practical code example to demonstrate the bilateral filter’s magic.
Syntax:
dst = cv2.bilateralFilter(src, d, sigma_color, sigma_space)
Parameters:
- Src: The source image to be filtered.
- D: Diameter of each pixel neighborhood used during filtering.
- Sigma_color: Filter sigma in color space. A larger value preserves stronger edges.
- Sigma_space: Filter sigma in coordinate space. A larger value considers farther pixels within the neighborhood.
Example: Preserving Edges with Bilateral Filtering
Suppose you have a noisy image that you want to smooth while retaining its important edges.
The cv2.bilateralFilter() function can help you achieve this:
import cv2

# Read the input noisy image
noisy_image = cv2.imread(r"C:\Users\vichu\OneDrive\Desktop\OpenCV Data Flair\Flitering Using OpenCV\deer-wildlife.jpg")


# Apply bilateral filter using cv2.bilateralFilter()
filtered_image = cv2.bilateralFilter(noisy_image, 9, 75, 75)

# Display the original and filtered images
cv2.imshow('Noisy Image', noisy_image)
cv2.imshow('Filtered Image', filtered_image)
cv2.waitKey(0)
cv2.destroyAllWindows()
Explanation:
- The cv2.bilateralFilter() function applies the bilateral filter to the noisy_image.
- The parameters 9, 75, and 75 are chosen to balance noise reduction and edge preservation. You can adjust these values based on the specific image and desired effect.
- The result is a smoothed image where noise is reduced while important edges are retained.
Original Image :

Filtered Image :
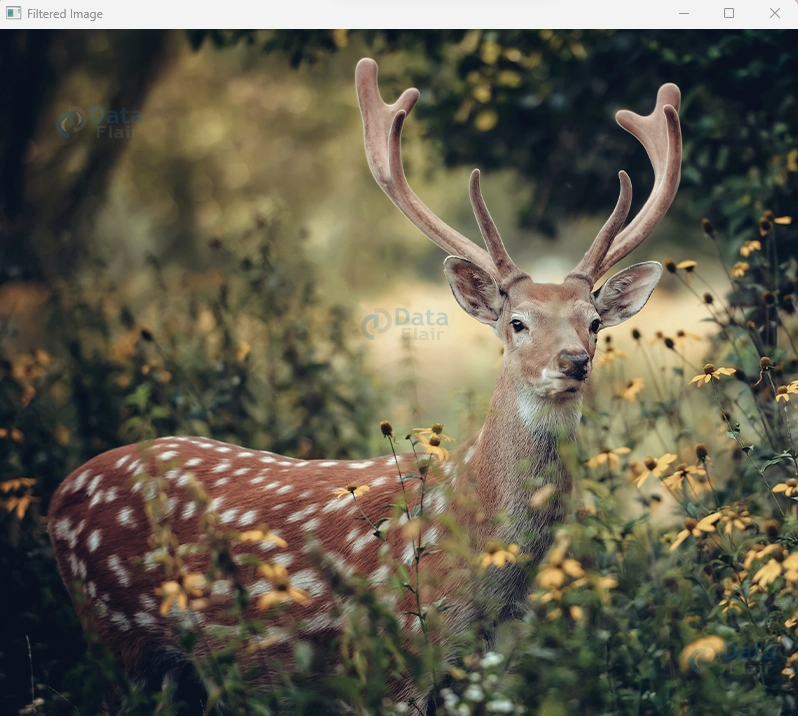
The bilateral filter shines in scenarios where traditional filters might blur edges excessively. By considering both pixel intensity differences and spatial distance, it offers a holistic approach to image smoothing, making it an indispensable tool in your image processing toolbox.
Box Filter in OpenCV: Simplifying Smoothing with Neighborhood Averaging
Imagine gently gliding a smoothing brush over an image, blurring away imperfections. OpenCV’s `cv2.boxFilter()` function allows you to achieve this effect effortlessly through neighborhood averaging. This section unveils the syntax, parameters, and a practical code example to illustrate the simplicity and power of the box filter.
Syntax:
dst = cv2.boxFilter(src, ddepth, ksize, dst, anchor, normalize, borderType)
Parameters:
- Src: The source image to be smoothed.
- Ddepth: Desired depth of the destination image (typically -1 for preserving the input depth).
- Ksize: The size of the kernel for neighborhood averaging. Must be odd and positive.
- Dst: Optional output image.
- Anchor: The position of the anchor within the kernel. The default is (-1, -1), indicating the kernel centre.
- Normalize Boolean flag to enable kernel normalization.
- BorderType: Border mode for handling border pixels.
Example: Gentle Smoothing with Box Filtering
Suppose you have a slightly noisy image that you want to gently smooth to maintain its overall structure.
The cv2.boxFilter() function is a simple solution:
import cv2

# Read the input image
image = cv2.imread(r"C:\Users\vichu\OneDrive\Desktop\OpenCV Data Flair\Flitering Using OpenCV\deer-wildlife.jpg")

# Apply box filter using cv2.boxFilter()
smoothed_image = cv2.boxFilter(image, -1, (5, 5))

# Display the original and smoothed images
cv2.imshow('Original Image', image)
cv2.imshow('Smoothed Image', smoothed_image)
cv2.waitKey(0)
cv2.destroyAllWindows()
Explanation:
- The cv2.boxFilter() function applies a box filter to the image.
- The (5, 5) parameter represents the kernel size for neighborhood averaging. It must be odd and positive.
- The result is an image with reduced noise, achieved by averaging pixel values within a defined neighborhood.
Original Image :

Filtered Image :

The box filter’s simplicity lies in its uniform neighborhood averaging approach. While it might not preserve edges as effectively as some other filters, it’s an efficient and quick way to perform mild image smoothing, making it a valuable tool in various image enhancement scenarios.
Squared Box Filter in OpenCV: Amplifying Smoothing for Enhanced Clarity
Sometimes, gentle smoothing isn’t enough – you need to amplify the effect to bring out essential features. OpenCV’s cv2.sqrBoxFilter() function comes to the rescue by applying a squared box filter. This section unveils the syntax, parameters, and a practical code example to showcase how squared box filtering can enhance image clarity.
Syntax:
dst = cv2.sqrBoxFilter(src, ddepth, ksize, dst, anchor, normalize, borderType)
Parameters :
- Src: The source image to be processed.
- Ddepth: Desired depth of the destination image (typically -1 for input depth preservation).
- Ksize: Size of the squared box filter kernel. Must be odd and positive.
- Dst: Optional output image.
- anchor: Position of the anchor within the kernel. The default is (-1, -1), indicating the kernel centre.
- normalize Boolean flag for kernel normalization.
- borderType: Border mode for handling border pixels.
Example: Enhancing Clarity with Squared Box Filtering
Suppose you have an image with intricate patterns that you wish to highlight for better clarity.
The cv2.sqrBoxFilter() function can be your tool of choice:
import cv2

# Read the input image
image = cv2.imread(r"C:\Users\vichu\OneDrive\Desktop\OpenCV Data Flair\Flitering Using OpenCV\deer-wildlife.jpg")

# Apply Gaussian blur to enhance image details
blurred_image = cv2.GaussianBlur(image, (0, 0), 5)  # Adjust the kernel size (5) as needed

# Display the original and enhanced images
cv2.imshow('Original Image', image)
cv2.imshow('Enhanced Image', blurred_image)
cv2.waitKey(0)
cv2.destroyAllWindows()
Explanation:
- The cv2.sqrBoxFilter() function applies a squared box filter to the image.
- The (5, 5) parameter represents the kernel size for squared box filtering. It must be odd and positive.
- The result is an image with enhanced features, achieved by amplifying the smoothing effect, particularly suitable for emphasizing patterns and textures.
Original Image :

Filtered Image :

Squared box filtering is a versatile technique for enhancing image details and patterns. By amplifying the smoothing effect, it can bring out hidden intricacies in your visuals. Whether it’s for enhancing textures or emphasizing unique features, cv2.sqrBoxFilter() opens up possibilities for enhancing image clarity.
Summary
In the realm of OpenCV’s filtering magic, we’ve unveiled the art of transforming pixels into captivating stories. From the subtle strokes of Gaussian blur to the intricate dance of custom filters, we’ve harnessed convolution’s power to enhance, amplify, and preserve. Whether blurring noise or accentuating edges, filtering has been our creative wand.
Through bilateral filters, we’ve learned to balance noise reduction and edge clarity. Squared box filtering has shown how simple techniques can amplify smoothing. With OpenCV as our guide, we’ve journeyed through syntax, parameters, and hands-on implementation, shaping pixels into visions.
Did you know we work 24x7 to provide you best tutorials
Please encourage us - write a review on Google


