OpenCV Project – Snake Game
Machine Learning courses with 100+ Real-time projects Start Now!!
Snake game is a popular classic video game where you control a snake to eat food without hitting the walls or your own body. OpenCV is a computer vision library that can be used to create visually appealing games with smooth animations. By combining these, we can use computer vision techniques like object detection to make the game more challenging.
We will build the game from scratch using OpenCV and add features like high scores and difficulty levels to make it fun and engaging.
Background
Snake game is a fun and classic arcade game where you control a snake to eat food and avoid obstacles and its own tail. As the snake grows longer, it becomes more challenging to maneuver.
OpenCV is a computer vision library that can be used to create this game. You can use it to render the game’s graphics and track the snake’s movement. The game can be controlled using ‘a’, ‘w’, ‘s’, ‘d’ keys, and collision detection is implemented to detect when the snake hits the walls or its own body.
You can also add sound effects, scorekeeping, power-ups, and multiple levels to make the game more interesting. Creating a Snake game using OpenCV can be a fun way to learn about computer vision and game development.
Controlling
| Key | Action |
| a | Left |
| d | Right |
| w | Up |
| s | Down |
Prerequisites for Snake Game Using OpenCV
It is important to have a solid understanding of the Python programming language and the OpenCV library. Apart from this, you should have the following system requirements.
1. Python 3.7 and above
2. Any Python editor (VS code, Pycharm, etc.)
Download OpenCV Snake Game Project
Please download the source code of OpenCV Snake Game Project from the following link: OpenCV Snake Game Project Code.
Installation
Open windows cmd as administrator
1. To install the opencv library run the command from the cmd.
pip install opencv-python
Let’s Implement It
To implement it follow the below step.
1. First of all we are importing all the necessary libraries that are required during implementation.
import cv2
import numpy as np
import random
2. ‘screen_width’ and ‘screen_height’ are the size of the game window in pixels. ‘board_width’ and ‘board_height’ determine the number of squares or cells on the game board. The width has 20 cells and the height has 15 cells.
screen_width = 640
screen_height = 480
board_width = 20
board_height = 15
3. ‘block_size’ is the size of each block on the game board, ‘score’ keeps track of the player’s score, and ‘white’, ‘black’, ‘red’, and ‘green’ are color codes used to set the colors of various elements on the game board.
block_size = 32
score = 0
white = (255, 255, 255)
black = (0, 0, 0)
red = (0, 0, 255)
green = (0, 255, 0)
4. This code initializes a 2D image array called ‘screen’ with the dimensions of the game screen and sets its data type to np.uint8.
screen = np.zeros((screen_height, screen_width, 3), np.uint8)
5. These variables set up the starting position, length, and direction of the snake in the game, and also initialize an empty list to store the snake’s body position.
x_snake= int(board_width / 2)
y_snake= int(board_height / 2)
snake_length = 2
snake_direction = 1
snake_body = []
6. This code creates a horizontal line of snake body segments with a length of ‘snake_length’, starting from the initial position of the snake. The positions of the segments are stored as tuples in the ‘snake_body’ list.
for i in range(snake_length):
    snake_body.append((x_snake- i, snake_y))
7. These lines of code randomly generate the x and y coordinates for the food item on the game board within the limits of the board.
food_x = random.randint(0, board_width - 1)
food_y = random.randint(0, board_height - 1)
8. Define the font that we will use for displaying text.
font = cv2.FONT_HERSHEY_SIMPLEX
9. Start the while loop.
while True:
10. This sets the entire screen to the color black.
screen[:] = black
11. This code draws the snake’s body using OpenCV by creating a line between the center coordinates of each block of the snake.
for i, block in enumerate(snake_body):
        x, y = block
        if i == 0:
            start_pos = (int((x+0.5)*block_size), int((y+0.5)*block_size))
        else:
            end_pos = (int((x+0.5)*block_size), int((y+0.5)*block_size))
            cv2.line(screen, start_pos, end_pos, white, block_size)
            start_pos = end_pos
12. This code displays the food as a yellow circle and the score as text on the game window using OpenCV. The cv2.circle() function is used to draw the food at the center coordinates, and the cv2.putText() function is used to display the score as text at a specific location on the screen.
cv2.circle(screen, (int((food_x+0.5)*block_size), int((food_y+0.5)*block_size)), int(block_size/2), (0, 255, 255), -1)

    cv2.putText(screen, f"Score: {score}", (10, screen_height - 20), font, 1, white, 2, cv2.LINE_AA)
13. This code updates the position of the snake’s head based on its current direction by either increasing or decreasing the x or y coordinate of the head, depending on which direction the snake is moving.
if snake_direction == 0:
        x_snake-= 1
    elif snake_direction == 1:
        y_snake-= 1
    elif snake_direction == 2:
        x_snake+= 1
    elif snake_direction == 3:
        y_snake+= 1
14. This code adds a new block representing the head of the snake to the front of the snake_body list, and then removes the oldest block from the end of the list if its length is greater than the current score, effectively maintaining the snake’s length based on its score.
snake_body.insert(0, (snake_x, snake_y))
    if len(snake_body) > snake_length:
        snake_body.pop()
15. This code checks if the snake has eaten the food. If it has, then it increases the length of the snake by one block, updates the score by one, and generates a new random location for the food on the game board.
if x_snake== food_x and y_snake== food_y:
        snake_length += 1
        score=score+1
        food_x = random.randint(0, board_width - 1)
        food_y = random.randint(0, board_height - 1)
16. This code checks if the snake is outside the game board. If it is, the game is over, and “Game Over” is displayed in the center of the screen. The program then waits for a key press, and the game ends.
if x_snake< 0 or x_snake>= board_width or y_snake< 0 or y_snake>= board_height:
        cv2.putText(screen, "Game Over", (200, 200), font, 3, white, 3, cv2.LINE_AA)
        cv2.imshow("DataFlair", screen)
        cv2.waitKey(0)
        break
17. This code checks if the snake’s head collides with its body. If there is a collision, the game is over, and the text “Game Over” is displayed in the center of the screen. The program then waits for a short time and the loop is broken, ending the game.
if (snake_x, snake_y) in snake_body[1:]:
        cv2.putText(screen, "Game Over", (200, 200), font, 3, white, 3, cv2.LINE_AA)
        cv2.imshow("DataFlair", screen)
        cv2.waitKey(100)
        break
18. This line of code displays the current game screen in a window with the title “DataFlair” using the cv2.imshow() function from the OpenCV library.
cv2.imshow("DataFlair", screen)
19. This code listens for keyboard input and updates the direction of a snake character in a game based on the key pressed. The ‘q’ key can be used to exit the game loop. The snake moves left, up, right, or down based on the ‘a’, ‘w’, ‘d’, or ‘s’ keys pressed respectively.
key = cv2.waitKey(150)
   if key == ord('q'):
       break
   elif key == ord('a'):
       snake_direction = 0
   elif key == ord('w'):
       snake_direction = 1
   elif key == ord('d'):
       snake_direction = 2
   elif key == ord('s'):
       snake_direction = 3

Opencv Snake Game Output
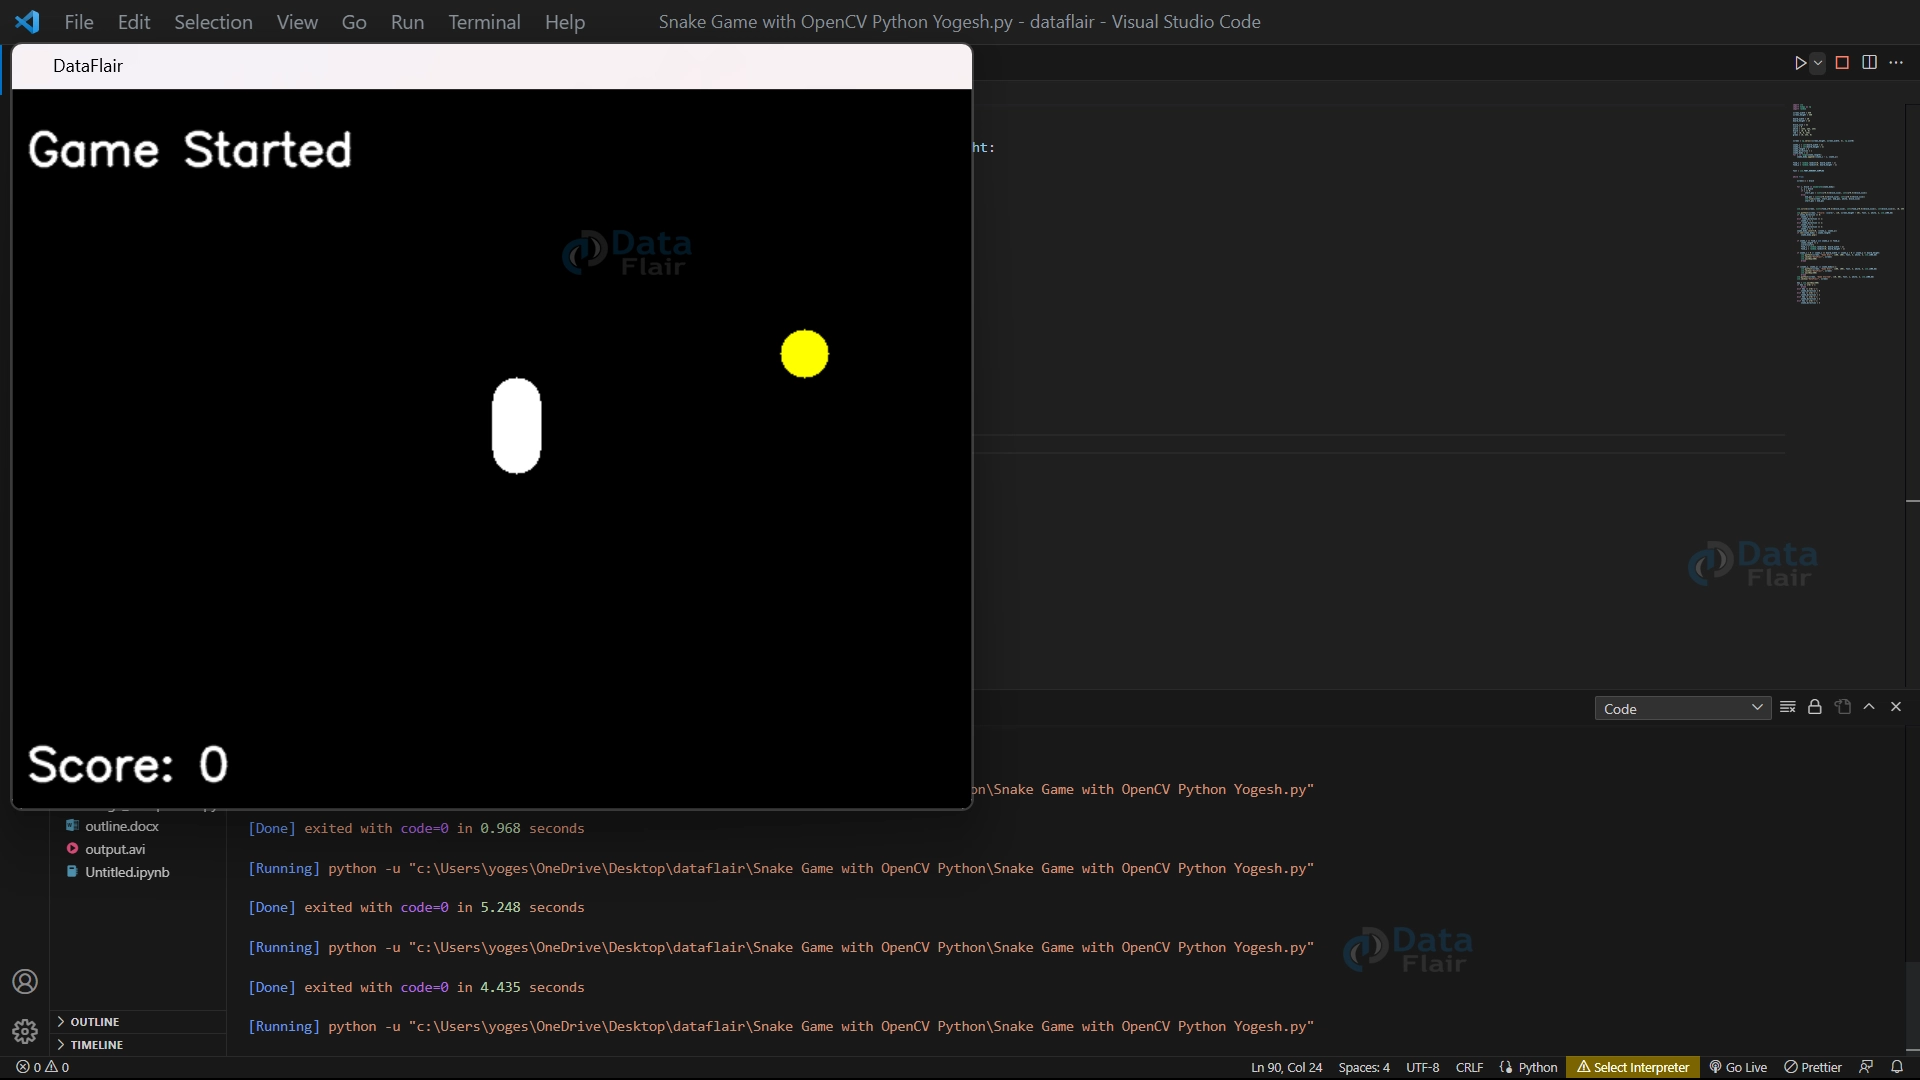
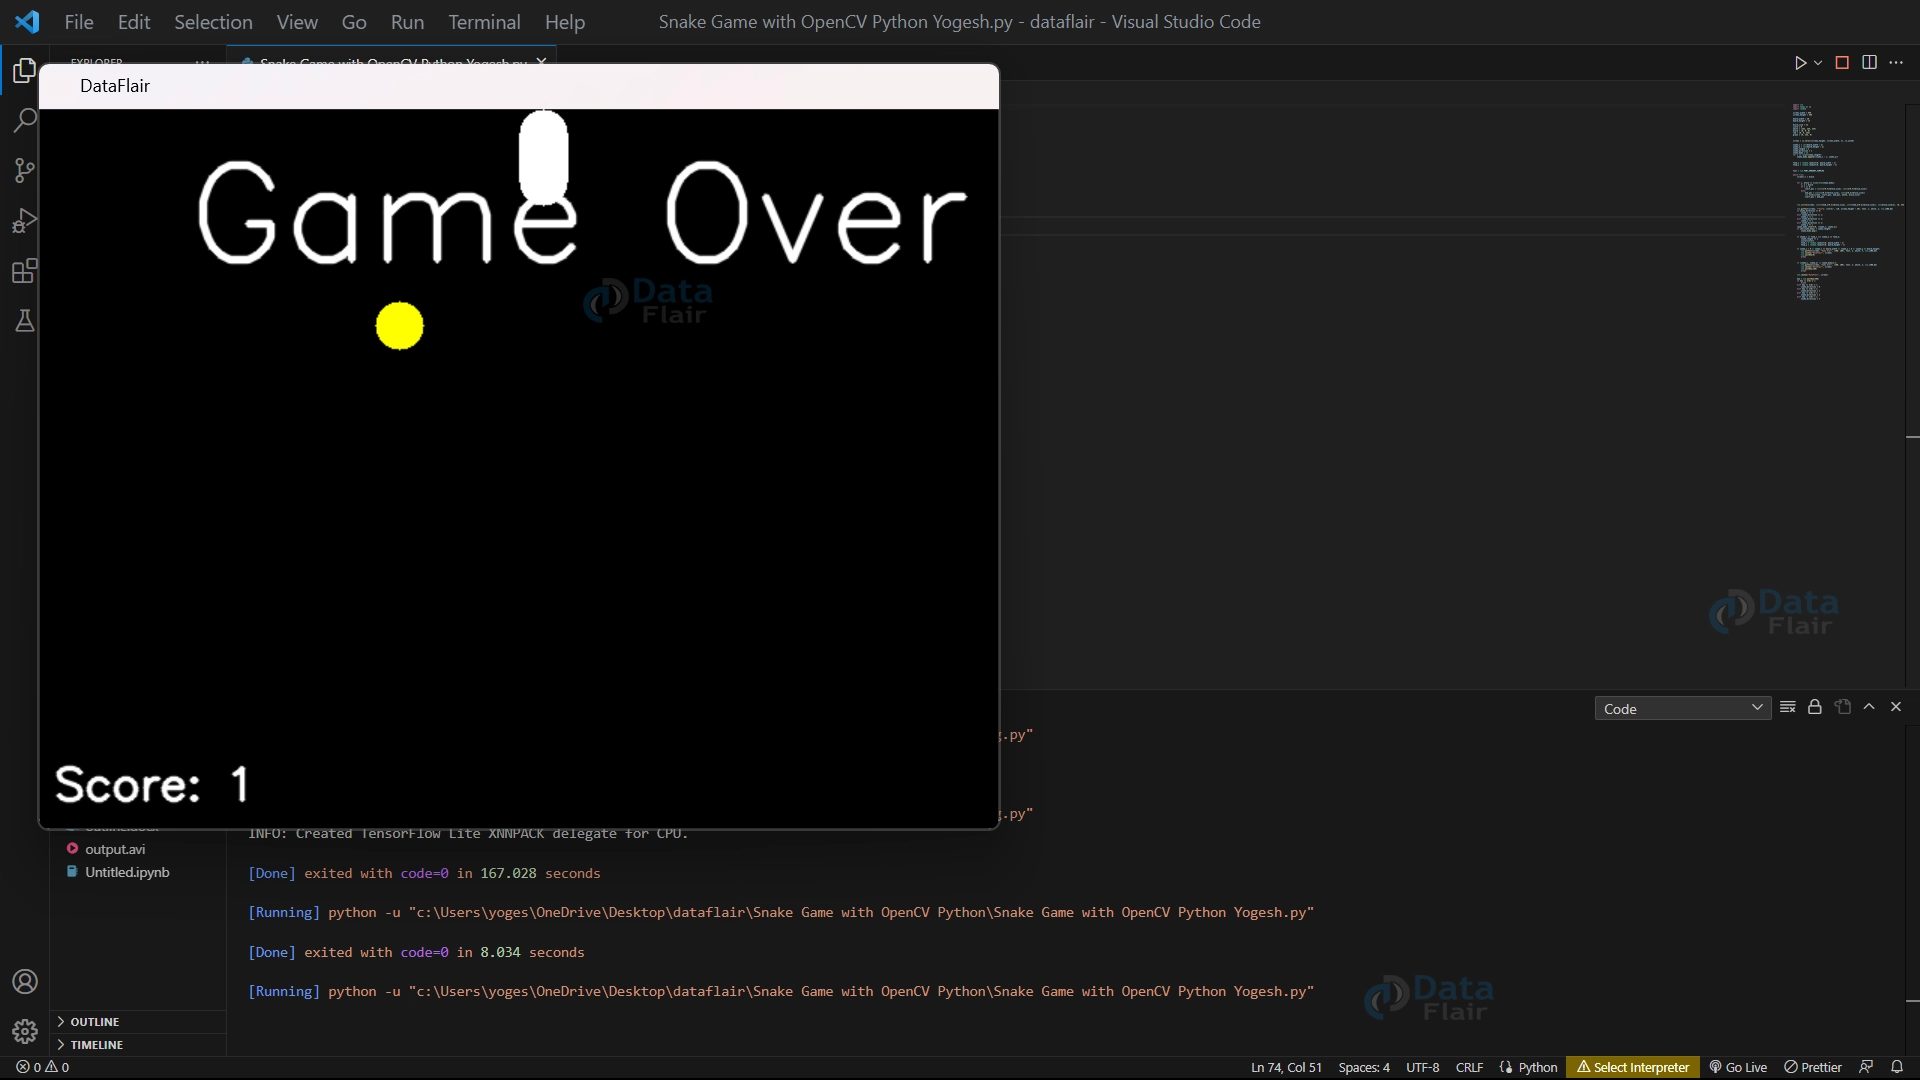
OpenCV Snake Game Video Output
Conclusion
The snake game using OpenCV is a fun and interactive program where users control a snake character with their keyboard. The code listens for keyboard input and updates the snake’s direction based on the key pressed. The game can be exited with the ‘q’ key. OpenCV can be used to create engaging and interactive games like this one. Additional features like collision detection, score tracking, and different difficulty levels can make the game even more enjoyable.
Did you like our efforts? If Yes, please give DataFlair 5 Stars on Google