Zip Command in Linux
Placement-ready Online Courses: Your Passport to Excellence - Start Now
In this article, we will learn everything about the zip command in Linux. We will look at what the zip command is, why it is used, how to install it, the syntax of the zip command, and the options used along with it.
In the end, we will also look at some examples of the zip command by pairing it with various options to understand its working. So pay attention, take notes, and read to the end for the best benefits.
What is linux zip command?
Zip is a command-line-based file packaging utility in Linux-based operating systems that compresses files and directories in your filesystem. When you use the zip command to compress a file, it will be saved with the extension “.zip”.
The zip command is available in many other operating systems like Windows, Unix, and more. The zip command puts one or more compressed files into a single zip archive, along with information about the files like date, time of last modification, name, protection, path, and many more.
Most compression ratios for text files are usually between 2:1 to 3:1. The compression method used by the zip command is known as deflation. In a nutshell, the zip command is useful for packaging a set of files for distribution. and saving disk space by temporarily compressing unused files or directories.
What are the uses of the zip files?
As we have seen, zip is used to compress files in Linux-based operating systems. But why do we compress or decompress files? First, let us look at the importance and uses of ‘zipped’ files’.
We zip files because zipped files take up way less storage space and can be transferred to other computers more quickly than uncompressed files, making workflow efficient as we save a lot of time and storage using zip files.
Just think about it, sharing one big file is any day better than sharing hundreds of small files. The best part is that this process is completely reversible, meaning that once the files are shared with another computer, the user can unzip the files and have full control over the file just like you.
Zip files are a boon when it comes to places where you can only send a limited amount of files, like mail, teams, and many more. Instead of the single 10-file limit, you can attach one zip file with a hundred files!
Syntax of the zip command
The simple syntax of the zip command is shown below:
zip <options> <filename(s)>
Let us look at the fields present in the syntax of the zip command:
<options>
This field takes in a variety of options that specify how the zip command must function, format, and print the output. You can also specify multiple options in this field.
<filename(s)>
This field takes in the file name you want to compress. You can also specify the names of directories and multiple filenames in this field.
Options used with the zip command in linux
In typical Linux fashion, the zip command has a huge truckload of options. Let us take a brief look at each of these options.
1. -a
This option translates files to ASCII format on systems using EBCDIC. You can also write this option as “–ascii.”
2. -A
This option adjusts the entry offsets stored in the archive to consider this “preamble” data. You can also write this option as “–adjust-sfx.”
3. -B
This option forces files to be read as binary. You can also write this option as “–binary.”
4. -b
This option puts the temporary zip archive present in the directory /tmp, copying over stuff.zip to the current directory when done. It is advantageous when updating an existing archive and the file system containing this old archive needs more space to hold both old and new archives simultaneously.
5. -c
This option adds one-line comments for each file. You can also write this option as “–entry-comments.”
6. -d
This option promotes or deletes entries from a zip archive. You can also write this option as “–delete.”
7. -D
For directories, this option does not create entries in the zip archive. You can also write this option as “–no-dir-entries.”
8. -e
It encrypts the zip archive’s contents using a password entered on the terminal in response to a prompt. You can also write this option as “–encrypt.”
9. -E
This option uses the.LONGNAME Extended Attribute as the file name. You can also write this option as “–longnames.”
10. -f
This option replaces an existing entry in the zip archive if modified more recently than the version already present in the zip archive. You can also write this option as “–freshen.”
11. -F
This option fixes the zip archive. The option “-F” can be used if some portions of the archive file are missing but requires a reasonably intact central directory. You can also write this option as “–fix.”
12. -g
This option appends to the specified zip archive rather than creating a new one. You can also write this option as “–grow.”
13. -I
This option scans through image files on Acorn RISC OS. You can also write this option as “–no-image.”
14. -j
This option stores only the name of a saved file and does not store the directory names. You can also write this option as “–junk-path.”
15. -J
This option strips any pretended data from the zip archive names. You can also write this option as “–junk-path.”
16. -k
This option tries to convert the paths and names to conform to MSDOS convention, stores only the MSDOS attribute, and marks the entry as made under MS-DOS.
17. -l
This option translates the end-of-line character in UNIX OS, LF into the MSDOS convention CR LF. You can also write this option as “–to-crlf.”
18. -L
This option displays the license of the zip command. You can also write this option as “–license.”
19. -m
This option moves the specified files into the zip archive. You can also write this option as “–move.”
20. -N
This option saves Amiga or MacOS file notes as zip file comments. You can also write this option as “–notes.”
21. -o
This option sets the “last modified” time of the zip archive file to the previous “last modified” time found among the entries in the zip archive.
22. -h
This option displays the help menu of the zip command as shown below:

23. -O
This option processes the archive file changes as usual, but rather than updating the existing archive, output the new archive to the output file.
24. -p
This option includes the relative file paths as part of the names of files stored in the archive zip file. You can also write this option as “–paths.”
25. -P
This option uses the password you specified to encrypt zip file entries. You can also write this option as “–password.”
26. -q
This option eliminates informational messages and comment prompts. You can also write this option as “–quiet.”
27. -s
This option enables creating a split archive and setting the split size. Split size is an archive file that could be split over many files. You can also write this option as “–split-size.”
28. -S
This option includes the system and hidden names. You can also write this option as “–system-hidden.”
29. -T
This option tests the integrity of the new zip file. If at all the check fails, the old zip file is unchanged, as no input files are removed. You can also write this option as “–test.”
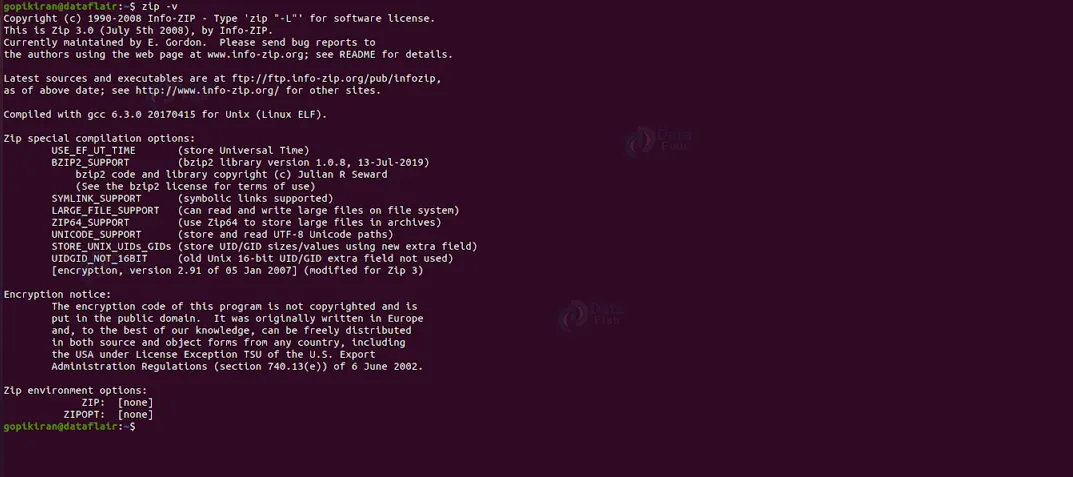
30. -v
This option displays information about the version of the zip command that you are currently using in your system.
How to install zip?
I did not address this initially because most of the Linux distributions already come with the preinstalled zip command. However, if your Linux distro does not have it, or if you uninstalled it, you can always install it using the commands shown below concerning your Linux distro:
Installing zip on Debian-based Linux distributions
If you want to download zip on Debian-based Linux distros like Kali, Ubuntu, Deepin, ParrotOS, Mint, MX Linux, Pure OS, AntiX, etc., use the command shown below:
sudo apt install zip
Installing zip on Fedora-based Linux distributions
If you want to download zip on Fedora-based Linux distros like Berry Linux, Qubes, Fedora spins, Clear OS, Korora, Hanthana, Arquetype, etc., use the command shown below:
sudo yum install zip
Now let us look at some Practical examples of the zip command in the terminal of Ubuntu 20.04.
Zipping a single file
If you want to zip a single file, run the zip command followed by the name of the file you want to zip it to and the name of the file you want to zip as shown:
zip <filename> <file to be zipped>

Zipping multiple files
Let us now look at the case of zipping multiple files. First, let us use the command “sudo touch testfile1.txt testfile2.txt testfile3.txt testfile4.txt” to create four text files. Now to zip all of them together, use the command shown:
zip files.zip testfile1.txt testfile2.txt testfile3.txt testfile4.txt
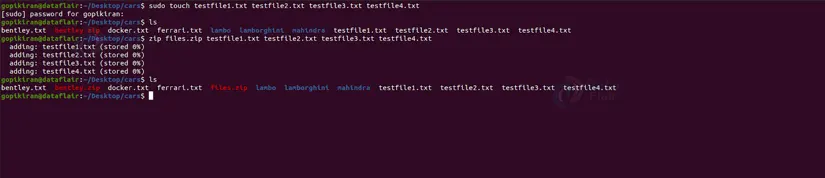
Another way to zip multiple files is by using the wildcard (*) that specifies all files of a similar kind. For example, use the syntax shown below:
zip files1.zip *.txt

Zipping a file to a different directory
If you want to zip a file into a different directory that is present in another location, use the zip command followed by the address of the directory and then the filename that you want to zip. Refer to the syntax shown below:
zip </path/to/directory.zip_file> <filename>

Adding a file to an existing zip
If you want to append a file to an already existing zip file, pair the zip command with the option “-u” followed by the name of the pre-existing zip file and then the name of the file you want to add as shown:
zip -u <zip_file><filename>

Removing a file from a zip file
Removing a file is exactly the same as adding a file into a zip file, except we replace the option “-u” with the option “-d” as shown:
zip -d <zip_file> <filename>

Zipping files in quiet mode
In all of the outputs shown above, the zip command produces the status of zipping. However, if you don’t want the zip command to print anything on the screen, you can activate the quiet mode. To do so, run your command by including the option “-q” in it as shown:
zip -q <zip_file> <filename>

Deleting original files after zipping
If you have carefully observed the screenshots, you will notice that the zip command never deletes the original files after zipping them. Nonetheless, if you want to, you can pair the zip command with the option “-m” as shown:
zip -m <zip_file> <filename>

Zipping directories
If you want to zip directories using the zip command, combine it with the option “-r” to zip recursively. Refer to the syntax shown:
zip -r <zip_file> <directory name>

Setting the level of compression
One of the best features of the zip command is that it allows us to set the compression level of files and directories. These levels vary from 9 to 9, where 0 is the lowest and 9 is the highest compression level.
The zip command will take six as the default value if you don’t specify a compression level. To set the level of compression, specify the numbers 0 to 8 preceded by a hyphen, as shown below:
In the screenshot shown below, all zip files in that directory have been zipped by using the highest compression level (9).

In the screenshot below, all directory zip files have been zipped using the lowest compression level (0).

Creating a password-protected zip file
Another amazing feature of the zip command is that it allows you to create a password-protected zip file. All you have to do is run the zip command by pairing it with the option “-e” as shown:
zip -e <zip_file> <filename>
Once you execute this command, the terminal will prompt you to enter the password and then retype it to confirm, as shown in the screenshot below.

Adding passwords to zip files
In the previous example, we saw how to create a file by protecting it with a password. We can also create a password for an already existing zip file by using the zipcloak command followed by the zip file name to which you want to set the password. Once you run the command, the terminal will prompt you to enter the password and then retype it to confirm, as shown in the screenshot below.

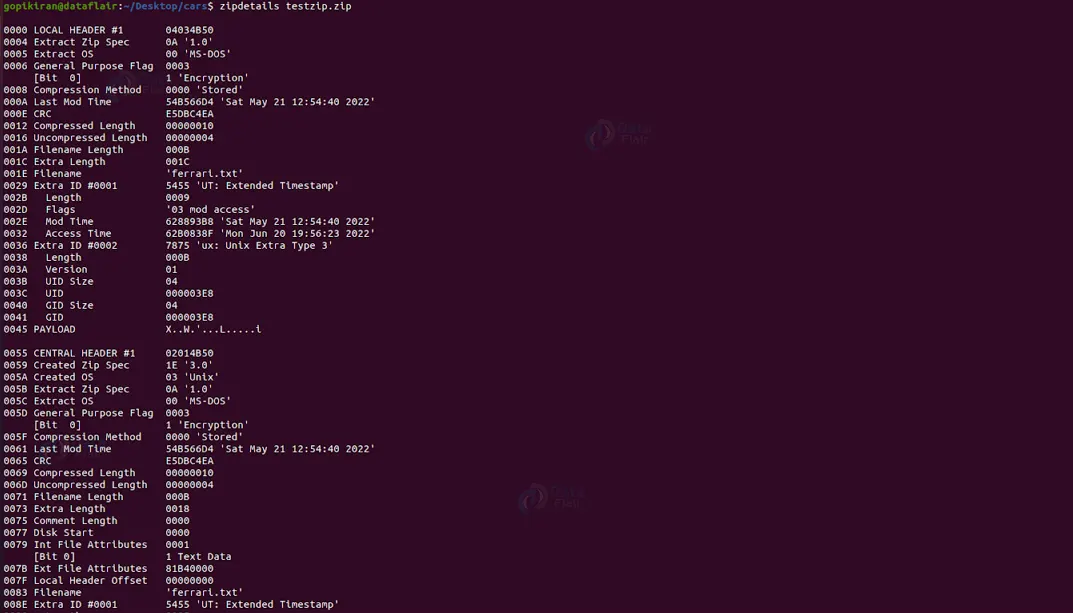
Viewing details of a file with the zip details command
The zip details command shows detailed information about the zipped file. It must be noted that the information it displays is about the record structure rather than that of the compressed data. To do so, execute the zipdetails command followed by the zip file name on which you want detailed information.
Searching inside the zip file
The zipgrep command lets us search for a given text within files inside the zipped file without extracting or unzipping it. It must be noted that if a zip file is password-protected, then you will have to first enter the password for it. If you want to search for text inside the zip file, run the zipgrep command followed by the string you want to search followed by the name of the zipfile you wish to search from as shown:
zipgrep <string> <zip_file>
Splitting the zip file
Sometimes, you may encounter a situation where the zip file size is too large that you cannot upload it or send it as an attachment because of the restrictions of size. This is one such scenario where the zipsplit command comes in handy.
The zipsplit command splits the zip files into smaller files that are easier, and faster to transfer. To do the same, run the zipsplit command along with the option “-n” followed by the size you want to split followed by the name of the zip file you are splitting as shown:
zipsplit –n <size> <zip_file>

To confirm that the spitting has taken place, run the ls command.
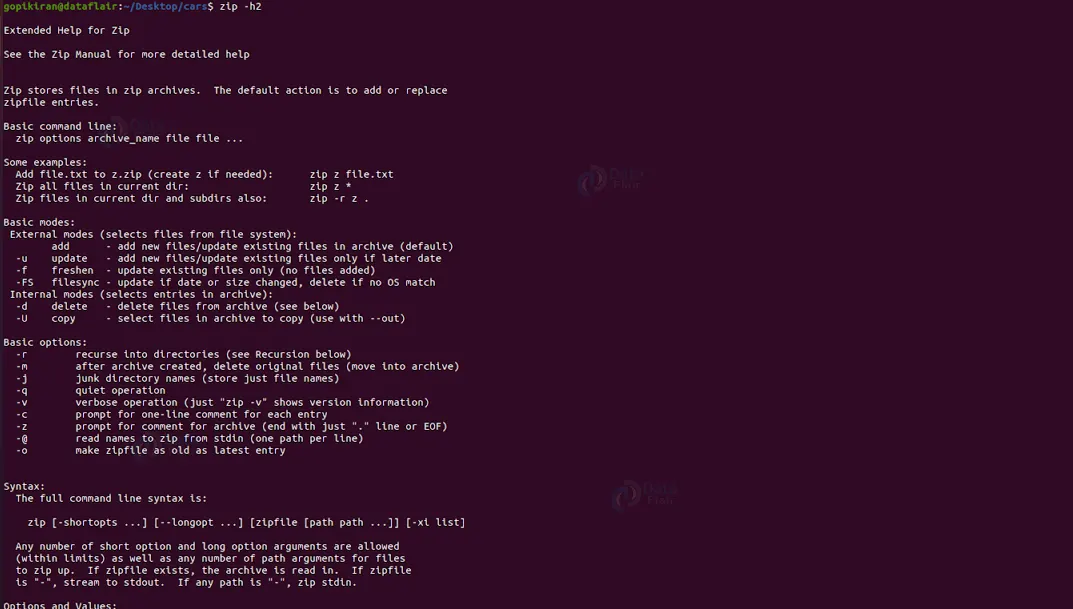
Viewing the help menu of the zip command
We have already seen that pairing the zip command with the option “–help” displays the help menu of the zip command. But the creators knew this puny little help menu was tiny for the vast list of options the zip command has. Hence, if you pair the zip command along with the option “-h2”, you will get a more lengthy help menu of the zip command as shown below:
Summary
As you have seen, the zip command is simple yet advanced and complicated at the same time. It helps us in the simple task of compressing files and directories in our file system. You have now understood what the zip command is, why it is used, the advantage of zipped files, the syntax of the zip command, and the various options used with it. We have also seen many examples that include various other zip-related commands like zipgrep, zipsplit, zipdetails, and many more.
You give me 15 seconds I promise you best tutorials
Please share your happy experience on Google


