Wget Command in Linux
Job-ready Online Courses: Click for Success - Start Now!
In this article, we will be going through, what WGET is, a brief history of it, its features, how to install it, the syntax, and options used with the Wget command in linux. In the end, we will also be looking at some beautiful examples of the wget command in action in the terminal. So buckle up, pay attention, and read right till the end!
What is Linux WGET?
WGET is a command-line-based utility in Linux-based operating systems that downloads files from the web. Using the wget command, you can download files using the FTP, HTTPS, and HTTP protocols.
We have come across ourselves downloading content from the web, this process can sometimes be quite cumbersome, the wget tool is a robust computer program that retrieves files from web servers.
The name of wget is derived from WWW (World wide web) and ‘get’. Using a wide range of options with the wget command, you can perform tasks like download multiple files, resume downloads, download in the background, mirror a website, limit the bandwidth, recursive downloads, and so much more.
The wget tool was a part f the GNU project. Apart from Linux-based operating systems, it has also been ported to other operating systems like Microsoft Windows, macOS, OpenVMS, AmigaOS, Solaris, and HP-UX.
History of the WGET utility
The wget command appeared right in time when the internet was booming in 1966. The wget tool is based on another program called “GETURL”. Both the applications were written, designed, and developed by Hrvoje Nikšić along with the contributions of many, including Dan Harkless, Ian Abbott, and Mauro Tortonesi.
GetURL was later changed to wget, as Hrvoje Nikšić became aware that there was already another amiga program with the name ‘geturl’, written by James Burton.
Wget Was welcomed with open arms by the public as it helped bridge the gap in the inconsistent web-downloading software available at that time. In the mid-1990s, there was not a single program that could reliably use HTTP and FTP protocols.
Features of Linux Wget Command
Before we go practical, let us finish the practical part of the command, by discussing some of its most appreciated features.
1. Robustness
Wget was designed to be extremely robust over unstable and slow network connections. For example, if a download does not complete due to some network issue, wget will automatically try to continue from where it left off.
2. Recursive download
Wget has the capability to work as a web crawler and extract resources linked from HTML pages and also download them sequentially. It repeats the process recursively until all the pages have been downloaded or the maximum recursion depth is reached.
3. Non-interactiveness
Interactiveness here means, that wget does not require the interaction of the user and does not need to control a TTY. In fact, it is so non-interactive, that you can start wget and log off! This is highly in contrast with other graphical or text user interface web browsers, which require the user to stay online and manually restart failed downloads.
4. Portability
The wget tool is written in portable C, a highly portable style of C with minimal dependencies on third-party libraries. We have already seen that wget is ported on numerous other environments like Microsoft Windows, macOS, OpenVMS, AmigaOS, Solaris, and HP-UX. It is also available as one of the GnuWin packages in the native Microsoft Windows program.
Wget also has many other features like:
1. Supports download through proxies.
2. Makes use of persistent HTTP connections when available.
3. Supports IPv6 on systems with appropriate interfaces.
4. SSL/TLS is supported for encrypted downloads using OpenSSL.
5. Files larger than 2GiB are supported on 32-but systems.
6. Saves output in the web archiving standard WARC format.
And so many more!
Installing wget
The wget command does not come pre-installed in all the Linux distributions, if you are not sure if your system has wget installed or not, simply type the command “wget” on your terminal, if you get a message saying “wget: missing URL” as shown below, you are good to go, as it is already installed in your system.
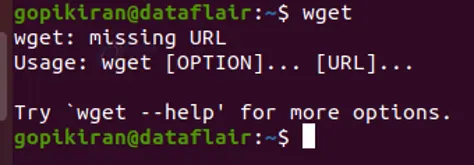
However, if you get the message “wget command not found”, you will have to install the wget tool, using the following commands with respect to your Linux distribution.
Installing wget in Debian based Linux distros
If you want to install wget on a Debian based Linux distribution like Ubuntu, Kali, Mint, Deepin, MX Linux, PureOS, AntiX, etc, use the command shown below:
sudo apt install wget
Installing wget in Fedora-based Linux distros
If you want to install wget on a Debian based Linux distribution like RHEl, Fedora spins, ClearOS, Qubes, etc, use the command shown below:
sudo apt install wget
Syntax of the wget command
The syntax of the wget command is as follows:
Wget <options> <URL>
Let us look at the fields in the syntax to provide a better understanding:
1. <options>
This field accepts a range of options that specify hope wget should function and print the output.
2. <URL>
This field takes in the URL of the file or directory you want to download or synchronize.
Options used with the wget command
We saw that when we pair the wget command with the various option, we can do different tasks like downloading multiple files, resuming downloads, downloading in the background, mirroring a website, limiting the bandwidth, recursive downloads, and so much more. Let us take look at the list of available options with the wget command:
Logging in and input file options
1. -o <logfile>
This option logs all the messages to the log file you specified. You can also write this option as “–output-file”
2. -a
This option is the same as the option “-o”, except it ‘appends’ to the specified log file, instead of overwriting the entire old log file. You can also write this option as “–append-output”
3. -d
This option turns on debug output. It prints various information important to the developers of wget if it does not work properly. You can also write this option as “–debug”
4. -q
This option turns off the output of wget. You can also write this option as “–quiet”
5. -v
This option provides verbose to the output to provide a better understanding of what is happening. You can also write this option as “–verbose”
6. -nv
This option does not give verbose to the output. You can also write this option as “–non-verbose”
7. -i <file>
This option reads URLs from a local or external file. You can also write this option as “–input-file”
8. -F
This option forces the input file to be treated as an HTML file. You can also write this option as “–force-html”
9. -B <url>
This option resolves links using URL as the point of reference when reading links from an HTML file specified with the option “-F”. You can also write this option as “–base”
Download options
1. –bind-address=<address>
This option binds to the specified address on the local machine when making a client TCP/IP connection.
2. -t <number>
This option sets the number of retries. You can even specify ‘inf’ for infinite retries! You can also write this option as “–tries”
3. -c
This option continues getting a partially downloaded file. You can also write this option as “–continue”
4. –progress = <type>
This option selects the progress bar style, you can either specify “dot” or “bar”.
5. -N
This option turns on timestamping. You can also write this option as “–timestamping”
6. –no-use-server-timestamps
This option does not set the local file’s timestamp to the one on the server.
7. -S
This option prints the header sent by HTTP servers and responses sent by FTP servers. You can also write this option as “–server-response”
8. –spider
This option makes wget behave as a web spider, meaning it does not download the pages and only checks that they are there.
9. -T <secoinds>
This option sets the network timeout to the number of seconds you specify. You can also write this option as “–timeout”
10. –dns-timeout = <seconds>
This option sets the DNS lookup timeout to the number of seconds you specify.
Directory options
1. -nd
This option does not create a hierarchy of directories when retrieving recursively. You can also write this option as “–no-directories”
2. -x
This option is the exact opposite of the option “-nd”. It creates a hierarchy of directories, even if one would not be created otherwise. You can also write this option as “–force-directories”
3. -nh
This option disables the generation of host-prefixed directories. You can also write this option as “–no-host-directories”
4. –protocol directories
This option uses the protocol name as a directory component of local file names.
5. –cut-dirs=<number>
This option ignores the number of directory components. It is useful for getting a fine-grained control over the directory when recursive retrieval is used
HTTP options
1. -E
This option appends the suffix “.html” to the name of the local file if a file of type application/xhtml+xml or text/html is downloaded and the URL does not end with the regexp “\.[Hh][Tt][Mm][Ll]?”. You can also write this option as “–html-extension”
2. –http-user=user / –http-passwd
This option specifies the user and password on an HTTP server.
3. –no-cache
This option disables the server-side cache.
4. –no-cookies
This option disables the use of cookies.
5. –load-cookies <file>
This option loads cookies from the specified file before the first HTTP retrieval file.
6. –save-cookies
This option saves cookies to the specified file before exiting.
7. –keep-session-cookies
This option causes the option “–save-cookies” to also save session cookies.
8. -header=<header line>
This option sends the header line you specify with the rest of the headers in each HTTP request
9. –max-redirect=<number>
This option specifies the maximum number of redirections to follow for a resource. If you do not specify any value, it takes the default value as 20.
10. –auth-no-challenge
This option sends basic HTTP authentication information for all the requests like wget 1.10.2 and prior did by default.
11. -V
This option prints the information about the version of the wget command.
PHEW!! Are we done? well, those don’t even scratch the surface of the list of options available with the wget command. These are just some of the most frequently used commands with the wget command. If you are really interested in learning more about the options, you can use the command “wget -h”, which prints an immensely long list of options as shown:
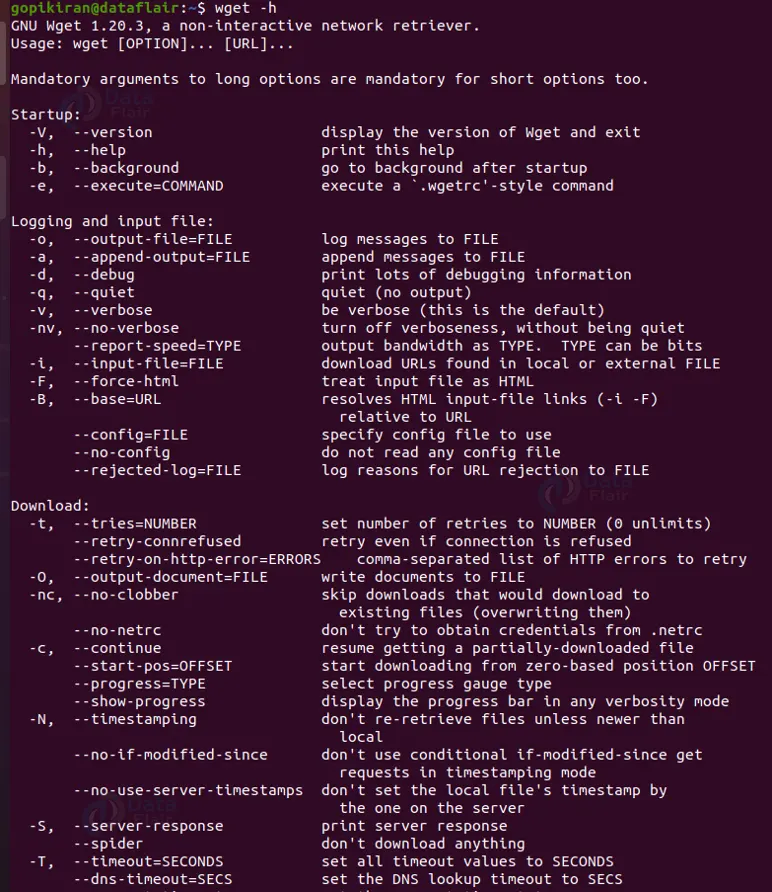
NOTE: this is only a fraction of the help menu!
Now that we have grasped our fundamentals, let us look at some practical command of the whet command in the terminal.
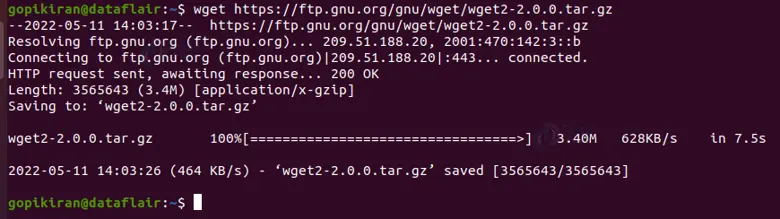
Downloading a file with wget
If you want to simply download a file with the wget command, simply use iot with no options as shown below:
wget <URL>
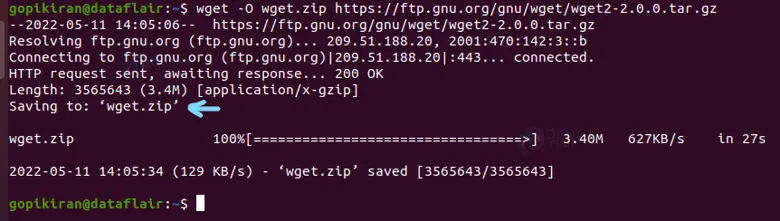
Downloading a file with a different name
To download the same file but with a different name, pair the wget command with the option “-O” followed by the new name as shown:
wget -O <name> <URL>
Downloading multiple files with HTTP and FTP protocol
If you want to download multiple files using HTTP and FTP protocols, simply use the wget command with no options followed by the URLs separated by a space as shown below:
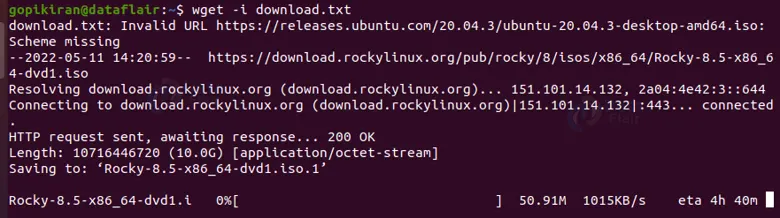
Downloading multiple files from a file
Say you have about 10 URLs and you want to retrieve content from all of these files, It would be really tedious and unprofessional to follow the previous method and write the 10 URLs side by side in the terminal.
Instead, you can write all of these URLs in a ”.txt” file and simply use the option “-i” followed by the name of the file that contains these URLs as shown:
wget -i <filename>

Downloading multiple within a range
Suppose you need to download similar URLs that only have a change in number, you can simply specify the range from where to where to want to download a shown:
wget <url{n1..n2}>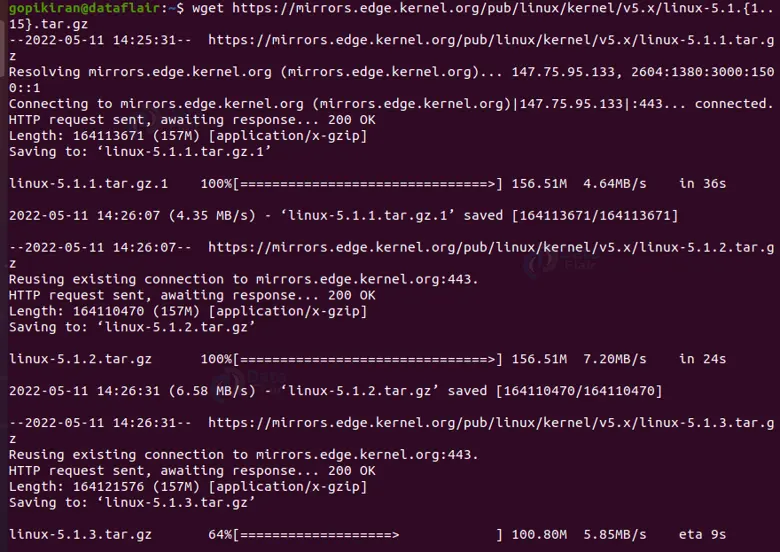
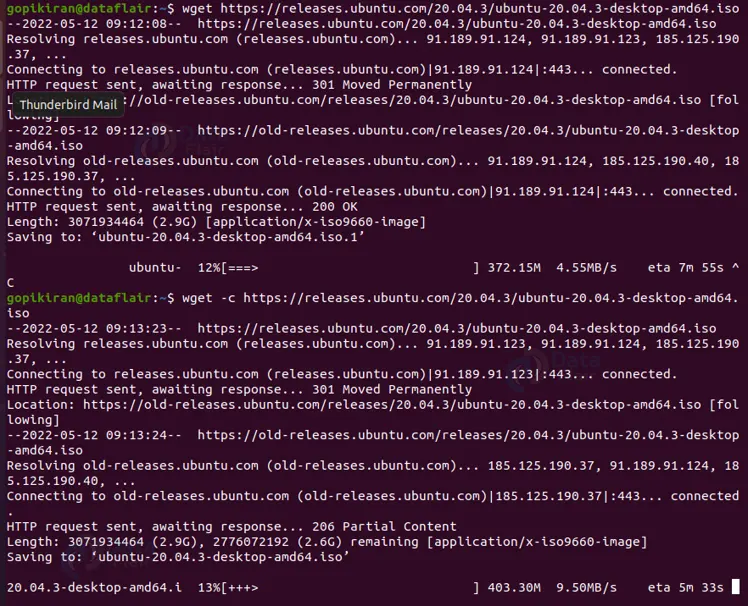
Resume an incomplete download
Wget also has the option to pause a download, we can do so by pressing “ctrl” + “c”. We know that using wget, we can resume a paused download, nu how? Well, we simply pair the wget command with the option “-c” and it will pick up the download exactly where you left off as shown below:
wget -c <URL>
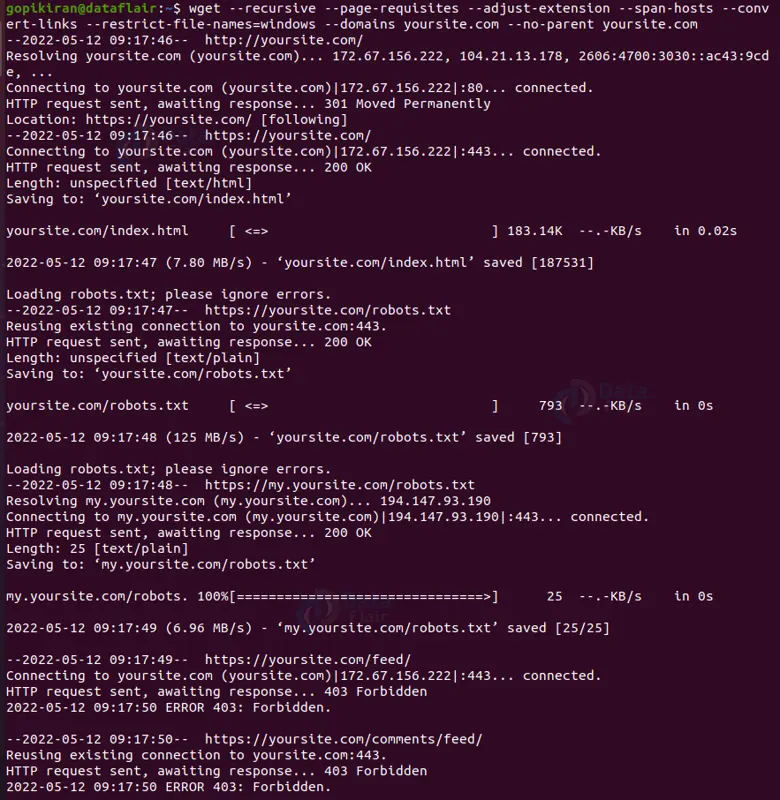
Mirroring an entire website
If you want to download an entire website for offline viewing, use the command shown in the output below. This command will make a local copy of the website along with other assets like CSS, images, Javascript and more
Downloading in background
If you want your download to happen in the background simply pair the wget command with the option “-b” followed by the filename you want to save it in a shown:
wget -b <url>

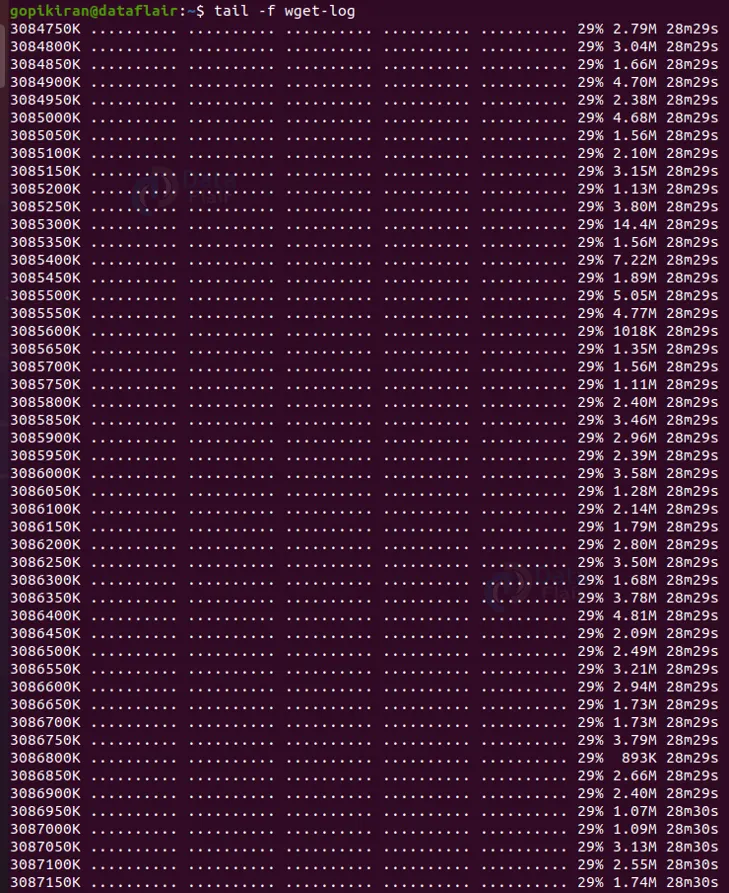
Specifying download speed limit
To specify the download speed limit, you can use the option “–limit-rate” a shown:
wget -c --limit-rate=<n> <url>

For example, the command shown in the above output will restrict the download speed limit to 100K and the logs will be created under the file “wget.log”. Now we can check the download speed of wget using the command shown below:
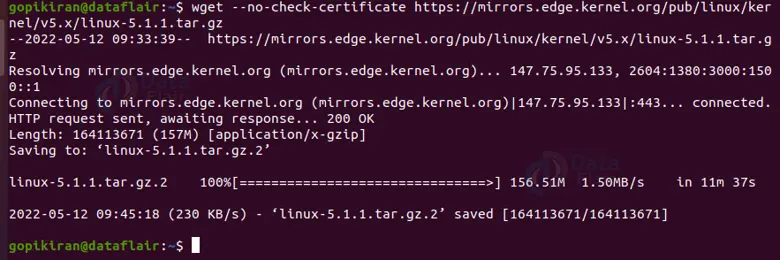
Ignoring the SSL certificate check
If you want to ignore the SSL certificate check while downloading files via HTTPS pair the wget command with the option “–no-check-certificate” as shown:
wget --no-check-certificate <url>
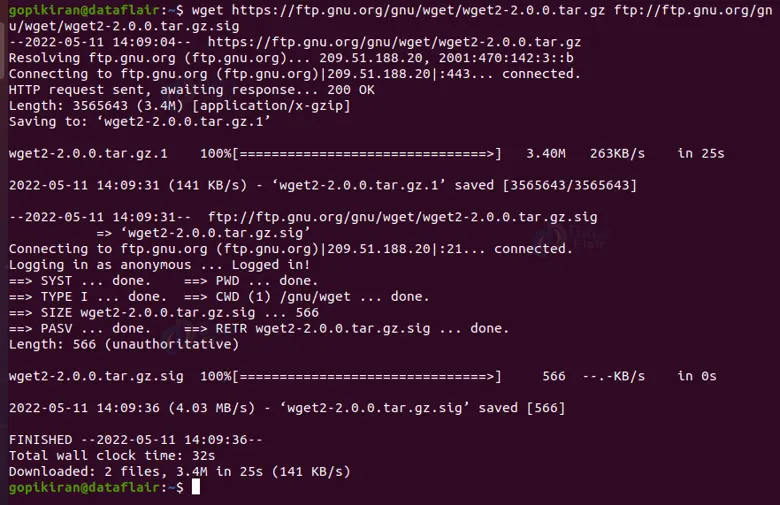
Downloading password protected files via FTP and HTTP
Use the options “–ftp-user=<username>” and “–ftp-password=<password>” If you want to download a file from a password-protected FTP server, as shown in the syntax below:
wget --ftp-user=narad --ftp-password=password ftp://ftp.example.com/filename.tar.gz
Use the options “–http-user=<username>” and “–http-password=<password>” If you want to download a file from a password-protected FTP server, as shown in the syntax below:
wget --http-user=narad --http-password=password ftp://http.example.com/filename.tar.gz
Downloading to the standard output
In the command shown below, the whet command will quietly download and print the output in the latest WordPress version to standard output. Since we piped this output to the tar utility, it extracts and archives it to the /home/gopikiran/Desktop directory
Wget -q -o - <url>

More options used with the wget command!!
We have already seen a truckload of options, yet before we call it a day, let us look at another truckload of options:
HTTPS (SSL/TLS) options
1. –secure-protocol
This option chooses the secure protocol to be used.
2. –no-check-certificate
This option does not check the server certificate against the available certificate authorities.
3. –certificate
This option uses the client certificate stored in the file.
4. –certificate-type
This option specifies the type of the client certificate. You can enter Legal values like PEM and DER, also known as ASN1.
5. –private key
This option allows you to provide the private key in a file separate from the certificate.
6. –private -key-type
This option specifies the type of the private key.
7. –ca-certificate
This option uses the file you specified with the bundle of certificate authorities (“CA”) to verify the peers.
8. –ca-directory
This option specifies a directory containing CA certificates in PEM format.
9. –random-file
This option uses the file you specified as the source of random data for seeding the pseudorandom number generator on systems without /dev/random.
10. –edg-file
This option uses the file you specified as the EGD socket, where EGD stands for Entropy Gathering Daemon, a user-space program that collects data from various unpredictable system sources and makes it available to other programs that might need it.
FTP options
1. –ftp-user
This option specifies the username user and password on an FTP server.
2. –no-remove-listing
This option does not remove the temporary “.listing” files generated by FTP retrievals.
3. –no-glob
This option turns of FTP globbing, where globbing refers to the use of shell-like special characters , like *, ?, [ and ] to retrieve more than one file from the same directory.
4. –no-passive-ftp
This option disables the use of the passive FTP transfer mode.
Recursive retrieval options
1. -r
This option turns on recursive retrieving. You can also write this option as “–recursive”
2. -I
This option specifies recursion maximum depth level depth. By default, the maximum depth is 5.
3. –delete-after
This option tells wget to delete every single file it downloads, after having done so.
4. -k
This option converts the links in the document to make them suitable for local viewing after the download is complete.
5. -K
This option backs up the original version with an .orig suffix. Affects the behavior of “-N” When converting a file.
6. -m
This option turns on recursion and time-stamping, sets infinite recursion depth and keeps FTP directory listings.
7. -p
This option causes wget to download all the files that are necessary to properly display a given HTML page.
8. –strict-comments
This option turns on strict parsing of HTML comments.
Recursive accept/reject options
1. -A / -R
This option specifies comma-separated lists of file name suffixes or patterns to accept or reject.
2. -D
This option sets domains to be followed. You can also write this option as “–domains”
3. –exclude domains
This option specifies the domains that are not to be followed.
4. –follow-ftp
This option follows FTP links from HTML documents. If it is not specified wget ignores all the FTP links.
5. –ignore-tags
This option wget ignores all the FTP links, use it to kip certain HTML tags when recursively looking for documents to download
6. -H
This option enables spanning across hosts when doing recursive retrieving.
7. -L
This option Follow relative links only. You can also write this option as “–relative”.
8. -I
This option specifies a comma-separated list of directories you want to follow when downloading.
9. -X
This option specifies a comma-separated list of directories you want to exclude from download.
10. -np
This option does not ever ascend to the parent directory when retrieving recursively.
Files used by wget
There are only 2 files used by the wget command. One is “/etc/wgetrc”, from where it obtains the default location of the global startup file, and second is “.wgetrc”, from which it obtains the user-startup file.
Summary
As you have seen the wget command is a not so simple yet very helpful tool with so many features. As we combine it with its many options, we can perform tasks like download multiple files, resume downloads, download in the background, mirror a website, limit the bandwidth, recursive downloads, and so much more.
You have now learned what wget is, a brief history of it, its features, how to install it, syntax, options, and some practical examples of the wget command in the terminal.
We work very hard to provide you quality material
Could you take 15 seconds and share your happy experience on Google


