Tar Command in Linux
Expert-led Online Courses: Elevate Your Skills, Get ready for Future - Enroll Now!
In this article, we will learn everything about the tar command in Linux. We will look at its meaning, why it is used, and the syntax, functions, and options used with the tar command. In the end, we will look at some practical examples that give us a better idea of how the tar command works, so pay attention and make it all the way to the end!
What is Linux tar command?
Tar is the abbreviation for “Tape ARchive”. The tar command is a command-line-based utility in Linux-based operating systems that helps create, extract, and list archived contents in the filesystem of your Linux OS.
tar command is used by a huge number of Linux system administrators to deal with tape drive backup. The tar command rips a group of directories and files into a highly compressed archive file called tar or tarball, gzip and bzip in Linux.
A question may arise as to what on earth is an archive file. An archive file is a compressed file containing one or multiple files bundled together for more accessible storage and portability.
The tar command is widely used to create highly compressed archive files that you can move easily from one disk to another disk or one machine to another machine. Tar was initially developed in the early days of Unix to back up files to tape-based storage devices.
Syntax of the tar command in linux
The syntax of the tar command might look intimidating at first, but once we understand the fields and different styles of writing the syntax, it will become a cakewalk. The syntax of the tar command is:
tar <operation mode> <option(s)> <archive> <file(s) or location(s)>
Let us look at the fields present in the syntax of the tar command:
1. <operation mode>
This field indicates which operation executes in the files (creation, extraction, etc.) You must note that you can only specify one operation mode in this field.
2. <option(s)>
This field specifies how the tar command should work and print the output. You can enter as many options you want in this field.
3. <archive>
This field specifies the name and extension of the file.
4. <file(s) or location(s)>
This field contains a space-separated list for extraction, compression, or wildcard-matched name.
The syntax of the tar command does not stop there. There are three ways or styles to use the operations and options. Let us look at them:
1. Traditional style
Here the syntax of the tar command and the options are clustered together without any dashes. Here is an example:
tar cfv <archive> <file(s) or location(s)>
2. Unix short option style
In this style of writing, each option’s syntax of the tar command is separated by a dash. Here is an example:
tar -cfv <archive> <file(s) or location(s)>
3. GNU long option style
Here, the syntax of the tar command and the options are written with a double dash and a descriptive option name. Here is an example:
tar --create --file <archive> --verbose <file(s) or location(s)>
Also, you can use all three styles in a single tar command. Here is an example:
tar c -f --verbose <archive> <file(s) or location(s)>
Options used with Linux tar command
Like most of the commands in Linux-based operating systems, the tar command also has a truckload of options that specify how the command should work and format the output. Some of the most commonly used options are:
1. A
This option appends tar files to an archive. You can also write this file as “–concatenate.”
2. d
This option calculates the differences present in the archive and the file system. You can also write this file as “–compare.”
3. c
This option creates a new archive. You can also write this file as “–create.”
4. –delete
This option deletes from the archive.
5. r
This option appends the files to the end of a tar archive. You can also write this file as “–append.”
6. t
This option lists the contents of an archive. You can also write this file as “–list.”
7. –test-label
This option tests the archive label and then exits.
8. u
This option appends the files that are newer than the copied file in the archive. You can also write this file as “–update.”
9. x
This option extracts files from an archive. You can also write this file as “–extract.”
10. -a
This option uses the archive’s suffix to determine the compression program. You can also write this file as “–auto-compress.”
11. –add-file
This option adds the file you specified to the archive.
12. –atime-preserve
This option preserves access times on archived files by restoring the times or not changing them in the first place.
13. –n0-auto-compress
This option does not determine the compression program automatically by making use of the archive file name suffix.
14. -C
This option changes to the directory you specified before performing any operations.
15. –check-device
This option checks the device numbers when creating incremental archives. It is the default behaviour.
16. –no-check-device
This option does not check the device numbers when creating incremental archives. It is the default behaviour.
17. –delay-directory-restore
This option delays the modification setting times and the permissions of the extracted directories until extraction has ended.
18. –exclude
This option avoids operating on files whose names match your specified file name pattern.
19. –exclude-backups
This option excludes backup and locks files from all operations.
20. –exclude-caches
This option excludes all directories containing a cache directory tag.
21. –exclude-tag
This option excludes any directory containing the specified file but archives the directory and the file you mentioned.
22. –exclude-tag-all
This option completely omits the directories containing the files you specified
23. –force-local
even if an archive file’s name contains a colon, this option treats the archive file as a local file.
24. –full-time
This option prints the full resolution of all file times.
25. -g
This option specifies that the archive is a new GNU-format incremental backup, using a snapshot of the file you specify to determine which files to back up.
26. -i
This option ignores zeroed blocks in the archive.
27. -I
This option uses the external compression program you specify.
28. –ignore-case
This option ignores the case of the character when matching patterns or file names.
29. -j
This option tells the tar command to read or write archives using the xz compressor.
30. -J
This option does not overwrite the existing files while extracting the files from an archive and it returns an error if such files exist.
31. –ignore-command-error
This option ignores the exit codes of subprocesses.
Now that we know the fundamentals and theory related to the tar command let us look at some beautiful examples of the tar command in the terminal of Ubuntu 20.04 to understand its functioning better.
1. Creating a tar archive file
The command shown below will create a tar archive file by the name “dataflair-04-06-22” for the directory “/home/gopikiran” in the current working directory:
tar -cvf dataflair-04-06-22.tar /home/gopikiran/
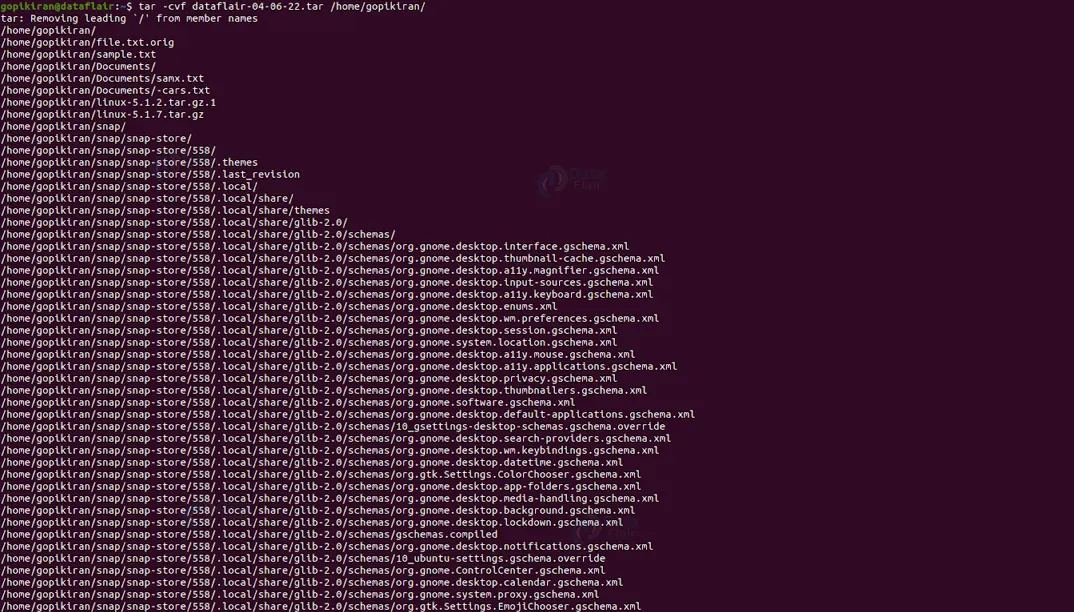
In the command in the screenshot, the option “c” Creates a new .tar archive file., the option “v” provides verbose, and the option “f” specifies the type of the File name of the archive file.
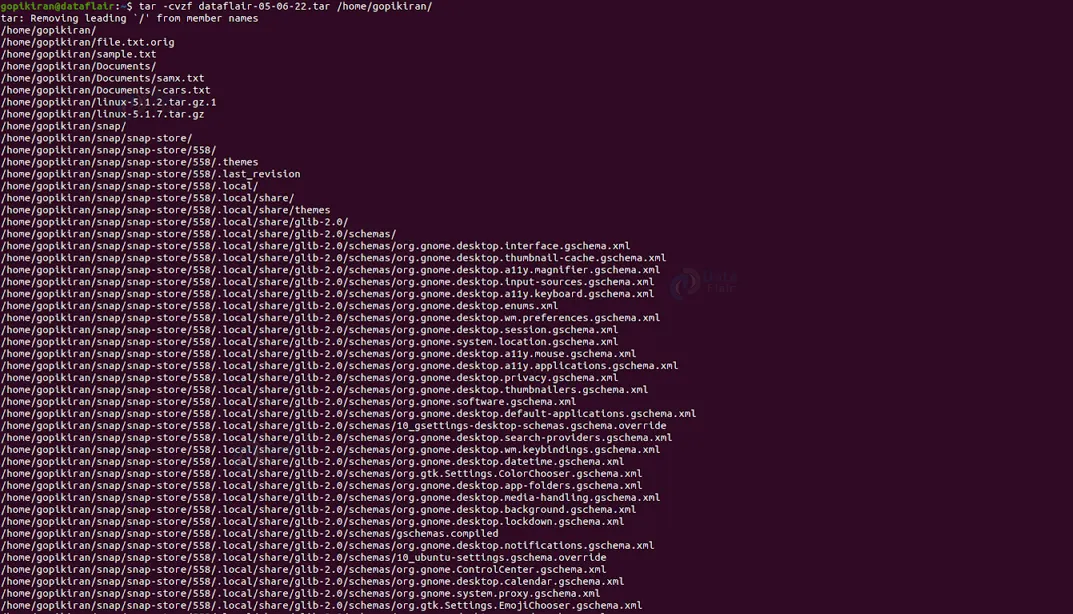
Creating a tar.gz archive file
If you want to create a compressed gzip archive file, use the option “z”. For example, the command shown below will create a compressed dataflair-05-06-22.tar.gz in the directory /home/gopikiran/
tar cvzf dataflair-05-06-22.tar.gz /home/gopikiran
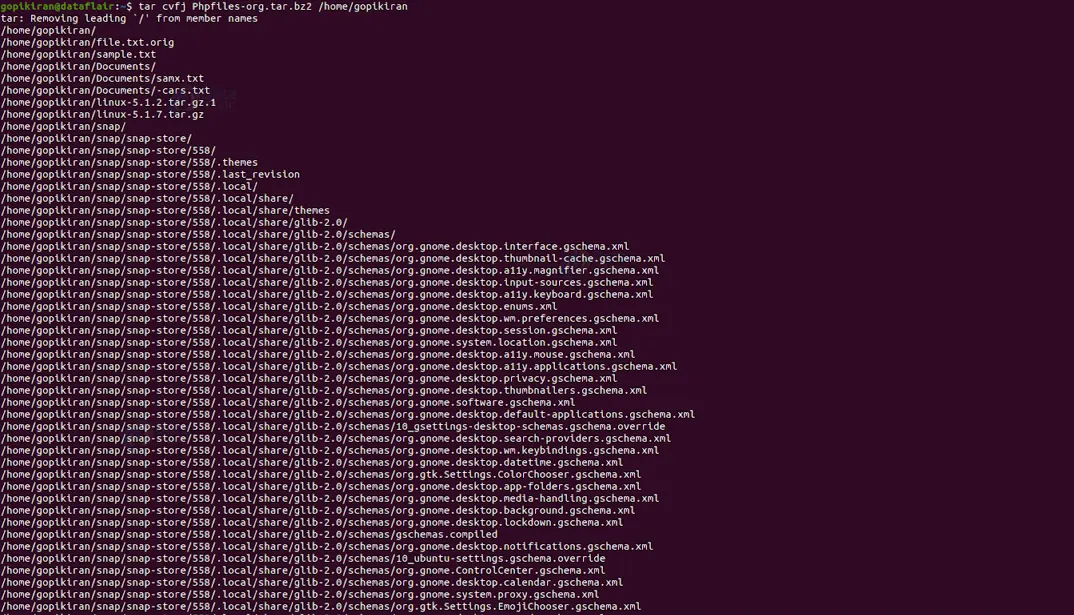
Creating a tar.bz2 Archive file
The bz2 is a better feature as it compresses and creates an archive file less than the size of the gzip. Nonetheless, the bz2 compression takes more time than gzip to compress and decompress files. If you want to create a highly compressed tar file, use the option “j” as shown below:
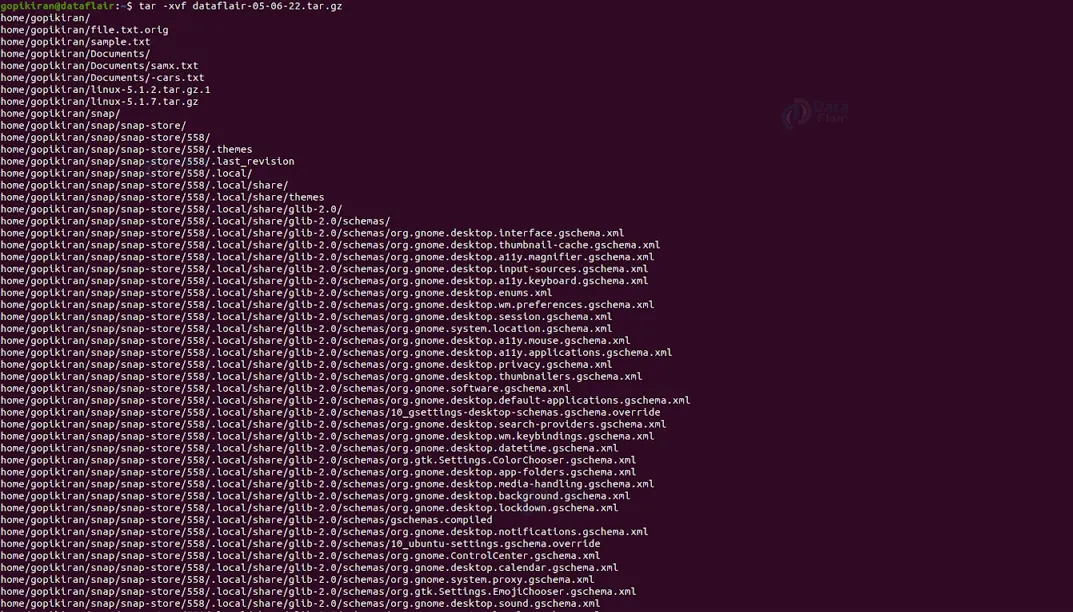
Untar archive file
If you want to untar or extract a tar file, use the option “x” and then use the option “-c” to specify the directory, as shown in the screenshot below:

Uncompress a tar.gz file
To uncompress a tar.gz file, run the command following the syntax below. If at all you want to specify a directory, use the option “-C”:
tar -xvf <filename>.tar.gz
Uncompress a tar.bz2 file
Use the syntax below if you want to uncompress the highly compressed tar.bz2 file. This syntax will untar all “.flv” files from the archive file.
tar -xvf videos-14-09-12.tar.bz2.
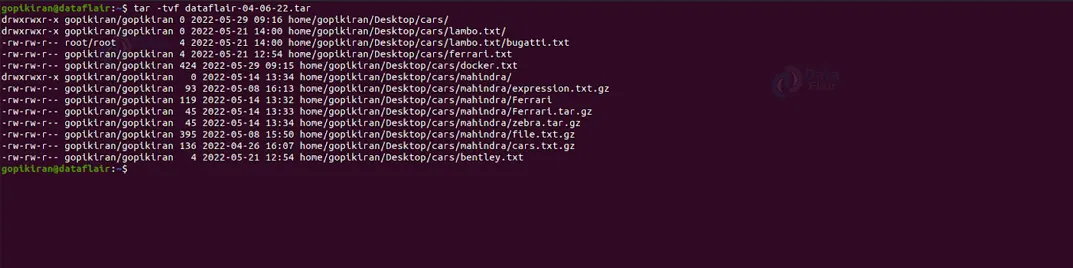
List the contents of a tar archive file
If you want to list the contents of the tar archive file, pair the tar command with the option “t”, as shown below:
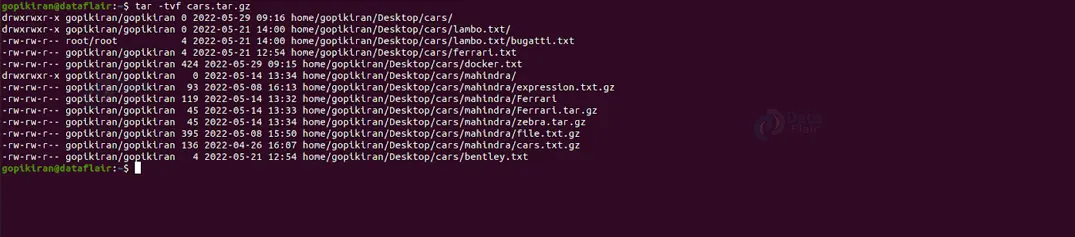
List the contents of a tar.gz archive file
Use the tar command followed by the filename with the extension tar.gz to list the contents of a tar.gz file.
tar -tvf <filename>.tar.gz
List the contents of a tar.bz2 archive file
To list the contents of a tar.bz2 file, use the syntax shown below:
tar -tvf <filename>.tar.bz2

Untar a single file from a .tar file
To untar or extract only a single file from a tar file, use the syntax shown below:
tar -xvf <filename>.tar <file to be extracted>
Untar a single file from a .tar.gz file
To untar or extract only a single file from a tar file, use the syntax shown below:
tar -zxvf <filename>.tar.gz <file to be extracted>
Untar a single file from a .tar.bz2 file
To extract or untar a single file from a tar file, use the syntax shown below:
tar -jxvf <filename>.tar.bz2 <file to be extracted>
Untar multiple files from tar, tar.gz, tar.bz files
Similarly, if you want to untar multiple files, you specify the names of the files you want to extract as shown in the syntaxes below:
- tar -xvf <filename>.tar “<file to be extracted>” “<file to be extracted>”
- tar -zxvf <filename>.tar.gz <file to be extracted> “<file to be extracted>”
- tar -jxvf <filename>.tar.bz2 <file to be extracted> “<file to be extracted>”
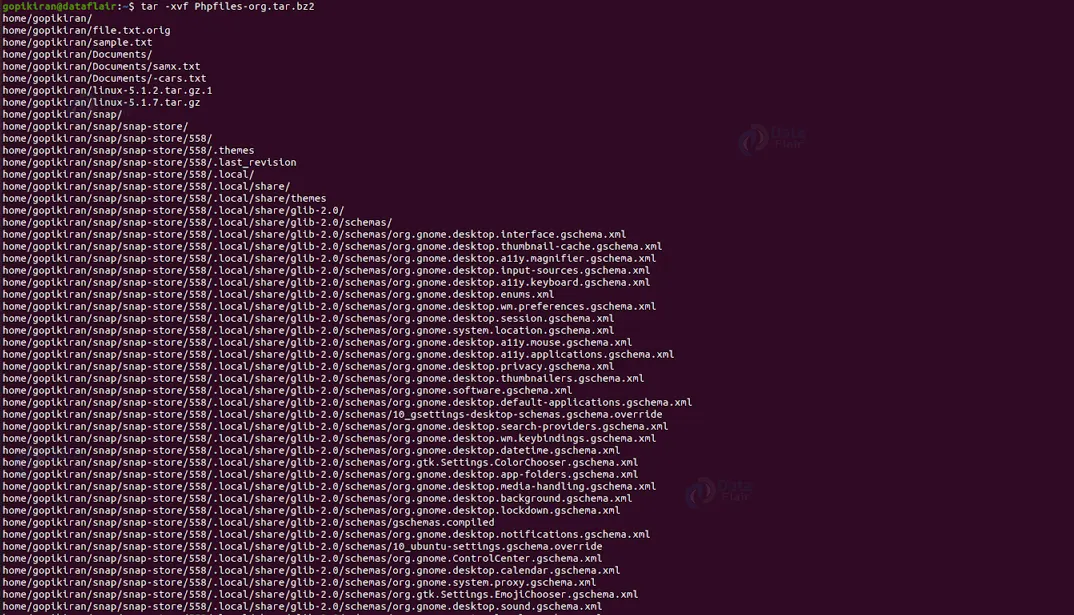
Extract a specific group of files
Suppose you want to remove all the .mpy files or all the .png files. It would be very tedious to write down the names of all these files. In such cases, we pair the tar command with the option “–wildcard” and then use the wildcard (*) as shown in the syntax below:
tar -jxvf Phpfiles-org.tar.bz2 --wildcards '*.php'

Add files to tar archive files
To add files to the tar archive file, use the option “r” as shown in the syntax below:
tar -rvf <archive filename>.tar <file to be added>

Add files to tar.gz and tar.bz2 archive files
The tar command only supports adding files to tar files and not tar.gz and tar.bz2 files. If you try to add, it will simply return an error as shown below:

Verifying tar, tag.gz, and tar.bz2 archive files
If you want to verify any tar or compressed archive file, use the option “W” as shown below:

Printing the size of tar, tar.gz, and tar.bz2 archive files
Use the syntax shown below to check the size of any tar, tar.gz, and tar.bz2 archive file.
tar -czf - <filename with extension> | wc -c

If you observe the above screenshot, you will notice the size of the tar.bz2 file is the least, just like we saw above, that it has the greatest compression.
Summary
As you have seen, the tar command is a simple tool that helps you create, extract, and list archived contents in the filesystem of your Linux OS. You have now learned what the tar command is, what it is used for, the different styles of writing, its syntax, and the many options used with it. You have also learned various examples like adding and removing files from archive files.
You give me 15 seconds I promise you best tutorials
Please share your happy experience on Google


