SU Command in Linux
Expert-led Online Courses: Elevate Your Skills, Get ready for Future - Enroll Now!
In this article, we will start right from what su is, and go through a brief history of it, how it works, comparing it with the sudo command, and the syntax and options of linux su command. In the end, we will also be looking into some practical examples of the su command in the terminal.
What is su command in Linux?
Su is the abbreviation for “Switch User”. The su command is a command-line-based utility in Linux based operating system that helps in running functions as a different user. This command is the easiest way to change the administrative account in the current logged-in session.
Some distributions of Linux like Ubuntu disable the rot user account by default to make the system more secure. However, this is one downside to it, this feature restricts the user from running specific commands. Now, of course you can use sudo privileges, but what if you are not there in the sudoers list?
The su command comes in handy in exactly these kinds of situations. When you use the su command, you act as a root user allows therefore bypassing these restrictions and performing different tasks as different users.
The su command only switches the user, unlike the sudo command that gives you elevated permission. Since both of them are so similar, it is best to compare both of them to understand them better.
SUDO vs SU
Before we proceed further and see the usage of the sudo command let us take a moment to compare another very similar command “SU” with the SUDO command. Why are we comparing? Well, we are doing so because these are the only 2 commands used in Linux to gain momentary access or elevated privileges.
The SU command stands for “Substitute user” whereas SUDO stands for “Super User Do”. the most distinguishable difference between the 2 is that the SU command is used on its own or mostly with the substitute username as a parameter.
One more advantages of the the sudo command is that the root password doesn’t need to be shared among multiple administrative user accounts and you can also allow users to run only specific programs with root privileges.
SUDO on the other hand is a prefix for another command. Sudo is the most loved of the 2, because of its ability to define constraints on whether a user can use sudo and with what command he can use it.
A brief history of the su command
Su command was a part of the 1st version of UNIX, it included features like Unix permissions systems and the setuid system call. In the 3version of UNIX, encrypted passwords appeared.
The su command was removed from the GNU Coreutils pack on the 8.18 release on the 12 of August 2012. It is also available on Microsoft windows as part of the UnxUtils collection of the Native Win32 ports of common GNU Unix-like utilities. The su command is now a part of the util-Linux package.
Syntax of Linux SU command
The syntax of the su command is pretty easy:
su <options> <user <argument>>
Let us look at the fields present in the syntax of the su command:
1. <options>
This field takes in a range of options that specify how the su command should function and print the output.
2. <user>
This field specifies the name of the user you want to temporarily become.
3. <arguments>
This file takes in the command you want to run as a different user.
Options used with linux su command
In typical Linux fashion, even the kill command has options just like every single command in Linux. However, unlike most commands, the kill command has only 11 options (out of which 2 of them are not even considered options!). Let us take a look at them:
1. -c
This option specifies a command that will invoke upon the shell using the option “-c”. You can also write this option as “–command”
2. -l
This option provides an environment similar to what the user would expect had the user logged in directly. You can also write this option as “–login”
3. -s
This option invokes the shell. You can also write this option as “–shell”.
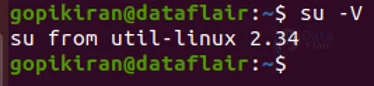
4. -V
This option prints the information about the version of su you are using.
5. -m
This option preserves the current environment, except for the variables $PATH and $IFS. You can also write this option as “–preserve-environment”.
6. -w
This option does not reset the specified variables. You can also write this option as “–whitelist-environment”.
7. -g
This option specifies the primary group. You can also write this option as “–group”.
8. -G
This option specifies the supplementary group. You can also write this option as “–supp-group”.
9. -p
This option creates a new pseudo-terminal You can also write this option as “–pty”.
10. -f
This option passes “-f” to the shell (this option is applicable only for users of the csh and tcsh shells). You can also write this option as “–fast”.
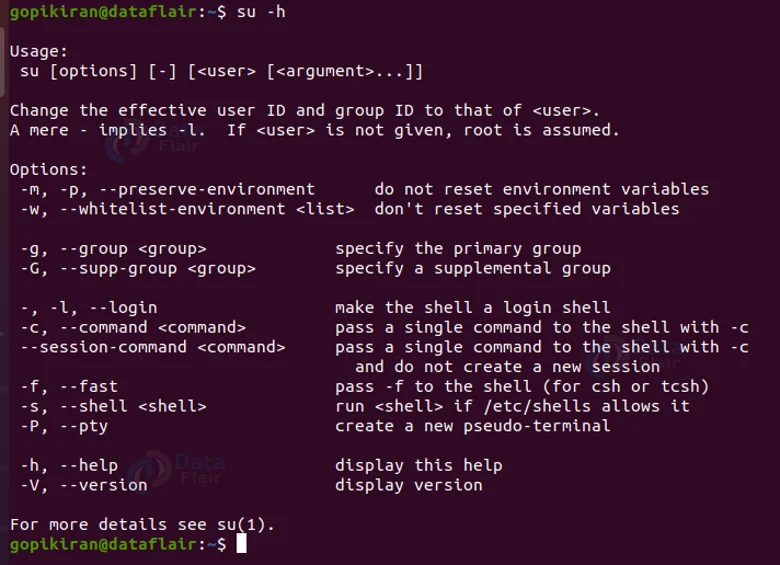
11. -h
This option displays the help menu which consisted of different information regarding the options and usage of the su command. You can also write this option as “–help”. The command “su -h” of “su –help” prints the menu shown below:
Now that we have laid down the fundamentals, let us look at how to use the su command.
Changing to root user
If you want to change from your current user to the root user, simply run the su command with no options whatsoever, the system will then prompt you to enter the password. Once you enter the correct password, you will notice the change in the shell (the color and name) as shown below:

Changing to another user from the root user
Ok, now you have changed to the root user but how do you come back? Well simply execute the su command followed by your user name. Since you are now the root user, the system will not prompt youtube to enter your password.
su <username>

Changing current directory (option “-l”)
Sometimes even though you change back to your username from the root user, the current directory remains. To change this, use the option “-l” as you are changing.
su -l <username>

It is always recommended to use the option “-l” while switching back because apart from changing the current directory it also does the following
1. All the environmental variables except “TERM” are cleared for terminal handling and whitelisted variables
2. The option “-l” also loads the environmental variables USER, LOGNAME, HOME, PATH, and SHELL.
3. It changes the current directory for the target user’s home.
4. It turns the shell into a login shell.
Another way to recreate the above-mentioned feature is to use a hyphen as shown below:

Elevated privileges using the su command
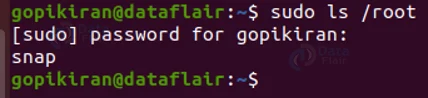
Let us say that we need to list the contents of the “/root” directory, we know that since we don’t have superuser privileges, we can’s accees it:

One thing we are used to in such cases is to use the sudo command because we can temporarily get elevated permissions to view the contents of the “/root” directory:
But did you know that we can do the same thing with the su command also? We can make use of the option “-c” followed by the argument, followed by the user you want to execute it as (in this case the root user):
su -c <argument> <user>

If you really badly want to check if that is the same output we get if we run the command as the root user, we can change our username and execute it:

Since we are on the topic of ‘sudo’ and ‘root user’, we can directly add a user to the list of sudoers (to enable the use of the sudo command to a user) directly using the command “usermod -aG sudo <user>” instead of going into the text editor and entering the name of the user.

Summary
As you have seen the su command is a really simple command that helps in switching users and also running commands as other users. You have now learned what su is, a brief history of it, compared the th SUDO command with su, syntax, option and practical example of the su command.
If you are Happy with DataFlair, do not forget to make us happy with your positive feedback on Google


