Rsync Command in Linux
Job-ready Online Courses: Click, Learn, Succeed, Start Now!
In this article, we will be going through the different aspects of Rsync command in linux. You will be learning what Rsync is, its advantages, how to install Rsync, and the syntax of the command. In the end, we will be looking at the options used with the Rsync command and also some practical examples of using the Rsync command in the terminal.
What is Rsync?
Rsync is a command-line-based utility in Linux-based operating systems that helps in transferring and synchronizing data between different machines and directories. Rsync is an abbreviation for Remote sync.
You can use Rsync with SSH (secure shell) and copy your files securely to another location. As the name suggests, the Rsync tool lets you copy files from your system to your remote system. You can also transfer files locally using the Rsync command.
This command is most commonly used by system administrators for different tasks like data mirroring, backups, or migrating files to other systems or servers across networks and disks.
Rsync is a very fast, efficient, and powerful tool as it copies or transfers only the file changes from the source. It also offers a lot of customization options, which we shall go through in later sections.
Rsync has many benefits over other methods of copying files because it uses both compression and decompression while sending and receiving files. It also saves bandwidth and has faster transfer time as it only transfers new or updated files and not everything.
There are various tools and commands for data transfer like FTP and SSH. However, most Linux users prefer SSH for securely transferring files. Even in SSH, there are various specialized tools for transferring files, like SCP SFTP. None of them match the feature that Rsync provides.
When we combine Rsync with SSH, bash, cron, and compression, we end up with the ultimate backup tool, and in this article, we will see exactly that!
Advantages of Linux Rsync
Before we jump to the technical part, let us discuss a few advantages of the Rsync command.
1. The command efficiently copies files and syncs them to or from a remote system.
2. Rsync also supports the copying of links, devices, permissions, owners, and the user group
3. Rsync is faster than SCP because it only copies the differences between the files in your system and the remote system. If it is your first time copying the file to the remote system, it will take time as it copies the entire file, but from the next time onwards, it copies only the differences.
4. The Rsync command consumes less bandwidth utilization because it uses the compression and decompression method while sending and receiving files on both ends.
How to install Rsync?
If you don’t have the rsync tool installed on your system, you can simply install it by typing just 1 command in the terminal. Different Linux distributions have different syntax for installation, type the command based on your distribution of Linux.
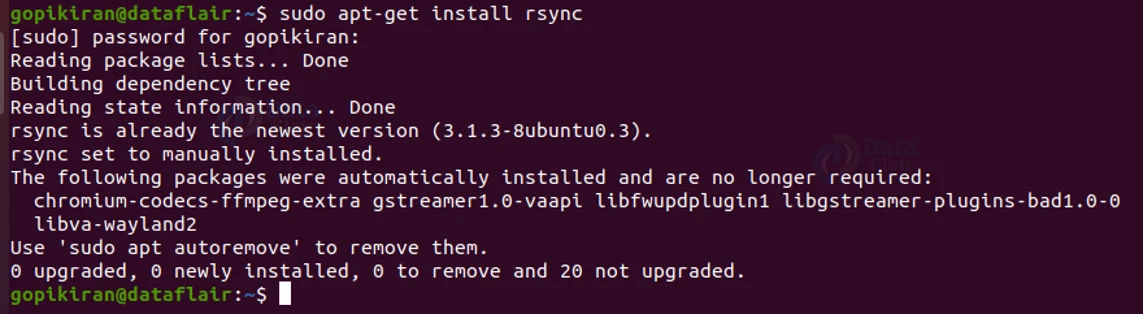
Installing rsync on Debian based Linux distros
If you want to download the rsync tool on Debian based Linux distributions like Ubuntu, Kali, Mint, Deepin, AntiX, MX Linux, you can do so by using the following command:
sudo apt-get install rsync
Installing rsync on RHEL and Fedora-based Linux distros
If you want to download the Rsync tool on Red hat and Fedora-based Linux distributions like CentOS, Alma Linux, berry Linux, Qubes, Rocky Linux, Oracle Linux, you can do so by using the following command:
sudo dnf install rsync
Installing rsync on Arch Linux-based distros
If you want to download Rsync on Linux distributions based on Arch like Manjaro, Chakra, Anarchy, Bluestar, Garuda, EndeavorOS, Archman, you can do so by using the command given below:
pacman -S rsync
Installing rsync on open SUSE-based Linux distros
To download rsync on open SUSE based Linux distributions like leap and tumbleweed, use the command given below:
sudo zypper install rsync
Installing rsync on Gentoo-based Linux distros
If you wish to download the Rsync tool on Gentoo based Linux distributions like Argent, Chromium OS, clover OS, Pentoo, Porteus, red core, Sabayon, you can do so by typing the command given below in the terminal:
emerge sys-apps/rsync
Syntax of the Rsync command
Before we look into the options used with the rsync command let us take a look at the basic syntax of the Rsync command:
rsync <options> <source> <destination>
The above syntax is in a generalized form, let us look at some specific cases:
1. Copy files Local to local
To copy files within you computer, use the following syntax:
rsync <options> <source> <destination>
2. Copy files Local to remote
To copy files from your local computer to the remote system, use the following syntax:
rsync <options> <source> <user@ host:destination>
3. Copy files Remote to local
To copy files from the remote system to your local computer, use the following syntax:
rsync <options> <user@ host:source> <destination>
Options with rsync command
There are soo many options that are used along with the rsync command that it would take an entirely separate article to discuss it, just to put the number into the picture, there are 18 main options with 140 sub-options!
To save both your time and my time, I will be listing only the most important and commonly used options, if you are that interested, in learning about all of the one hundred and forty options, you are most welcome to type the command “rsync -h” or “rsync –help” and go through all of them.
Here is the list of some of the most commonly used options with the Rsync command:
1. -v
This option provides verbose to the output for a better understanding.
2. -r
This option copies data recursively. It does not preserve timestamps and permissions while transferring the data.
3. -a
This option activates archive mode. Archive mode allows copying files recursively. It also preserves symbolic links, timestamps, user & group ownerships, and file permissions.
4. -z
This option compresses the data of the file and works similarly to the “gzip” command.
5. -h
This option outputs numbers in a human-readable format.
6. -q
This option enabled the quiet mode, where most of the warnings are suppressed. This option shows only the error messages.
7. -P
This option shows a progress bar during the transfer and keeps the partially transferred files. This option is really helpful while transferring large files over slow or unstable network connections.
8. -l
This option preserves symbolic links
9. -e
This option specifies the remote shell to use. This is often set to ssh. This option is automatically enabled when using the option “-a”.
10. -d
This option transfers directories without recursing
11. -p
This option preserves the permissions of the files.
12. -o
This option preserves the owner of the files.
13. -g
This option preserves the group of the files.
14. -T
This option creates temporary files in the directory you specify.
15. -H
This option preserves the hard links.
Again, this barely scratches the surface, given the number of options rsync has, nonetheless this is sufficient for now, and if you are that interested you are most welcome to read all of them in the manual of rsync, by typing the command “man rsync” in the terminal.
Now that you know the basics of rsync like the installation, syntax advantages, and options, let us look at some practical examples.
Transferring files locally
To transfer files or sync all the files from one directory to another directory, use the following syntax:
rsync <options> <source directory path> <destination directory path>
Here I used the option “-v” to provide verbose.

You must note that if the destination directory does not exist, rsync will create one for you.
Checking Rsync progress
To check the progress of Rsync when transferring files, use the option “-p”
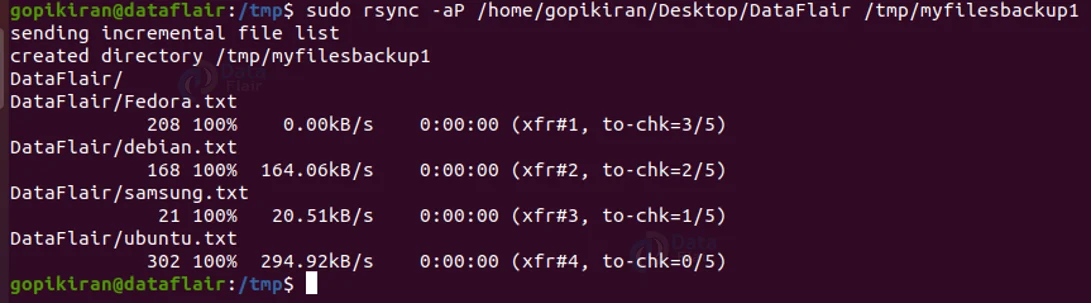
However, if you run the command again, it will simply print “sending incremental file list” as follows:

That means, that if at all rsync detects any change in any of the previously sent files, it will only copy the changes and not the entire files again.
Copying files to a server
To copy or sync files all the files from your system to the server or any remote system, use the following syntax:
rsync <options> <source> <user@ host:destination>
In the source field, you must enter the path of the directory from which you want the files to be transferred (this directory must exist on your computer), In the destination field, you must enter the IP address of the host followed by the path of the directory you want the files to sync or copy.
For example, the command:
rsync -avP /home/gopikiran/Desktop [email protected]: /tmp/backup
Will copy all the files in my desktop to the remote system at the IP address “192.168.0.132” in the directory “/tmp/backup”. If the destination directory does not exist, rsync will create one for you with the same name.
Copying files from a server
To copy or sync files all the files from the remote system to to your system, use the following syntax:
rsync <options> <user@ host:source> <destination>
In the source field, you must enter the IP address of the remote system followed by the path of the directory you want the files to sync or copy from, in the destination field, enter the path of the directory from which you want the files to be transferred.
For example, the command:
rsync -avP [email protected]: /tmp/backup /home/gopikiran/Desktop
Will copy the files from the remote machine at the IP address “192.168.0.132” from the directory “/tmp/backup” to the directory “/home/gopikiran/Desktop” in my local system.
Rsync over SSH
We can use SSH or secure shell to copy or sync our files, as it helps transfer in a secured connection. This way SSH can send our logins in an encrypted manner so that our password is safe.
Using SSH, we can ensure that our data is being transferred in a secured connection so that nobody can read our data while it is being transferred over the internet.
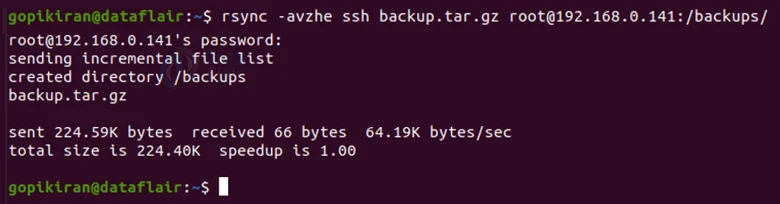
Copying files to a server with the help of SSH
We are doing the same tasks we have done earlier, except this time we are taking the help of SSH, the syntax also changes ever so slightly, all we doo is add an ‘ssh’ before the source field as follows:
rsync <options> ssh <source> <user@ host:destination>
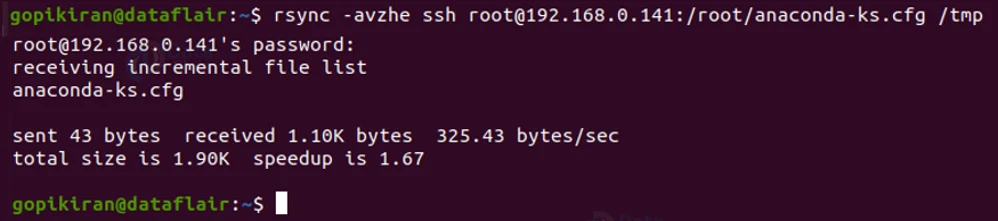
Copying files from a server with the help of SSH
To copy files from a server with the help of ssh, we use the following syntax:
rsync <options> <user@ host:source> <destination>
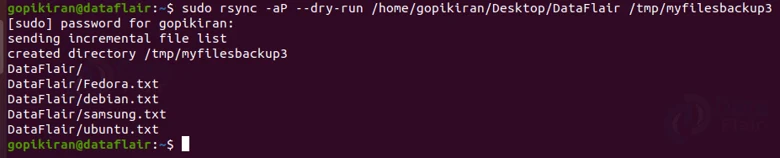
Performing a dry run
If you are new to rsync, or just confused about what your command will do, you can always dry run Rsync using the “–dry-run” option. This option will only display what will happen when you run the command and will make no actual changes.
This is really helpful because sometime you might mess up the destination directories, and end up losing your data. Hence, whenever you are confused as the whether the destinations directory exists or not, it is best to perform a dry run to check if rsync created the directory or rewrites it.
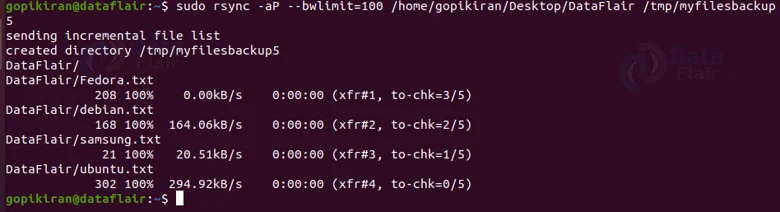
Setting a bandwidth limit
If you wish to set a bandwidth limit while transferring data, you can do so by using the option “–bwlimit” as this helps us limit the I/O bandwidth.
Setting the maximum size of files
You can specify the maximum file size to be transferred or synced by using the option “–max-size”.
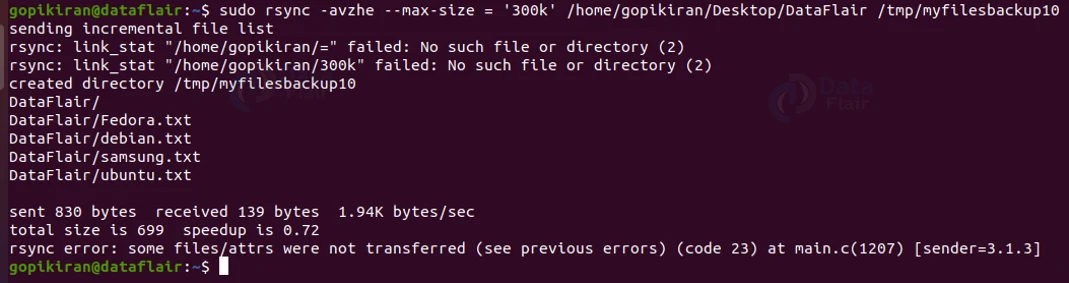
If I specify 300K as the max limit, only those files which are less than or equal to 300K will be transferred or synced.
Deleting extra files
Say there is an extra file in the destination that is not present in the directory. You can delete this extra file while syncing by using the option “-delete”
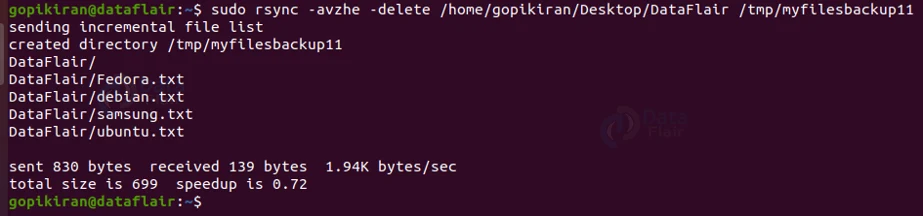
On executing this command, the file that is present only in the destination directory and not in the source directory will be automatically deleted.
Using “–include” and “–exclude” options
The options “-include” and “-exclude” allow us to specify parameters. These options specify those files or directories which we want to include in our sync and exclude files and folders with which we don’t want to be transferred.
We can use these option using th following syntax:
rsync -a --exclude=node_modules --exclude=tmp /src_directory/ /dst_directory/
Deleting files after successful transfer
If you want to delete the files from the source directory after the files have been successfully transferred into the destination directory, you can do it by using the option “–remove-source-files”

After executing this command, if your search for the file named ‘DataFlair’, there will be no such directory in the system:

Summary
As you have seen, Rsync is a really simple, powerful, and efficient tool that is used to transfer and synchronize data across systems. You have learned what Rsync is, why it is used, its advantages, how to install it, and a few options used with it along with the syntax. Last but not least we have seen the Rsync in action by executing some practical commands in the terminal.
Did you like this article? If Yes, please give DataFlair 5 Stars on Google


