PING Command in Linux
Placement-ready Courses: Enroll Now, Thank us Later!
By the end of this article, you will learn all there is to the ping command in Linux-based operating systems. We will be going through different topics like what ping is, and how it works, how to use it. We will also be going through the practical examples of the command as we look at the syntax, and the different options used with the ping command. In the end, we shall combine all of this and see some examples of the ping command in the terminal.
What is ping command in Linux?
Ping is an abbreviation for Packet Internet Groper. Ping is a command-line-based utility in a Linux-based operating system that helps in checking the connectivity between the hosts and the server.
The ping command takes either the URL or IP address as the input and transfers the data packet to a specified address. During the transfer, the system also gives a ‘PING’ message.
Upon successful transfer of data, it will get a message from the server. The time taken is called latency.
In less intimidating words, ping allows us to send and receive data from either another computer or network. Ping is most commonly used to test if another system is reachable over a network, and if it successfully does connect, how much time it took for the data to be exchanged (latency).
Why use the ping command in Linux?
The ping command is a really simple yet efficient tool that helps you do the following:
1. Ping checks if the remote machine is up and running.
2. It tests your internet connection.
3. It helps in analyzing network issues like high latency or dropped packets.
How does ping work?
Ping uses the ICMP protocol’s ECHO_REQUEST datagram to obtain an ECHO_RESPONSE from the host. These ECHO_REQUEST datagrams or pings have an internet protocol address followed by a struct timval and a random number of pad bytes used to fill out the packet.
When you ping a remote host, the machine you are using sends ICMP ECHO_REQUESTs and waits for the response. If a connection has successfully been established, you receive an ECHO_RESPONSE for every request.
The output of the ping command or the “ping message” consists of the latency time. The terminal keeps printing these ping messages until kt is interrupted. After every session, a few lines with ping statistics will be displayed in the terminal.
Syntax of Linux ping command
The syntax of the ping command is really simple:
ping <options> <IP address or URL>
How to use Linux ping command?
Once you invoke a session using the syntax discussed above, we saw that ping messages will be printing until it is interrupted. Now how exactly do you terminate it, or give this ‘interruption’? Well, you simply press the keys “Ctrl” and “c” at the same time.
Understanding the output of the ping messages
Before we go any further, let us look at the output of the oping messages. In a ping message, there are 4 types of data: from, icmp_seq, TTL, and time. Let us look at each field in specific.
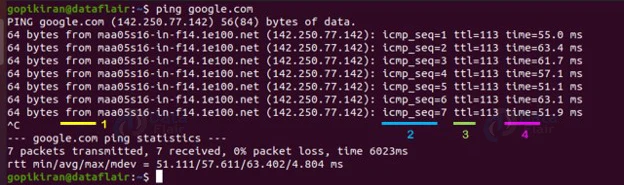
1. From
The “from” field (marked yellow) tells the name and IP address of the target
2. icmp_seq
This field (marked blue) tells all the ICMP packet’s sequence numbers. The icmp_seq number increases by 1 for each echo request.
3. TTL
This field (marked in green) tells the network hops a packet can take before a server removes it. Ttl is the abbreviation for ‘time to live’ and it has a value between 1 to 225.
4. Time
This field (marked in pink) tells the time that it took the packet to reach the target and come back to where it began. The value for the time filed is in milliseconds (ms).
Options used with the ping command
In the syntax of the ping command, we have seen that there is a field to enter options. We use options to specify how ping should function and what should be printed in the output. Let us look at the options that are available with the ping command:
1. -a
Audible ping
2. -A
Adaptive ping
3. -b
This option allows the pinging of a broadcast address.
4. -B
This option does not allow ping to change the source address of the probes.
5. -m <mark>
This option uses the mark you specified to tag packets going out
6. -c <number>
This option stops after sending the specified number of ECHO_REQUEST packets.
7. -d
This option sets the SO_DEBUG option on the socket being currently used.
8. -f
This option stands for “flood printing”, where a period (.) is printed for every ECHO_REQUEST and a backslash for every ECHO_REPLY.
9. -i <interval>
This option waits for the specified number of seconds between sending each packet. I no value is specified, ping takes the default value of 1 second.
10. -I <interface address>
This option sets the source address to the specified address of the interface.
11. -l <number>
This option makes ping send the specified number of packets not waiting for a reply.
12. -L
This option surpasses the loopback of multicast packets
13. -n
This option gives out numeric output only.
14. -p <pattern>
This option takes up to 16 pad bytes to fill out the packet you need to send.
15. -D
This option prints the timestamp before each line.
16. -Q
This option sets the quality of service-related bits in ICMP datagrams.
17. -q
This option gives a quiet output, meaning that nothing is displayed except for the summary lines at startup time and when finished.
18. -R
This option includes the RECORD_ROUTE option in the ECHO_REQUEST packet and displays the route buffer on the returned packets.
19. -r
This option bypasses the normal routing tables and sends them directly to a host on the attached interface.
20. -s <size>
This option specifies the number of data bytes that are to be sent.
21. -S <sndbuf>
This option sets the sndbuf of the socket,
22. -t <ttl>
This option sets the internal protocol TTL.
23. -T <timestamp>
This option sets the special IP timestamp option.
24. -M
This option selects the path MTU discovery strategy.
25. -U
This option prints the full user-to-user latency.
26. -v
This option provides verbose to the output to give a better understanding.
27. -V
This option provides information about the version of ping you are using.
28. -W <time>
This option specifies the time to wait for a response in seconds (s).
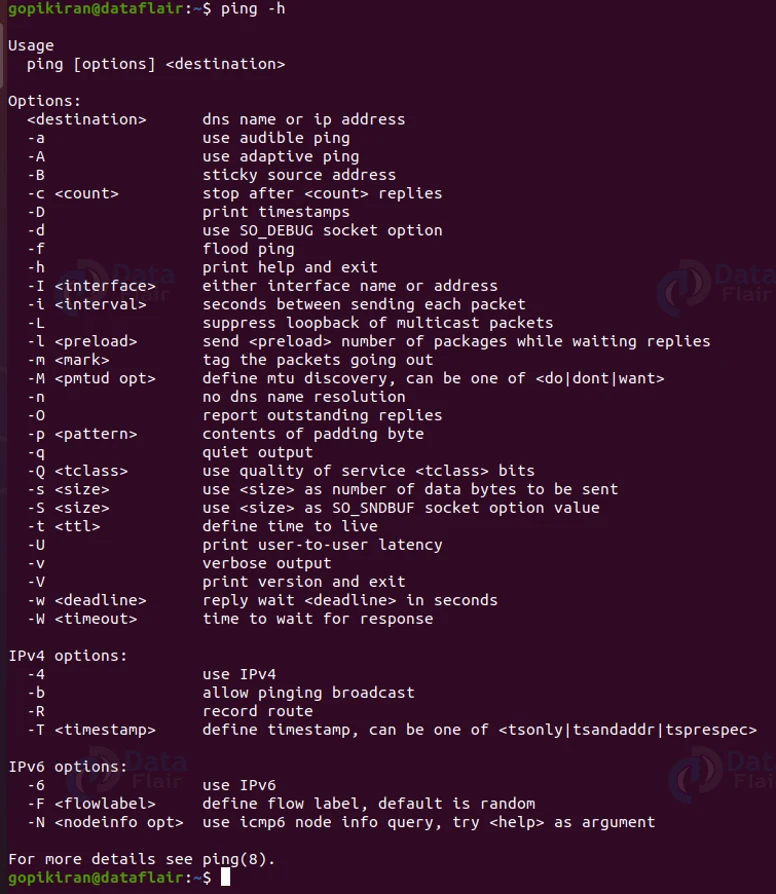
Phew! Those are a lot of options. If you ever get stuck or forget any option and what it dopes, you can always type the command “ping -h” as it displays the help menu.
Now that we have laid down the fundamentals of the ping command, let us look at some commands of the ping command in the terminal
Checking local network
If you are facing any network issues, you can ping your own localhost by using the following command:
ping localhost
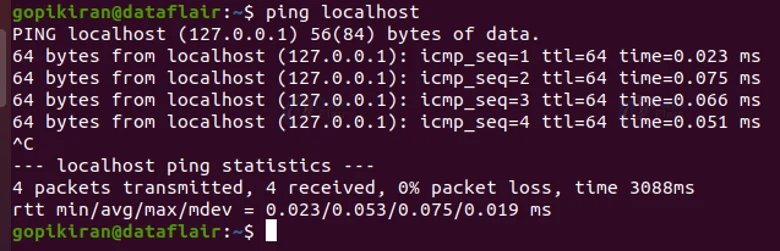
You can also use the command “ping 0” or “ping 127.0.0.1” t0 check your local network
Specifying the internet protocol
If you wish to request IPv6 or IPv4 addresses, add a “-6” or “-4” after the ping command as follows
ping -6 <hostname/IPv6>
ping -4 <hostname/IPv6>
The IPv6 address format will replace the IPv4 address format because there is a limited number of IPv4 addresses and we are running out of possible combinations.
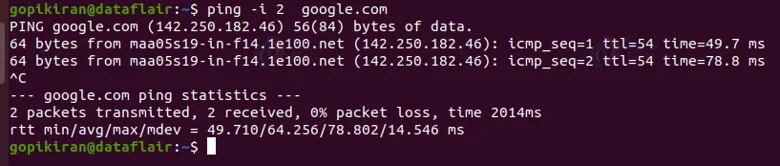
Changing the time interval between requests
We saw above that the default interval between each ping request is one second. We can increase and decrease this time by using the option “-i” followed by the time as follows:
ping -i 2 <URL>
Specifying packet size
If you want to specify the size of a packet, use the option “-s” as follows:
ping -s <size> <URL>
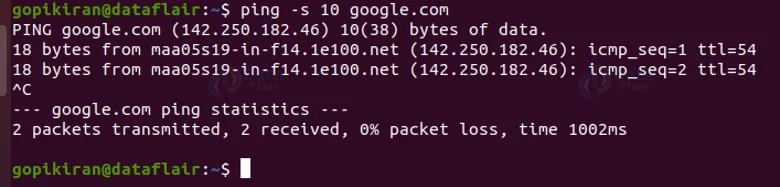
The default size of the packets is 56 (84) bytes.
Testing the performance of your network
You can use the option “-F” to ping flood to send a large number of packets as soon as possible to test the performance of your network. To use this option you either need to be a root user or have sudo privileges.

Limiting the number of ping packets
Instead of pressing “ctrl” + “c” every time you want to stop sending requests, you can automatically limit the number of ping packets so that ping will immediately print the summary after the specified number of packets have been sent.
You can set the number of ping packets by using the option “-c” followed by the number as follows:
ping -c <n> <URL>
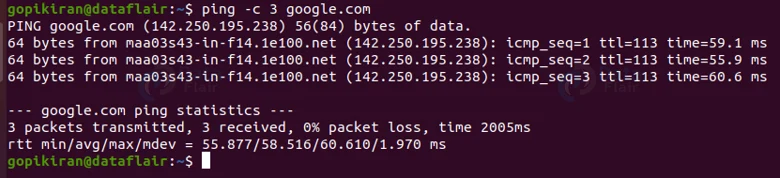
In the above output, the stats were printed immediately after 3 packets and I had no need to press “ctrl” + “c”.
Printing only the summary
If you want your terminal to be clean or you don’t want to see the ping message every tie a packet is sent, you can simply suppress the output for it to directly print the final summary statistics by using the option “-q”.
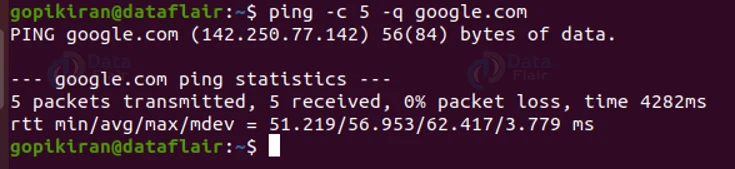
In the above output, the summary statistics have been directly printed after the passing of 5 packets.
Adding timestamp before each ping message
If you want to add the time of when you execute the ping command, use the option -D as follows:
ping -D <URL>

Get an audible ping upon successful connection
If you want to hear an audible ping every time a packet has been sent and the connection was successful, use the option “-a” as follows:
ping -a <URL>
Print the version of ping
To print the version information of ping, use the option “-V”. Note that these commands are case sensitive, use “-V” and not “-v”

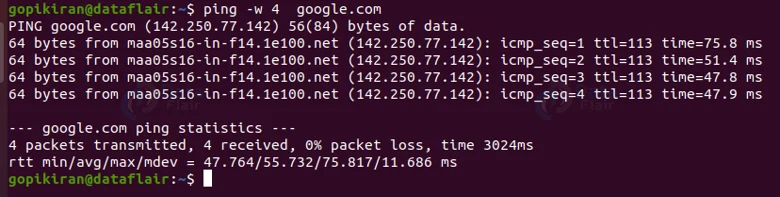
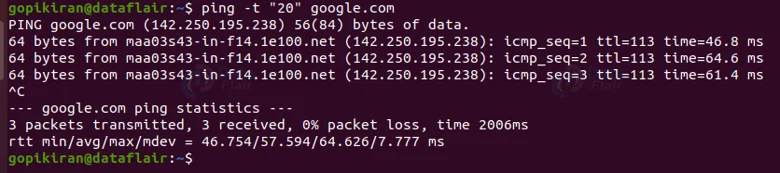
Fixing the time limit of the ping command
To fix a specific time limit is seconds for the ping command to automatically terminate and print the summary statistics, use the option “-w” followed by the time as shown:
ping -w <t> <URL>
Specifying the time to live
If you want to specify a certain TTL, which is basically the maximum hop a packet can travel before a router removes it, you can use the option “-t”.
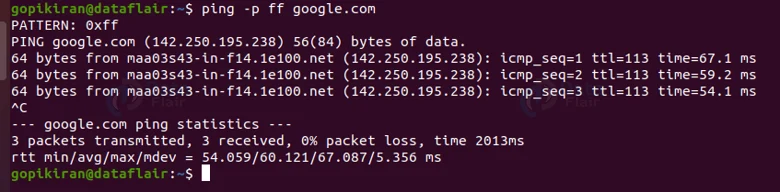
Filling the packets with data
If you want to fill data in a packet, use the option “-p”. For example the option “-p ff” fills the packets with ones.
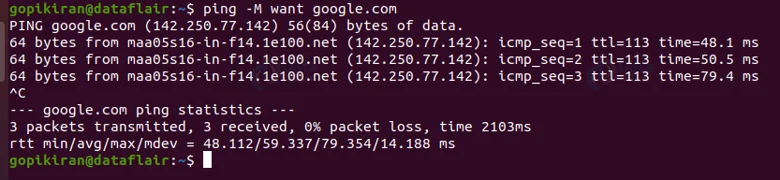
Discovering MTU path
A simple protocol to find out the Maximum Transmission Unit a TCP path can take is the path MTU discovery. To invoke this protocol, use the option “-M” followed by “want” or “dont” as follows:
ping -M <want/dont> <URL>
Summary
As you have seen the ping command is a really simple yet powerful and efficient tool that is used to check internet connection, Ping checking if the remote machine is up and running, or analyze network issues like high latency or dropped packets.
Did we exceed your expectations?
If Yes, share your valuable feedback on Google


