lshw command in Linux with Examples
Expert-led Online Courses: Elevate Your Skills, Get ready for Future - Enroll Now!
In this article, we will learn everything about the lshw command in Linux. We will look at the lshw command, why it is used, how to install it, the syntax of the lshw command, and the options used along with it.
At last, we will also look at some amazing practical examples of the lshw command by pairing it with various options to understand its working. So pay attention, take notes, and read to the end for the best benefits.
What is the lshw command in linux?
Lshw is the abbreviation for lost hardware. The Lshw command is a command-line-based utility in Linux-based operating systems providing detailed information on the system’s hardware configuration from various files in the /proc directory in your system.
The lshw command can also report the exact memory configuration, firmware version, mainboard configuration, CPU version and speed, cache memory configuration, bus speed, and many more.
The lshw command can print all the information mentioned above on a DMI-capable x86 or IA-64(Itanium family of 64 microprocessors) system and some PowerPC machines. In a nutshell, the lshw is a small command that gives you a complete picture of your hardware configuration.
One thing that you must note while using the lshw command is that you must either be the root user or have elevated privileges (sudo command). If you don’t have proper permissions, the lshw command prints only half the information, it would typically print.
Syntax of linux lshw command
The simple syntax of the lshw command is shown below:
lshw <format> <options>
Let us take a look at the fields present in the syntax of the lshw command:
<options>
This field takes in a variety of options that specify how the zip command should function, format, and print the output. You can also specify multiple options in this field.
<format>
This field specifies the format in which the lshw must print the output. You can specify any of the following four format specifiers in this field.
1. -html: Output hardware tree as HTML.
2. -xml: Output hardware tree as XML.
3. -short: Output hardware paths.
4. -businfo: Output bus information.
5. -json: Output device tree as a JSON object.
Options used with linux lshw command
The lshw command has only a couple of options. Here are some of the most used ones in this section, and cover the remaining on the fly as we look at some examples in the subsequent section.
1. -enable
This option enables different parameters of the system. It is the complete opposite of the “–disable” command.
2. -disable
This option disables various parameters of the system. It is the complete opposite of the “–enable” command.
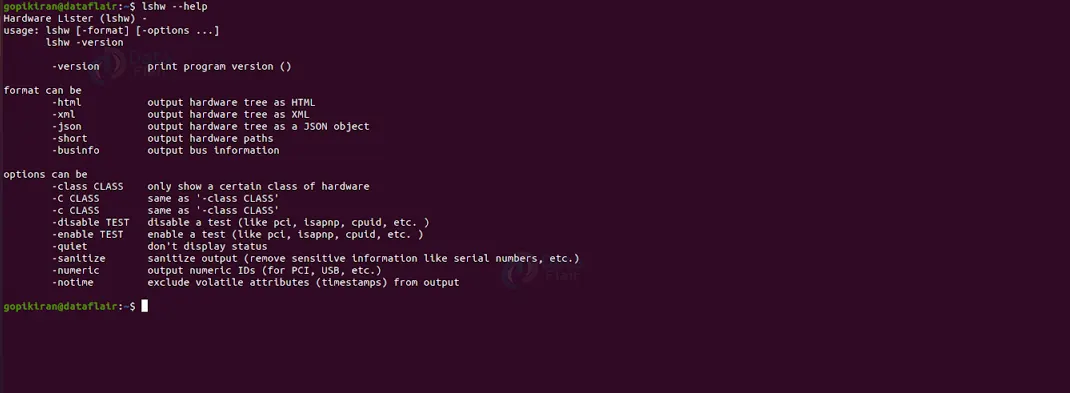
3. –help
This option prints the help menu of the lshw command, as shown below:
4. -numeric
This option displays and prints out numeric ID’s for fields like PCB, USB, and more.
5. -sanitize
This option prints the output without any sensitive information. If you want to print the information of your system’s hardware configuration without displaying any private and sensitive information, use the lshw command along with the “–sanitize” option.
6. -c
This option displays only the class of hardware you specified.
7. -quite
This option hides the display status.
8. -notime
This option excludes volatile attributes from the output.
Now, let us look at some Practical examples of the lshw command in the terminal of Ubuntu 20.04.
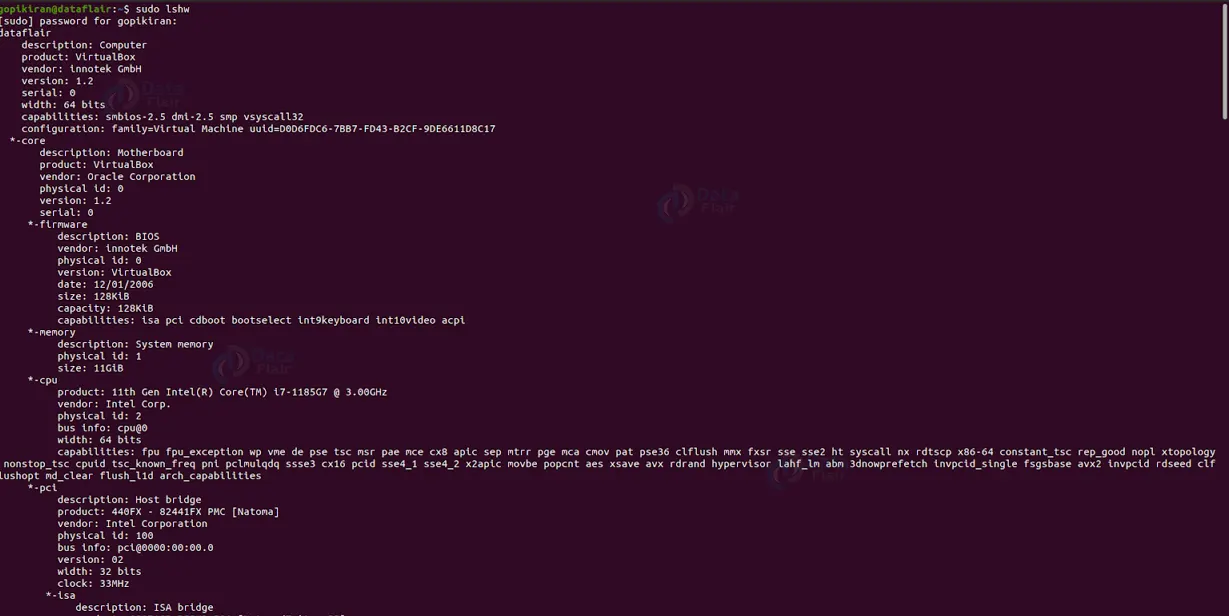
Displaying full hardware information
To display complete hardware information of your computer, use the lshw command with no options and format specifiers.
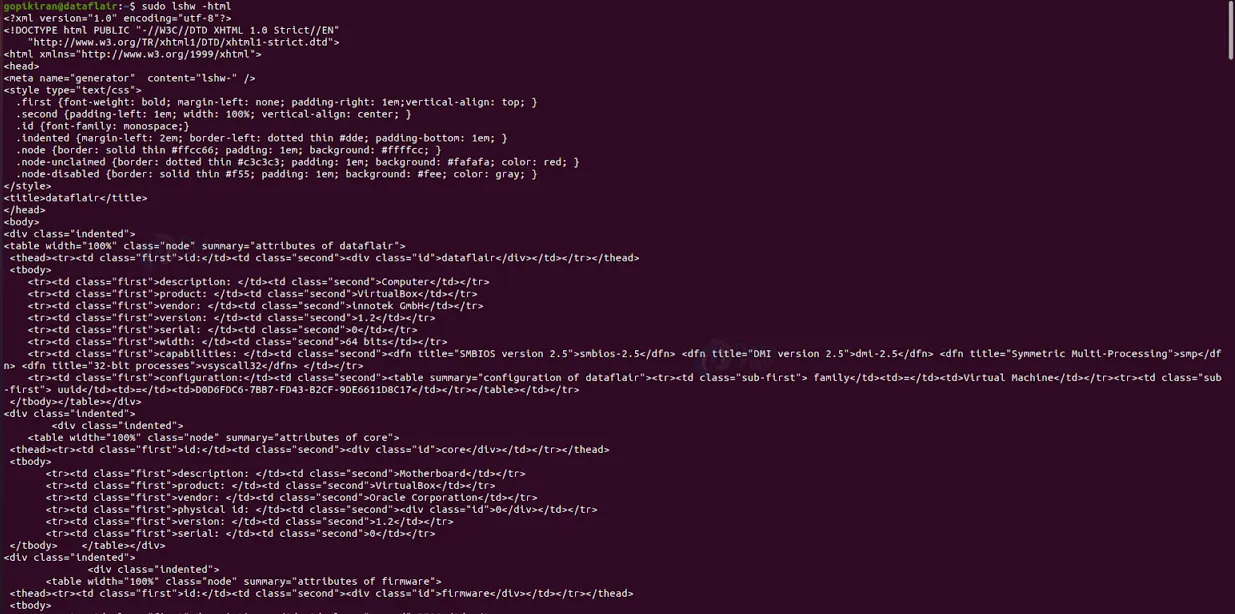
Displaying information in HTML format
To change the format of the output and print it in HTML format, use the lshw command followed by the format specifiers “-html” as shown:
lshw -html
Displaying information in XML format
To change the output format and print it in XML format, use the lshw command followed by the format specifiers “-xml” as shown:
lshw -xml

Displaying information in JSON format
To change the output format and print it in JSON format, use the lshw command followed by the format specifiers “-json” as shown:
lshw -json

Displaying hardware paths
If you want to display the paths of the hardware, run the lshw command by combining it with the format specifier “-short” as shown:
lshw -short

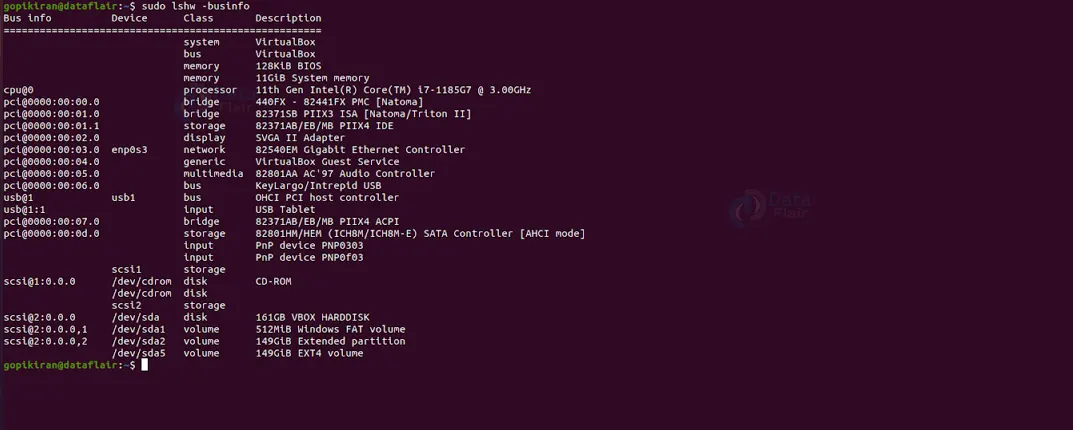
Displaying bus information
If you want to display the bus information that gives more details on the sections SCSI, USB, IDE, and PCI addresses, run the lshw command by combining it with the format specifier “-businfo” as shown:
lshw -businfo
Displaying a specific class of hardware
If you want to display a specific class of hardware, execute the lshw command by pairing it with the option “-c” followed by the class of hardware on which you want to see the information.
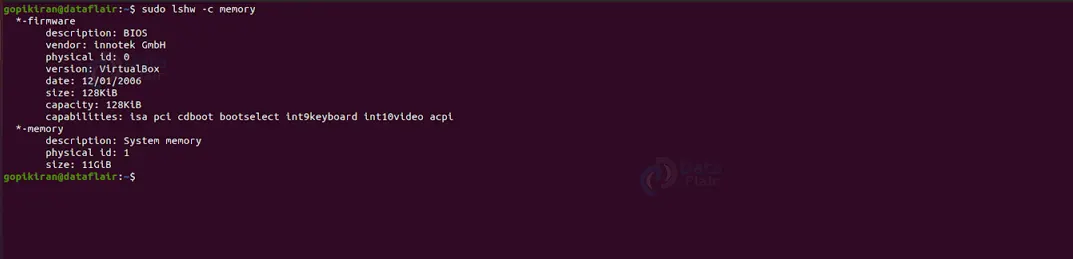
Showing system information
If you want to print the system information, couple the lshw command with the option “-class” followed by the “system” class of hardware as shown:
lshw -class system

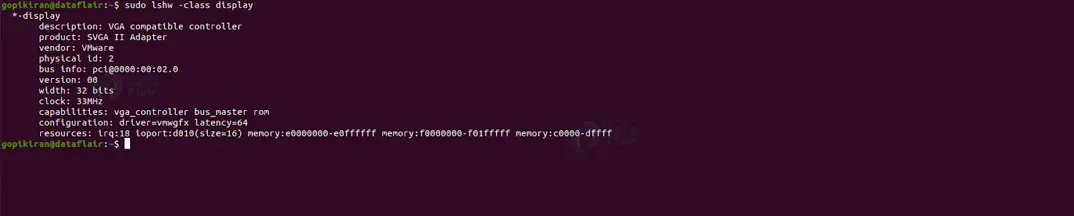
Showing display information
To display the system information, couple the lshw command with the option “-class” followed by the “display” class of hardware as shown below:
lshw -class display
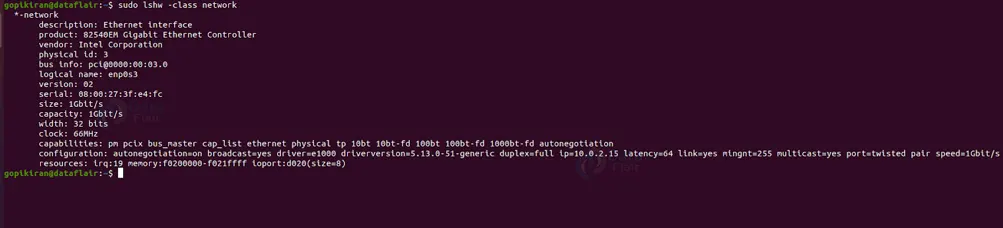
Showing network information
To display the network information, couple the lshw command with the option “-class” followed by the “network” class of hardware as shown:
lshw -class network
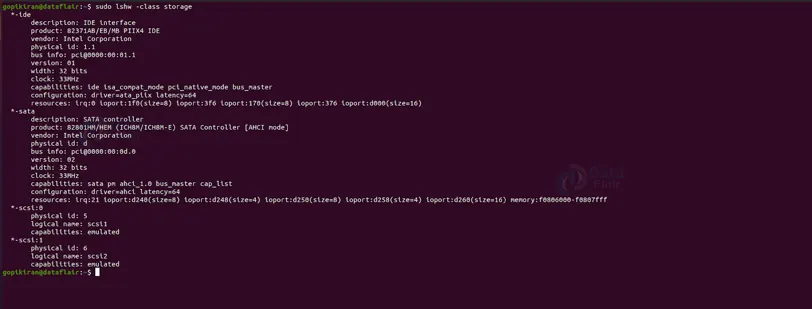
Showing storage information
To display the storage information, couple the lshw command with the option “-class” followed by the “storage” class of hardware as shown:
lshw -class storage
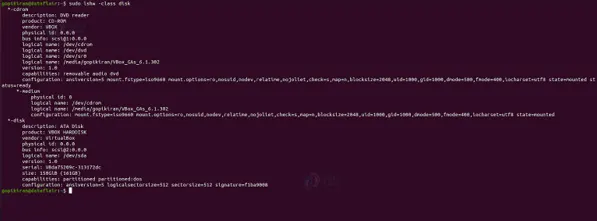
Showing disk information
To display the disk information, couple the lshw command with the option “-class” followed by the “disk” class of hardware as shown:
lshw -class disk
Showing processor information
To display the processor information, couple the lshw command with the option “-class” followed by the “processor” class of hardware as shown:
lshw -class processor

Showing motherboard information
To display the motherboard information, couple the lshw command with the option “-class” followed by the “bus” class of hardware as shown:
lshw -class bus
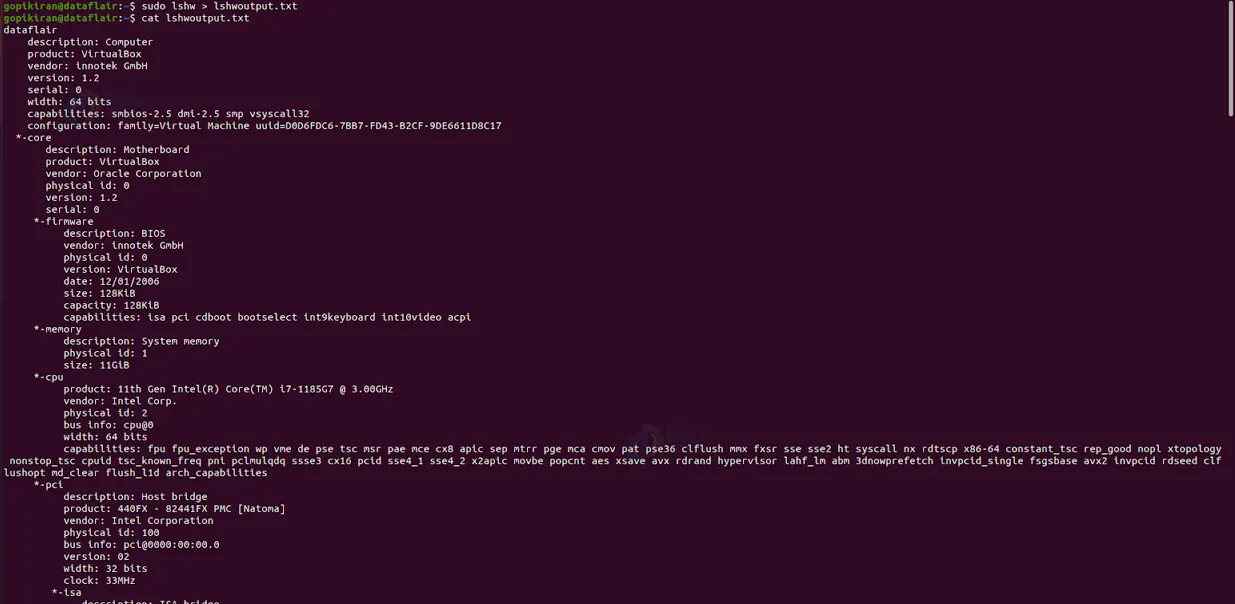
Saving output in a different file
We can save the output of the lshw command in a separate file by making use of the redirection operator as shown in the syntax below:
lshw > <filename>
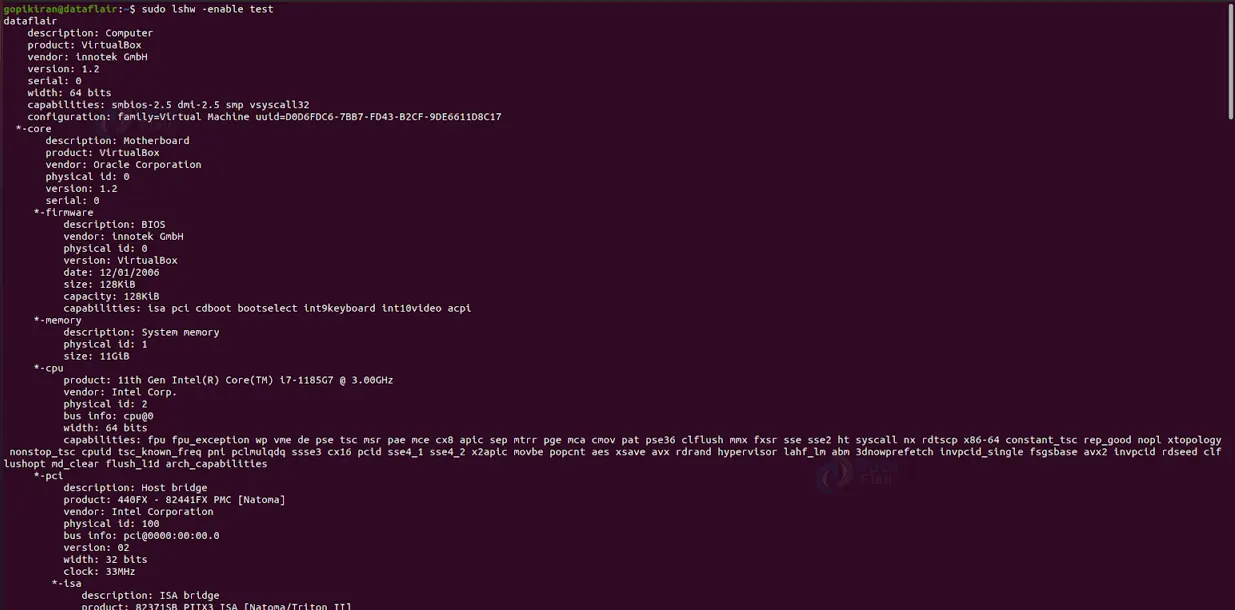
Enabling system hardware components
Pairing the lshw command with the option “–enable” lets us enable various system parameters. These parameters include dmi, Device-tree, Spd, Memory, cpuinfo, cpuid, pci, isapnp, pcmcia, ide, usb, scsi, and network.
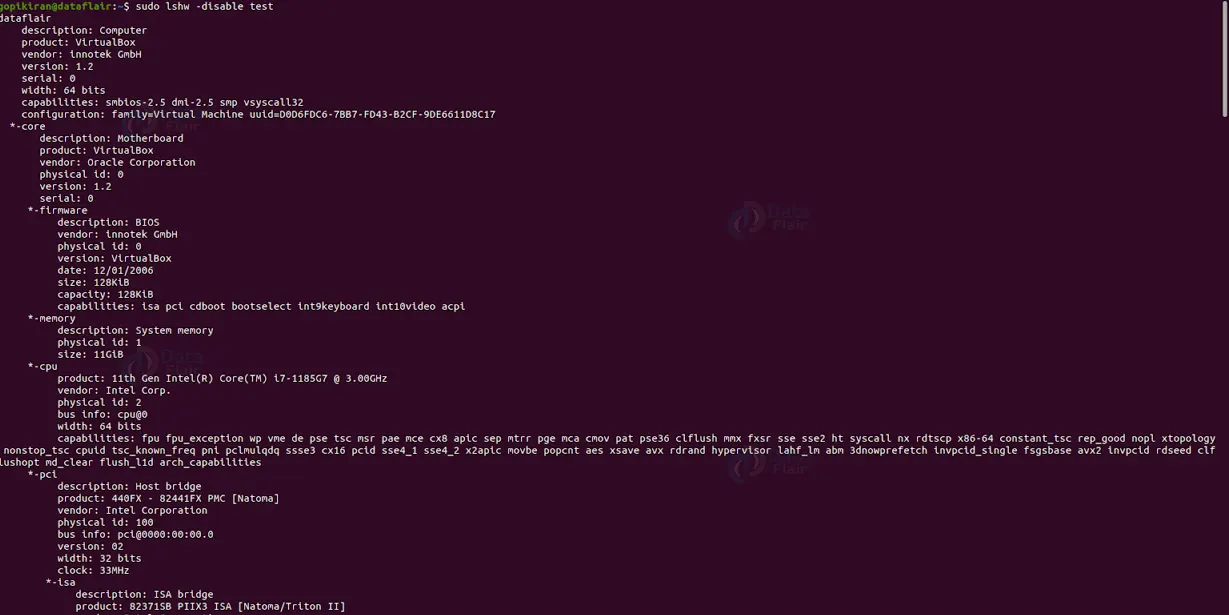
Disabling system hardware components
Just like enabling, disabling is also extremely easy. All you have to do is replace the option “-enable” with “-disable,” as shown in the syntax below:
lshw -disable <component>
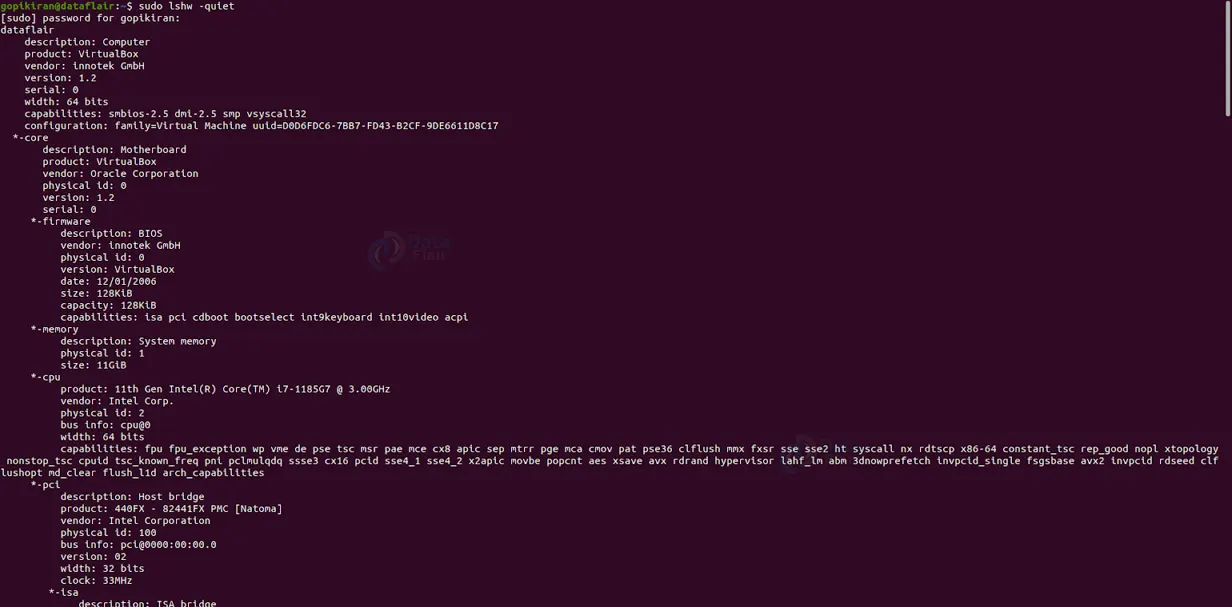
Hiding display status
If you don’t want the status displayed in the output, run the lshw command along with the option “-quiet” as shown:
lshw -quiet
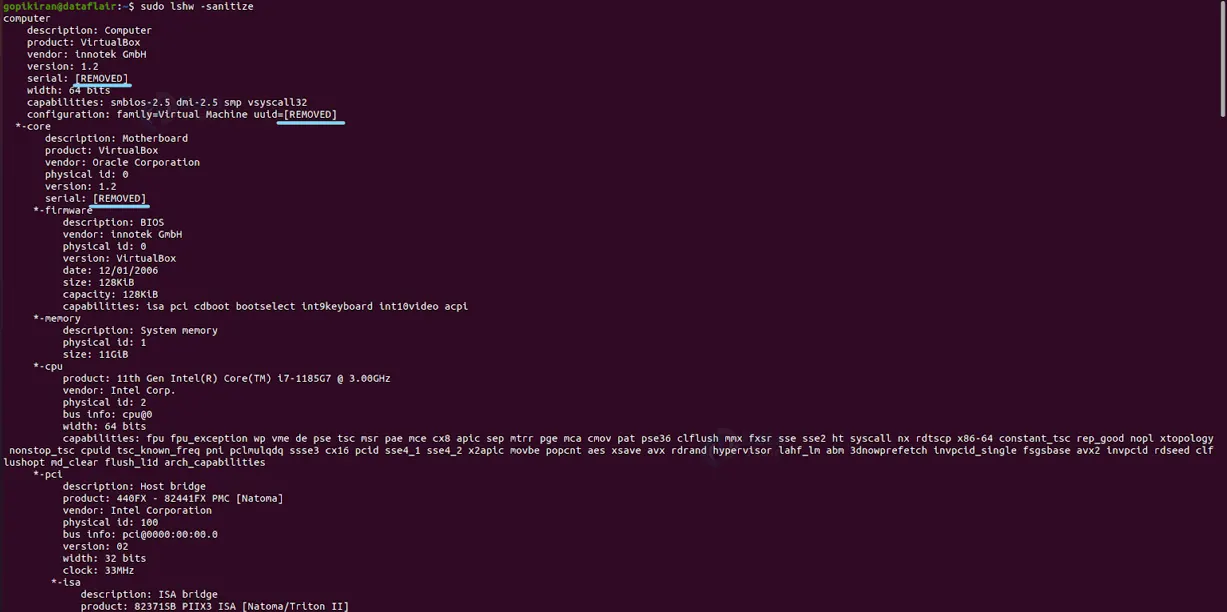
Hiding sensitive information
As we saw above, to hide sensitive or private information like IP addresses, serial numbers, etc., use the option “-sanitize” as shown:
lshw -sanitize
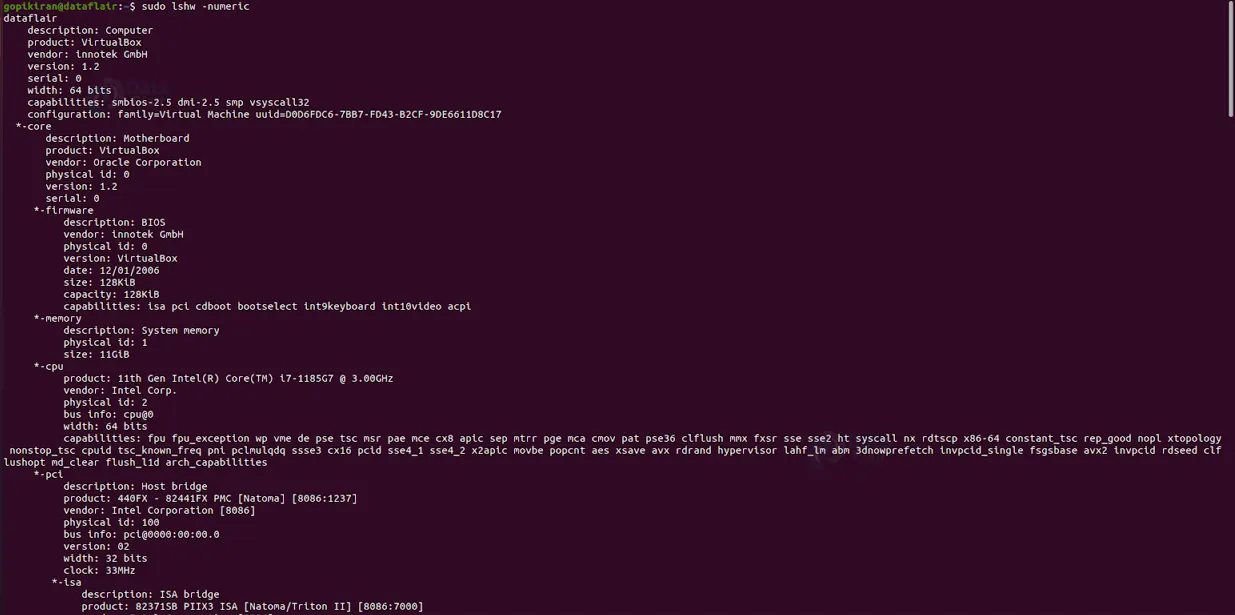
Displaying numeric IDs
If you want to display numeric IDs for the fields PCI and USB devices, use the option “-numeric” as shown:
lshw -numeric
Conclusion
As you have seen, the lshw command is a tool that gives you every single detail of your hardware configuration. You have now understood what the lshw command is, learned its use, the syntax of the lshw command, and the options used with it. We have also looked at 20 beautiful examples by combining the lshw with its various options and format specifiers.
Did you like this article? If Yes, please give DataFlair 5 Stars on Google


