Locate Command in Linux
Expert-led Courses: Transform Your Career – Enroll Now
In this article, we will learn everything about the locate command in Linux. We will first look at various theoretical topics like what locate is, why it is used, how it works, how to install it, and the syntax and options used with the locate command. In the end, we will look at some practical examples of the locate command to understand better how it works. So pay attention and make it to the end of the article.
What is Linux locate command?
Locate is a command-line-based utility in Linux-based operating systems that finds files in your filesystem. Of course, there are many ways you can search for a specific file in Linux – you can use the find command, pipe the grep command with the ls command, or use the GUI. But the best method is to use the locate command.
Why is the locate command the best way, you ask? Well, it is the best because locating would look through a database rather than searching the file system when a file search is initiated (which is what the find command would do). The database that the locate command searches through contains bits and pieces of files and their respective paths on your system.
However, if you cannot find a file with the locate command, then your database is not up to date. Don’t worry. You can update your database by making use of the “updatedb” command. The default location command setting is not to check if the files found in the database still exist.
Another reason why the locate command is the best is because of its lightning speed! In addition, locate helps you find your files or search patterns without delays as it refers only to the database rather than searching through the whole filesystem.
However, there is one slight drawback to this. The locate command doesn’t check for files that are outside the database, this means that it doesn’t report the files that are created after the most recent database update.
How does locate command work in linux?
As mentioned above, The locate command searches for a given pattern through a database file generated by the updatedb command. During the installation of the package name mlocate, a cron job is automatically created that runs the updatedb command every 24 hours to update your database regularly.
You can update the database by manually running the command “updatedb”. You must note that while running this command, you must either be the root user or have elevated privileges (sudo). Updating your database may take time, depending on the number of files and directories in your filesystem.
How to install linux locate command?
The locate command comes preinstalled in all Linux distributions. Nonetheless, if you don’t have or may have deleted it, you can always install it. Use the command shown below with respect to your Linux distro:
Installing the locate command in Debian-based Linux distros:
If you want to install the locate command utility in a Debian-based Linux distribution like Ubuntu, Kali, pureOS, Deepin, AntiZ, Mint, MX Linux, etc., use the command shown below:
sudo apt install mlocate
Installing the locate command in Fedora-based Linux distros:
If you want to install the locate command utility in a Fedora-based Linux distribution like RHEL, Qubes OS, Clear OS, Berry Linux, Fedora Spins, etc., use the command shown below:
sudo yum install mlocate
Syntax of the locate command in linux
The syntax of the locate command is extremely simple and easy to remember. See for yourself:
locate <options> <pattern>
Let us look at the fields present in the syntax of the locate command:
1. <options>
This field takes in a range of options that specify how the locate command should function and print the output. You can enter as many options as you want in this field.
2. <pattern>
In this field, you can enter the name of the file you are searching for or simply the file’s extension.
Options used with linux locate command
In typical Linux fashion, just like every command has a truckload of options, locate also has a range of options that specify how it must function and format the output. Let us look at each of these options in brief:
1. -b
This option matches only the base name against the specified patterns. You can also write this option as “–basename.”
2. -c
This option displays the number of matching entries. You can also write this option as “–count.”
3. -d
This option replaces the default database with the path of the database you mentioned. You can also write this option as “–database.”
4. -e
This option prints only entries that refer to existing files when the locate command is run. You can also write this option as “–existing.”
5. -L
This option follows trailing symbolic links when checking if the file exists. You can also write this option as “–follow.”
6. -i
This option ignores case distinctions when matching patterns. You can also write this option as “–ignore-case.”
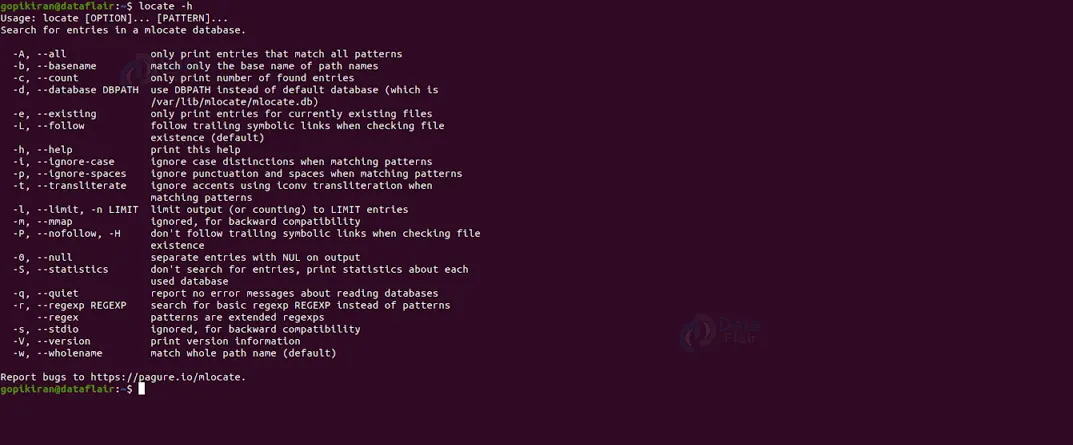
7. -h
This option prints the help menu of the locate command, as shown below:
8. -0
This option separates the entries on output using the ASCII NUL character rather than writing each of the entry on a separate line. You can also write this option as “–null.”
9. -q
This option writes no messages about the errors encountered while reading and processing the databases. You can also write this option as “–quiet.”
10. -r
This option interprets all PATTERNs as extended regular expressions (REGEX). You can also write this option as “–regexp.”
11. -w
This option matches only the whole path name against the specified patterns. You can also write this option as “–wholename.”
12. -P
This option does not follow trailing symbolic links When checking if a file exists. You can also write this option as “–no follow” or “-H.”
13. -V
This option prints the information related to the version of the locate command:

Now that we have covered the fundamentals and theory about the locate command, let us look at some practical commands in the terminal of Ubuntu 20.04 to get a better picture of how the locate command works.
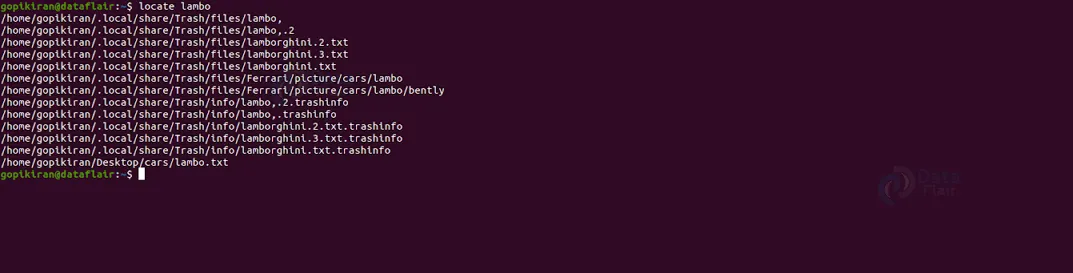
Searching for a pattern in linux
The locate command works very similarly to the grep command. Even if you give a part of the filename, it will search for the filename with the matching pattern in their name. To search for a specific pattern, use the locate command followed by the pattern you are searching for, as shown:
locate <pattern>
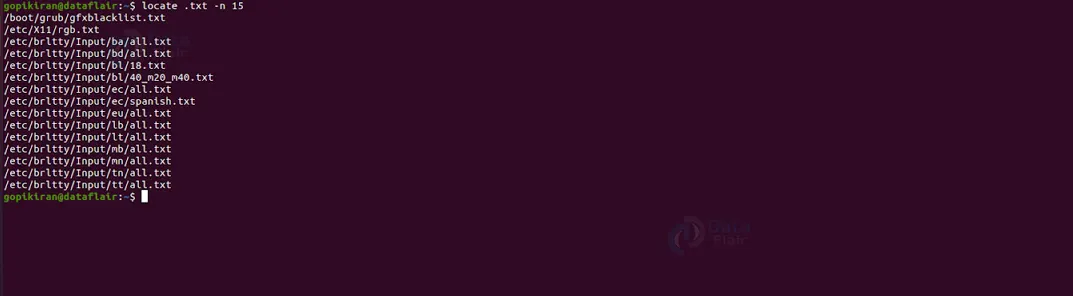
Limiting search queries to a specific number
If you don’t want the locate command to print every single filename with the pattern you searched and want to limit it to a specific number of results, use the option “-n” followed by the number of queries you want as shown:
locate <pattern> -n <number>
Displaying the number of matching entries
Instead of displaying the file address, if you want to display only the number of matches, use the option “-c” as shown:
locate -c <pattern>

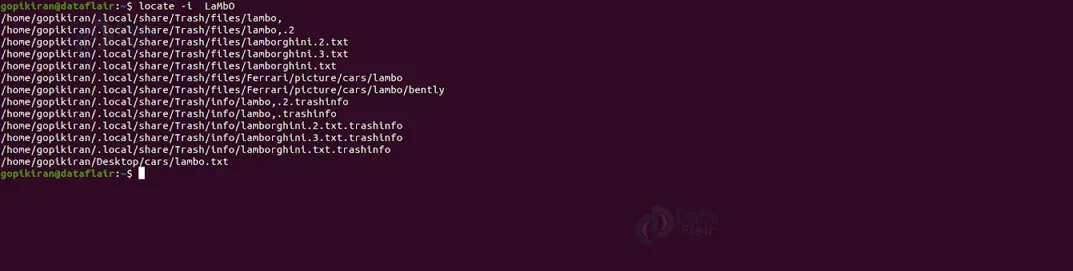
Ignoring case sensitivity
If you want to ignore the case sensitivity while searching for the pattern, use the option “-i”. This option will think that both “FILE.TXT”, “file.txt”, and “FiLe.TxT” are all the same.
Refreshing the database of mlocate
We saw above that the locate command does not print the files if the database is out of date. Therefore you need to keep updating the database regularly by using the command “sudo updatedb.”

Displaying only the files present in your system
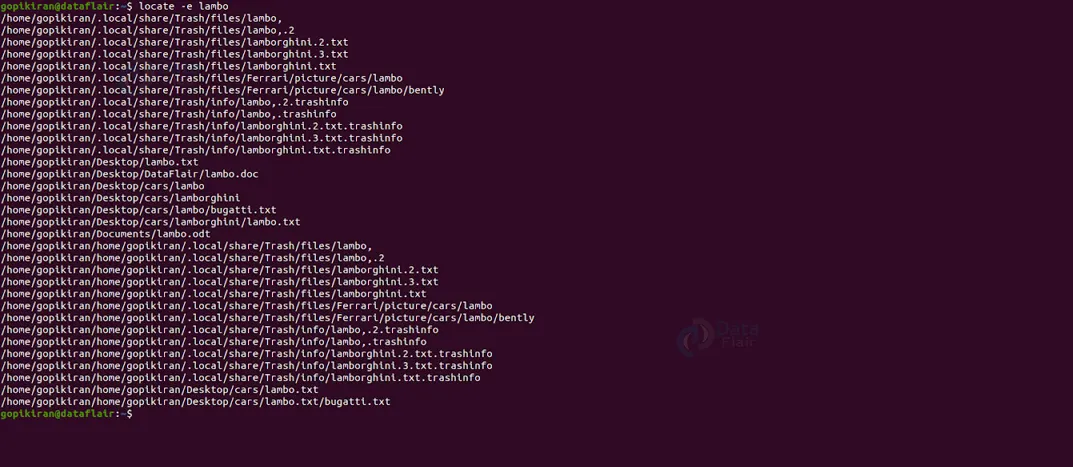
Even though you have updated the database of mlocate, the locate command will still print the results of files whose physical copies are deleted from the system. If you want to avoid printing the files not present on your machine at the time of punching in the command, use the option “-e” as shown:
locate -e <pattern>
Reviewing your database of mlocate
If you ever want to check the status of your mlocate database, you can easily view the locate database statistics by making use of the option “-S” as shown below:
locate -S

Printing all output entries in one line
Every time the locate command outputs the matching entries, it prints them in new separate lines, but if we want them all to be printed in only o line, use the option “-0” as shown:
locate -0 <pattern>

Suppressing error messages
When you try to constantly access your locate database, the locate command sometimes prints unnecessary error messages. They state that you do not have the appropriate privileges to have root access to the mlocate database, as you are just a regular user and not the root. To suppress these errors, use the option “-q.”

Choosing a different mlocate location
If you are inputting queries to look for results that are not present in the default database of mlocate and want answers from a different mlocate database located somewhere else in your system, use the option “-d” followed by the path of the database as shown in the syntax below:
locate -d <new database path> <pattern>
Using regex to search for multiple types of files
If you want to search for multiple files with different names or extensions, you can use the option “-r,” as shown in the syntax below:
locate --regex "(\<pattern1>|\<pattern2>)"

Ignore Diacritics and Accent Differences
The locate command uses only ordinary letters for matching, meaning you can’t search for file names that contain letters with diacritics. However, if you pair the locate command with the option “-t,” you can instruct the locate command to ignore the differences there in between letters and include diacritics in the results.
Summary
As you have seen, the locate command is a simple yet fast and powerful tool that finds files in your filesystem by searching through a database. You have now learned the locate command, why it is used, how it works, how to install it, and the syntax and options used with the locate command. You have also learned a few practical examples of the locate command in the terminal.
Your 15 seconds will encourage us to work even harder
Please share your happy experience on Google


