Gzip Command in Linux
Job-ready Online Courses: Click for Success - Start Now!
In this article, you will learn all there is to the gzip command in Linux. We will start right from what gzip is, why it is used and the file format related to gzip.
We shall also be going technical by looking at the syntax of the gzip command and discussing the various options used along with the output from the terminal. At the very end, we shall also be looking into a couple of practical examples of the gzip command in Linux.
What is Linux gzip?
Gzip is a command-line-based utility in Linux based operating system that helps compress a file or list of files in Linux. It is a very simple command that is very commonly used.
In windows, you have the ability to zip or compress files and folders into a single zip file. You can also unzip or decompress the zip files to access the contents in them. See the similarity? Gzip is to Linux what zip is to windows.
In windows, we know that the zip file had an extension of “.zip”, we also know that Linux is more powerful and better than windows, hence we get the opportunity of compressing files in Linux using gzip in either “.gz” or “.z”. Gzip also recognizes files with “.tgz”, “.taz”, “.tar.gz”, and “.tar.Z” extensions.
Gzip was created by Jean-loup Gailly and Mark Adler. Their program was the replacement for the ‘compress’ program, which was used in the early Unix systems. They released the first version under GNU GPL, making it open source. Version 0.1 of gzip was publicly released on the 31st of October 1992.
Linux Gzip vs Gunzip
Before we go any further, let us settle the difference between these 2 very common commands – Gzip and Gunzip. Both these commands are exactly the same from head to toe, with only one single difference.
The gzip command is used to zip files and the gunzip command is used to unzip files. It is that simple! If you want more information on the gunzip command, feel free to read my article on it.
What are the uses of the gzip command?
As we have seen, gzip is used to compress files in Linux based operating system. But why do we compress or decompress files? Let us look at the importance and uses of ‘zipped’ files.
Let’s get straight to the point, the very reason why we zip files is that zipped files take up way less storage space and can be transferred to other computers more quickly than uncompressed files making workflow efficient as we save a lot of time and storage using zip files.
Just think about it, sharing 1 big file is any day better than sharing hundreds of small files. The best part is, that this process is completely reversible, meaning that once the files are shared to another computer, the user can unzip the files and have full control over the file just like you.
Zip files are a boon when it comes to places where you can only send a limited amount of files, like mail, teams, and many more, instead of the single 10 file limit, you can simply attach 1 zip file, with a hundred files!
Syntax of linux gzip command
Before heading any further let us look at the syntax of the gzip command to prove a better understanding of the subsequent sections.
The syntax for using the gzip command is shown below:
gzip <options> <filename>
Let us take a closer look at the fields in the gzip command:
1. <options>
This field takes in a range of options that specify how the gzip command should function and print the output.
2. <filename>
This field takes in the name of the file you want to compress. You can also enter multiple filenames one after the other separated by a space if you want to compress multiple files.
Gzip file format
The gzip tool is based on the deflate algorithm which was intended as a replacement for LWZ and other data compression algorithms. The deflate algorithm is a combination of Huffman coding and LZ77. Gzip is also referred to as the gzip file format. Let us see what it is:
1. The gzip file format is a 10-byte header that contains a magic number, the compression method, a 4-byte timestamp, 1 byte of header flags, compression flags, and the ID of the operating system.
2. The file format also consists of optional extra headers as allowed by the header flags, including the original filename, the lower half of a CRC-32 checksum for the header section, an ‘extra’ field, and a comment field
3. Gzip is a body, which contains a DEFLATE-compressed payload.
4. Gzip is an 8-byte footer, containing the length of the original uncompressed data and a CRC-32 checksum.
Gzip is mostly used to compress just single files. The final compressed file mostly typically has the ‘.tar.gz’ or ‘.tgz’ extensions.
Gzip vs Zip
Before we look at the options of the gzip command, let us settle another difference between 2 very similar commands – gzip and zip. This time, these 2 have a lot of differences but have 1 similarity – compressing files. Let us look at some of the differences between them:
1. Gzip is much better than zip in terms of compression, especially when compressing a huge number of files.
2. In gzip, we archive all the files into a single tarball before compression. However, in zip, the individual files are compressed and then added to the archive.
3. Gzip takes a lot longer time than zip.
4. When you are pulling a single file using the zip command, it is simply extracted, then decompressed, but with the gzip command the whole file needs to be decompressed before extracting the file you want from the archive.
5. The reason gzip is better than zip in compression is if you archive and compress 10 identical files with ZIP and GZIP, the ZIP file would be over 10 times bigger than the resulting GZIP file!
Options used with Linux gzip command
We can use different options in the syntax of the gzip command to specify the way the output or compression of a file happens. Let us look at some of the most commonly used options:
1. -a
This option converts end-of-lines using local conventions. This command can also be written as ‘–ascii’. Please note that this option is supported only on some non-Unix systems.
2. -c
This option writes output on standard output. It keeps original files unchanged.
3. -d
This command decompressed the files. It can also be written as ‘–decompress’ or ‘–uncompress’
4. -f
This command forces decompression even if the file has multiple links or the corresponding file already exists, or if the compressed data is read from or written to a terminal. This command can also be written as “–force”
5. -L
This option displays the information about the gzip license.
6. -n
This option does not save the original file name and timestamp when decompressing it.
7. -N
This option is the exact opposite of the option ‘-n’, it saves the original file name and timestamp when decompressing it.
8. -q
This option suppresses all the warnings.
9. -r
This option ravel the directory structure recursively. If it finds any of the file names specified on the terminal are directories, gzip will go into the directory and uncompress all the files in it.
10. -S
This option uses the suffix ‘.suf’, instead of ‘.gz’ when decompressing.
11. -t
This option performs a test by checking the integrity of the decompressed file.
12. -v
This option provides a verbose to give a better understanding of what is happening.
13. -V
This option displays the information about the version of gzip you are using.
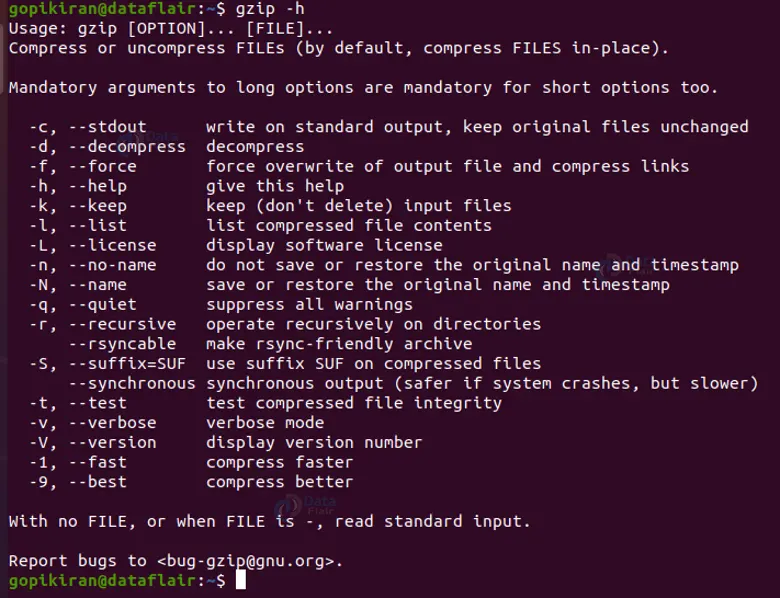
14. -h
This option displays the help menu, with the different options. If at all you get stuck anywhere anytime using the gzip command, just type the command “gzip -h” or “gzip –help”
Now that you have known the basic information of gzip and have also gone through the syntax and different options used. Let us now use this information to look into some of the practical examples of the gzip command in the terminal.
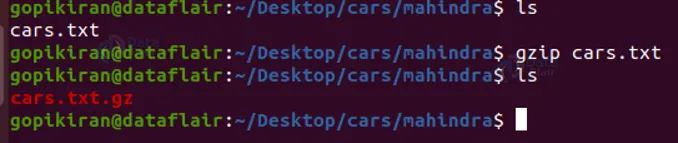
Compressing a file using the gzip command
To compress a file, use the command:
gzip <filname.gz>
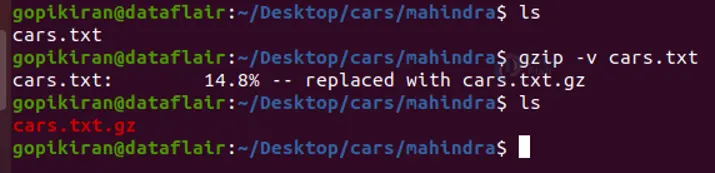
Providing verbose while decompressing
In the above output, there is absolutely no proof of checking if the file has been decompressed or not, except if we type the ‘ls’ command and check the extension. It would be really helpful if we have some verbose, thankfully we can by using the option ‘-v’.
gzip -v <filename>
Forcing gzip to decompress a file
To force the decompressing of the file, use the option ‘-f’ like this:
gzip -f <filename.gz>
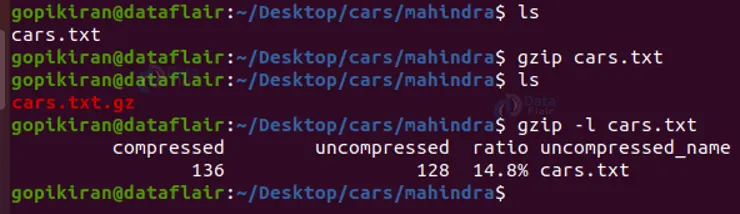
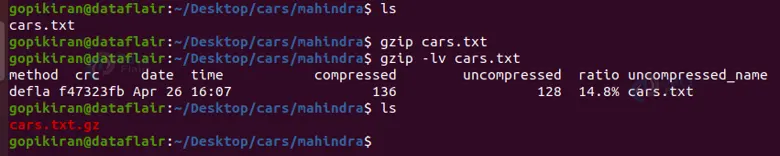
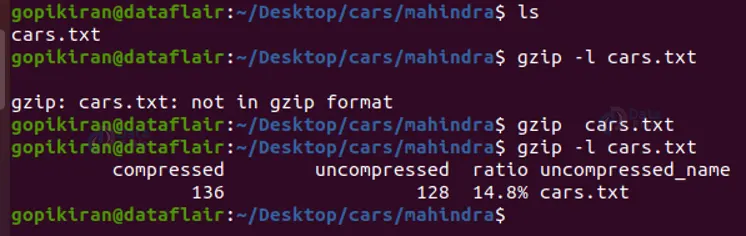
Listing the contents of the compressed file
If you want the terminal to show you information about the compressed file, you can use the option ‘-l’. Note that this command will not decompress the file, but only show you the contents.
gzip -l <filename>
If the data shown in the above output is not enough, you could always ask for even more verbose by using the option ‘-v’ as shown:
gzip -v (filename.gz)
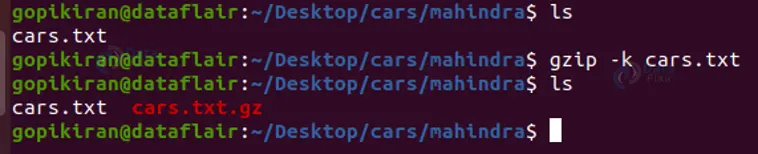
Keeping both original and compressed files.
If you wish to keep the original file even after compressing it, you can do it by using the option ‘-k’ as shown:
gzip -k (filename.gz)
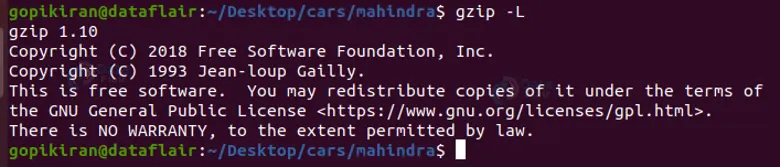
Displaying License of gzip
Use the option ‘-L’ to display the license information of gzip as shown below
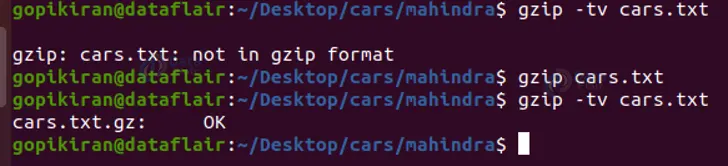
Testing if a file is valid or not
To test if a file is valid for decompression or not, use the option ‘-t’
Viewing information about a file
To get information about either the compressed or uncompressed file, use the option “-l” as shown:
gzip -l <filename.gz>
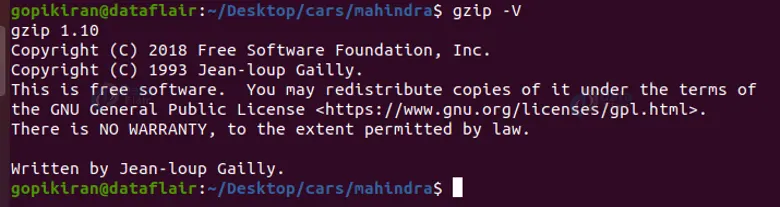
Viewing the version of gzip
To display information about the version of gzip, use the option “-V” as shown:
gzip -V
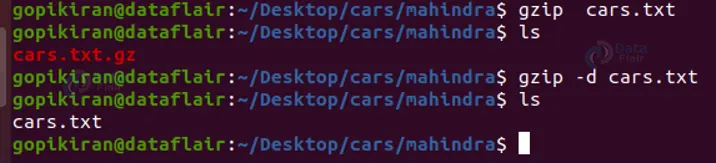
Decompressing using gzip!
We saw that the gzip command is for compressing and the gunzip command is for decompressing, but, we can also turn to gzip into gunzip using the option “-d”! This means that now you can decompress a compressed file using gzip!
Gzip -d <filename>
Recursively compressing
Using the option “-r”, we can compress every file in a folder and its subfolders. The command “gzip -r <foldername>” traverses the directory structure and compresses each file in the folder you specified.
Changing compression level
The numbers between “-1” and “-9” allow us to change the compression level of a file. For example, you can go for a smaller compression which will work faster by using the option “-1” or you can go for maximum compression which takes longer to run by using the option “-9”.

Compressing multiple files at once
To compress multiple files at once, specify the names of the file one after the other separated by as spaces as shown:
gzip <file1> <file2> <file3>

Creating and compressing a directory
Just like we compress regular files, we can also compress directories by simply writing the name of the directory in place of the filename. Just to take think slightly up a notch, let us create and compress a directory in just one command. To do so use the syntax shown below:
tar cf - <directory> | gzip > <directory>
In the above command, we are creating a directory using the “tar command” and then piping it to the gzip command to compress it.
Using standard input
If you want to create a .gz file from the stdin, pipe the output of the command to gzip.
mysqldump database_name | gzip -c > database_name.sql.gz
Summary
As you have seen, the gzip command is a really simple tool that helps in the efficiency of workflow. The simple process of compressing a file or directory with just a simple command is simply god sent! The way we can use gzip with the many options it comes with makes the process of compressing files so much easier.
You have now learned what gzip is, the different uses of it, and how the tool works. We have also gone deep to understand the file format of gzip along with the syntax and different options used with the command. In the end, we have also looked at some practical examples of decompressing files.
Did we exceed your expectations?
If Yes, share your valuable feedback on Google


