File Management in Linux
Job-ready Online Courses: Click for Success - Start Now!
By the end of this article, you will become a pro at managing files through the terminal in Linux. Yes, you read that right, we are going to learn file management system in Linux. We will be going through various linux file management commands like PWD, cd, cat, ls, rm, mv, cp and so many more. So buckle up and read right to the end with full attention.
Managing files through the terminal
We all know that there are 2 ways to do almost anything in Linux, one is the GUI and the other is the terminal. we also know that the command line or the terminal is what makes Linux stand out. To sum up the terminal in one sentence: it is a lean mean coding machine.
The Terminal is all about efficiency and productivity rather than the GIU where you have to click many buttons and navigate through different items. However, in the terminal, there are no extra Clicks on nicks!
Just like in every other operating system like Windows and Mac OS we can control and manage files like creating, removing deleting, copying, cutting, and pasting using the GUI.
Since Linux is all about unorthodox methods, let us look into how to manage files using the terminal using various different commands like PWD ( present working directory), Cat ( concatenate), ls ( listing), cp ( copying), rm dir ( remove directory), mk dir ( make directory) and so many other.
Linux file system
Before we take a look into the different commands I mention area for managing the file system. Let’s take a moment and have an overview of the main file types in the Linux file system.
1. Linux Regular files
This type is the most common file type in the Linux file system. regular files contain program instructions human-readable text and ASCII characters.
Some examples of regular files are simple text files PDF files zipped or compressed files binary files or other files like “.png”,”.mp4”, “jpeg”, “.gif”, and many more.
2. Linux Special files
Special files are the files that represent physical devices for any input and output devices like printers, CD drives, keyboards, mice, etc.
3. Linux Directories
directory basically means folder and works just like the folders that are present in the Windows operating system. a directory is a special type of file that stores both regular and special files in a hierarchical order. this hierarchy starts from the root directory which is denoted by a slash (/).
let us take a look at the hierarchy of the directories in the Linux file system. if I navigate to the root directory using the “cd ..” command (which we will learn later) and use the LS command (which we shall learn later) to list the directories in the root directory I will get the following output:

All of the files that are in dark blue are the already prepackaged directories, and the directories shown in other different colors are the directories I created later on. Let us understand what each directory is and its usage.
1. The “root” directory is the home directory for the root user
2. that “/dev” directory contains the device files such as /dev/sda
3. the “/boot” directory contains static boot files
4. The “/usr” directory contains the application and user utilities
5. “/var” directory contains the log files of various system applications
6. The “/etc” directory contains all system configuration files
7. The “/home” directory contains user folders like the desktop and music
8. “/opt” directory contains add-on application packages
9. The “/media” contains files for removable devices such as CD drivers
10. The “/proc” directory holds information on currently running processes
11. “/bin” directory contains the user command binary files
12. The “/lib” directory contains shared library images and kernel modules
13. The “/mnt” directory contains subdirectories that act as temporary Mount points for mounting devices such as cd-roms
Now that you have proper knowledge of the Linux file system, let us now see and explore the commands for managing files in Linux.
In this article, I am using the Ubuntu 20.04 operating system. nonetheless, all of the commands in this article are standard in all distributions of Linux and come pre-installed so there is no hassle in installing them
Linux PWD command
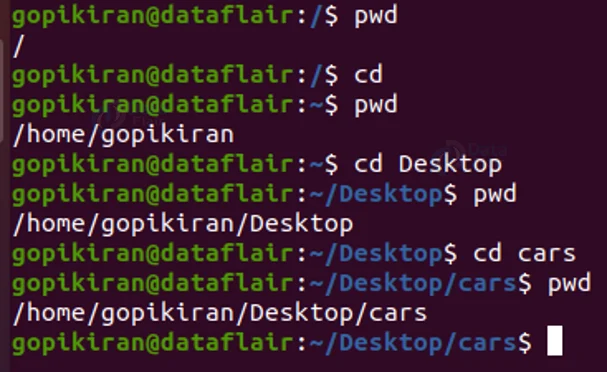
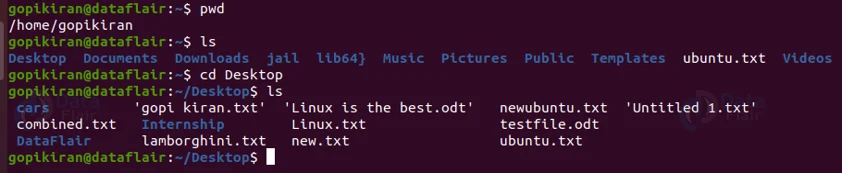
The PWD command is an abbreviation for “Present Working Directory”. This command is very straightforward and simple, it prints out the path of your current directory, starting all the way from the root directory.
The PWD command is so simple, that it does not have any other variations or options!
Linux CD command
The “cd” command is used to navigate through the files. Just like in GUI, you press the directory you want to go, cd does the same, but in the terminal. The cd command is the abbreviation for ‘Change Directory’.
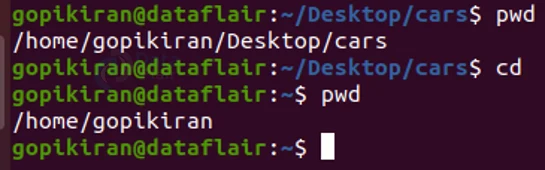
If you simply type ‘cd’, you will go back to the home directory, no matter where you are.
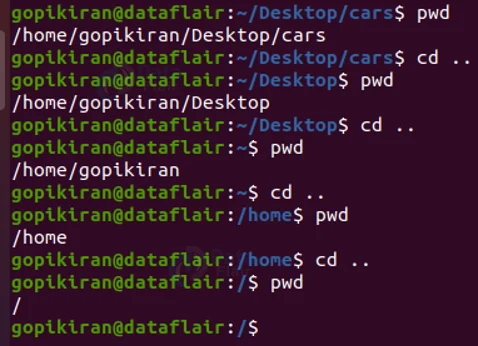
If you press “cd ..”, this command will take you to the previous directory or parent directory. You can go all the way back to the root directory using this command.
Ok, we have seen how to go to the home directory and how to go back, but how do you go forward, well once you are in a directory, you can simply type the command “cd <subdirectory>”. This command will take you to the subdirectory you have specified.

If you look at the above method of going to the directory ‘cars’ from the root directory, it is a very long process, I had to use the cd command 4 times. The previous method was on par with the GUI, where you go to the directory and press on the subdirectory.
However, remember when I said the terminal is all about efficiency? Well, there is a way you can even go 100 directories deep from the home directory just by using 1 single cd command! You can do so by using the following syntax: “cd <directory path>” If you specify the path of the directory to cd, it will take you directly there with no additional stops in between.
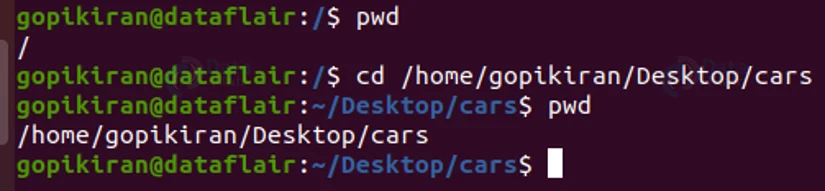
Take that GUI!!
Linux LS command
Ok, now you can check your present working directory and navigate through the files. But what if you need to list out the files or subdirectories present in a directory? That is exactly where the ls command comes to help. The ls command stands for “list”
To list the contents of a directory, you can simply use the ls command:
But this is too cheap and simple for the terminal and ls command to hand, their simple goal is to be better than the GUI, and that is exactly where the different options of the ls command come into the picture.
We can use various options to specify the output. Let us look at the options used with the ls command:
1. -a
This option enlists the entire list of the current directory including the hidden files.

2. ~
This option lists the contents of the home directory, irrespective of your present working directory.

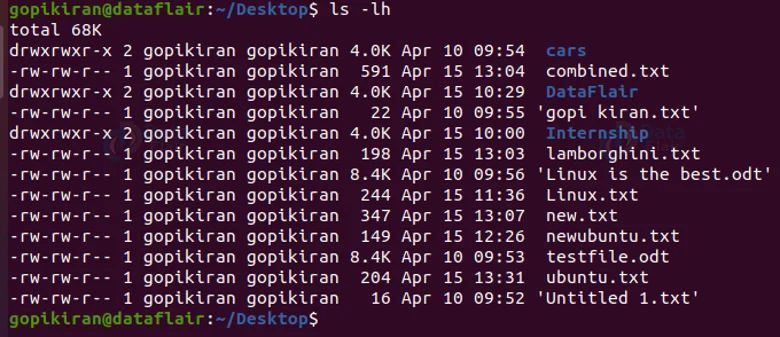
3. -lh
This option will show you the file sizes in a human-readable format. By default the ls command will show the size of files in bytes, which is very hard to understand, Hence we use the option “-h” to print the sizes in Megabytes.
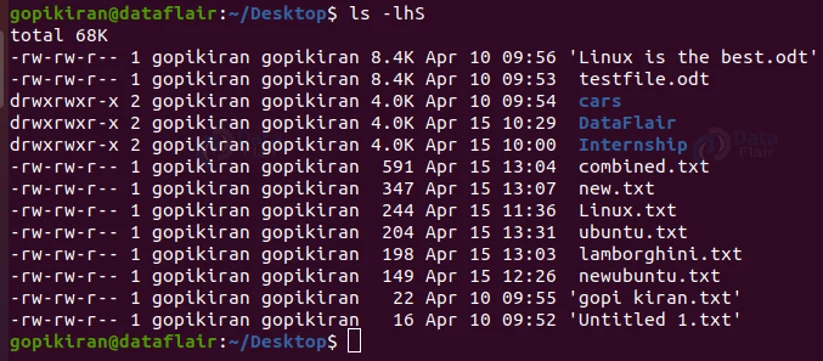
4. -lhS
This option displays the file in descending order of their size.
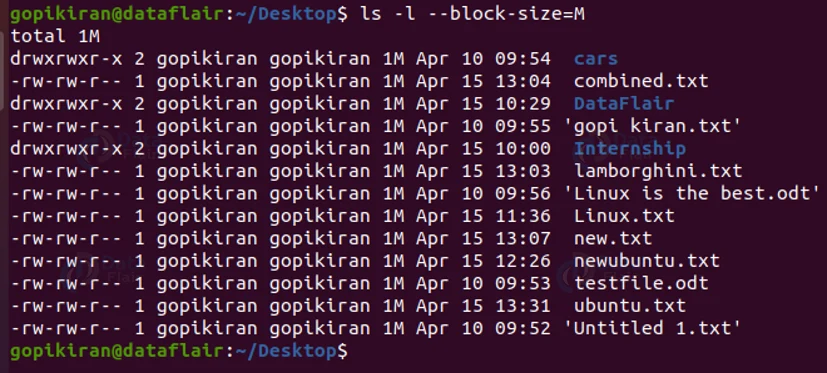
5. -l – -block- size=<size>
This option displays the files in a specific size format.
6. -d*/
This option displays only the subdirectories and not the regular files.

7. -m
This option prints out the directories and files separated by a comma.

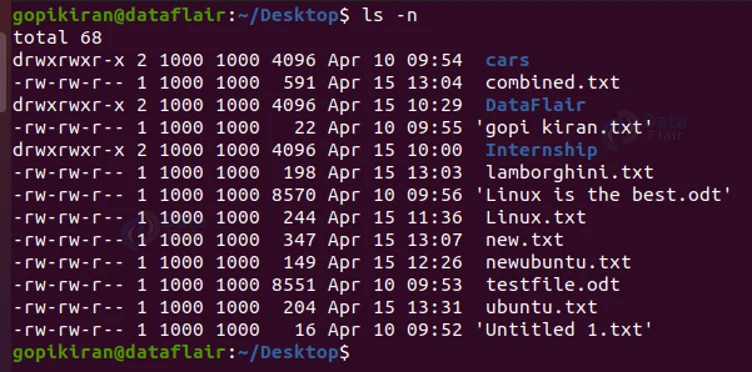
8. -n
This option prints the group ID and owner ID instead of their names.
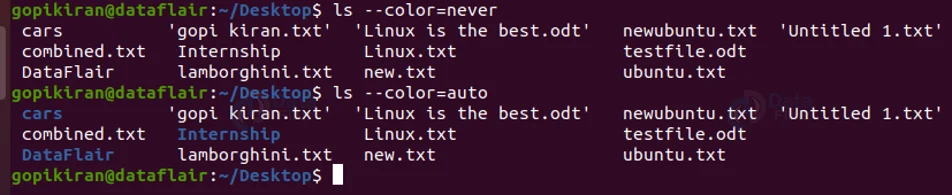
9. –color <value>
This option prints the list as colored or discolored
10. -p
This option identifies the directories easily by marking the directories with a slash sign.

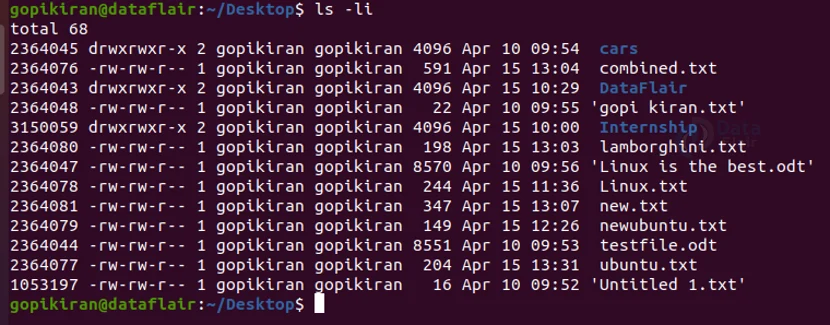
11. -li
This option prints the index number if the file system is the file is displayed in the first column.
12. -r
This option prints the list in reverse order.

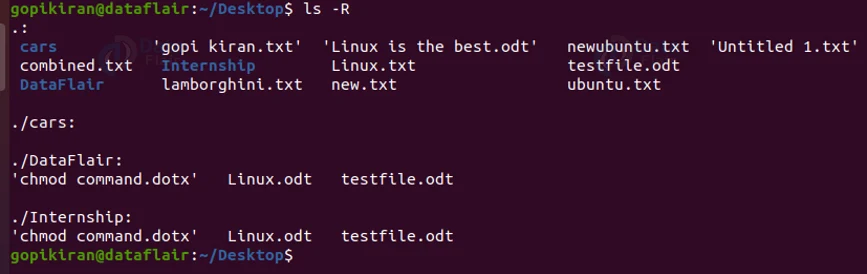
13. -R
This option displays the content of the sub-directories also.
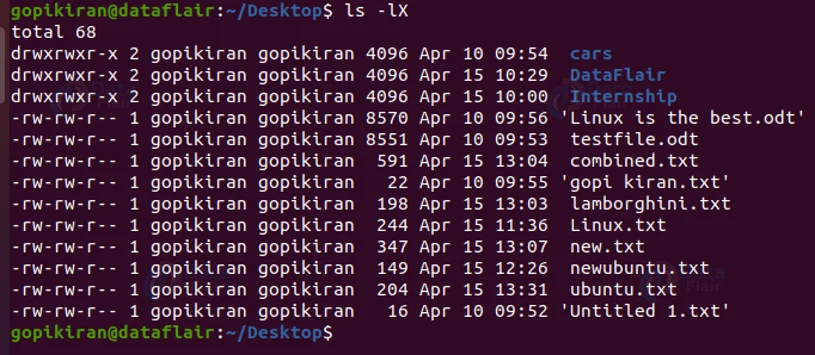
14. -lX
This option groups the files with the same extensions together in the list.
15. -Q
This option adds quotation marks to all directories and files.

16. -l
This option shows the list in a long list format

17. ../
This option lists the contents of the parent directory
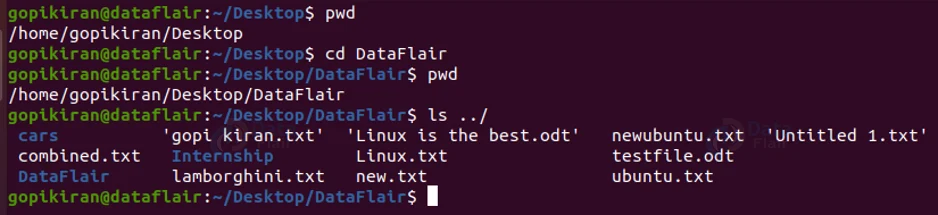
In the above output, even though I moved to the directory “DataFlair”, using the command “ls ../” printed the content of the “Desktop” directory, which is the parent directory of the “DataFlair” directory.
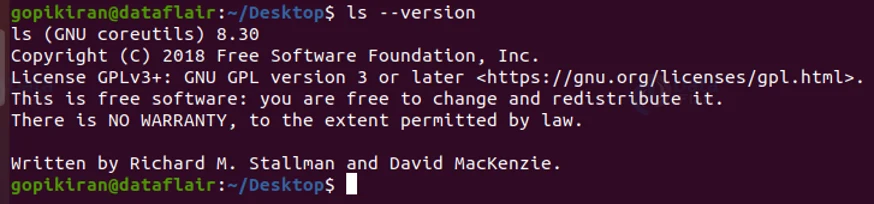
18. –version
This option prints information about the version of ls you are using.
19. –help
This option prints out all of the commands and information regarding them
20. -g
This option displays the files excluding the column of information regarding the group and user.

21. -lt
This option sorts the list by displaying the recently modified field at the top.

22. /
This option lists the files in the root directory

23. *
This option lists the contents of the directory along with its subdirectories. It is exactly the same as the option “-R”
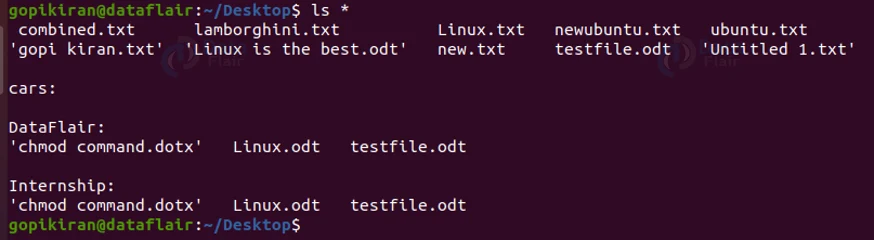
Take that GUI!!
If at all you feel lost while using these commands and need help, you can use the command “ls -h” to display the help menu.
Linux Touch command
Now that you can list the contents of a file, can you make one? Who said you can’t? Using the touch command, you can create any file (remember, file and not a directory) by simply using the following syntax:
touch <filname>
For example, the command “touch ubuntu.txt” will create a text file with the name ubuntu. You can create any type of file using the touch command, like “.odt”, “.doc”, “.ott”. “.html”, “.sh”, “.xml”, “.c”, “fodt”, “.uot”, “.rtf”, “.dot” and many more.

After creating the file, you can use the ls command to verify if it has been created successfully.
Linux CAT command
So you have created your file and now you need to open it and write something down. How are you going to do it? Use the GUI? NOPE! NEVER! We use the cat command. The cat command is an abbreviation of concatenate.
The cat command is a command-line-based utility that helps in many tasks like reading files, writing in files, viewing the content of files, concatenating files, redirecting output in the terminal and so many more things.
If you simply use the cat command, using the syntax “cat <filename>”, it will only display the contents of a file. If the file is empty and has no content, it will show nothing:

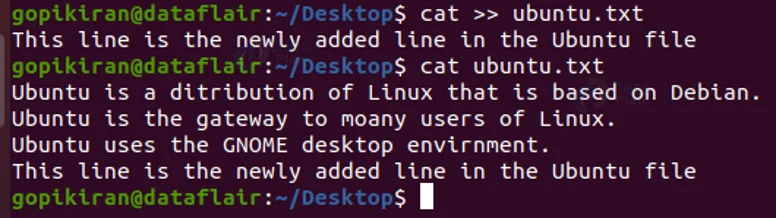
So how do you write in the file using the cat command? If you want to add some new lines or write in an already existing file, you can do so by using the syntax: cat >> <filename>

Once you finish writing and want to save your work, press “ctrl” + ‘“d”. Now you can use the simple cat command to check if your work has been successfully saved or not.

And voila created and saved! But wait, that is not the only feature of the cat command, it has so many other features too. You can directly create a file and start writing in it, instead of just creating a file using the touch command! Let us look at some of the features of the cat command.
Creating a file with the cat command
If you want to create a file using cat straight in the terminal and not using the GUI, you can do it by using the syntax:
cat ><filename>

Once you enter the command, the cursor will go to the next line and wait for your input. You can enter what you choose to write in the file you just created.

After you finish writing, you can press “ctrl” + “d” to save your work in the file you just created.
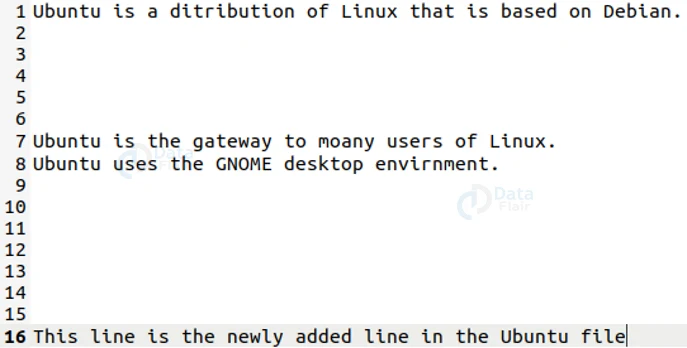
Displaying line numbers
If you want to display the line number of the content in a file, you can do so by using the option “-n” like this:
cat -n <filename>

Displaying the tab-separated lines
To display or highlight the tab spaces in the file with “^I”, use the option “-T” like this: cat -T <filename>

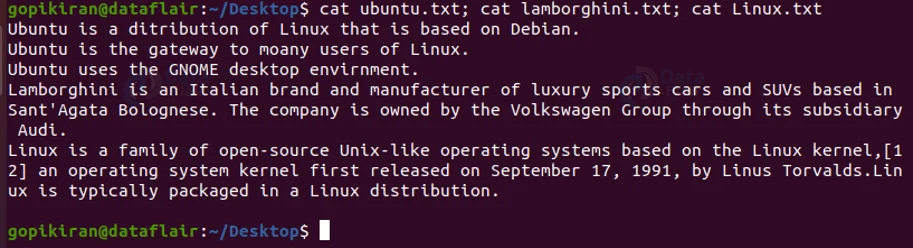
Displaying multiple files at once
Another way to show the contents of multiple files is to cat each of them individually such that they are separated by a semicolon. Use the following syntax: cat <file1>; cat <file2>; cat <file3> and so on
Using the redirecting operator
If you want to write the contents of a specific file to another file (new or existing), you can do so by using the redirection operator (>) in the syntax: cat <old file> > <new file>
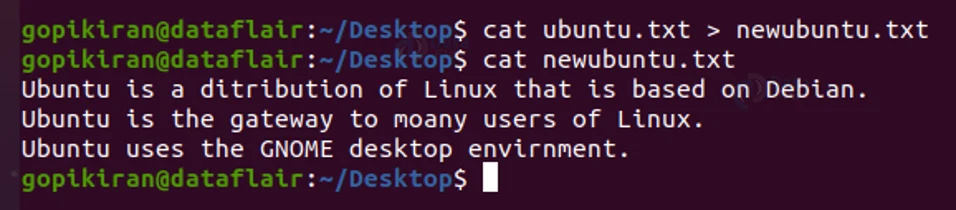
If you enter the name of an already existing file and it already had contents in it, cat will override them with no warning, so choose the file name carefully
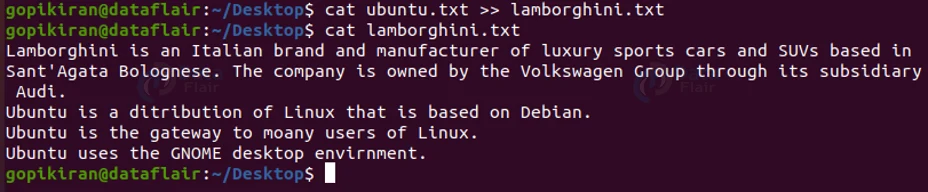
Appending with redirecting operator
If you want to append the content of 1 file to the contents of another existing file, you can do so by using the “>>” symbol like this:
cat <file 1> >> <file2>
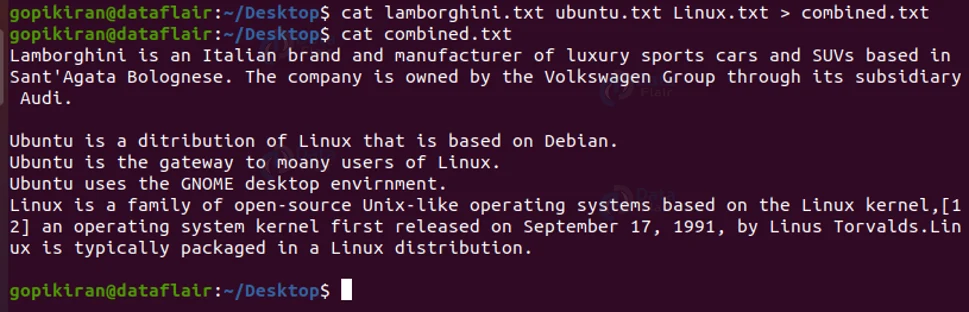
Redirecting multiple files
If you want to combine more than 1 file together in a single new file, you can do it by using the redirecting operator like this:
cat <file 1> <file 2> <file 3> <file 4> > <new file>
This command will copy all the files (file 1, file 2, file 3, and file4) into the new file.
Writing in an already existing file
If you want to add some new lines or write in an already existing file, you can do so by using the syntax:
cat >> <filename>
Once you finish writing the text and want to save and exit, press “ctrl” + “D”
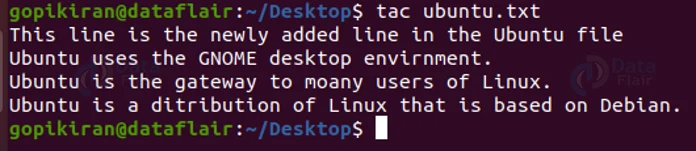
Displaying content in reverse order
To display the contents of a file in reverse order, use the syntax:
tac <filename>
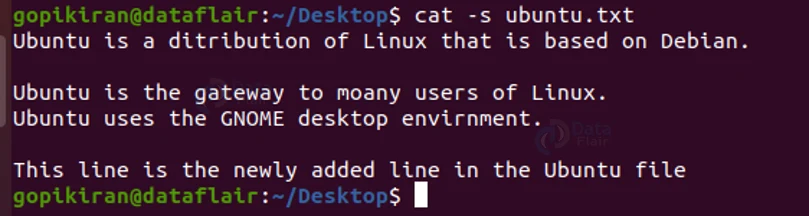
Suppressing empty line
If you don’t want the empty lines in your file to be shown in your output, you can suppress them by using the “-s” option like this: cat -s <file name>
Once again, if you feel lost about any of the options used with the cat command, you can always type the command “cat -h” to print out the help menu or “man cat” to display the entire manual of the cat command.
Linux MV command
Now that you have created your file, say you have created it in the wrong directory, and now have to move it to some other location. This is where the mv command comes to help. The mv command is the abbreviation for Move.
The mv command is really efficient and powerful, yet remains simple. You can not only move files from one location to another but also rename them.
To move a file from 1 location to another, you use the following syntax:
mv <filename> <destination path>
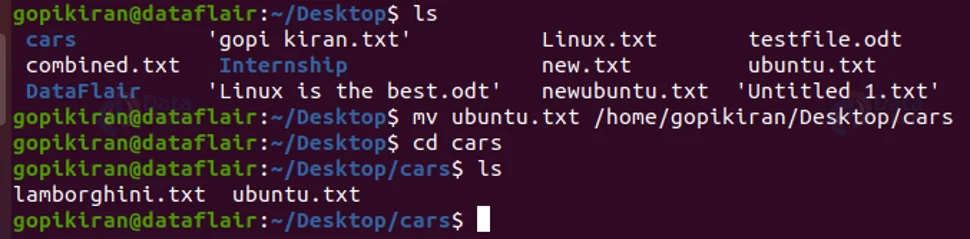
In the above output, I have moved the file “ubuntu.txt” to the subdirectory “cars” from the Desktop.
In the above example, I had was in the directory of the file that had to be moved. Let us try doing the reverse, moving the file to the directory I am in.
To do that, you have to follow the following syntax:
mv <path of file>
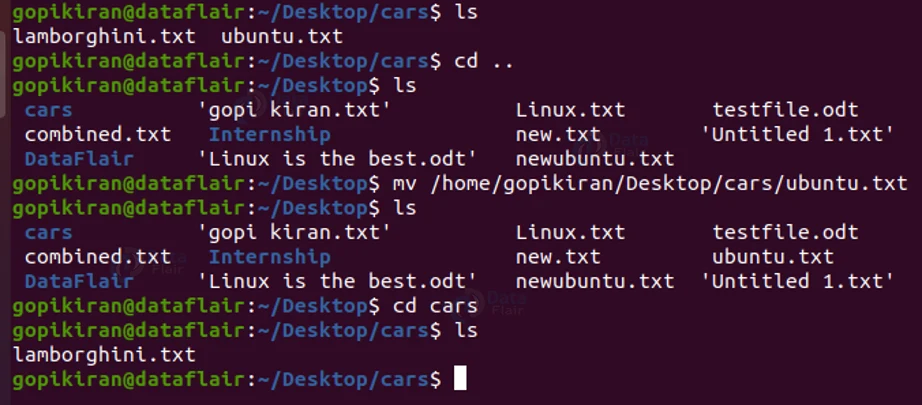
In the above output, the file “ubuntu.txt” has been moved from the subdirectory “cars” to Desktop, with me being in the Desktop directory and not directory “cars”
What if you want to rename the file? To rename a file using the mv command, use the following syntax:
mv <oldname> <newname>
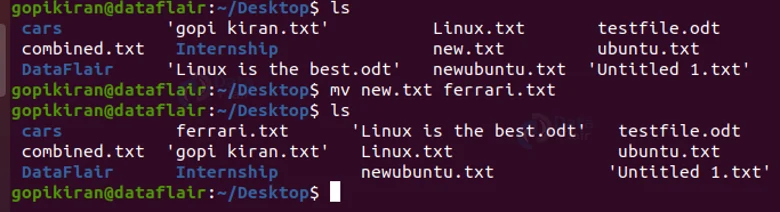
In the above output, I have renamed the file “new.txt” to “ferrari.txt”.
If you want even more efficiency, you can even move and rename a file at the same time in 1 single command! To do so, use the following syntax:
mv <oldname> <path of new location> <new name>
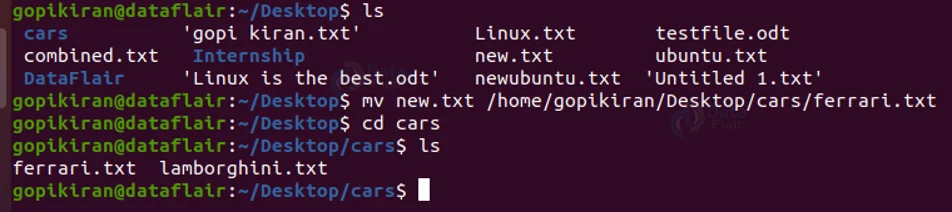
In the above output, I renamed the file “new.txt” to “ferrari.txt” and moved it to the subdirectory “cars” just using 1 single command.
Tell me, if you had to do the above example, how many clicks would it have taken, first renaming, then pressing “ctrl” + “x” and then go the specific directory and then press “ctrl” + “v”. See? that is exactly why the terminal is God tier!
Linux CP command
Not only you just moving the files from one location to another using the terminal, but you can also copy files from one directory to another. In fact in the GUI, once you copy, you even have to paste it back. But in the terminal, the cp command does the pasting job.
The cp command is very powerful and efficient as you can copy 1 file into another, many files into 1 directory, and also 1 directory into another directory. Let us look into the syntax along with an example for each of the above-mentioned tasks
1. Copying a file to another file (2 file names)
As we have seen, to copy the contents of 1 source file to a destination file we need only 2 files names:
cp <options> <source file> <destination file>

2. Copying one or more files to a directory (More than one argument)
to copy the contents of multiple source files to a destination file, we need to enter the names of the multiple files followed by the destination directory:
cp <options><source file1><source file2> < destination directory>
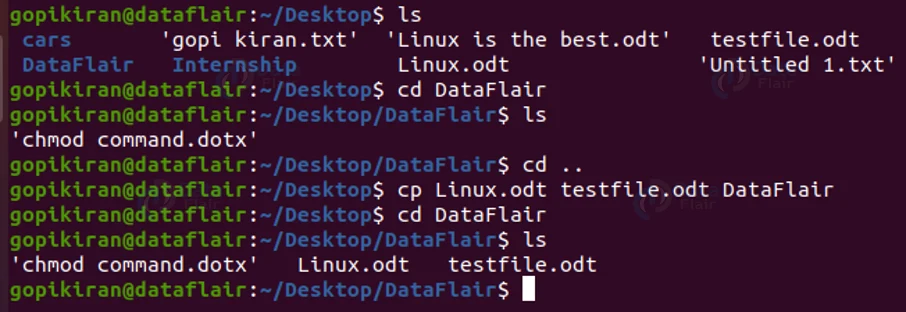
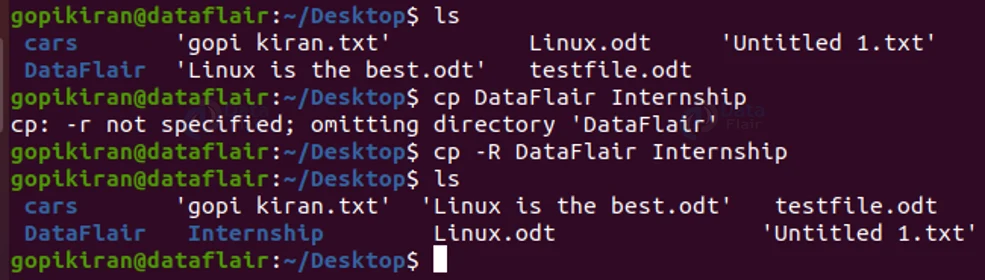
3. Copying entire directories into a directory (2 directory names)
to copy the contents of a source directory to a destination directory, we need to enter the names of the source and destination directories:
cp -R <source directory> <destination directory>
You must note that if the destination file or directory does not exist, the cp command will automatically create it for you. However, if it already exists, it will overwrite the contents. Hence you must select the name of the destination with care.
Here are 2 precautions you can take to avoid overwriting while copying data
1. Asking before overwriting
If you are not sure, if the destination file exists already and has contents you feel are important, you can make cp to prompt you to allow overwriting or not by using the option “-i”.

2. Completely Avoid overwriting
If you completely want to avoid overwriting and don’t want to overwrite the existing files, use the option “-n”.

Linux MKDIR command
We learned how to create file, it is only fair to learn how to make directories too. To make directories we use the mkdir command with the following syntax:
mkdir <name of directory>
The mkdir command is an abbreviation for Make Directory.
To make a directory in a specific parent directory, you must first be there.

If you feel lazy to go to that specific directory to create a subdirectory in it, you can create a directory anywhere, just by writing its path, no matter where you are (on the computer).

In the above output, I created the directory “BMW_pictures” in the path “/home/gopikiran/Desktop/cars” even though I was in the path “/home/gopikiran/Desktop/DataFlair” (different directories).
Linux RMDIR command
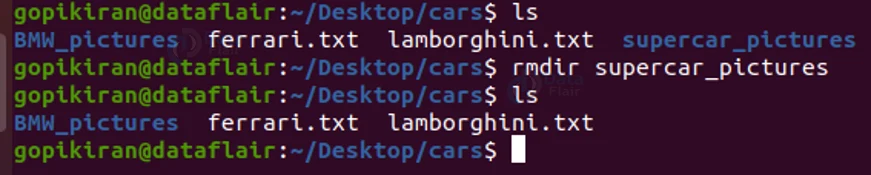
Need to remove a created directory, rmdir does just that. Rmdir is the abbreviation for Remove Directory. It functions exactly like the mkdir command.
If you simply used the syntax: rmdir <directory name>, you will remove the directory with that specific name, only if it is there in the directory you are currently in.
If you use the syntax: rmdir <path of directory>, you will remove that specified directory regardless of which directory you are currently in.

In the above output, I removed the directory “BMW_pictures” in the path “/home/gopikiran/Desktop/cars” even though I was in the path “/home/gopikiran/Desktop/DataFlair” (different directories).
Linux RM command
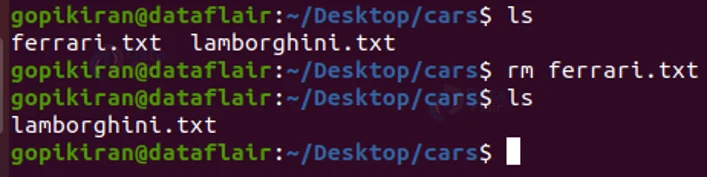
The rm command is the rmdir command on steroids. The rmdir command can perform actions only on directories, whereas the rm command can perform actions on both files and directories. Rm stands for Remove.
To remove a file use the syntax:
“rm <filename>”
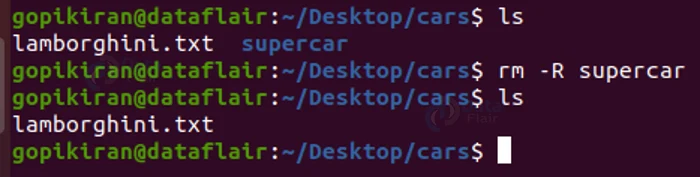
To delete a directory use the syntax: “rm -R <directory name>” The option “-R” means recursively.
Linux FIND and LOCATE commands
The last thing you need to know to become a pro in managing your files using the terminal in Linux is the find the files or directories you have created. That is exactly what the commands find and located do. First, let us take the case of the find command
Linux find command
The find command searches for a file in a particular location. It takes two arguments: the search path or directory and the file to be searched. The syntax of the find command is:
“find <path> -name <file or directoryname>”

Linux locate command
The find command is very similar to the find command, except locate only takes 1 argument: the filename
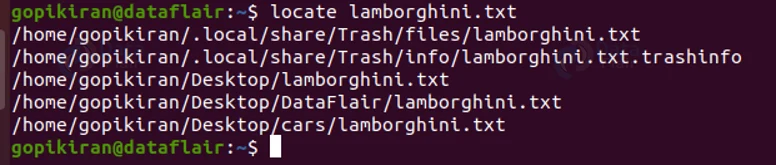
The locate command searches the entire system for that file or directory you specified. The locate command is much faster than the find command, but the find command is much more powerful because it works in situations where the locate command fails to give desirable results.
Linux wc command
Here is a bonus command for sticking around till the end: The wc command is a very handy and powerful tool that helps in the process of counting the lines, words, and characters in a file. The wc command is usually used by piping it to some main command.
By default, the wc command prints the number of lines, number of characters, and the number of words one after the other separated by a space
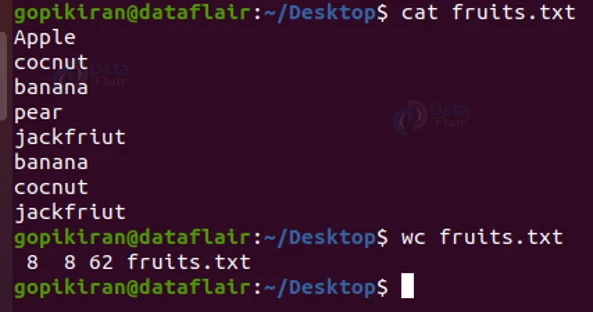
In the above output, there are 8 words, 8 lines and 62 characters.
Remember when I told that the wc command was powerful? Well, it can even tell you the count of lines, words and characters in multiple files.

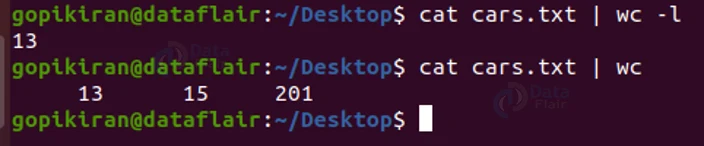
You can also use the wc command by piping it, here’s an example:
Let us look at some of the options that are used with the wc command:
1. -c
This option prints the count of the bytes.
2. -m
This option prints the count so the characters.
3. -l
This option prints the count of the lines.
4. -w
This option prints the count of the words.
5. -L
This option prints the maximum display width.
Metacharacters or wildcards in Linux
Just like In the card game ‘UNO’, the wildcard takes any card you want it to be, Linux also has a wildcard that is denoted by an asterisk. These wildcards are technically called metacharacters.
You can use these when you are targeting a large group of files. For example, if you want to operate some command on all the ‘.txt’ files in a ‘specific directory, it would be time-consuming to list every single ‘.txt’ file (that is even if you remember them) instead, you can use the wildcard to target all the ‘.txt’ files by using the wild cars as shown “*.txt”.
You can also use metacharacters to target a specific name. For example, if you want to target all the files starting with “Ubuntu”, you can use the wildcard as shown: “Ubuntu.*”, this will select all types of files with names starting with “Ubuntu”.
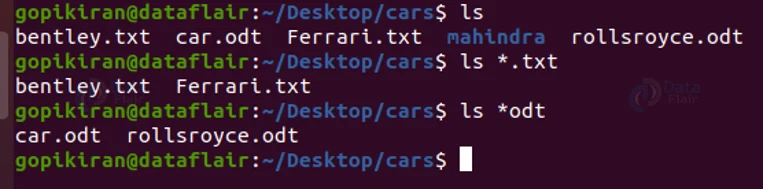
In the above output, I have listed only “.txt” files and “.odt” files separately by using the wildcard (*).
Summary
As you have seen linux file management system and managing files and directories is much more efficient and simple using the terminal than the GUI. You have now learned how to manage files using the following commands: pwd, cd, ls, cat, mv, cp, mkdir, rmdir, rm, find and locate.
We work very hard to provide you quality material
Could you take 15 seconds and share your happy experience on Google


