Cut Command in Linux
Placement-ready Online Courses: Your Passport to Excellence - Start Now
In this article, we will learn everything about the cut command in Linux. We will look at what the cut command is, its uses, the syntax of the cut command, and the options used with it. In the end, we will also look at some practical examples of the cut command in the terminal by pairing it with many options. So pay attention, take notes and make it to the end of the article.
What is the cut command in Linux?
The cut is a command-line-based utility in Linux-based operating systems that allows you to cut parts of lines from specified files or piped data and print the result to standard output. The cut command can also be used to cut parts of a line by delimiter, byte position, and character.
Every system user will know three basic tasks – copy, cut, and paste. The cut (“Ctrl” + “x”) command is a frequently used command in day-to-day operations like doing articles, typing, searching, and much more. However, the cut command in the terminal of the Linux-based operating systems is slightly different, or should I say that it is way better?
To explain the cut command in a nutshell, it slices a line and extracts the text. However, its functioning and features are not that simple. Therefore, we can combine the cut command with various options that specify how it should function and format the output.
Syntax of Linux cut command
The syntax of the cut command is extremely simple. Take a look for yourself-
cut <options> <filename>
Let us look at the fields present in the syntax of the cut command:
1. <options>
This field takes in a range of options that specify how the cut command must function, format, and print the output. It is essential for you to enter at least one option in this field, as the cut command produces an error message if you try to run it without any options.
2. <filename>
This is the field where you specify the file name on whose content you want to perform the cut command. If you don’t enter a filename in this field, the cut command expects a standard input, which means cut filters the pipeline. You can also enter multiple filenames in this field.
Options used with Linux cut command
Unlike most of the commands in Linux, the cut command has only a few options associated with it. Let us take a brief look at each one of them:
1. -b
This option selects only the bytes from each line as specified by you. You can either specify a set of bytes or a range of bytes. You can also write this option as “–bytes.”
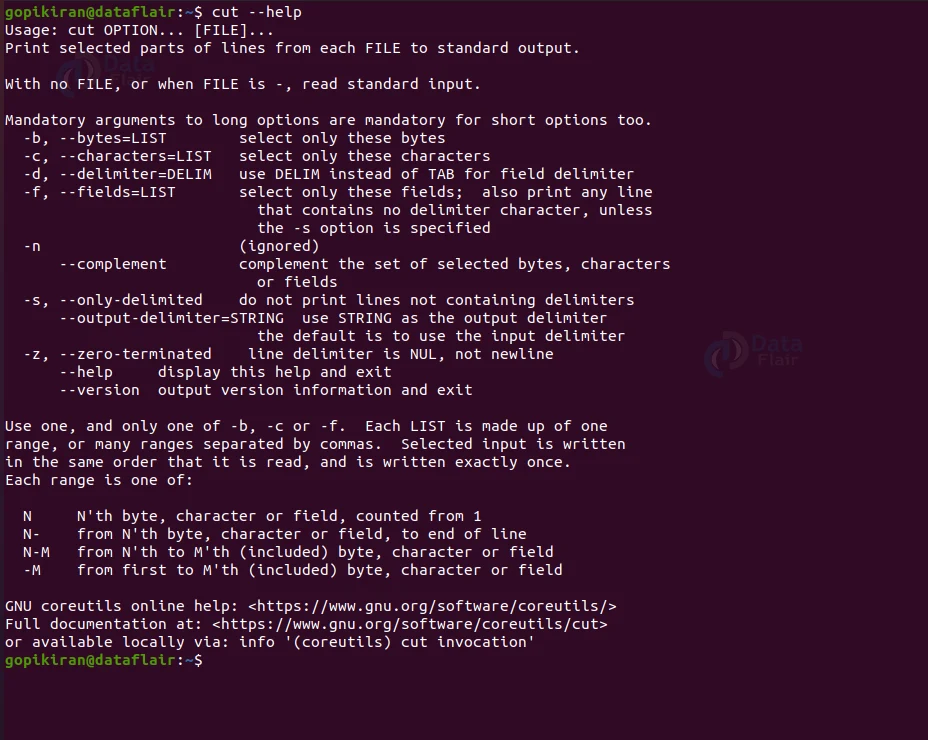
2. –help
this option displays the help menu of the cut command, as shown below:
3. -d
This option uses the delimiter you specified instead of a tab for the field delimiter. You can also write this option as “–delimiter.”
4. -s
This option does not print lines that do not contain delimiters. You can also write this option as “–only-delimited.”
5. -f
This option selects only the fields you specify on each line. If you don’t specify the option “-s”, it will also print lines that do not contain delimiters. You can either specify a set of fields or a range of fields. You can also write this option as “–fields.”
6. -n
This option is ignored by the cut command. Then why is it added? Well, it is included for compatibility reasons.
7. –complement
This option complements the set of selected bytes, characters, or fields.
8. –output-delimiter
This option uses the string you specified as the output delimiter string.
9. -c
This option selects only the characters from each line as specified by you. You can either specify a set of characters or a range of characters. You can also write this option as “–characters.”
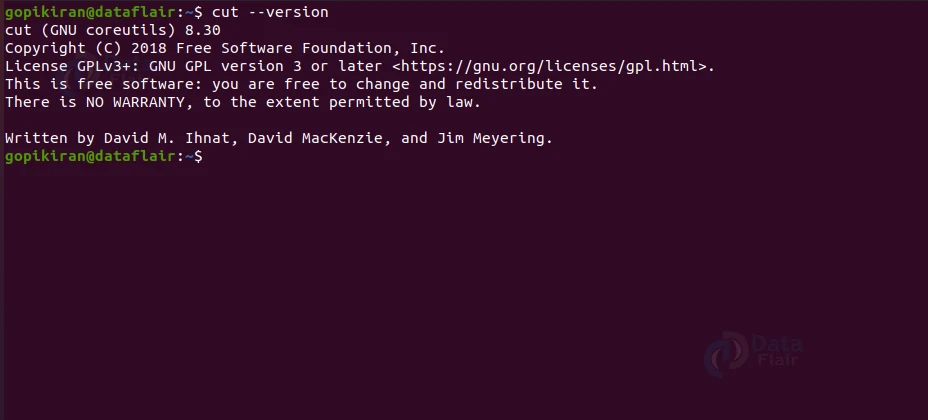
10. –version
This option prints information about the version of the cut command.
Now that we have covered the basics and the theoretical part of the cut command, let us understand how the cut command and its options work by looking at some practical examples of the cut command in the terminal of Ubuntu 20.04.
Before we look at the examples, we need a sample text file to perform the cut command. Hence let us consider the sample text file shown below:

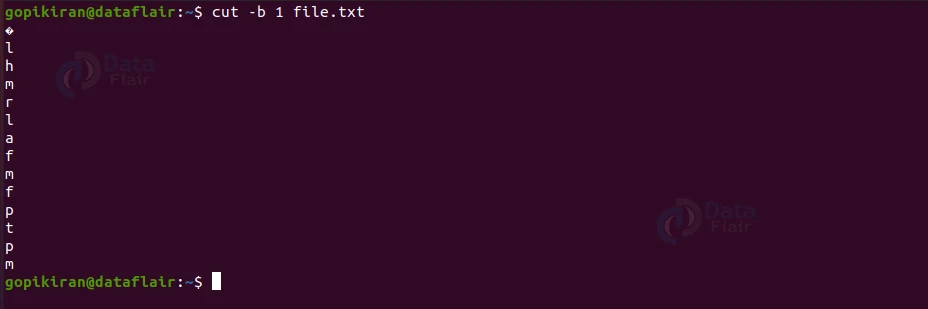
Cutting with respect to bytes
As discussed above, we can use the cut command and option “-b” to extract data using bytes. You can either cut a single byte, multiple bytes, or a byte range. For example, if you want to cut the content for the file, pair the cut command with the option “-b” followed by the list of byes and then the filename as shown: cut -b <n> <filename>.
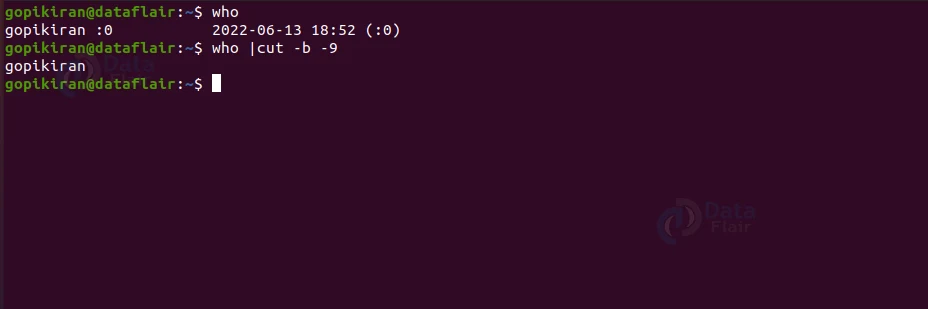
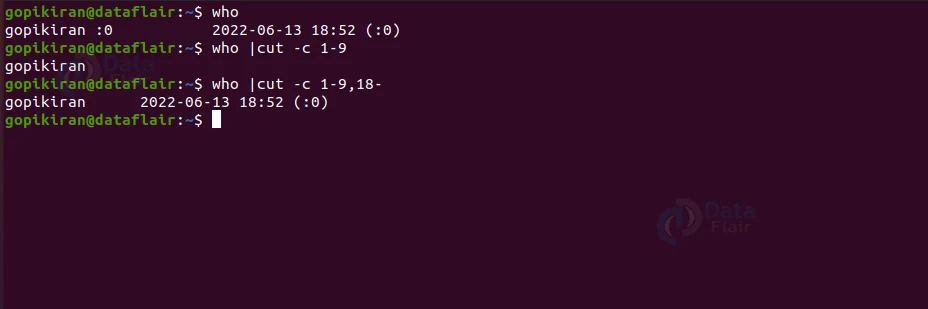
Here is another example of cutting based on bytes, except this time we piped it with a data stream instead of a file:
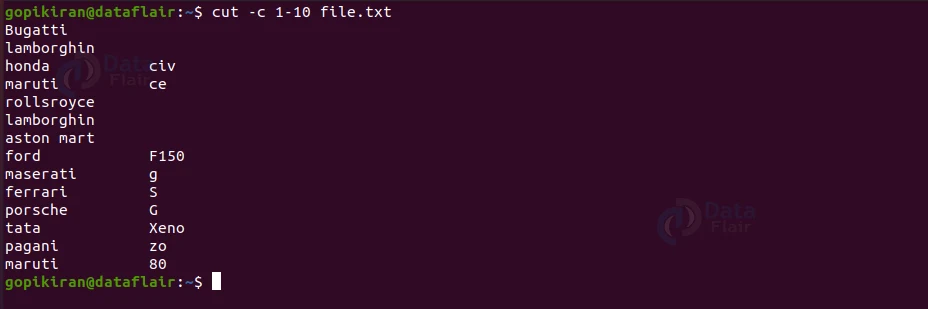
Cutting with respect to characters
To cut based on character, combine the cut command with the option “-c” followed by the position of the character as shown:
cut -c <n> <filename>
In the screenshot below, the command “cut -c 1-10 file.txt” will print from the 1st character to the 10th character of the file.
Here is another example of cutting based on bytes, where we piped it with a data stream instead of a file:
Cutting with respect to delimiters
If the content you specified is not separated by a standard tab space and is separated by another character, you can still cut the content by using the option “-d” followed by the delimiter you want to cut at. Use the following syntax:
cut -d <delimiter> <file>
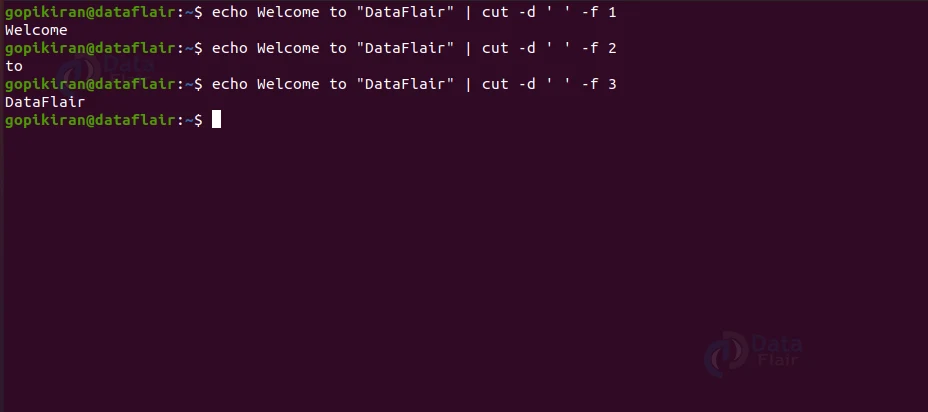
Cutting with respect to fields
When you are dealing with data that does not have a fixed format, cutting based on characters, bytes, and delimiters is not very helpful, this is where cutting with respect comes to the rescue. Pair the cut command with the option “-f” as shown:
cut -f <n> <filename>
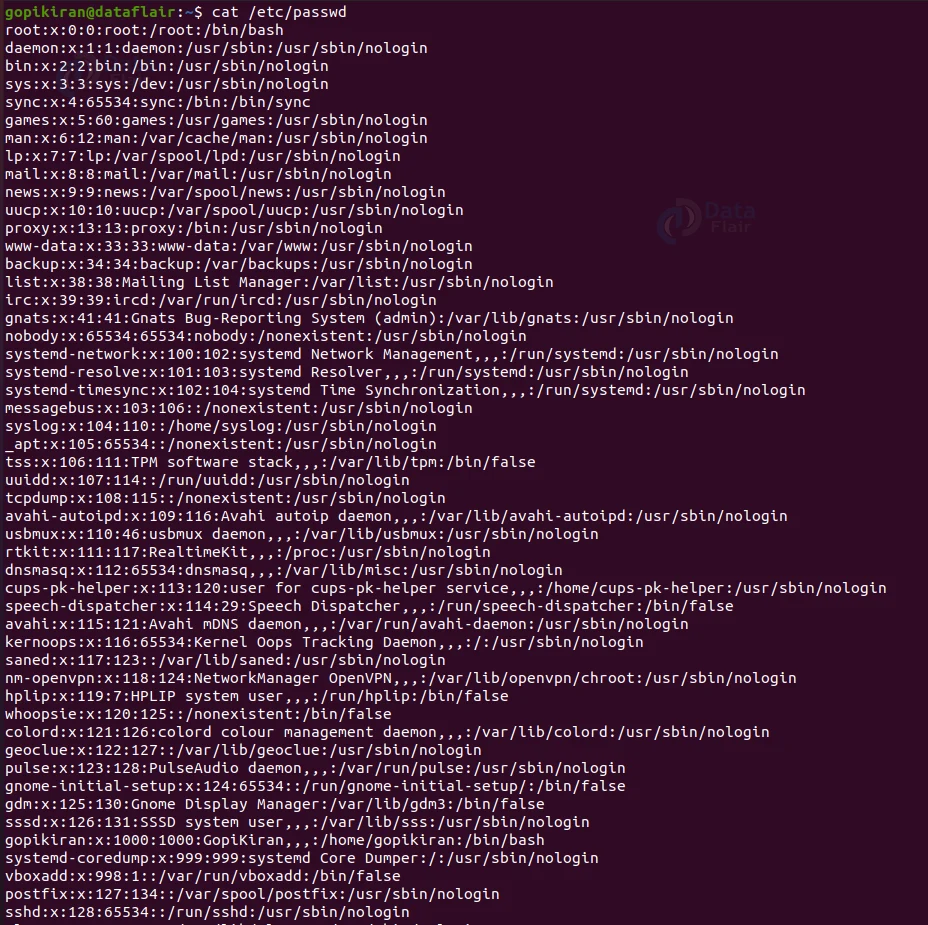
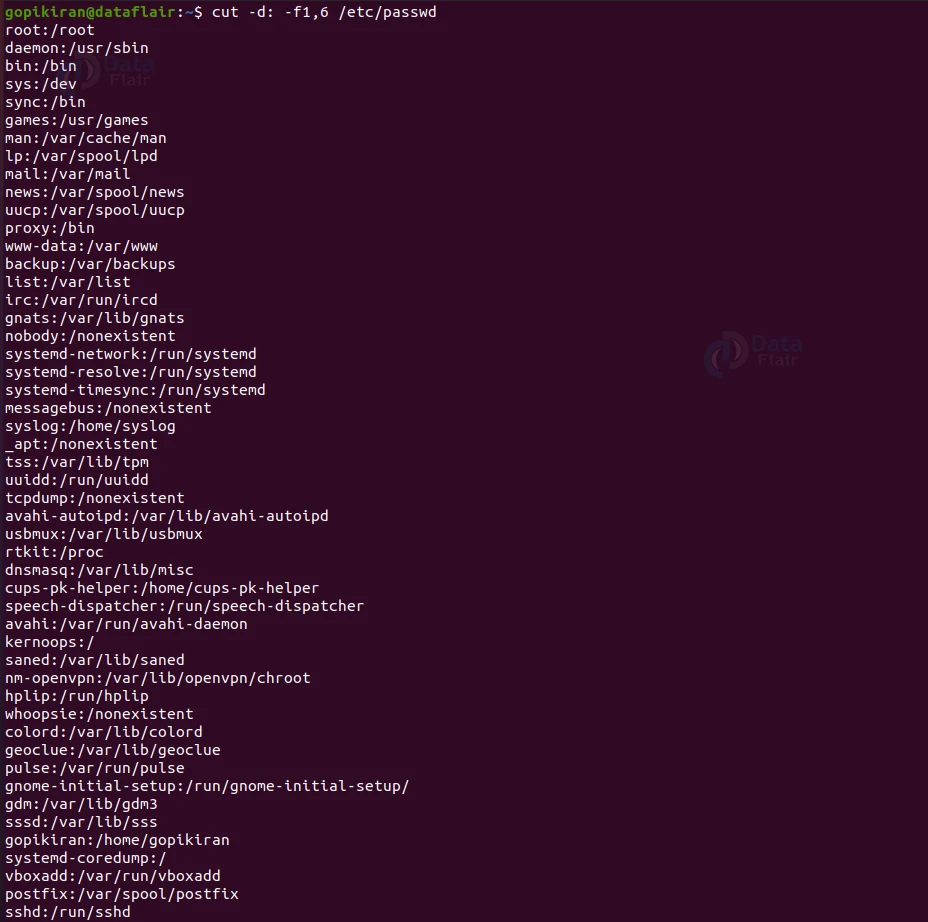
Here is an example of cutting based on fields for the datastream “/etc/passwd.”
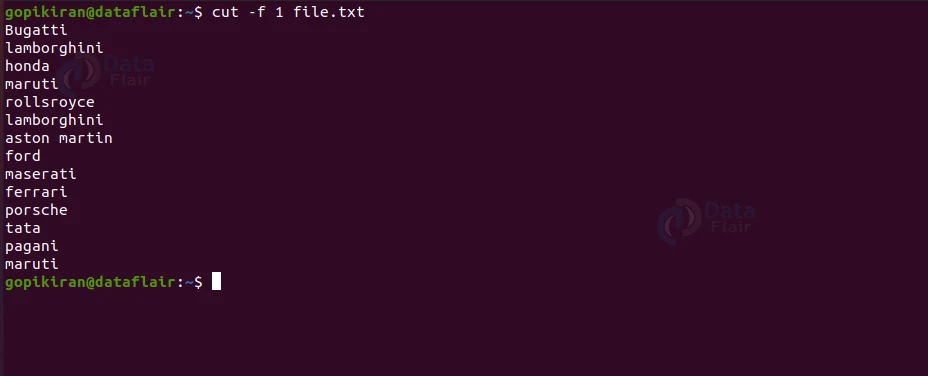
We can even use fields to cut in regular files, here is an example:
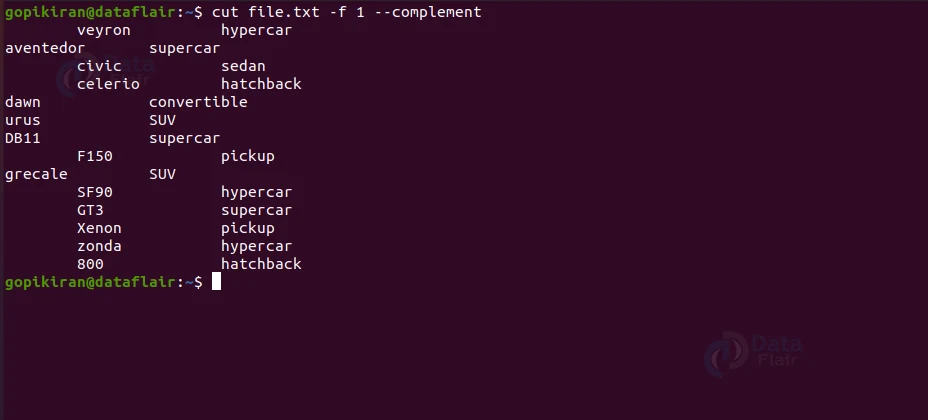
Complement a selection
When you execute the cut command by pairing it with the option “–complement”, it prints everything for the character/byte/field at the specified position.
Specifying an output delimiter
The cut command concatenates the output without a delimiter when we specify multiple characters/bytes/fields. Nonetheless, if you want to specify a delimiter in the output, use the cut command with the option “–output-delimiter,” as shown:
#image#
Summary
As you have seen, the cut command is a simple tool that helps you to cut parts of lines (based on bytes, delimiters, and characters) from specified files or piped data and print the result to standard output. You have now understood what the cut command is and why it is used and learned the cut command’s syntax and the options used with it. We have also seen a few practical examples of the cut command by combining it with the various options available.
You give me 15 seconds I promise you best tutorials
Please share your happy experience on Google


