Curl Command in Linux
Job-ready Online Courses: Dive into Knowledge. Learn More!
In this article, you will learn all there is to the curl command in Linux-based operating systems. We will be going through, what the curl command is, how to install it, syntax, options, and understanding its progress meter.
In the end, we will also look at some practical examples of the curl command in the Linux terminal. So sit down, grab a snack, pay attention, and read right till the end of this long yet effective article.
What is Linux curl command?
Curl is a command-line-based tool in Linux-based operating systems used for transferring data to or from servers designed to work without user interaction. With the help of the curl command, you can either upload or download data using any supported protocols.
The protocols supported by the curl command are HTTP, HTTPS, FTP, SFTP, TFTP, TELNET, LDAP, FILE, FTP, IMAP, POP3, and SCP. The curl command is powered by libcurl. One of the standalone features of curl is that it is designed to work without user interaction.
The curl command comes with a range of options that allows you to resume transfers, limit the bandwidth, proxy support, user authentication, and more. Curl can also transfer multiple files in just one command and we will see all these options and beautiful examples in the subsequent sections.
Installing curl
Curl does not come preinstalled in most distributions of Linux, to download it follow the command shown below with respect to your following Linux distribution:
Installing curl in Debian based Linux distros
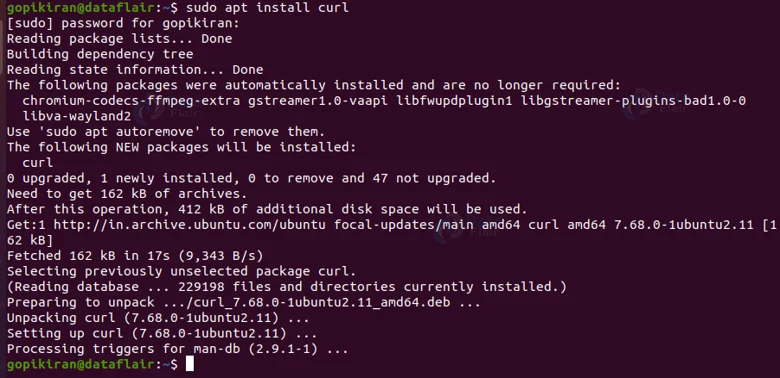
If you want to install curl on Debian based Linux operating systems like Ubuntu, Kali, ParrotOS, MX Linux, Mint, Deepin, etc, use the command shown below:
sudo apt install curl
Installing curl in Fedora-based Linux distros
If you want to install curl on Fedora-based Linux operating systems like Fedora spins, CentOS, Berry Linux, Qubes OS, RHEL, etc, use the command shown below:
sudo yum install curl
Syntax of the curl command
The syntax of the curl command is pretty easy:
curl <options> <URL>
Let us take a closer look at the fields present in the syntax of the curl command:
1. <options>
This field takes in a range of options that specifies how the curl command should function and sprint the output. These options allow you to do tasks like resuming transfers, limiting the bandwidth, proxy support, user authentication, and more.
2. <URL>
This field takes in the URL of the website you either want to download or upload files to. You can even specify multiple URLS in this field.
Options used with the curl command
As we have seen, there is a field in the syntax of the curl command that takes in a wide range of options. In typical Linux fashion, the curl command has a gargantuan list of options, let us take a look at them:
1. -a
This option appends to the target file instead of overwriting when use in an FTP upload. If the file you specified does not exist, it will create one for you.
2. -A
This option specifies the User-agent string to send to the HTTP server.
3. –anyauth
This option Tells curl to figure out the authentication method by itself, and use the most secure method the remote site claims it supports.
4. -b
This option passes the data to the HTTP server as a cookie
5. -B
This option enables ASCII transfer
6. –basic
This option tells curl to use HTTP Basic authentication. This is the default and this option is usually pointless. The only scenario you use this option is to override a previously set option that sets a different authentication method.
7. –ciphers
This option specifies which ciphers to use in the connection.
8. –compressed
This option requests a compressed response using one of the algorithms supported by the curl command
9. –connect-timeout
This option limits the connection phase
10. -c
This option specifies what file you want curl to write all cookies after a completed operation.
11. -C
This option continues or resumes a previous file transfer at the specified offset
12. –create-dirs
This option creates the necessary local directory hierarchy as needed.
13. –crif
This option converts LF to CRLF in upload.
14. -d
This option Sends the specified data in a POST request to the HTTP server.
15. –data-ascii
This option is the alias for the option “-d”.
16. –data-binary
This option posts data exactly as specified with no extra processing whatsoever.
17. –delegation
This option sets the level you specified to tell the server what it is allowed to delegate with the user credentials. The following are the levels you can specify:
- None – Don’t allow any delegation.
- Policy – Delegates if and only if the option “OK-AS-DELEGATE” flag is set in the Kerberos service ticket.
- Always – Unconditionally allow the server to delegate.
18. –digest
This option enables HTTP Digest authentication.
19. -D
This option writes the protocol headers to the specified file.
20. -e
This option sends the “Referrer Page” information to the HTTP server.
21. –engine
This option selects the OpenSSL crypto engine to use for cipher operations.
22. –environment
This option Sets a range of environment variables.
23. -E
This option specifies the client certificate files when getting a file with HTTPS, FTPS, or another SSL-based protocol.
24. -f
This option is similar to quiet mode, it prints no output at all on server error.
25. –ftp-account
This option asks for “account data” after a username and password were provided, this data is sent off using the ACCT command.
26. -F
This option lets curl emulate a filled-in form where a user has pressed the submit button.
27. -g
This option switches off the “URL globbing parser”.
28. -G
This option makes all data specified with -d/–data or –data-binary to be used in an HTTP GET request instead of the POST request that otherwise would be used.
29. –ignore-content-length
This option ignores the Content-Length header. It is very useful, particularly for servers running Apache 1.
30. -i
This option includes the HTTP header in the output.
31. -I
This option fetches only the HTTP header.
32. -k
This option explicitly allows the curl command to perform “insecure” SSL connections and transfers.
33. –krb
This option enables Kerberos authentication and use.
34. -K
This option specifies which config file to read the curl arguments.
35. –limit-rate
This option specifies the maximum transfer rate you want curl to use.
36. –local-port
This option sets a preferred number or range of local port numbers to use for the connection
37. –libcurl
When you append this option to any ordinary curl command line, you receive as output C source code that uses libcurl, written to the file that does the equivalent of what your command-line operation does
38. –max-filesize
This option specifies the maximum size (in bytes) of a file to download.
39. -m
This option specifies the maximum time in seconds you allow the whole operation to take.
40. –mail-auth
This option Specify a single address that will be used to specify the authentication address or identity of a submitted message that is being relayed to another server.
41. –mail-from
This option specifies a single address that the given mail should get sent to.
42. –metalink
This option tells curl to parse and process a given URI as a Metalink file and make use of the mirrors listed within for failover if there are errors.
43. -n
This option makes the curl command scan the .netrc file in the user’s home directory for login name and password.
44. –negotiate
This option enables GSS-Negotiate authentication.
45. –no-keepalive
This option disables the use of keepalive messages on the TCP connection, as by default curl enables them.
46. -N
This option disables the buffering of the output stream.
47. -o
This option writes the output to the file you specified instead of stdout.
48. -O
This option writes the output to a local file named like the remote file we get.
49. -Q
This option sends an arbitrary command to the remote FTP or SFTP server.
50. –raw
This option disables all internal HTTP decoding of content or transfer encodings and instead makes them passed on unaltered, raw.
PHEW!! Those are a lot of options! Even though we hit half a century, we barely scratched the surface of the gargantuan list of options available with the curl command. Nonetheless, we do not use most of these options on a regular basis, enact we will look at the most used option in action in subsequent sections.
Environmental variables used by the curl command
You can specify environment variables either in lowercase or uppercase, let us look at the environment variables used by the curl command:
1. http_PROXY [protocol://]<host>[:port]
This environment variable sets the proxy server to use for HTTP.
2. HTTPS_PROXY [protocol://]<host>[:port]
This environment variable sets the proxy server to use for HTTPS.
3. [url-protocol]_PROXY [protocol://]<host>[:port]
This environment variable sets the proxy server to use for the specified [url-protocol],
4. ALL_PROXY [protocol://]<host>[:port]
This environment variable sets the proxy server to use if no protocol-specific proxy is set.
5. NO_PROXY
This environment variable specifies the list of hostnames that shouldn’t go through any proxy.
Progress meter vs progress bar
When you are using curl (while uploading or downloading files), the curl command by default displays a progress meter that indicates the amount of transferred data, transfer speeds and estimated time left, and more. As shown below:

However, If you want a progress bar instead of a meter, use the option “-#” as shown below:

Now that we have liad down the fundamentals, let us look at some practical examples of the curlc command in the terminal.
Saving output to a file
To save the output of the curl command to a file, use the option “-o” or “-O” as shown below:
curl -o <filename> <URL>

Downloading multiple files
If you want to download multiple files in just one command, use multiple options “-o”s followed by the URLS you want to download as shown:
curl -o <filename> <URL1> <URL2>
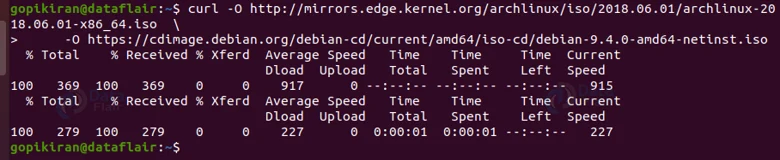
In the above examples, we downloaded the iso files of Arch Linux and Debian is just one command.
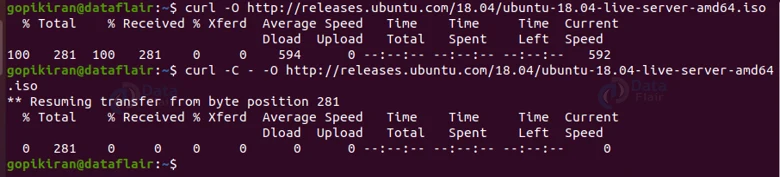
Resuming a download
Say for some reason, your download failed, instead of downloading again from scratch, you can resume that particular download by using the option “-C -” as shown:
curl -C -o <filename> <URL>
Retrieving the HTML headers of a URL
Before we retrieve them let us take a glance at what HTML headers are. HTML headers are colon-separated key-value pairs that contain various information like user agent, content type, encoding and so much more.
These headers are passed between the server and clients with responses or requests. To retrieve the HTML headers of a webpage, use the option “-I” as shown below:
curl -I <URL>
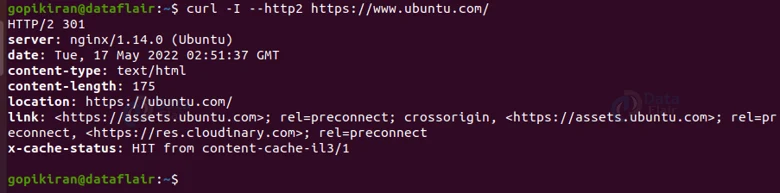
Testing if a website supports HTTP/2
If you want to check if a particular website supports the HTTP/2 protocol or not retrieve the HTML header by using the option “-I” followed by the option “–http2” and piping this output to a grep command to see if it matched the string “HTTP” as shown below:
curl -I --http2 -s <URL>

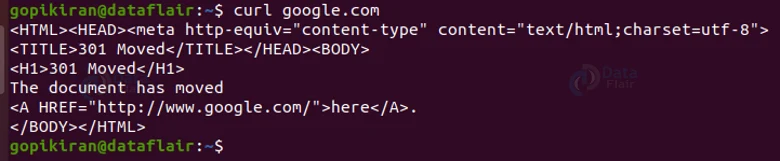
Following redirects
By default, curl does not follow the HTTP location headers. However, if you are interested in following these redirects, you can use the option “-L”. For example, if you simply run the command “curl google.com”, you will be redirected to the WWW version of it as shown:
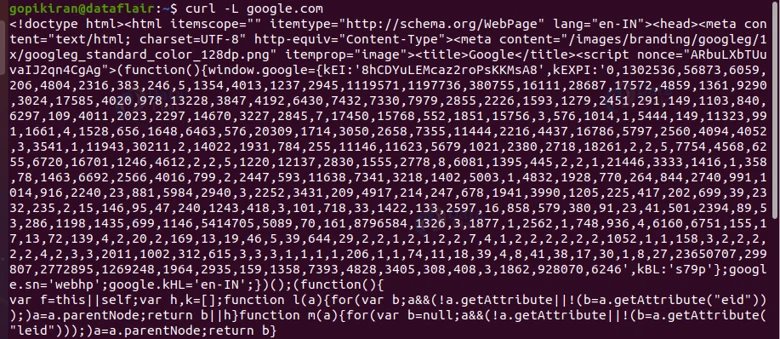
But, If you are interested in retrieving the non-WWW version, use the option “-L”, as this option tells curl to follow any redirect until it reaches the final destination. Use the syntax shown:
curl -L <filename> <URL>
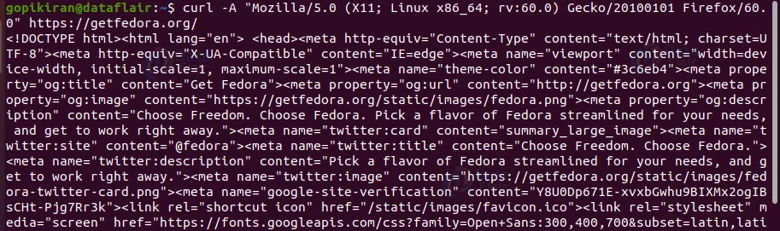
Changing the User-Agent
When downloading a file, the remote server may sometimes be set to block curl User-Agent or to return different contents. In such scenarios, to emulate a different browser, use the option “-A” as shown below:
Specifying a maximum transfer rate
We saw that the option “–limit-rate” allows you to limit the data transfer rate. You can specify the value in bytes, kilobytes (k), megabytes (m), and gigabytes (g).
For example, if you want to set the download speed to 1mb, use the command shown below:
curl --limit-rate <n> -o <filename> <URL>

Transferring files through FTP
If you want to access a protected FTP server with the curl command, ue the option “-u” and specify the username and password as shown below:
curl -u <username> <password> ftp://ftp.example.com/
Upon successful login, the command lists all the files and directories in the user’s home directory. You can also download a single ftp file from the FTP server using the following syntax:
curl -u <username>:<password> ftp://ftp.example.com/file.tar.gz
Similarly to upload a file to the FTP server use the option “-T” followed by the name of the file you want to upload:
curl -T newfile.tar.gz -u <username>:<password> ftp://ftp.example.com/
Sending cookies
Sometimes, you may need to make an HTTP request with a specific set of cookies to access a remote resource. By default, when you request a resource with the curl command, no cookies are sent or stored. Nonetheless, if you want to send cookies to a server, use the option “-b” followed by the name of the cookies as shown below:
curl -L -b <cookie name> -o <filename> <URL>

Using proxies
We have already seen that the curl command supports different types of proxies like HTTP, HTTP, SOCKS and so many more. If you want to transfer data through a proxy server, the option “-x” or “–proxy” followed by the URL of the proxy as shown below:
curl -x <URL>
The command shown above downloads specified resource using a proxy on 192.168.44.1 port 8888
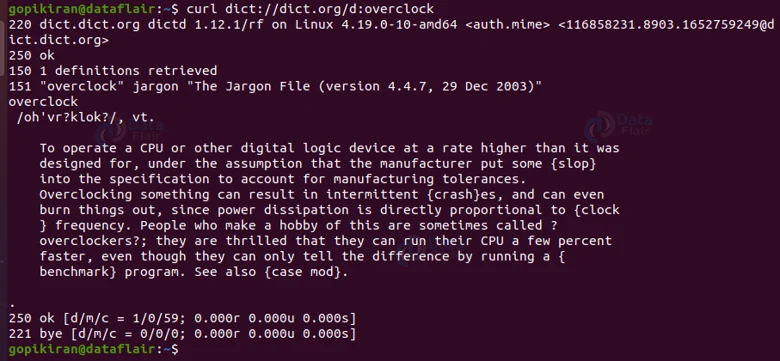
DICT protocol
Libcurl defined the DICT protocol that can be used to easily get the definition or meaning of any word directly from the command line: use the following syntax to use the DICT protocol:
curl [protocol:[dictionary_URL]:[word]
Checking the version of curl
If you want to check the version of the curl command you are using in your computer use the option “–version” to print information about the version and exit. Use the command “curl –version”

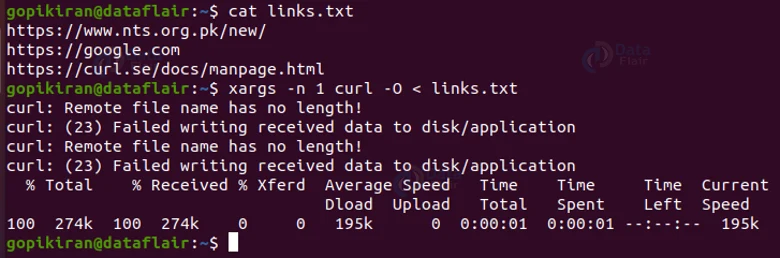
Downloading multiple files from a file
We have already seen that we can download multiple files using the curl command by using multiple option “-o”s and specifying the URLS one after the other. But, instead of doing such a tedious job, you can simply write all the links in one text file and later use the “xargs” command to download from the file as shown below:
xargs -n -1 curl -O < <filename>
Modifying name resolution
Say you are a web developer and want to test a local version of “yourdomain com” before pushing it live. To do so, use the option “–resolve” followed by the URL of your website as shown below:
curl --resolve www.yourdomain.com:80:localhost http://www.yourdomain.com/
Protocols supported by curl
We have seen that curl supports so many various kinds of protocols, it is only fair to have a look at the complete list:
1. DICT
This protocol is a dictionary network protocol for querying dictionary servers about the meanings of words.
2. FILE
This protocol is a URL scheme for obtaining a file from the local file system using curl.
3. FTP
This protocol stands for File Transfer Protocol, used for file transfers between clients and servers.
4. GOPHER
An old protocol for searching, retrieving, and distributing internet documents, a precursor of HTTP.
5. HTTPS
This protocol stands for Hypertext Transfer Protocol, used for web and internet data transfer.
6. IMAPS
This protocol stands for Internet Message Access Protocol, used for email access and management.
7. LDAP
This protocol stands for Lightweight Directory Access Protocol, used for distributed directory information access and management.
8. MQTT
This protocol stands for Message Queuing Telemetry Transport – a protocol for data exchange between small devices, usually IoT systems.
9. POP3
This protocol stands for Post Office Protocol version 3 – a protocol for email retrieval from a server.
10. RTMP
This protocol stands for Real-Time Messaging Protocol – a streaming protocol for audio, video, and other data.
11. RTSP
This protocol stands for Real-Time Streaming Protocol, used for streaming media servers management.
12. SCP
This protocol stands for Secure Copy – a protocol for copying files to and from an SSH server.
13. SFTP
This protocol stands for SSH File Transfer Protocol – a version of the File Transfer Protocol using the SSH connection.
14. SMB
This protocol stands for Server Message Block – a protocol for managing shared access to files and computer peripherals.
15. SMTP
This protocol stands for Simple Mail Transfer Protocol – an email protocol for easy transmission of email.
16. TELNET
This protocol is an application layer protocol for bidirectional interactive text-oriented communication.
17. TFTP
This protocol stands for Trivial File Transfer Protocol, used for uploading or downloading files to or from a remote host.
Summary
As you have seen the curl command is a really simple yet extremely useful tool that helps in uploading and downloading files from the web. You have now learned what curl is, how to install it, syntax, options, and so many examples of how to use the curl command.
Your 15 seconds will encourage us to work even harder
Please share your happy experience on Google


