Apache Sqoop Tutorial – Learn Sqoop from Beginner to Expert
Big Data tool, which we use for transferring data between Hadoop and relational database servers is what we call Sqoop. In this Apache Sqoop Tutorial, we will learn the whole concept regarding Sqoop. We will study What is Sqoop, several prerequisites required to learn Sqoop, Sqoop Releases, Sqoop Commands, and Sqoop Tools.
Afterward, we will move forward to the basic usage of Sqoop. Moving forward, we will also learn how Sqoop works. Moreover, we will also learn Sqoop Import and Sqoop Export with Sqoop Example.
So, let’s start our Sqoop Tutorial.
What is Apache Sqoop?
An open-source data integration programme called Apache Sqoop is intended to make it easier to move data between Apache Hadoop and conventional relational databases or other structured data repositories. The difficulty of effectively integrating data from external systems into Hadoop’s distributed file system (HDFS) and exporting processed or analysed data back to relational databases for use in business intelligence or reporting tools is addressed.
Data import from several relational databases, including MySQL, Oracle, SQL Server, and PostgreSQL, into HDFS is one of Sqoop’s core functionalities. It enables incremental imports, allowing users to import just the new or changed records since the last import, minimising data transfer time and guaranteeing data consistency. Parallel imports are supported, enabling the efficient transfer of big datasets.
When it comes to exporting, Sqoop makes it possible to send processed or analysed data from HDFS back to relational databases, guaranteeing that the knowledge obtained from big data analysis can be incorporated into current data warehousing systems without any difficulty.
Additionally, Sqoop is essential for connecting with other Hadoop ecosystem parts, such as Apache Hive for data warehousing. Since Sqoop is versatile for usage in scripts and automated processes thanks to its command-line interface (CLI) and APIs, developers may successfully integrate it into their data pipelines. Sqoop is a flexible and useful solution for large data integration projects because of its extensible design, which allows for new connections to enable additional data sources beyond those supported by its built-in connectors
Basically, Sqoop (“SQL-to-Hadoop”) is a straightforward command-line tool. It offers the following capabilities:
- Generally, helps to Import individual tables or entire databases to files in HDFS
- Also can Generate Java classes to allow you to interact with your imported data
- Moreover, it offers the ability to import from SQL databases straight into your Hive data warehouse.
Sqoop Tutorial – Releases
Basically, Apache Sqoop is an Apache Software Foundation’s open source software product. Moreover, we can download Sqoop Software from http://sqoop.apache.org. Basically, at that site, you can obtain:
- All the new releases of Sqoop, as well as its most recent source code.
- An issue tracker
- Also, a wiki that contains Sqoop documentation
Prerequisites to learn Sqoop
In Apache Sqoop tutorial, we are going to study prerequisites to learn Sqoop. Such as:
- Basic computer technology and terminology.
- General familiarity with Sqoop command-line interfaces like bash and many more.
- Relational database management systems.
- General familiarity with Hadoop’s purpose and operation.
Basically, an important thing to note that to use Apache Sqoop, we need a release of Hadoop installation and configuration. Although, currently Sqoop is supporting 4 major Hadoop releases. Such as – 0.20, 0.23, 1.0 and 2.0.
In addition, be assured that you are using a Linux or the Linux-like environment. Also, remember that Sqoop is predominantly operated and tested on Linux.
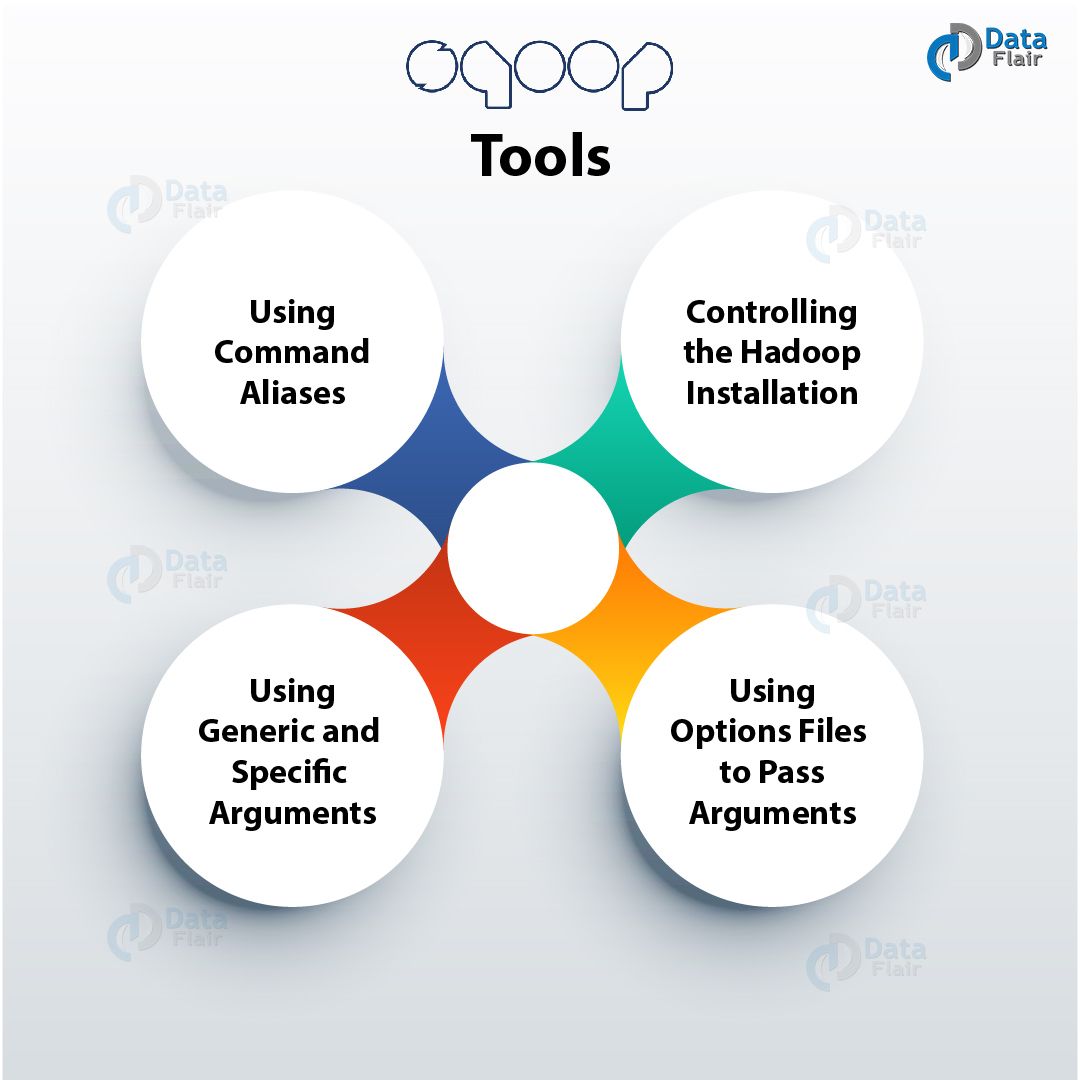
Sqoop Tutorial – Tools
Basically, Sqoop attains the collection of related tools. We can use Sqoop, by just specifying the tool we want to use but with the arguments that control the tool.
Apache Sqoop Tutorial -Sqoop Tools
In addition, Since Sqoop is compiled from its own source, by running the bin/sqoop program we can run Sqoop without a formal installation process. Also, users of a packaged deployment of Sqoop will see this program installed as /usr/bin/sqoop. Such as an RPM shipped with Apache Bigtop. Moreover, the remainder of this documentation will refer to this program as sqoop. For example:
$ sqoop tool-name [tool-arguments]
Here, an example that starts with a $ character indicates that the commands must be entered at a terminal prompt. For example bash. Basically, $ character shows the prompt itself. Moreover, note that we should not start these commands by typing a $. Also, we can enter commands inline in the text of a paragraph such as sqoop help.
Although, these examples do not show a $ prefix. However, we should enter them the same way. Make sure that you don’t confuse the $ shell prompt in the examples with the $. Since that precedes an environment variable name.
Like, here the string literal $HADOOP_HOME includes a “$”.
Basically, Sqoop ships with a help tool. Type the following Sqoop command, to display a list of all available tools:
$ sqoop help
usage: sqoop COMMAND [ARGS]
Table. 1 Sqoop Tutorial – Available Sqoop commands
| codegen | Generate code to interact with database records |
| Create-hive- table | Import a table definition into Hive |
| eval | Evaluate a SQL statement and display the results |
| export | Export an HDFS directory to a database table |
| help | List available commands |
| import | Import a table from a database to HDFS |
| Import-all-tables | Import tables from a database to HDFS |
| list-databases | List available databases on a server |
| list-tables | List available tables in a database |
| version | Display version information |
Also, by entering sqoop help (tool-name), we can display help for a specific tool. Like, sqoop help import.
In addition, we can also add the –help argument to any Sqoop command: sqoop import –help.
a. Using Command Aliases
We can use alias scripts by typing the sqoop (toolname) syntax. Basically, that specifies the sqoop-(toolname) syntax. Like, the scripts sqoop-import, sqoop-export and many more. Although, each select a specific tool.
b. Controlling the Hadoop Installation
To elicit Sqoop we can use the program launch capability provided by Hadoop. To run the bin/hadoop script shipped with Hadoop, we can use the sqoop command-line program wrapper. Since there are multiple installations of Hadoop present on your machine, we can easily select the Hadoop installation just by setting the $HADOOP_COMMON_HOME and $HADOOP_MAPRED_HOME environment variables.
For example-
$ HADOOP_COMMON_HOME=/path/to/some/hadoop \
HADOOP_MAPRED_HOME=/path/to/some/hadoop-mapreduce \
sqoop import –arguments…
or:
$ export HADOOP_COMMON_HOME=/some/path/to/hadoop
$ export HADOOP_MAPRED_HOME=/some/path/to/hadoop-mapreduce
$ sqoop import –arguments…
Keep in mind that if either of these variables is not set, Sqoop will fall back to $HADOOP_HOME. Although if that is not set either for Apache Bigtop, Sqoop will use the default installation locations, /usr/lib/Hadoop and /usr/lib/Hadoop-MapReduce, respectively.
In addition, from $HADOOP_HOME/conf/ the active Hadoop configuration is loaded. Till the $HADOOP_CONF_DIR environment variable is set.
c. Using Generic and Specific Arguments
Basically, we can use generic and specific arguments to control the operation of each Sqoop tool.
For example-
$ sqoop help import
usage: sqoop import [GENERIC-ARGS] [TOOL-ARGS]
Table. 2 Sqoop Tutorial – Common arguments
| –connect <jdbc-uri> | Specify JDBC connect string |
| –connect-manager <jdbc-uri> | Specify connection manager class to use |
| –driver <class-name> | Manually specify JDBC driver class to use |
| –hadoop-mapred-home <dir>+ | Override $HADOOP_MAPRED_HOME |
| –help | Print usage instructions |
| –P | Read password from console |
| –password <password> | Set authentication password |
| –username <username> | Set authentication username |
| –verbose | Print more information while working |
| –hadoop-home <dir>+ | Deprecated. Override $HADOOP_HOME |
[…]
Table. 3 Sqoop Tutorial – Common arguments
Generic Hadoop command-line arguments:
(must preceed any tool-specific arguments)
Generic options supported are
| -conf <configuration file> | specify an application configuration file |
| -D <property=value> | use value for given property |
| -fs <local|namenode:port> | specify a namenode |
| -jt <local|jobtracker:port> | specify a job tracker |
| -files <comma separated list of files> | specify comma diffrentiate files to be copied to the map reduce cluster |
| -libjars <comma separated list of jars> | specify comma separated jar files to include in the classpath. |
| -archives <comma separated list of archives> | specify comma separated archives to be unarchived on the compute machines. |
The general command line syntax is
bin/hadoop command [genericOptions] [commandOptions]
It is essential to supply the generic arguments after the tool name like -conf, -D, and so on.
However, it must be before any tool-specific arguments like –connect.
Note: Here, generic Hadoop arguments are preceded by a single dash character (-). However, tool-specific arguments start with two dashes (–), until and unless they are single character arguments like -P.
In addition, some arguments control the configuration and Hadoop server settings. Like -conf, -D, -fs and -jt. For example, to set the name of the MR job that Sqoop launches, we can use the -D mapred.job.name=<job_name>. Although, if not specified, the name defaults to the jar name for the job that is derived from the used table name.
Well we can not use are typically use -files, -libjars, and -archives arguments in Sqoop. However, as part of Hadoop’s internal argument-parsing system, their arguments are included in it.
d. Using Options Files to Pass Arguments
For convenience, the Sqoop command line options that do not change from invocation to invocation can be put in options file in Sqoop. Basically, an options file can be defined as a text file. In a text file, each line identifies an option in the order that it appears otherwise on the command line.
Moreover, by using the backslash character at the end of intermediate lines, an options file allows specifying a single option on multiple lines. Although, on a new line, comments must be specified. Also, important that may not be mixed with option text. However, when option files have expanded, all comments and empty lines are ignored.
We can also specify an options file, by simply creating an options file in a convenient location and pass it to the command line. By using –options-file argument.
Although, it is expanded on the Sqoop command line before the tool is invoked, whenever options file is specified. Moreover, if needed we can specify more than one option files within the same invocation.
Let’s see this as an example. Here, the following Sqoop invocation for import can be specified alternatively as shown below:
$ sqoop import –connect jdbc:mysql://localhost/db –username foo –table TEST
$ sqoop –options-file /users/homer/work/import.txt –table TEST
where the options file /users/homer/work/import.txt contains the following:
import
–connect
jdbc:mysql://localhost/db
–username
foo
For readability purposes, the options file can have empty lines and comments. So the above example would work exactly the same if the options file
/users/homer/work/import.txt contained the following:
#
# Options file for Sqoop import
#
# Specifies the tool being invoked
import
# Connect parameter and value
–connect
jdbc:mysql://localhost/db
# Username parameter and value
–username
foo
#
# Remaining options should be specified in the command line.
#
How Sqoop Works?
Let’s move forward in Sqoop tutorial. Here, below image describes the workflow of Sqoop.
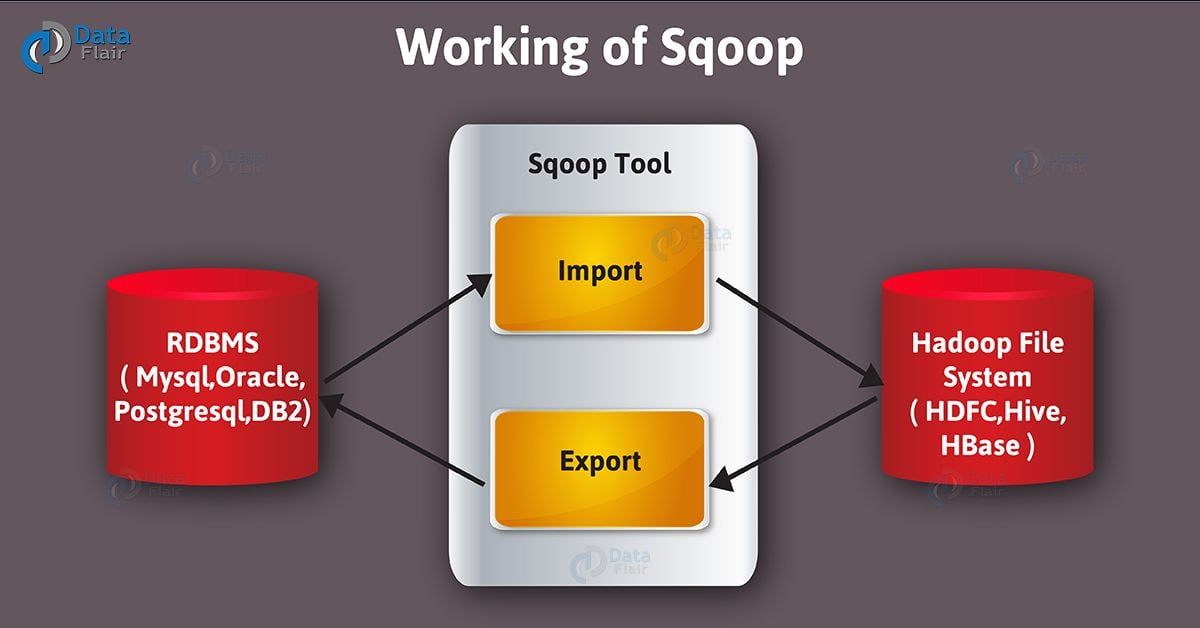
Apache Sqoop Tutorial – Working of Sqoop
Sqoop Import
Basically, when it comes to importing tool, it imports individual tables from RDBMS to HDFS. Here, in HDFS each row in a table is treated as a record. Moreover, in Avro and Sequence files all records are stored as text data in text files or as binary data.
a. Purpose of Sqoop Import
From an RDBMS to HDFS, the import tool imports an individual table. Here, in HDFS each row from a table is represented as a separate record. Moreover, we can store Records as text files (one record per line). However, in binary representation as Avro or SequenceFiles.
b. Syntax
We can type the import arguments in any order with respect to one another, while the Hadoop generic arguments must precede any import arguments only.
The important thing to note here is that arguments are grouped into collections organized by function. Basically, some collections are present in several tools. For example, the “common” arguments.
Table. 4 Sqoop Tutorial – Common arguments
| Argument | Description |
| –connect <jdbc-uri> | Specify JDBC connect string |
| –connection-manager <class-name> | Specify connection manager class to use |
| –driver <class-name> | Manually specify JDBC driver class to use |
| –hadoop-mapped-home <dir> | Override $HADOOP_MAPRED_HOME |
| –help | Print usage instructions |
| –password-file | Set path for a file containing the authentication password |
| -P | Read password from console |
| –password <password> | Set authentication password |
| –username <username> | Set authentication username |
| –verbose | Print more information while working |
| –connection-param-file <filename> | Optional properties file that provides connection parameters |
| –relaxed-isolation | Set connection transaction isolation to read uncommitted for the mappers. |
Sqoop Export
When we want to export a set of files from HDFS back to an RDBMS we use the export tool. Basically, there are rows in table those are the files which are input to Sqoop those contains records, which we call as rows in the table. Although, those files are read and parsed into a set of records. Also, delimited with the user-specified delimiter.
a. Purpose of Sqoop export
When we want to export a set of files from HDFS back to an RDBMS we use the export tool. One condition is here, the target table must already exist in the database.
In addition, to transform these into a set of INSERT statements, the default operation is that inject the records into the database. Moreover, Sqoop will generate UPDATE statements in “update mode,” that replace existing records in the database. Whereas, in “call mode” Sqoop will make a stored procedure call for each record.
b. Syntax
$ sqoop export (generic-args) (export-args)
$ sqoop-export (generic-args) (export-args)
Basically, the export arguments can be entered in any order with respect to one another,
However, the Hadoop generic arguments must precede any export arguments.
Table. 5 Sqoop Tutorial – Common arguments
| Argument | Description |
| –connect <jdbc-uri> | Specify JDBC connect string |
| –connection-manager <class-name> | Specify connection manager class to use |
| –driver <class-name> | Manually specify JDBC driver class to use |
| –hadoop-mapred-home <dir> | Override $HADOOP_MAPRED_HOME |
| –help | Print usage instructions |
| –password-file | Set path for a file containing the authentication password |
| -P | Read password from console |
| –password <password> | Set authentication password |
| –username <username> | Set authentication username |
| –verbose | Print more information while working |
| –connection-param-file <filename> | Optional properties file that provides connection parameters |
Table. 6 Sqoop Tutorial – Validation arguments More Details
| Argument | Description |
| –validate | Enable validation of data copied, supports single table copy only. |
| –validator <class-name> | Specify validator class to use. |
| –validation-threshold <class-name> | Specify validation threshold class to use. |
| –validation-failurehandler <class-name> | Specify validation failure handler class to use. |
Table. 7 Sqoop Tutorial – Export control arguments:
| Argument | Description |
| –columns <col,col,col…> | Columns to export to table |
| –direct | Use direct export fast path |
| –export-dir <dir> | HDFS source path for the export |
| -m,–num-mappers <n> | Use n map tasks to export in parallel |
| –table <table-name> | Table to populate |
| –call <stored-proc-name> | Stored Procedure to call |
| –update-key <col-name> | Anchor column to use for updates. Use a comma separated list of columns if there are more than one column. |
| –update-mode <mode> | Specify how updates are performed when new rows are found with non-matching keys in database.Legal values for mode include updateonly (default) and allowinsert. |
| –input-null-string <null-string> | The string to be interpreted as null for string columns |
| –input-null-non-string <null-string> | The string to be interpreted as null for non-string columns |
| –staging-table <staging-table-name> | The table in which data will be staged before being inserted into the destination table. |
| –clear-staging-table | Indicates that any data present in the staging table can be deleted. |
| –batch | Use batch mode for underlying statement execution. |
To specify the table to populate the database and the directory in HDFS that contains the source data. The –export-dir argument and one of –table or –call is all we want.
The important thing to note is that support for staging data prior to pushing it into the destination table is not always available for –direct exports. Also, we can say it is not available when export is invoked using the –update-key option for updating existing data.
Even when procedures are stored it used to insert the data.
c. Inserts vs. Updates
By default, sqoop-export appends new rows to a table; each input record is transformed into an INSERT statement that adds a row to the target database table. If your table has constraints (e.g., a primary key column whose values must be unique) and already contains data, you must take care to avoid inserting records that violate these constraints.
The export process will fail if an INSERT statement fails. This mode is primarily intended for exporting records to a new, empty table intended to receive these results.
If you specify the –update-key argument, Sqoop will instead modify an existing dataset in the database. Each input record is treated as an UPDATE statement that modifies an existing row. The row a statement modifies is determined by the column name(s) specified with –update-key. For example, consider the following table definition:
CREATE TABLE foo(
id INT NOT NULL PRIMARY KEY,
msg VARCHAR(32),
bar INT);
Consider also a dataset in HDFS containing records like these:
0, this is a test,42
1, some more data,100
…
Running sqoop-export –table foo –update-key id –export-dir /path/to/data –connect … will run an export job that executes SQL statements based on the data like so:
UPDATE foo SET msg=’this is a test’, bar=42 WHERE id=0;
UPDATE foo SET msg=’some more data’, bar=100 WHERE id=1;
…
If an UPDATE statement modifies no rows, this is not considered an error; the export will silently continue. (In effect, this means that an update-based export will not insert new rows into the database.) Likewise, if the column specified with –update-key does not uniquely identify rows and multiple rows are updated by a single statement, this condition is also undetected.
The argument –update-key can also be given a comma-separated list of column names. In which case, Sqoop will match all keys from this list before updating an existing record.
Depending on the target database, you may also specify the –update-mode argument with allowing insert mode if you want to update rows if they exist in the database already or insert rows if they do not exist yet.
Table. 8 Sqoop Tutorial – Input parsing arguments:
| Argument | Description |
| –input-enclosed-by <char> | Sets a required field encloser |
| –input-escaped-by <char> | Sets the input escape character |
| –input-fields-terminated-by <char> | Sets the input field separator |
| –input-lines-terminated-by <char> | Sets the input end-of-line character |
| –input-optionally-enclosed-by <char> | Sets a field enclosing character |
Table. 9 Sqoop Tutorial – Output line formatting arguments:
| Argument | Description |
| –enclosed-by <char> | Sets a required field enclosing character |
| –escaped-by <char> | Sets the escape character |
| –fields-terminated-by <char> | Sets the field separator character |
| –lines-terminated-by <char> | Sets the end-of-line character |
| –mysql-delimiters | Uses MySQL’s default delimiter set: fields: , lines: \n escaped-by: \ optionally-enclosed-by: |
| –optionally-enclosed-by <char> | Sets a field enclosing character |
Basically, Sqoop generates code to parse and interpret records of the files containing the data to be exported back to the database. If these files were created with non-default delimiters (comma-separated fields with newline-separated records), you should specify the same delimiters again so that Sqoop can parse your files.
Also, Sqoop will fail to find enough columns per line if you specify the incorrect delimiter. This will cause export map tasks to fail by throwing ParseExceptions.
Table. 10 Sqoop Tutorial – – Code generation arguments:
| Argument | Description |
| –bindir <dir> | Output directory for compiled objects |
| –class-name <name> | Sets the generated class name. This overrides –package-name. When combined with –jar-file, sets the input class. |
| –jar-file <file> | Disable code generation; use specified jar |
| –outdir <dir> | Output directory for generated code |
| –package-name <name> | Put auto-generated classes in this package |
| –map-column-java <m> | Override default mapping from SQL type to Java type for configured columns. |
Specifying –jar-file and –class-name obviate the need to specify delimiters in this case.
In addition, the use of the existing code is incompatible with –update-key. Basically, an update-mode export requires new code generation to perform the update. You cannot use –jar-file, and must fully specify any non-default delimiters.
d. Exports and Transactions
Basically, by multiple writers, it performs exports in parallel. Here, to the database each writer uses a separate connection; these have separate transactions from one another. Moreover, Sqoop uses the multi-row INSERT syntax to insert up to 100 records per statement.
Also, every 100 statements commit the current transaction within a writing task, causing a commit every 10,000 rows. Also, it ensures that transaction buffers do not grow without bound, and cause out-of-memory conditions. Therefore, an export is not an atomic process. Partial results from the export will become visible before the export is complete.
e. Failed Exports
However, there are no. of reasons for which exports may fail such as:
- When there is a loss of connectivity from the Hadoop cluster to the database. It can be for many reasons like due to the hardware fault, or server software crashes.
- While we attempt to INSERT a row that violates a consistency constraint. For example, inserting a duplicate primary key value.
- Also, by attempting to parse an incomplete or malformed record from the HDFS source data
- By using incorrect delimiters while it attempts to parse records
- Due to some capacity issues. For Example, insufficient RAM or disk space.
Due to these or other reasons, if an export map task fails, it may cause the export job to fail. Although, failed exports just have undefined results. Also, we can say each export map task operates in a separate transaction. Moreover, individual map tasks commit their current transaction periodically. However, in the database any previously-committed transactions will remain durable, leading to a partially-complete export.
Sqoop Tutorial – Usage
In this Sqoop Tutorial, we study Working, import, export, release, and tools now look at usage of sqoop. Basically, by using Sqoop we can easily import data from a relational database system. Also possible from a mainframe to HDFS. Although to import process, the input is either database table or mainframe datasets.
However, Sqoop will read the table row-by-row into HDFS for databases. Whereas, Sqoop will read records from each mainframe dataset into HDFS for mainframe datasets. Furthermore, a set of files containing a copy of the imported table or datasets is the output of this import process.
Therefore, it performs the import process in parallel. For this reason, the output will be in multiple files.
Moreover, there are some other Sqoop commands. Also, allow us to inspect the database you are working with. For example, you can list the available database schemas and tables within a schema. Sqoop also includes a primitive SQL execution shell (the sqoop-eval tool).
In addition, we can customize most aspects of the import, code generation, and export processes. Furthermore, we can control the specific row range or columns imported from databases. Basically, we can specify particular delimiters. Also, can escape characters for the file-based representation of the data, as well as the file format used. Moreover, we can also control the class or package names used in generated code.
So, this was all in Apache Sqoop Tutorial. Hope you like our explanation.
Conclusion – Sqoop Tutorial
As a result, we have seen in this Apache Sqoop Tutorial, what is Sqoop. Moreover, we have learned all the tools, working, and Sqoop commands. Also, we have learned the way to Import and Export Sqoop. Afterward, we have learned in Apache Sqoop Tutorial, basic usage of Sqoop. However, if you want to ask any query regarding Sqoop Tutorial, feel free to ask in the comment section.
Did you like our efforts? If Yes, please give DataFlair 5 Stars on Google


The tutorials are good. It is quite useful. But I do have a feedback for you guys. You have got to do some proof reading. While the content is good, the language is making it extremely hard to follow. I don’t understand why the need to use words like Also, moreover, furthermore, however, etc so frequently. Language is important if you want people to follow your content. Sentences need to be framed better.
If the sysdate is suppose 22 when the map reduce is at 0% and sysdate becomes 23 when map reduce becomes 100%, then , will the sqoop fetch 22nd date data or 23rd date data from the oracle source table?