Flask Flashing – A Simple Way to Send Messages to Users
Expert-led Online Courses: Elevate Your Skills, Get ready for Future - Enroll Now!
In web development, sending messages to users is an essential part of the user experience. Flask provides a simple way to send messages to users using the flash() function. In this article, we will explore Flask flashing, how to use it, and its benefits.
What is Flask Flashing?
Flask flashing is a feature that allows developers to send messages to users, usually in response to some user action. These messages are often used to inform users about the success or failure of a particular operation or to provide feedback about the system’s status.
Using Flask flashing, we can send messages of different types, such as success, error, warning, and info messages. Flask flashing is a simple way to provide users with feedback about their actions on the website.
How to Use Flask Flashing?
To use Flask flashing, we need to follow three simple steps:
Step 1: Import the Flash module
We need to import the flash() function from the Flask module. We can do this by adding the following code to our Python file:
from flask import Flask, flash
Step 2: Add Messages to Flash
Once we have imported the flash() function, we can add messages to the flash object. We can do this by calling the flash() function and passing it the message we want to display to the user. We can add a message to the flash object by using the following code:
@app.route('/login', methods=['POST'])
def login():
    username = request.form['username']
    password = request.form['password']
    if username == 'admin' and password == 'password':
        flash('You were successfully logged in')
        return redirect(url_for('index'))
    else:
        flash('Invalid username/password')
        return redirect(url_for('login'))
In this code snippet, we add two messages to the flash object, depending on whether the user logs in successfully or not.
Step 3: Display Messages to the User
Once we have added messages to the flash object, we can display them to the user. We can do this by adding the following code to our HTML template:
{% with messages = get_flashed_messages() %}
    {% if messages %}
        <ul class=flashes>
        {% for message in messages %}
            <li>{{ message }}</li>
        {% endfor %}
        </ul>
    {% endif %}
{% endwith %}
This code snippet retrieves the messages from the flash object and displays them in an unordered list on the web page.
How does Flask flash work?
The flash method, which enables developers to show messages to users, is one of the many useful features of Flask. When using Flash, programmers can make a flash message in one Flask View and display it in the “next” View, which is typically a template View. The page that the user views is called the template view, and it is in charge of showing the data that the Flask View sends.
For instance, a normal Template View would resemble the following:
@app.route('/template')
def blog():
    #codes...
    #codes...
    return render_template('template.html')
In this instance, a Flask View generates a Flash message in one view and passes it on to the following view, which displays the message to the user while also receiving the request.
The syntax for Flash is simple:
flash(message, category)
The message that will be displayed in this case is message, and category is an optional parameter that can be assigned to “error,” “info,” or “warning.”
Developers use the get flashed messages() method to retrieve the flash message from the session, where it is stored, and show it on the template.
get_flashed_messages(with_categories, category_filter)
Here, category filter is an optional parameter that allows you to filter and show only particular messages. with categories is an optional parameter tuple that specifies the category (error/info/warning).
To display the flashed message in a template, the following code can be used:
{% with messages = get_flashed_messages() %}
   {% if messages %}
      {% for message in messages %}
         {{ message }}
      {% endfor %}
   {% endif %}
{% endwith %}
The flashed message is taken out of the session by this code, and it is then displayed in the template.
In conclusion, Flask’s flash method and get flashed messages() function enable developers to seamlessly make and present messages to users. These tools and techniques enable developers to give users insightful input, enhancing the user experience as a whole.
Advanatages of Flask Flashing
Flask flashing has several benefits:
1. Simple to use: Flask flashing is a simple and effective way to send messages to users.
2. Provides feedback: Flask flashing provides feedback to users about the success or failure of their actions.
3. Improves user experience: Flask flashing improves the user experience by providing real-time feedback to users.
4. Customizable: Flask flashing is customizable, allowing developers to change the look and feel of the messages.
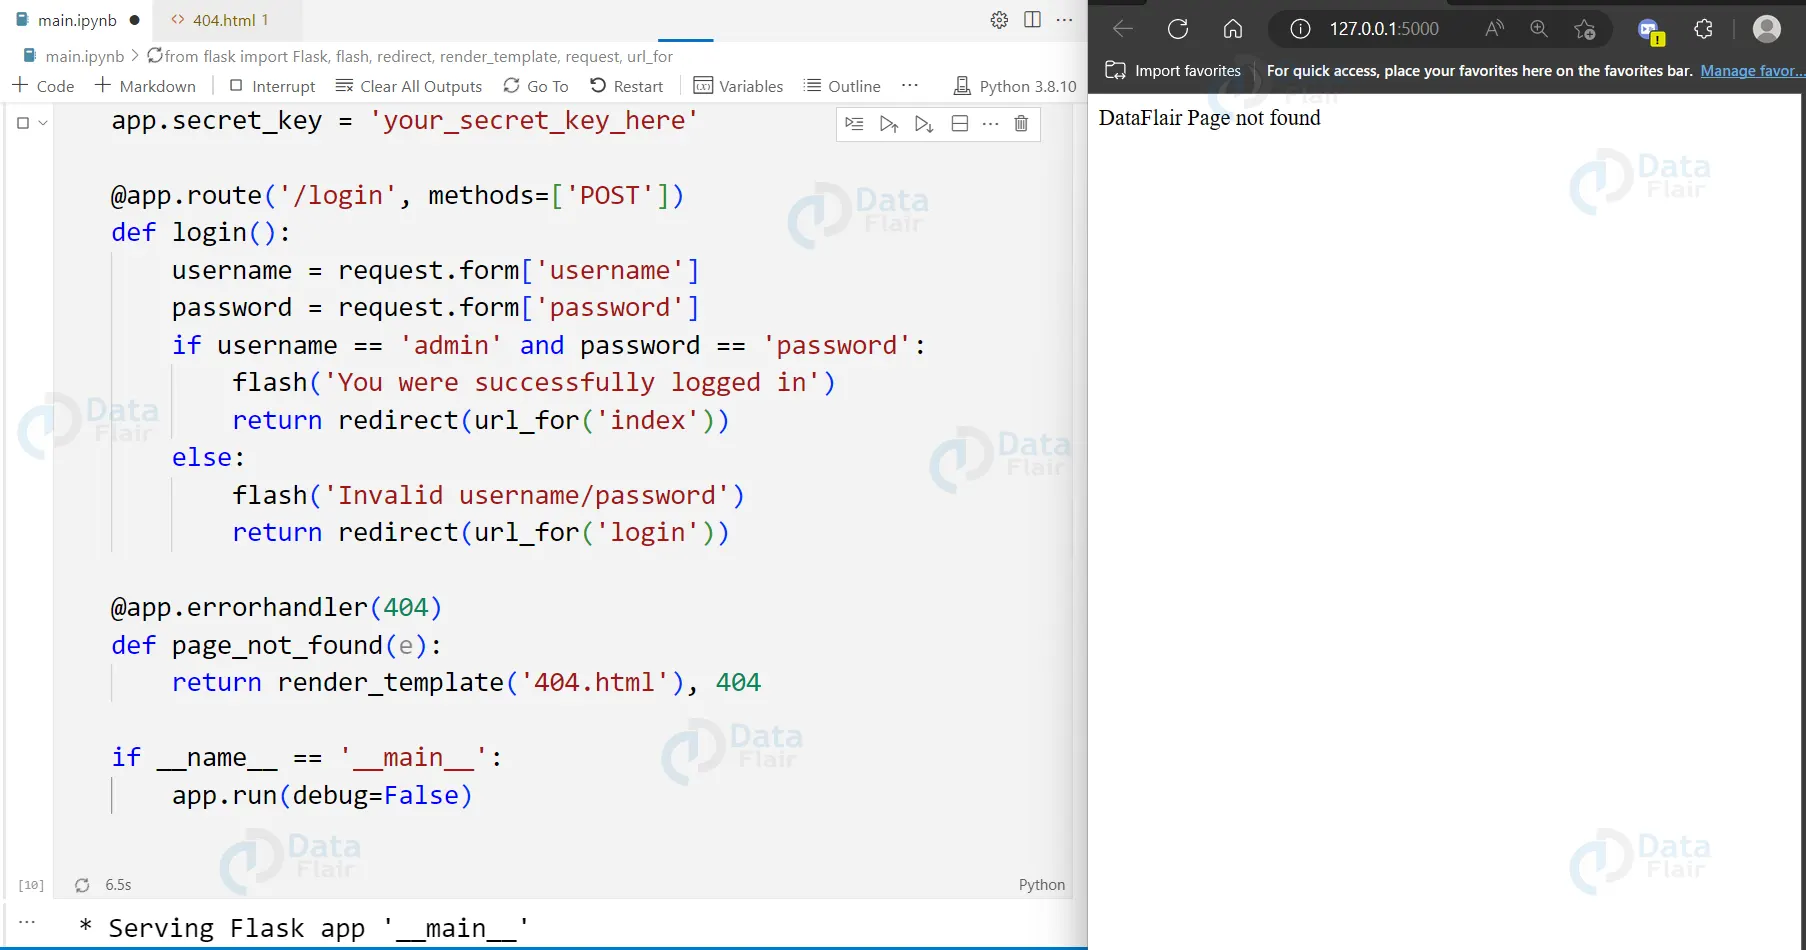
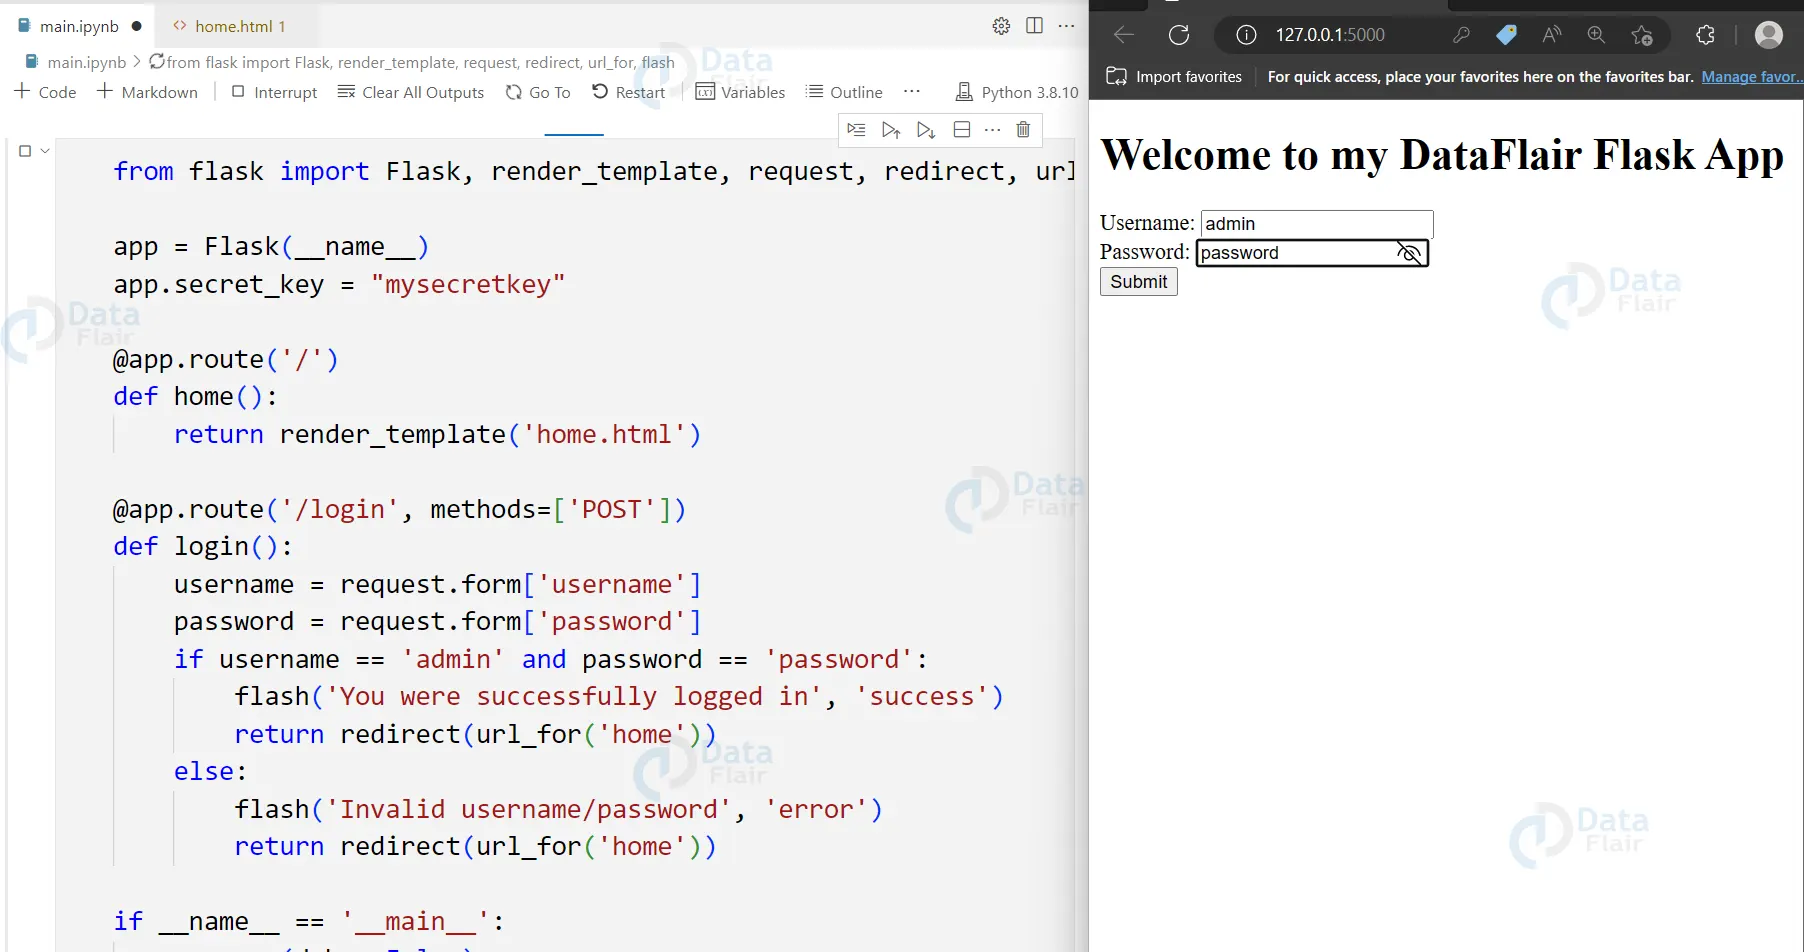
Code example for Flask flashing:
from flask import Flask, render_template, request, redirect, url_for, flash

app = Flask(__name__)
app.secret_key = "mysecretkey"

@app.route('/')
def home():
    return render_template('home.html')

@app.route('/login', methods=['POST'])
def login():
    username = request.form['username']
    password = request.form['password']
    if username == 'admin' and password == 'password':
        flash('You were successfully logged in', 'success')
        return redirect(url_for('home'))
    else:
        flash('Invalid username/password', 'error')
        return redirect(url_for('home'))

if __name__ == '__main__':
    app.run(debug=True)

Flask Flashing with Categories
It’s crucial to give users feedback when creating web applications so they can understand whether a particular action was effective or if there was a problem. Flashing messages, which are messages that are displayed to the user for a brief time before disappearing, are one method to give this feedback.
Flashed messages have the category “message” by default, but it is possible to use different categories to give greater feedback. To make error messages stick out, they could, for instance, be displayed with a red background.
The flash() function’s second argument can be used to flash a message with a distinct category:
flash('Invalid password provided', 'error')
The get flashed messages() function needs to be instructed in the template to yield the categories as well. The message and topic can then be displayed together in the loop that displays the messages.
{% with messages = get_flashed_messages(with_categories=true) %}
  {% if messages %}
    <ul class=flashes>
    {% for category, message in messages %}
      <li class="{{ category }}">{{ message }}</li>
    {% endfor %}
    </ul>
  {% endif %}
{% endwith %}
This is just one example of how to render these flashed messages. One might also use the category to add a prefix such as <strong>Error:</strong> to the message.
Overall, flashing messages with different categories can provide better feedback to the user and make it easier to differentiate between different types of messages.
Filtering Flash Messages
It’s frequently helpful to have the option to filter the messages by topic when using flashed messages in a web application. You can accomplish this by providing the get flashed messages() function with a collection of categories.
For instance, you could use the following code in your template to show all error messages in a separate block from other messages:
{% with errors = get_flashed_messages(category_filter=["error"]) %}
{% if errors %}
<div class="alert-message block-message error">
  <a class="close" href="#">×</a>
  <ul>
    {%- for msg in errors %}
    <li>{{ msg }}</li>
    {% endfor -%}
  </ul>
</div>
{% endif %}
{% endwith %}
In this case, the category filter argument is used to filter the flashed messages to only include those with a category of “error”. After being looped through, the filtered communications are then shown in a separate block with a different CSS class.
Using category filtering can make it simpler to distinguish between various message types and to give the user feedback that is more specifically targeted.
Types of Flask flash messages
Flask supports different types of flash messages that can be used to distinguish between different types of messages. The most common types are ‘success’, ‘error’, ‘warning’, and ‘info’. Each type of message can be styled differently, making it easy to differentiate between different types of messages.
Flask flashing best practices
Here are some best practices for using Flask flashing:
- Use descriptive message types that clearly communicate the purpose of the message.
- Keep messages short and to the point.
- Use consistent message formatting throughout the application.
- Use message categories to group related messages together.
- Use flash messages sparingly to avoid overwhelming the user.
- Avoid displaying sensitive information in flash messages.
Flask flashing examples and use cases
Here are some examples and use cases for Flask flashing:
- Displaying success or error messages after a form submission.
- Providing feedback to users during user authentication.
- Displaying informative messages to users, such as confirmation messages or error messages.
- Providing feedback to users during long-running processes, such as file uploads or database operations.
Flask flashing with forms and user authentication
Flask flashing is often used with forms and user authentication. When a user submits a form, Flask flashing can be used to display a success or error message based on the outcome of the form submission. During user authentication, Flask flashing can provide feedback to users by displaying error messages when an incorrect username or password is entered. This helps users understand what went wrong and how to correct the error.
Flask flashing and Ajax requests
Flask flashing can be used with Ajax requests to provide real-time feedback to users without refreshing the page. When an Ajax request is made, Flask flashing can be used to display a success or error message based on the outcome of the request.
Flask flashing and Bootstrap integration
Flask flashing can be easily integrated with Bootstrap, a popular front-end framework. Bootstrap provides built-in support for displaying alert messages, which can be used to display Flask flash messages. This makes it easy to style Flask flash messages in a consistent and visually appealing way.
Flask flashing with redirects
Flask flashing can be used with redirects to display flash messages on a different page than the one where the action occurred. It can display success or error messages to users when they submit a form on one page and are redirected to another. This makes it easier for users to understand what has happened and provides a better user experience.
To use Flask flashing with redirects, simply call the flash() function before the redirect:
@app.route('/submit-form', methods=['POST'])
def submit_form():
    # process form data here
    flash('Form submitted successfully')
    return redirect(url_for('success'))
Then, on the new page, use the get_flashed_messages() function to display the flash message:
<!DOCTYPE html>
<html>
<head>
    <title>Success Page</title>
</head>
<body>
    {% with messages = get_flashed_messages() %}
        {% if messages %}
            <ul class=flashes>
            {% for message in messages %}
                <li>{{ message }}</li>
            {% endfor %}
            </ul>
        {% endif %}
    {% endwith %}
    <h1>Success Page</h1>
    <!-- rest of the page content here -->
</body>
</html>

Conclusion
In conclusion, Flask flashing is a useful feature in Flask web applications that allows developers to provide real-time feedback to users. By displaying flash messages, developers can communicate the success or failure of user actions and improve the overall usability of their web application. Flask flashing is a simple and customizable way to display messages in Flask web applications. It can be used to display messages on different pages, support internationalisation and localization, and for testing purposes. Using Flask flashing can make web applications more responsive and user-friendly, leading to a better user experience.
If you are Happy with DataFlair, do not forget to make us happy with your positive feedback on Google


