
File Uploading in Flask
We offer you a brighter future with industry-ready online courses - Start Now!!
Flask is a lightweight Python web framework that provides useful tools and features for building modern web applications. One of the features that Flask provides is the ability to handle file uploads from users. In this blog post, we will explore how to implement file uploading in Flask and the best practices for handling uploaded files securely.
How to upload file in Flask?
Step 1: Setting up the Flask project
To start, create a new Flask project by creating a new directory and creating a file named app.py inside it. In the app.py file, you can set up a basic Flask application using the following code:
from flask import Flask, request

app = Flask(__name__)

@app.route('/')
def index():
    return 'Welcome to the Flask file upload example'

if __name__ == '__main__':
    app.run(debug=True)
Step 2: Adding Flask file upload form
The next step is to add a file upload form to the index page of your application. You can do this by adding a new route and template to your Flask application
from flask import Flask, request, render_template

app = Flask(__name__)

@app.route('/')
def index():
    return render_template('index.html')

@app.route('/upload', methods=['POST'])
def upload_file():
    if request.method == 'POST':
        file = request.files['file']
        file.save('uploaded_file.txt')
        return 'File uploaded successfully'

if __name__ == '__main__':
    app.run(debug=True)
Create a templates directory in your project and add a new file named index.html. This file will contain the file upload form.
<html>
<head>
    <title>Flask File Upload Example</title>
</head>
<body>
    <h1>File Upload</h1>
    <form action="{{ url_for('upload_file') }}" method="post" enctype="multipart/form-data">
        <input type="file" name="file">
        <input type="submit" value="Upload">
    </form>
</body>
</html>

Step 3: Handling the uploaded file in Flask
Once the user has selected a file and submitted the form, the uploaded file can be accessed through the request.files dictionary. You can access the uploaded file using the name of the file input field in the form, in this case, “file”.
The uploaded file can be saved to disk using the save method of the file object. In this example, we’re saving the file with the name uploaded_file.txt
from flask import Flask, render_template, request

app = Flask(__name__)

@app.route('/')
def index():
    return render_template('index.html')

@app.route('/upload', methods=['POST'])
def upload_file():
    if request.method == 'POST':
        file = request.files['file']
        file.save('uploaded_file.txt')
        return 'File uploaded successfully'

if __name__ == '__main__':
    app.run(debug=True)
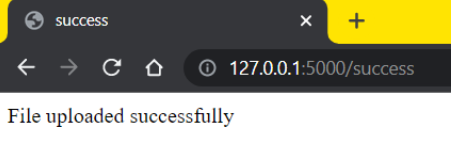
In this example, we’re using the save method of the file object to save the uploaded file to disk. We’re saving the file with the name uploaded_file.txt.
Step 4: Security considerations in Flask
When handling file uploads, it’s important to consider security issues such as preventing malicious files from being uploaded to your server. Here are a few best practices for handling uploaded files securely:
a. Validate the file type: You should only allow specific file types to be uploaded to your server. You can validate the file type using the content_type attribute of the file object.
b. Limit the file size: You should also limit the maximum size of the file that can be uploaded. You can do this by checking thecontent_length attribute of the file object.
c. Store uploaded files securely: Make sure to store uploaded files in a secure location on your server, such as outside the document root directory.
d. Sanitize filenames: You should also make sure to sanitize the filenames of uploaded files to prevent any malicious attacks or code injections.
How to improve file uploading capabilities?
If you’re a pro user of Flask and you want to improve the file uploading capabilities of your application, there are several things you can do to optimize your file uploads.
Firstly, you should consider implementing server-side file validation. This means that when a file is uploaded, your server-side code should check that the file is of the correct type, size, and format before accepting it. You can use the os module in Python to check the file extension and size, and return an error message if the file does not meet the required criteria.
Another way to improve file uploading in Flask is to use client-side validation. This means that when a user selects a file to upload, the client-side code can validate the file before it is sent to the server. You can use JavaScript to perform this validation, and display an error message to the user if the file is invalid.
Additionally, you may want to consider using a third-party library for file uploading in Flask. There are several popular libraries available, such as Flask-Uploads and Flask-Dropzone, which can simplify the process of file uploading and provide additional features such as progress bars and drag-and-drop functionality.
Finally, you can also optimize your server configuration to improve file upload performance. This might include increasing the maximum file size and timeout limits, and configuring your server to handle multiple file uploads concurrently.
Overall, improving file uploading in Flask requires a combination of server-side and client-side validation, the use of third-party libraries, and careful server configuration. By implementing these techniques, you can provide a better user experience for your users and ensure that your application is secure and reliable.
Conclusion
In this blog, we’ve shown you how to implement file uploading in Flask. We’ve covered the steps for creating a file upload form, handling the file upload, and security considerations for handling uploaded files. By following these steps, you can create a secure and functional file upload system for your Flask application.
Did you like our efforts? If Yes, please give DataFlair 5 Stars on Google






these two programs are not working properly