Streams in Nodejs
Expert-led Courses: Transform Your Career – Enroll Now
In this article, we will be discussing streams, its advantages, its types, reading streams, writing streams, piping and also chaining.
What is a stream in Nodejs?
Streams are objects that we use to read data from a source or write data to a destination in sequential fashion.
Advantages of Nodejs Stream:
1. Memory efficiency: It is memory efficient because it enables us to download files in smaller chunks instead of a whole in the memory before we can use it, thus saving space.
2. Time efficiency: We start processing the data in smaller chunks so the procedure starts early .
3. Composable data: Data is composed because of piping.
Nodejs Stream Types:
1. Readable stream: Stream for receiving and reading the data in an ordered manner.
2. Writable stream: Stream for sending data in an ordered manner.
Duplex stream: It is both readable and writable. We can send in and receive data together.
3. Transform stream: It is used for modifying the data. It is duplex in nature.
Operation on streams in Nodejs:
Below are the different types of operations on streams with examples:
1. Reading from Nodejs streams:
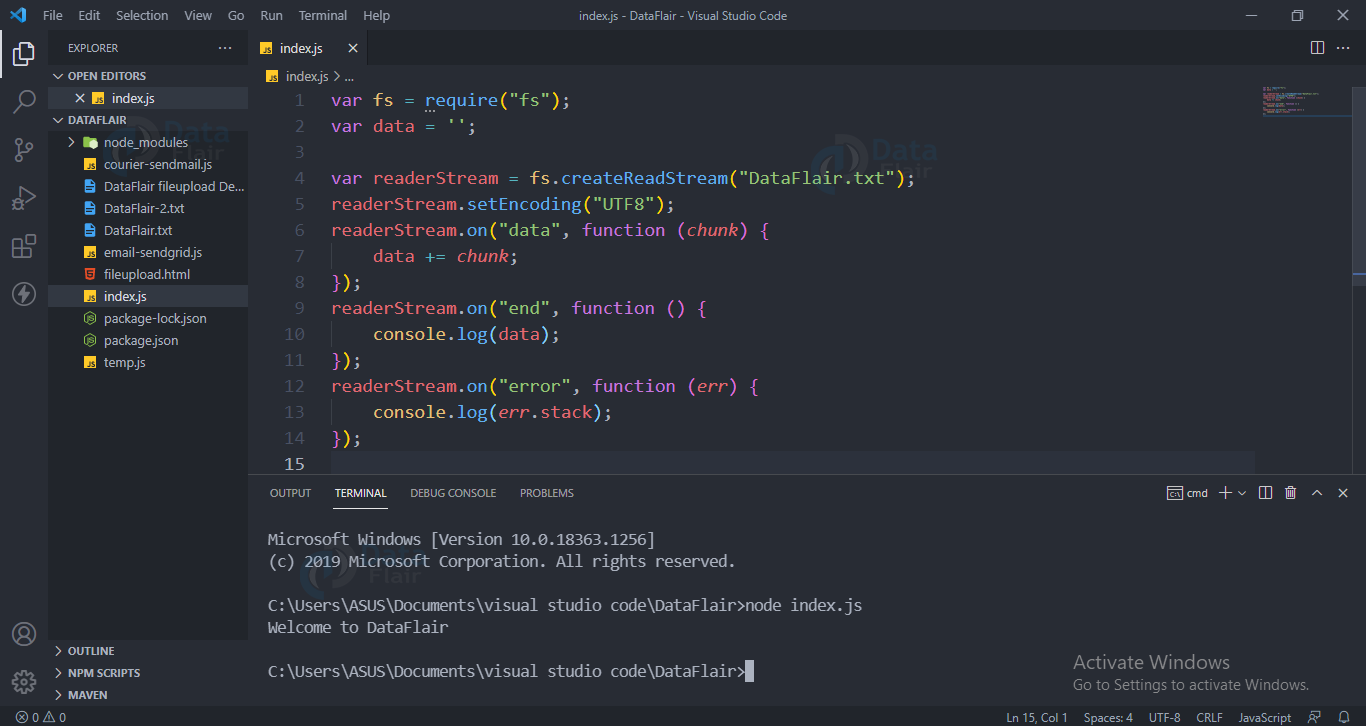
We have a text file named “DataFlair.txt” which contains the string “Welcome to DataFlair”. Now in the below code we will be reading this file in small chunks and displaying them:
Code for Reading from stream:
var fs = require("fs");
var data = '';

var readerStream = fs.createReadStream("DataFlair.txt");
readerStream.setEncoding("UTF8");
readerStream.on("data", function (chunk) {
    data += chunk;
});
readerStream.on("end", function () {
    console.log(data);
});
readerStream.on("error", function (err) {
    console.log(err.stack);
});
Output
Paused and flow modes in readable stream:
Readable streams by default start in paused mode but they can be switched to flow and back to paused mode. The switch happens automatically.
To manually switch between the two streams we can use the resume() and pause() methods.
2. Writing to a Nodejs stream:
We will be using createWriteStream(“filename”) from the filesystem module to create a writing stream.
Code for writing to a stream:
var fs = require('fs');
var data = 'Data"+ "Flair';

var writerStream = fs.createWriteStream('DataFlair_output.txt');

writerStream.write(data, 'UTF8');

writerStream.end();
writerStream.on('finish', function () {
});

writerStream.on('error', function (err) {
    console.log(err.stack);
});
Output:
“Welcome to DataFlair”
You will see a DataFlair_Output.txt file in your current directory.
3. Piping in Nodejs:
In piping, we provide a readable stream from a source as an input to another writable stream which is our destination.
Code for piping:
var fs = require('fs');
var readerStream = fs.createReadStream('DataFlair.txt');
var writerStream = fs.createWriteStream('output.txt');
readerStream.pipe(writerStream);
Output:
“Welcome To DataFlair”
In your current directory you will see a output.txt file which will contain the data present in the DataFlair.txt file
4. Chaining Nodejs Stream:
It means connecting the output of one stream with another stream. It is used with piping operations. We will be compressing the “DataFlair” file and decompressing it using piping for demonstrating chaining of streams.
Code for compressing:
var fs = require('fs');
var zlib = require('zlib');
fs.createReadStream('DataFlair.txt')
    .pipe(zlib.createGzip())
    .pipe(fs.createWriteStream('DataFlair.txt.gz'));

console.log('File Compressed.');
Output:
File Compressed
You will see a DataFlair.txt.gz file in your current directory.
Code for Decompressing:
var fs = require('fs');
var zlib = require('zlib');
fs.createReadStream('DataFlair.txt.gz')
    .pipe(zlib.createGunzip())
    .pipe(fs.createWriteStream('DataFlair.txt'));

console.log('File Decompressed.');
Output
“File Decompressed”
5. Transform stream in Nodejs:
In order to transform a stream, we use the transform method. For this we have to first initialize the transform module.
Code for Transforming stream:
const { Transform } = require('stream')
const TransformStream = new Transform();
TransformStream._transform = (chunk, encoding, callback) => {
    this.push(chunk.toString().toUpperCase());
    callback();
}
Output:
The above code will internally convert the data into uppercase letters.
6. Stream object mode:
Stream generally expects string or buffer types of data. But if we want to use the javascript objects then we have to use the flag “objectmode”.
Code for objectmode in stream:
const { Transform } = require('stream');
const commaSplitter = new Transform({
    readableObjectMode: true,

    transform(chunk, encoding, callback) {
        this.push(chunk.toString().trim().split(','));
        callback();
    }
});
const arrayToObject = new Transform({
    readableObjectMode: true,
    writableObjectMode: true,
    transform(chunk, encoding, callback) {
        const obj = {};
        for (let i = 0; i < chunk.length; i += 2) {
            obj[chunk[i]] = chunk[i + 1];
        }
        this.push(obj);
        callback();
    }
});
process.stdin
    .pipe(commaSplitter)
    .pipe(arrayToObject)
    .pipe(process.stdout)
Nodejs Stream events:
Important events for readable stream:
- Data Event: This event emits whenever a chunk of data is passed to a customer.
- End event: This event emitted whenever there is no more data in the stream.
Important events for writable stream:
- Drain event: It implies that the writable stream can receive more data.
- Finish event: It implies that all the data has been flushed.
Streams-powered Node.js APIs:
- Process.stdin: it returns a stream connected to stdin
- Process.stdout: it returns a stream connected to stdout
- Process.stderr: it returns a stream connected to stderr
- http.request(): returns a http clientrequest instance
- zlib.createGzip(): compress data into stream
- zlib.createGunzip(): decompress a gzip stream.
- zlib.createInflate(): decompress a deflate stream
Conclusion
We have discussed streams with codes and examples in detail, hope you liked reading it.
Did you like our efforts? If Yes, please give DataFlair 5 Stars on Google


