SQL Database Configuration in Azure
Top AWS Course for AWS Certified Cloud Practitioner (CLF-C01) Start Now!!
Placement-ready Online Courses: Your Passport to Excellence - Start Now
In today’s article, we will learn about SQL Database Configuration in Azure. Let us begin.
What is Azure SQL Database?
Azure SQL Database is a fully managed platform as a service (PaaS) database engine that takes care of most database maintenance tasks like upgrading, patching, backups, and monitoring without the need for human intervention.
With 99.99 percent availability, Azure SQL Database is always running on the most recent stable version of the SQL Server database engine and a patched OS.
Azure SQL Database’s PaaS capabilities allow you to focus on the domain-specific database management and optimization tasks that are vital to your business.
SQL Service Tiers in Azure
There are three service tiers available in Azure SQL Database:
The General Purpose/Standard service tier is intended for everyday tasks. It provides balanced compute and cost-effective storage solutions. The Business Critical/Premium service tier is intended for OLTP applications that demand high transaction rates and low I/O latency.
It uses many separate replicas to provide the best resilience to failures.
Most business workloads are best served by the Hyperscale service tier.
With independently scalable CPU and storage resources, hyper-scale gives significant flexibility and high performance.
It provides greater failure resilience by allowing the configuration of several isolated database replicas.
Perquisites
- An Azure subscription that is active. Creating a free account.
- The most recent versions of Azure PowerShell and Azure CLI.
Creating a Single database
Below are the steps to create single database in Azure:
1: Select SQL Deployment from the drop-down menu.
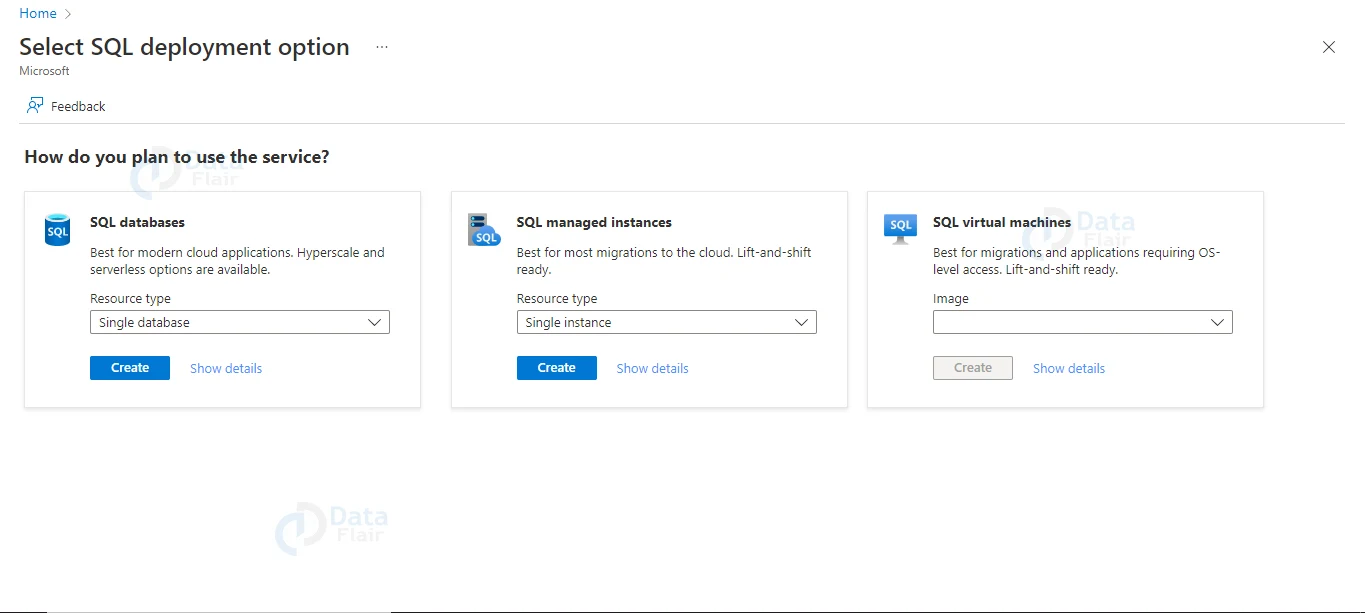
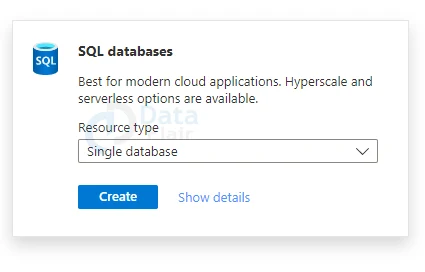
2: Select Create and leave the Resource type to Single database under SQL databases.
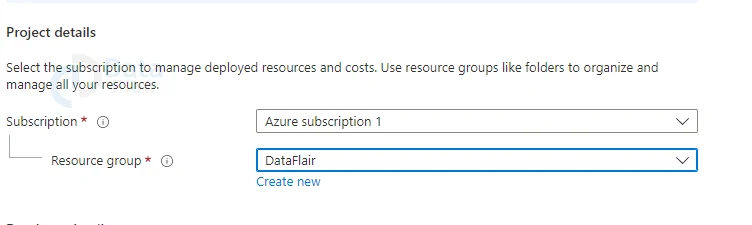
3: Select the desired Azure Subscription under Project information on the Basics tab of the Create SQL Database form.
4: Create a new Resource group, name it according to you and click OK.
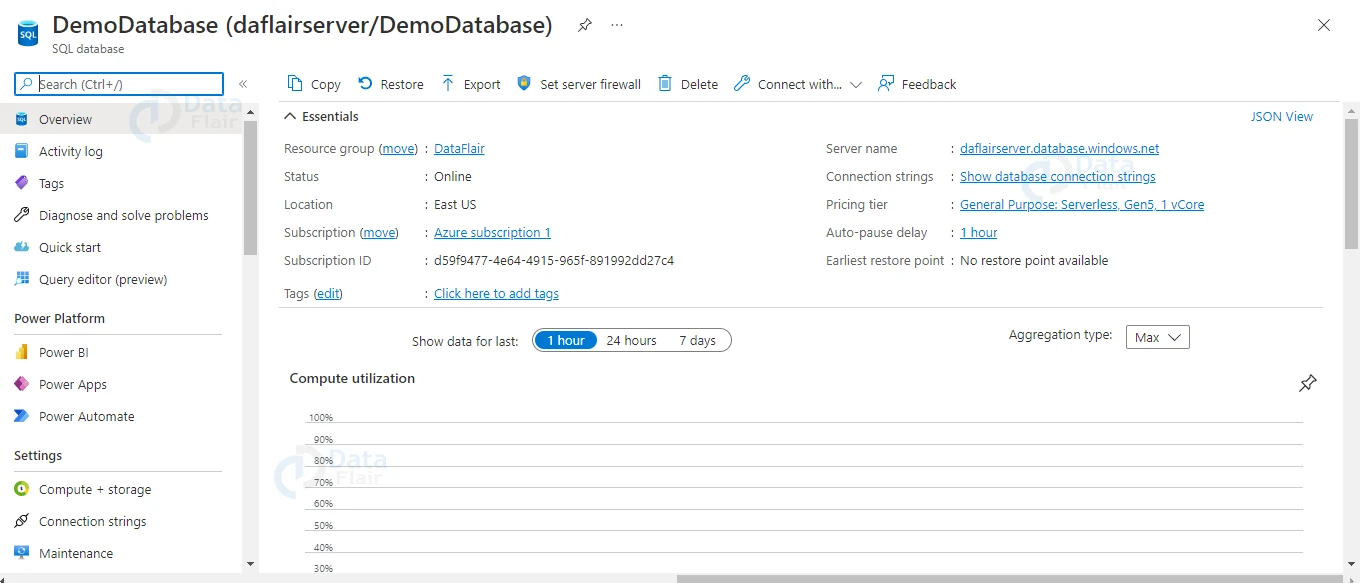
5: For the Database name, enter DemoDatabase.

6: Select Create new for Server and enter the following information in the New server form:

7: Select Create new for Server and enter the following information in the New server form:
Server name: Provide the name dataflairserver and add some characters to make it distinctive. Because in Azure server names must be globally unique for all servers in Azure, not simply unique inside a subscription, we can’t supply an exact server name to use. So, if any user enters in mysqlserver12345, the portal will tell you whether it’s available or not.
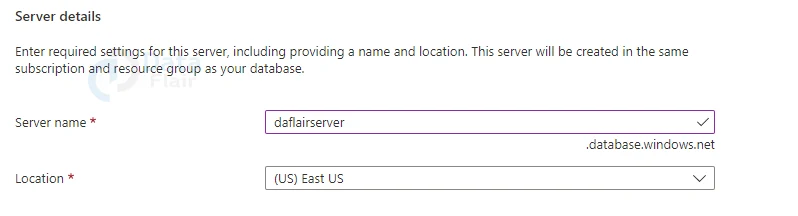
Location: From the dropdown menu, choose a location.
Authentication method: Choose Use SQL authentication.
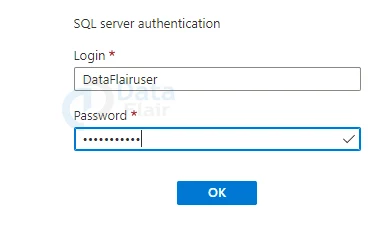
Server admin login: Here enter your admin’s information (We will provide DataFlairuser).
Password: Enter a password that satisfies the requirements, then confirm it in the Confirm password field.
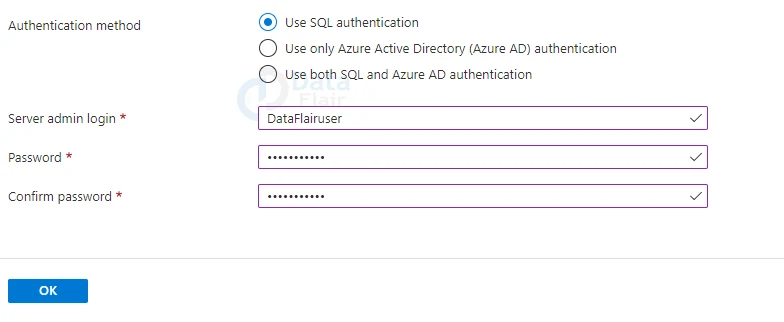
8: Hit the ok button.
9: Set the option to No if you don’t want to use the SQL elastic pool.
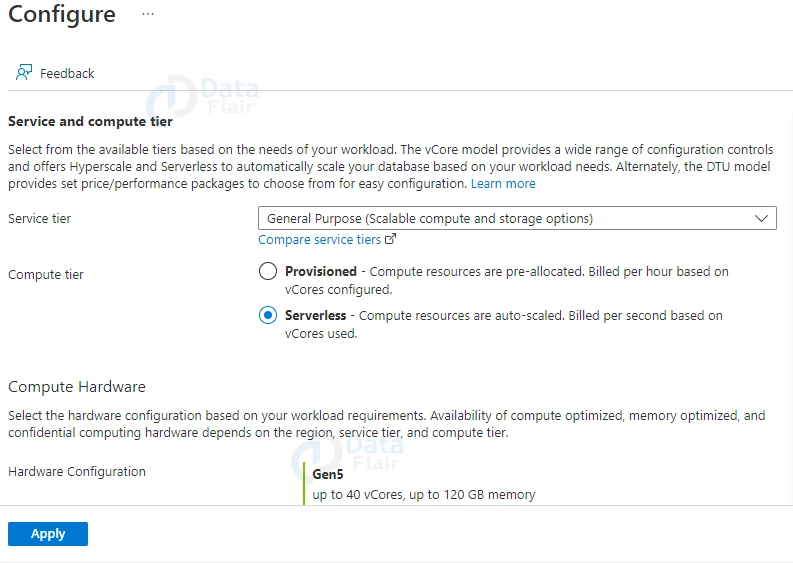
10: Select Configure database from the Compute + Storage menu.
Because this quickstart makes use of a serverless database, leave the Service tier at General Purpose (Scalable compute and storage options) and the Compute tier at Serverless. Apply should be selected).
11: At the bottom of the page, click Next: Networking.
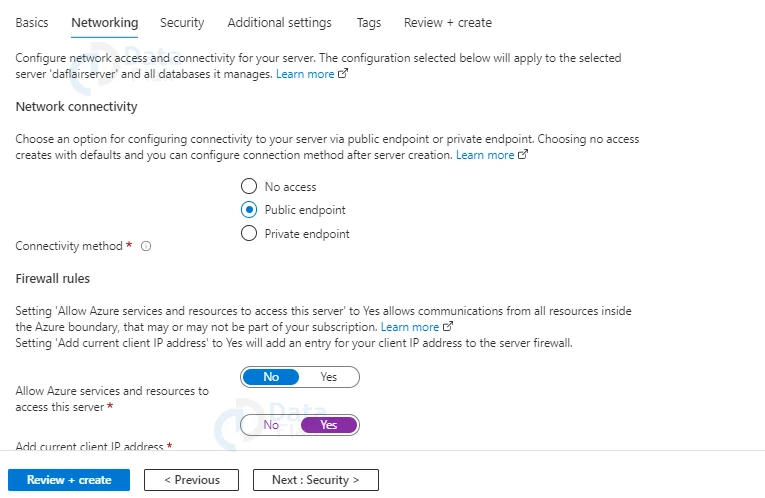
12: Select the Public endpoint under the Connectivity method on the Networking tab.
13: Set the Firewall rules to Yes, and add the current client IP address. Permit Azure services and resources to connect to the following server should be set to No.
14: At the bottom of the page, click Next: Security.
15: The option to enable Microsoft Defender for SQL is found on the Security tab. At the bottom of the page, select Next to go to Additional settings.
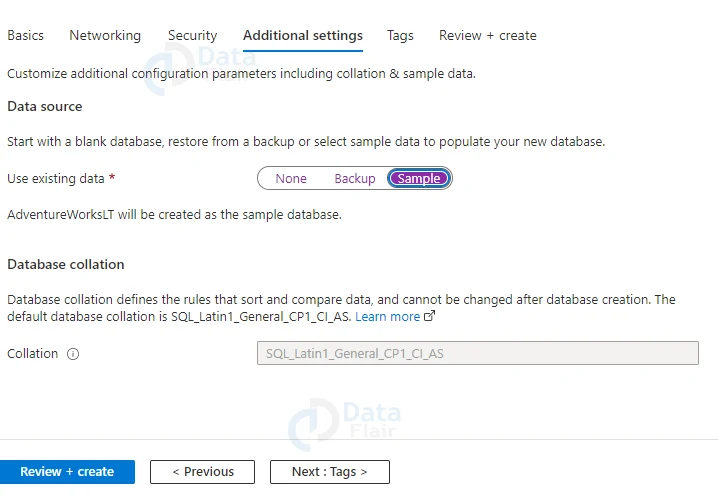
16: Select Sample from the Use existing data drop-down menu on the Additional options tab’s Data source section. Instead of an empty database, this builds an AdventureWorksLT sample database containing tables and data to query and explore.
17: At the bottom of the page, click Review + Create
Querying the database using Azure
After you’ve established your database, you may connect to it and query data using the Azure portal’s Query editor (preview) as per below steps:
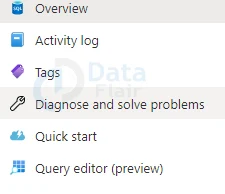
1: Search for and select SQL databases on the portal, then choose your database from the list.
2: Select Query editor (preview) from the left menu on the page for your database.
3: Select OK after entering your server admin login information.
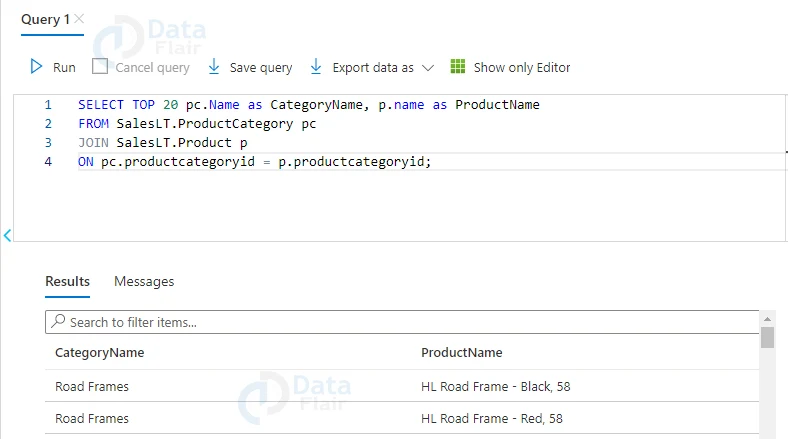
4: In the Query editor box, type the following query.
SELECT TOP 20 pc.Name as CategoryName, p.name as ProductName

FROM SalesLT.ProductCategory pc

JOIN SalesLT.Product p

ON pc.productcategoryid = p.productcategoryid;
5: Select Run, and then go to the Results window to look at the query results.
6: Now, close the Query editor page, and click on OK when prompted to discard your unsaved edits.
Azure Firewall Rules
We can define firewall rules on a logical server in Azure. IP regulations are one possibility. Based on the originating IP address of each request, IP rules will provide access to the database. The virtual network rule is the second type of rule. Virtual network service endpoints serve as the foundation.
There are two levels of rules for Azure SQL databases:
1. Server level firewall rules
Clients can access our complete Azure SQL server, i.e., each database within a logical server, using these firewall rules. The master database will store these firewall rules. The portal or Transact-SQL statements can be used to configure server-level firewall rules.
2. Database-level firewall rules
Clients can access certain (secure) databases within the same logical server using these rules. These rules can be created for each database (including the master database) and stored in the respective databases.
Configuring Firewall Rules in Azure
- Go to the firewall configuration you previously made in your database server. Click Add Client after that.
- Next, click Add existing virtual network and fill in the relevant information, as indicated in the diagram.
- Finally, click Save, and you’ll see that your firewall rules have been modified.
Geo-Replication in Azure
It is created as a business continuity solution that allows the application to execute speedy disaster recovery of individual databases in the event of a regional disaster or large-scale outage. It is defined at the database level, not the server level.

We define a secondary database at a location far away from the primary while configuring geo-replication.
We can have a traffic management that sends traffic to our primary load balancer by default, and the primary load balancer is selected based on the application request. It can route to a primary logical server if it is read and write.
It can route to a secondary server if it is ‘read-only.’ As a result, geo-replication has the advantage of allowing us to offload some of the read-only traffic from primary and route it to secondary.
Because read-only queries use a specific number of CPU or DTU units, the primary performance will be good. We also have a secondary database where the data is continuously replicated.
Configuring Geo-Replication in Azure
- When you select Geo-Replication, a window appears on the screen.
- Now choose the place where you want your database to be replicated. Multiple places are available.
- Create a SQL server for the location where you want your data to be replicated.
- Your server has been successfully established and replicated.
- The replication of the servers can be seen on the screen.
Failover Groups in Azure
The SQL database’s auto-failover group functionality allows us to manage replication and failover of a group of databases on a logical server or all databases in a Managed Instance to a different region.
We can either manually begin failover or delegate it to the SQL Database service based on a user-defined policy.
Any outage that affects one or more of the databases in the group results in automatic failover when we use auto-failover groups with automatic failover policy.
When the database changes during failover, it allows the read-write SQL application to transparently re-join to the primary database.
Database Backups in Azure
The SQL database creates full, differential, and transaction log backups for Point-in-Time Restore using SQL server technology (PITR).
Transaction log backups are normally performed every 5-10 minutes, and differential backups are often performed every 12 hours, depending on the compute size and database activity.
The default backup retention duration for each SQL database is between 7 and 35 days, depending on the purchasing type and service tier. Long-term backup retention (LTR) makes use of the entire database backups that are made automatically to allow point-in-time restore.
If the LTR policy is enabled, these backups are replicated to other storage blobs. For each SQL database, we can define an LTR strategy that specifies how often backups should be copied to the long-term storage blobs.
Cleaning up resources
To go to the next phases, keep the resource group, server, and single database, and learn how to connect and query your database using various techniques.
When you’re done with these resources, you can delete the resource group you made, which will also remove the server and single database it contained. Follow below steps for the same:
1: Search for and choose Resource groups in the portal, then choose resource groups from the list.
2: Select Delete resource group from the resource group page.
3: Enter the resource group in the Type the resource group name box, then click Delete.
Conclusion
You may develop a highly available and high-performance data storage layer for Azure apps and solutions with Azure SQL Database. Because it has the capability to process both relational data and non-relational structures such as graphs, JSON, spatial, and XML, SQL Database is a good fit for a range of modern cloud applications.
We work very hard to provide you quality material
Could you take 15 seconds and share your happy experience on Google


