How to Set and Change Margins in MS Word?
FREE Online Courses: Click for Success, Learn for Free - Start Now!
Margins in a Word document refers to the space between the content and the edge of a page. Adding proper margins to your document increases its presentability and makes reading easier for the viewers. By default, Word documents have a 1-inch margin on each side of the page, but they can be customized according to the needs of the document.
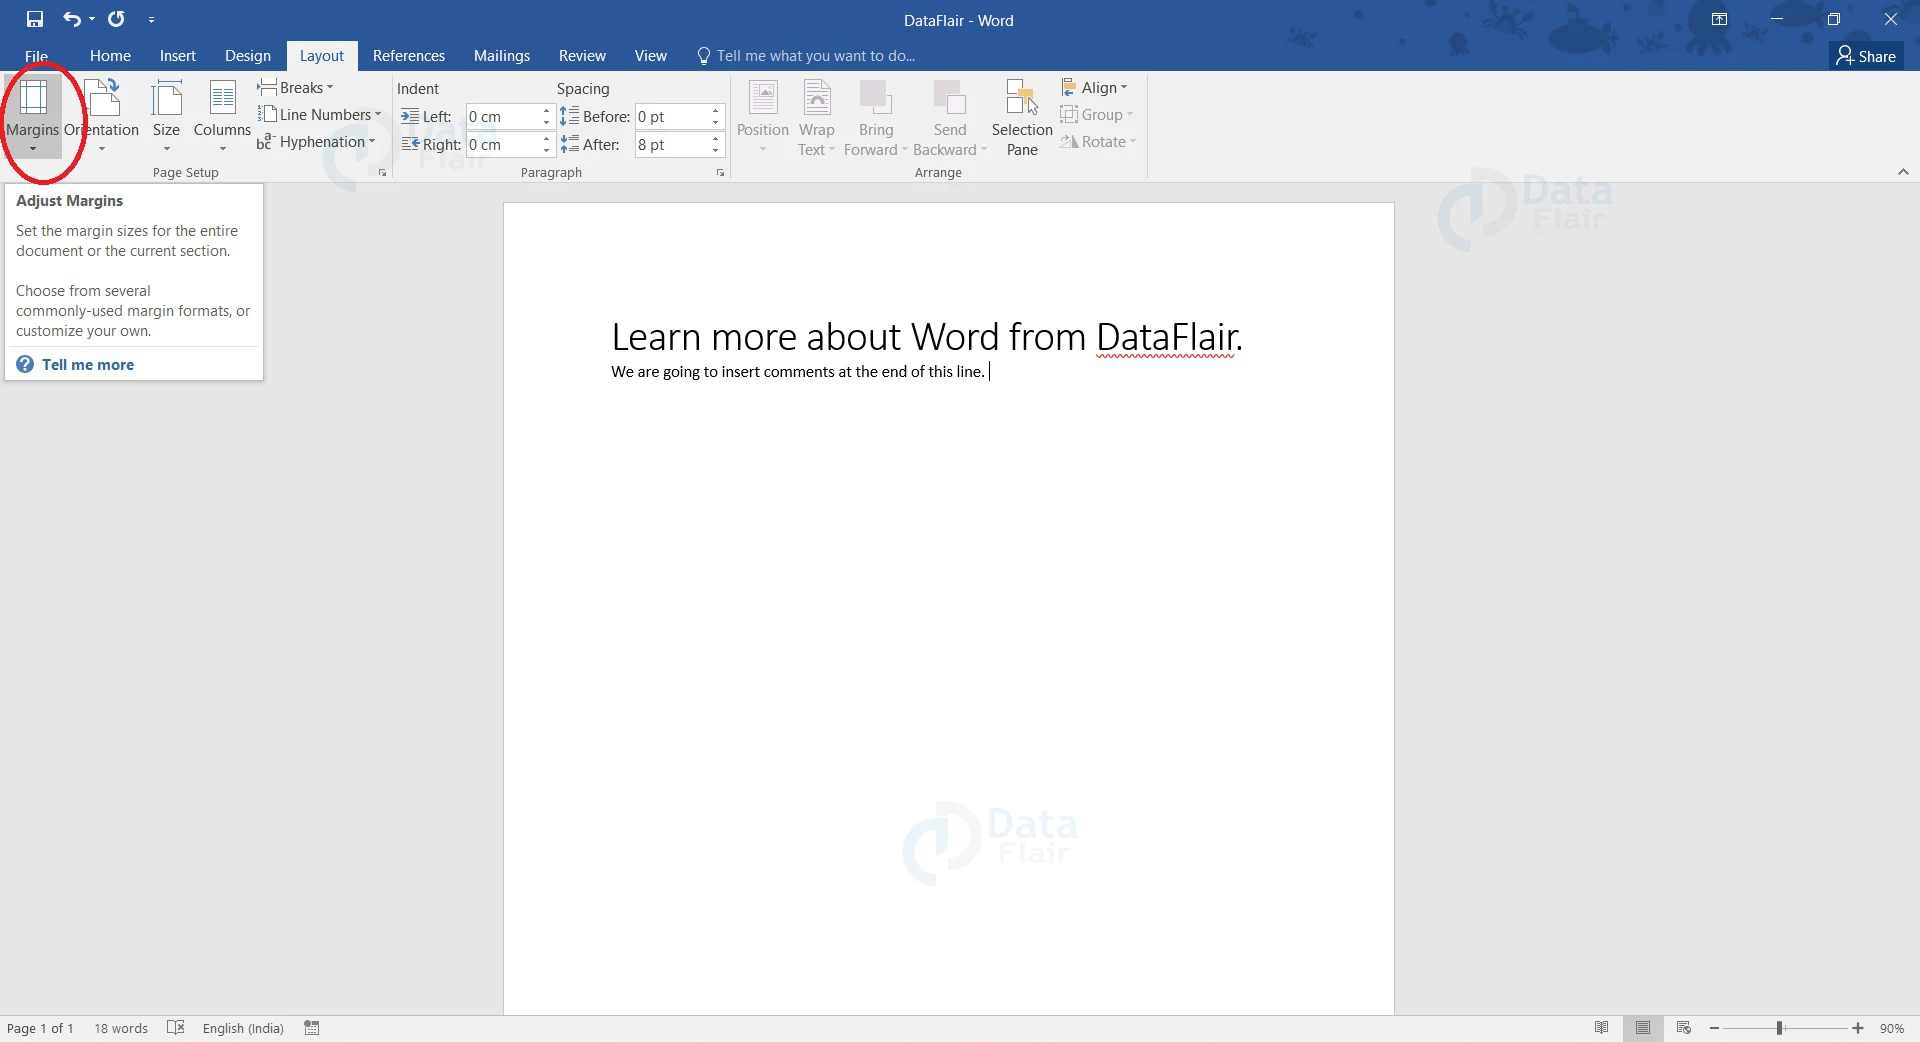
Let us see how we can change margins in Word. Most tools for changing margin settings can be found in the Margins group under the Layout tab ribbon.
Set Margins in Word
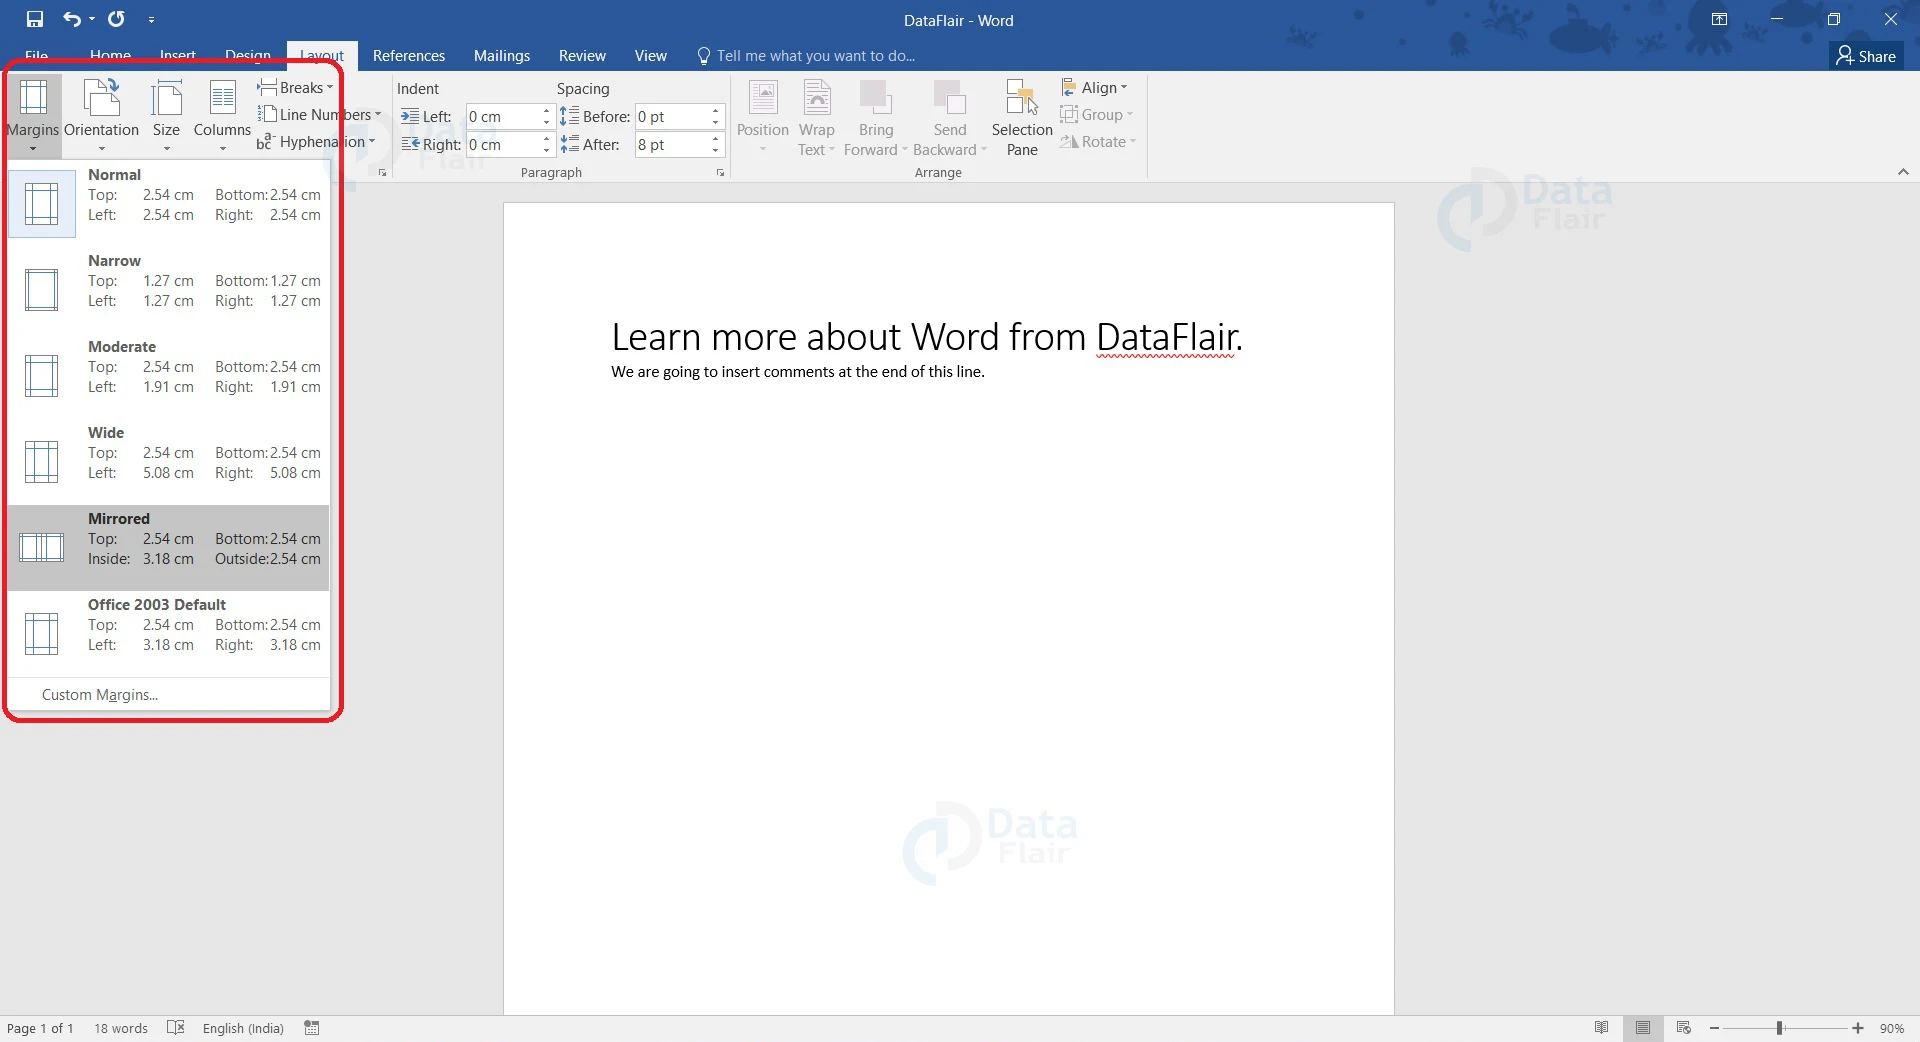
Word documents have a margin of 1 inch on each side of the page. You can choose to select another preset margin setting if you want to.
1. Select Layout tab
2. Under the Margins group, select the Margins option.
3. Choose one of the preset margin settings.
If you want to use a custom margin setting, you can follow the steps mentioned below.
Set Custom Margins in Word
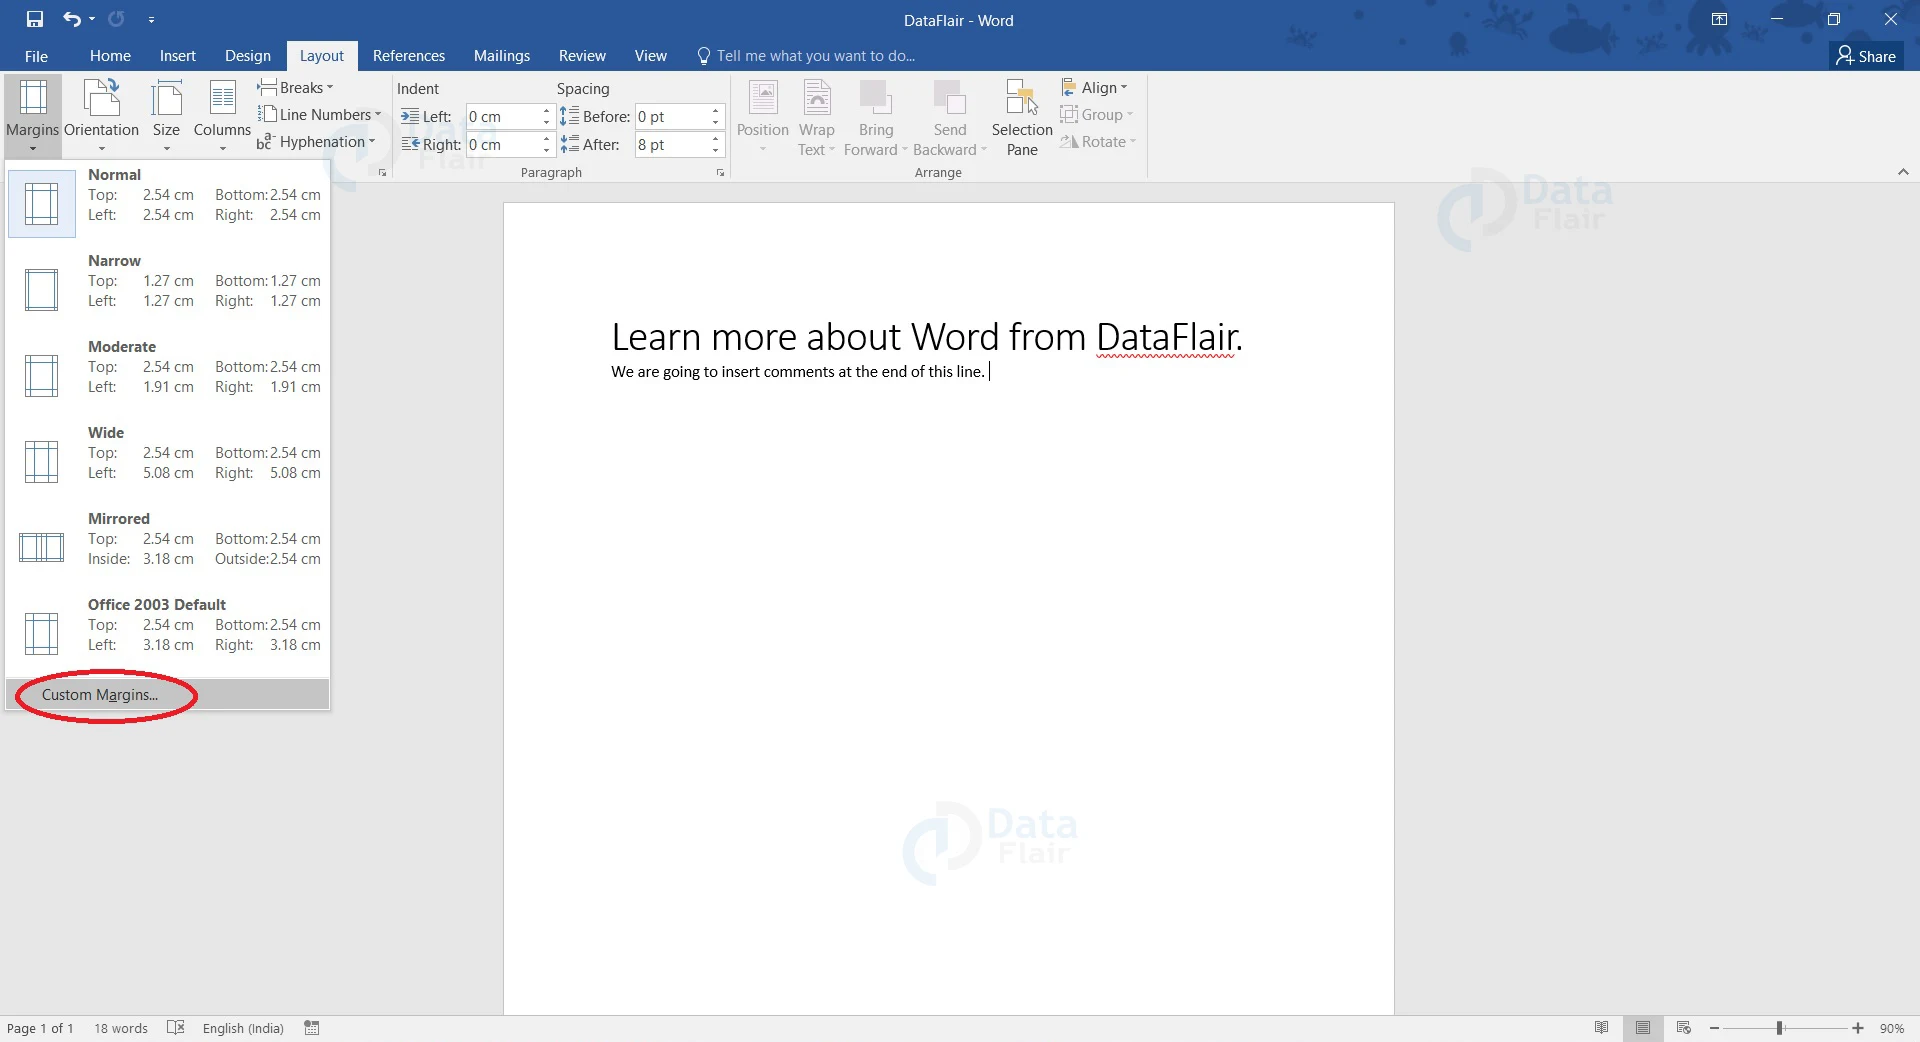
1. Select the Margins button on the Layout tab.
2. Select Custom Margins… option.
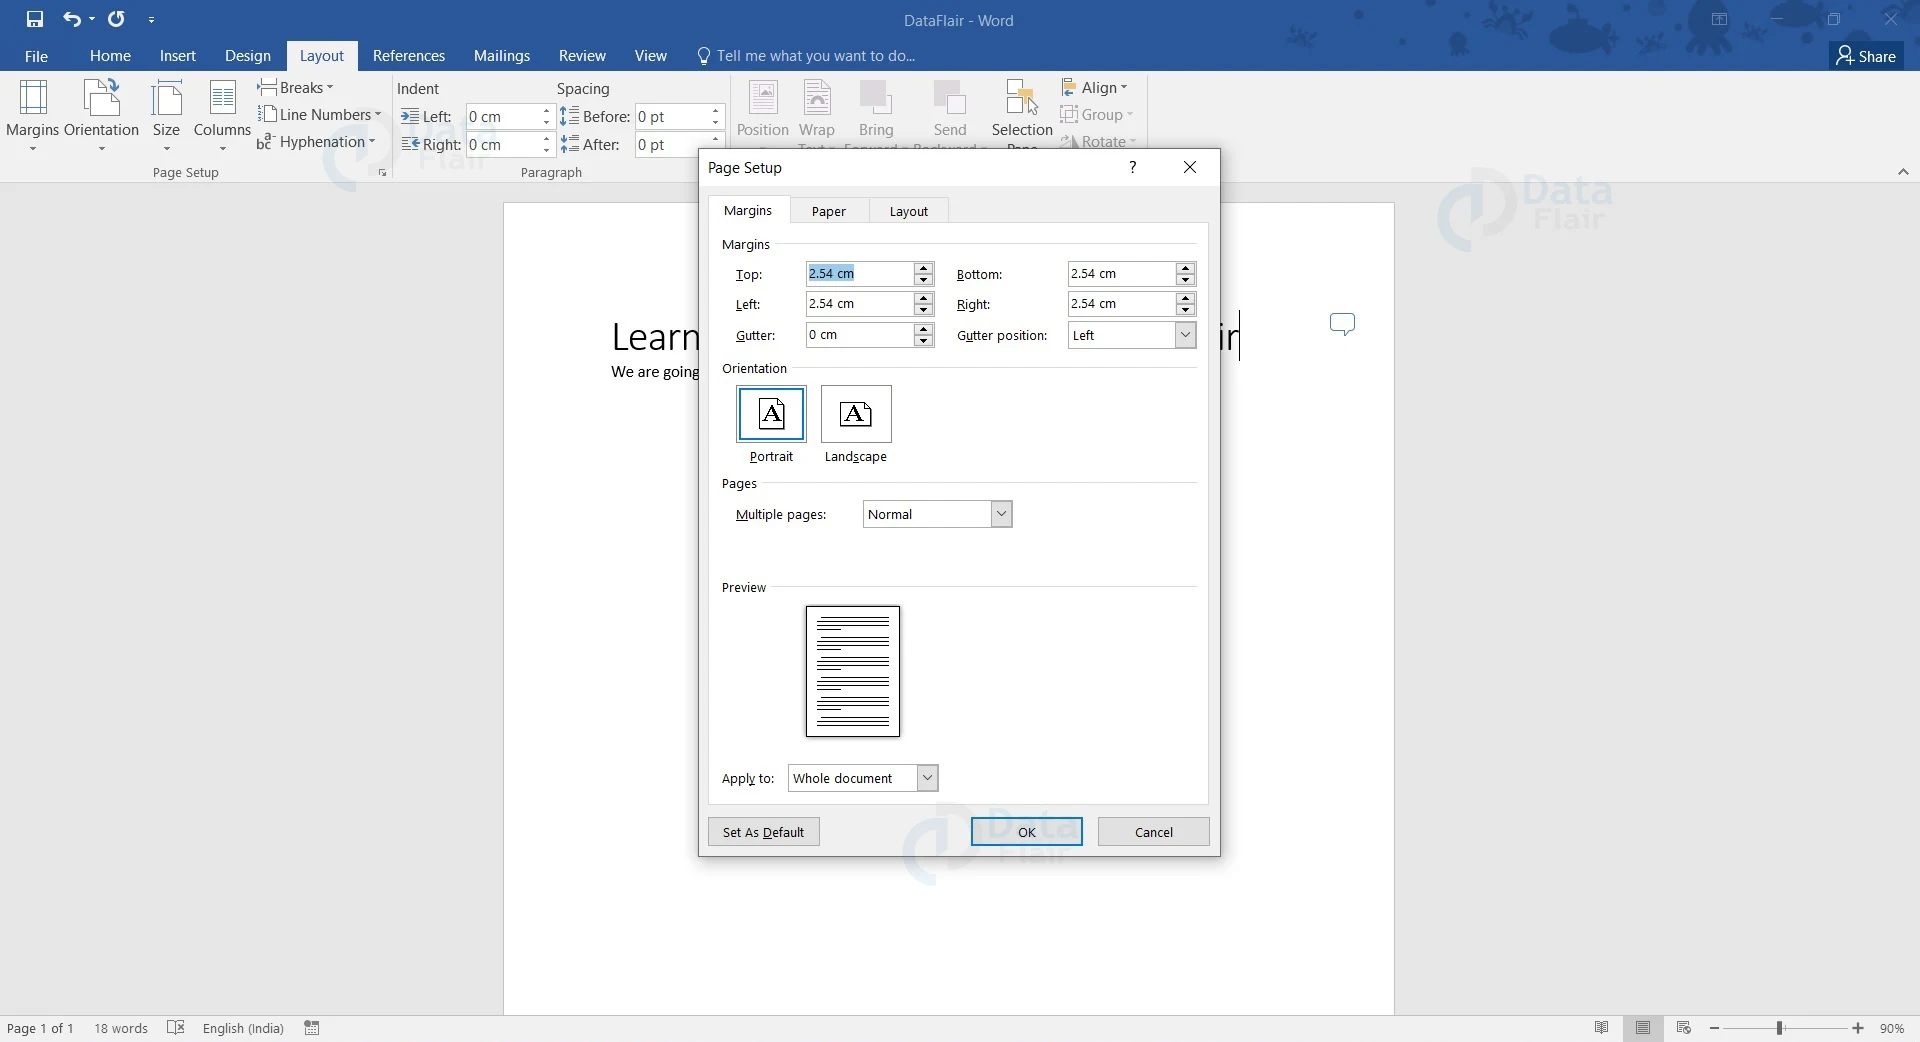
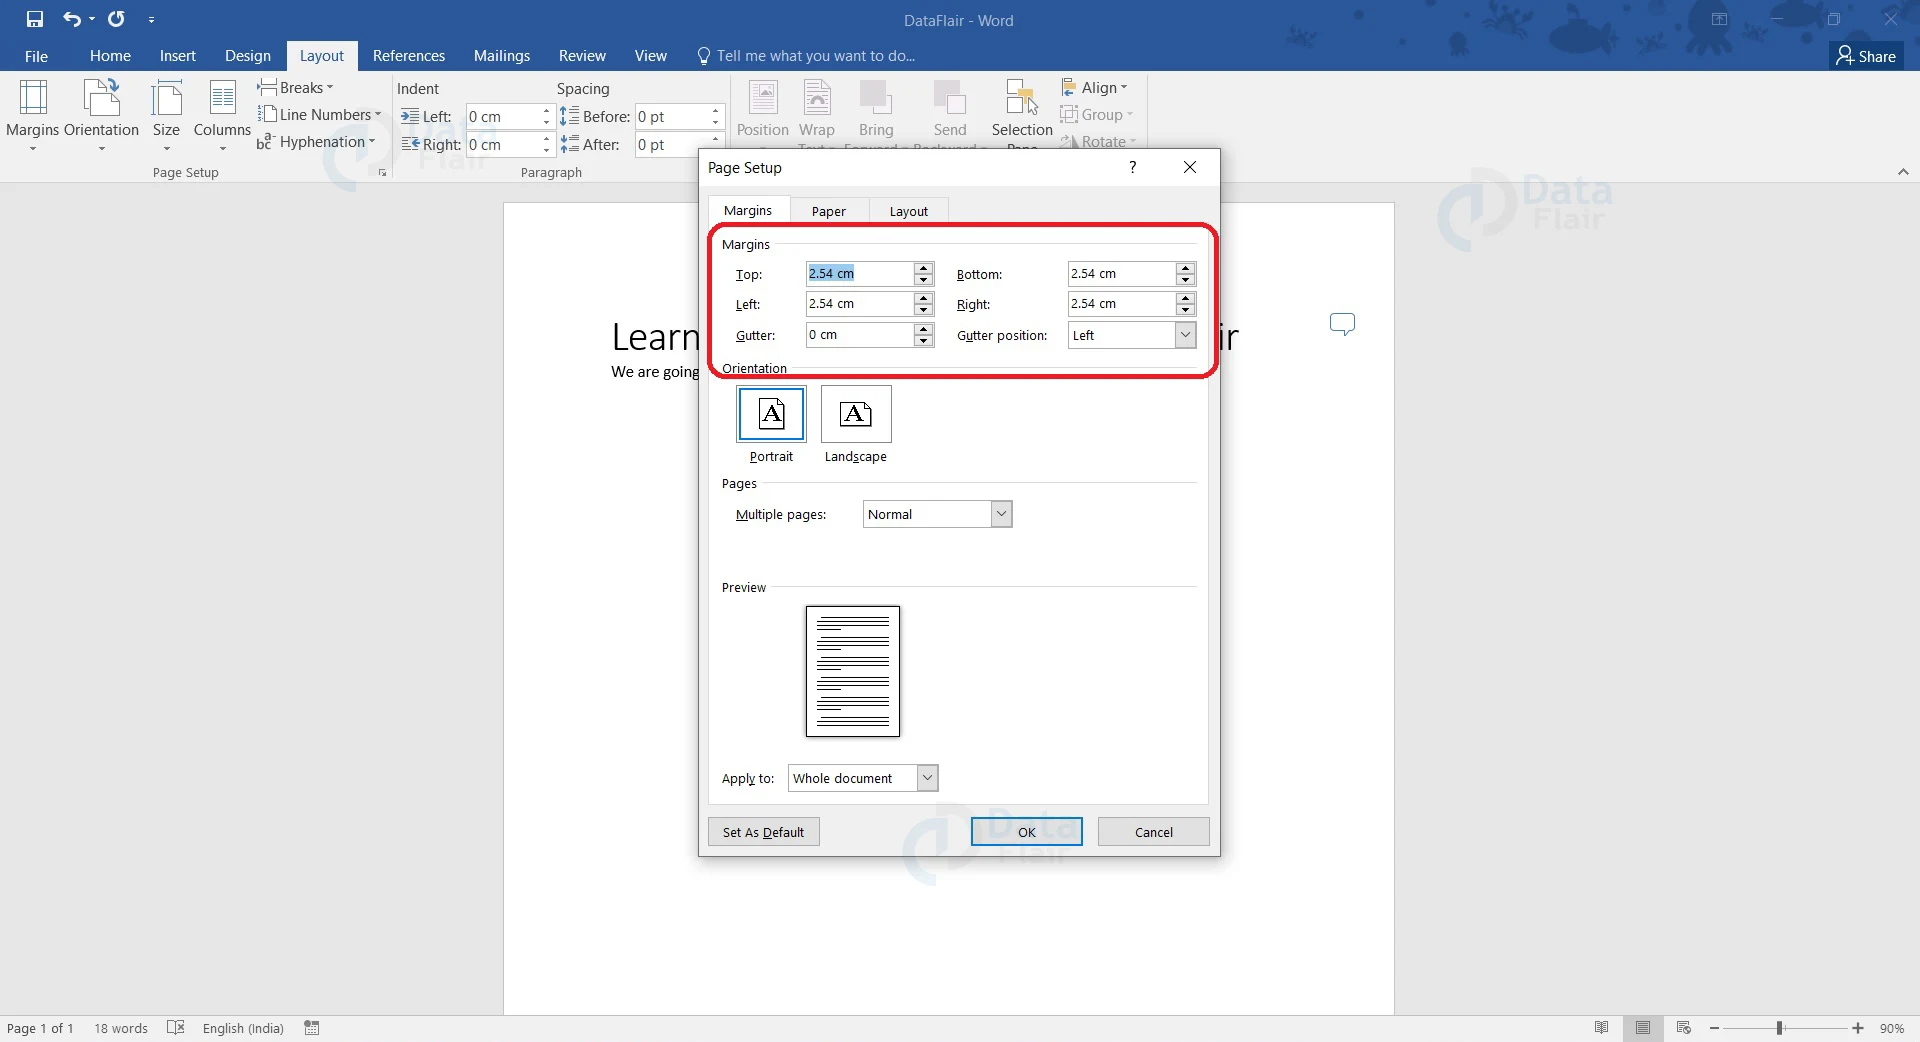
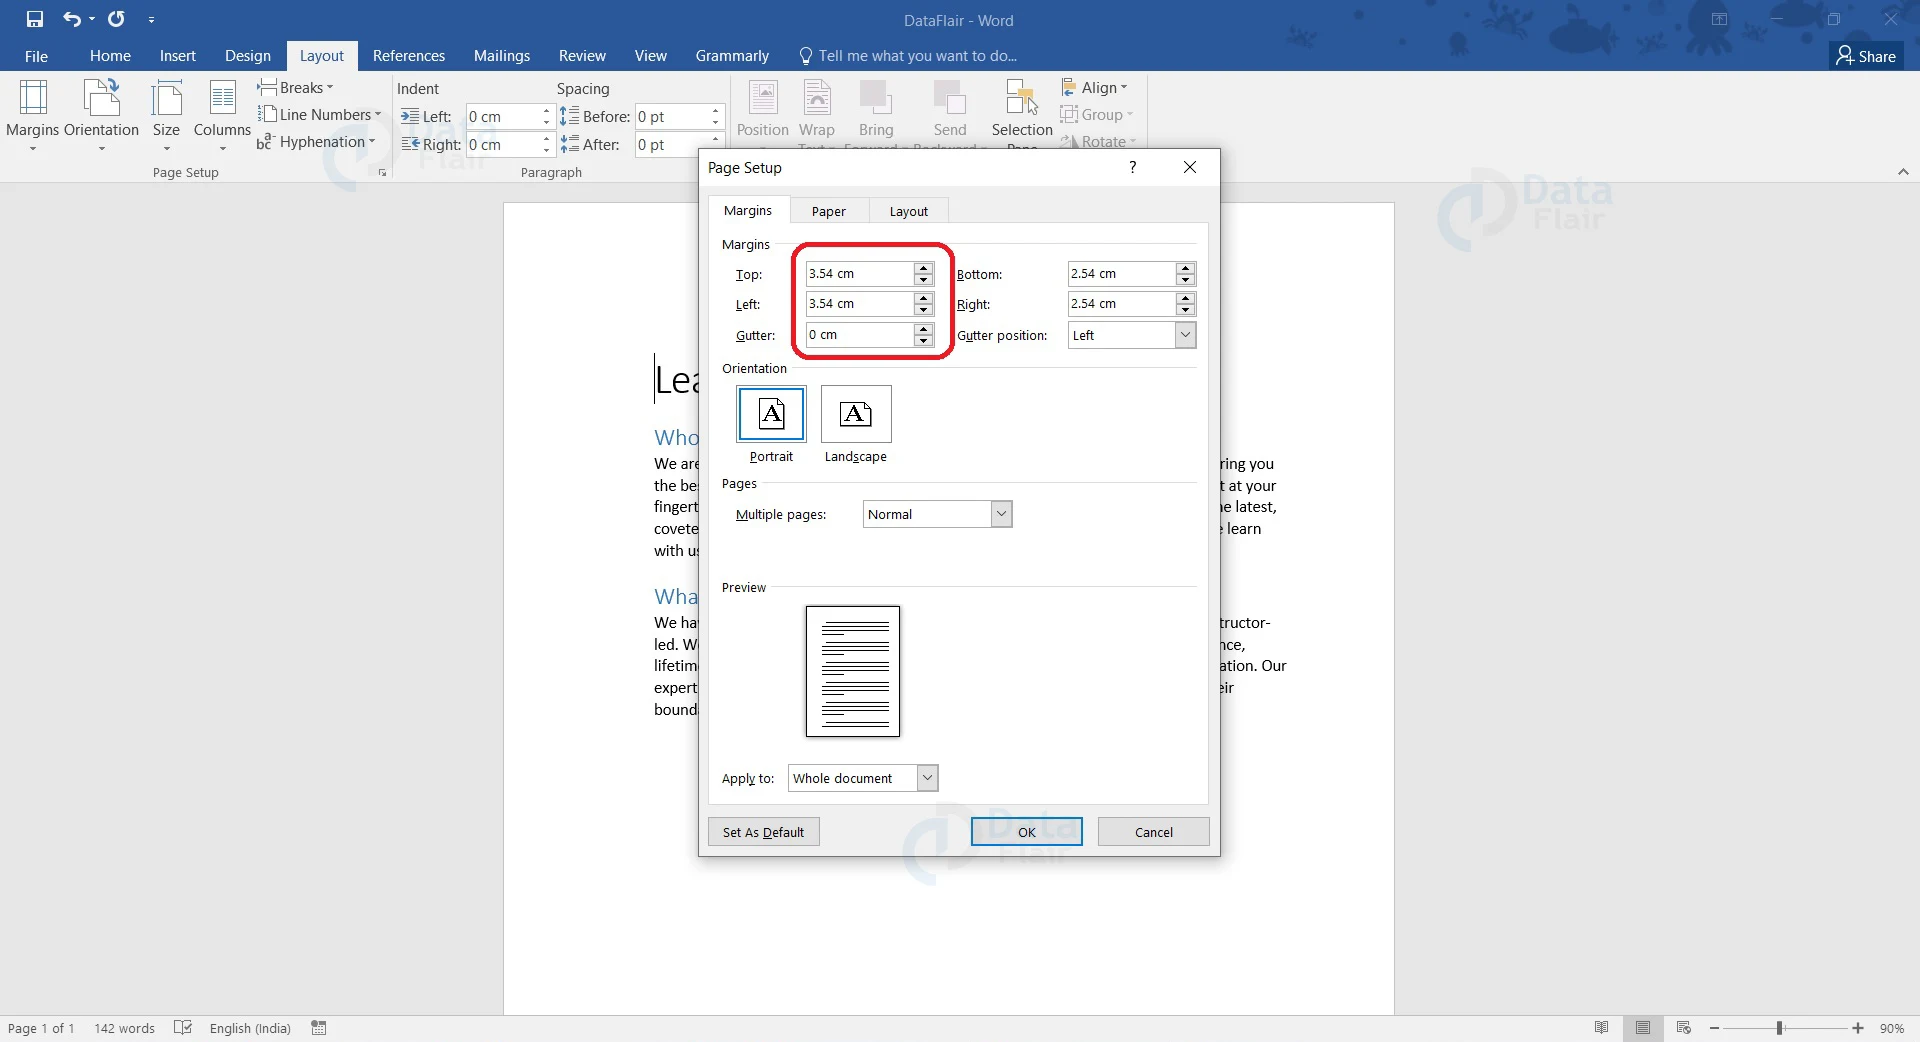
3. The Page Setup dialog box appears. Here, change the margin settings for Top, Left, Bottom, and Right.
4. If you wish to bind the printed document, use the Gutter settings to leave the appropriate space in the appropriate position.
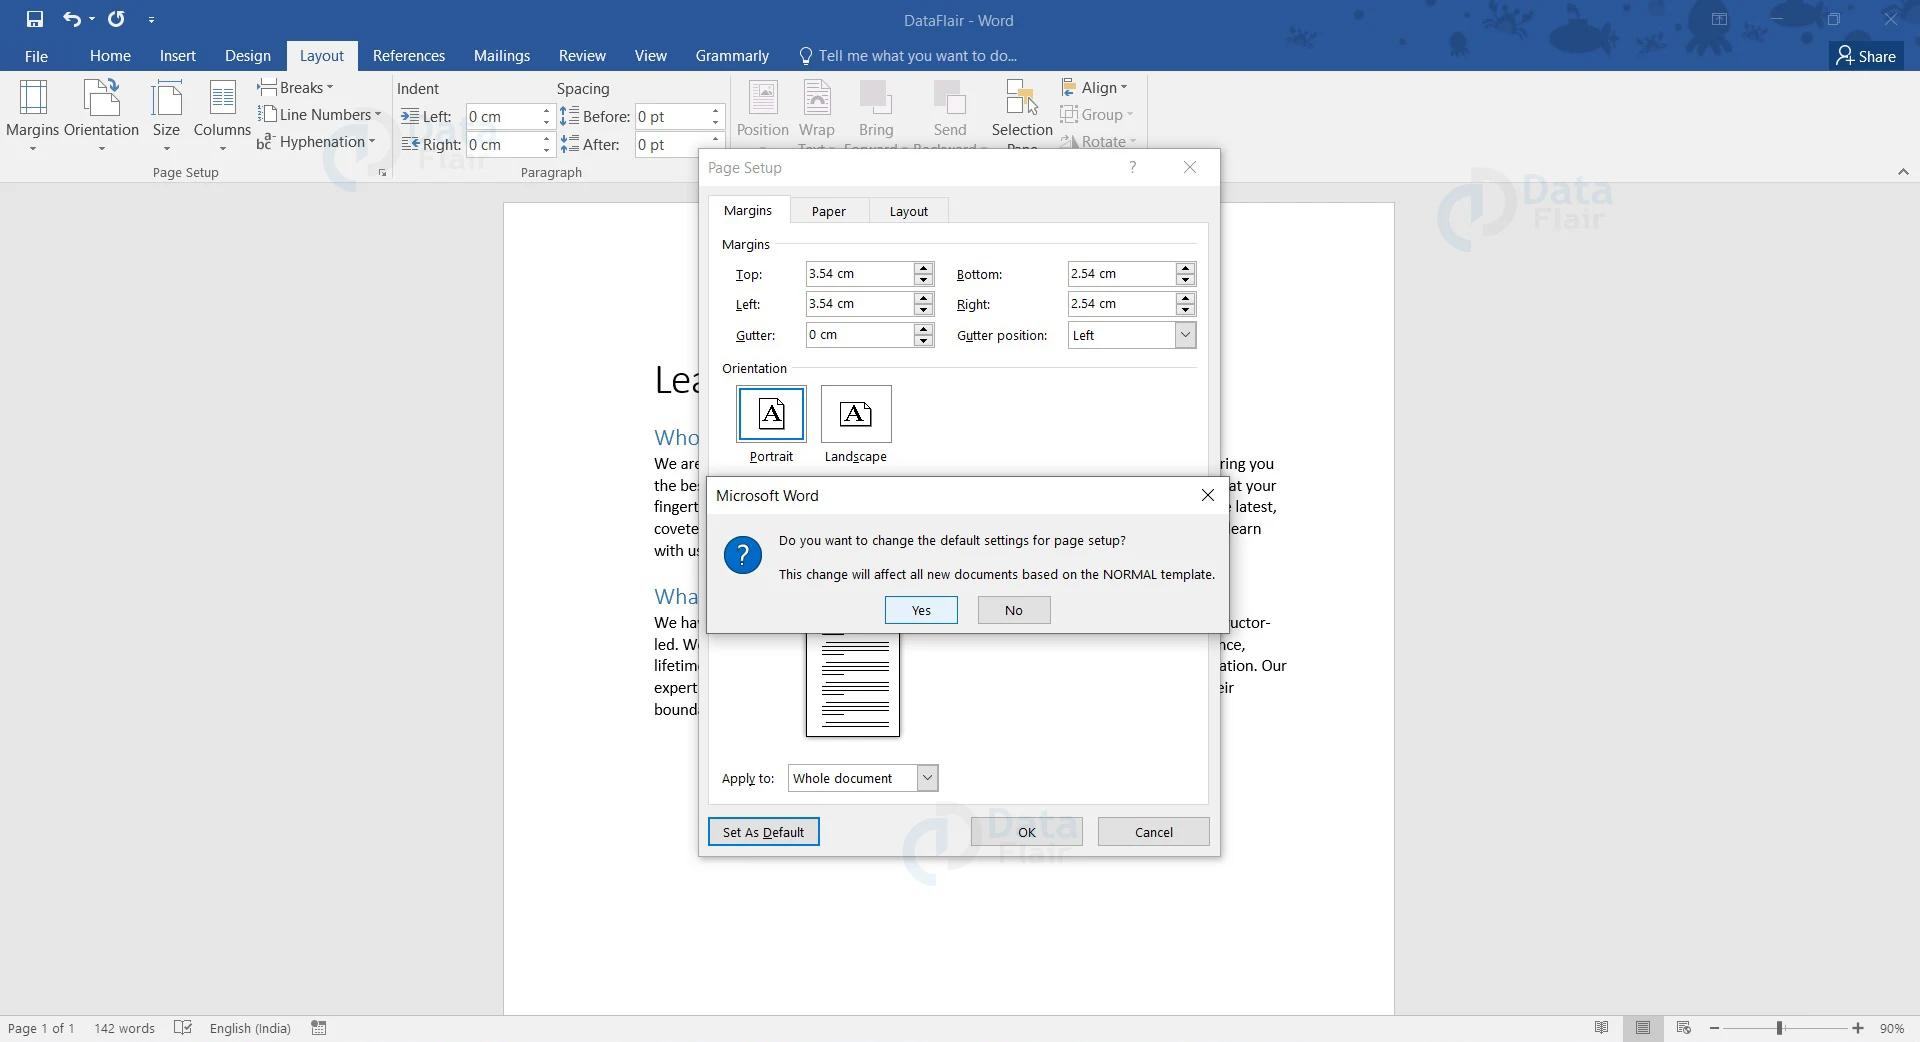
5. You can set this margin setting as the default setting for all of your future documents on Word. To do this, click on the Set as Default button. Click Yes to set this margin style as your default setting. If you wish to use this custom margin setting only once, click OK. You will see that the margin setting has been applied to your document.
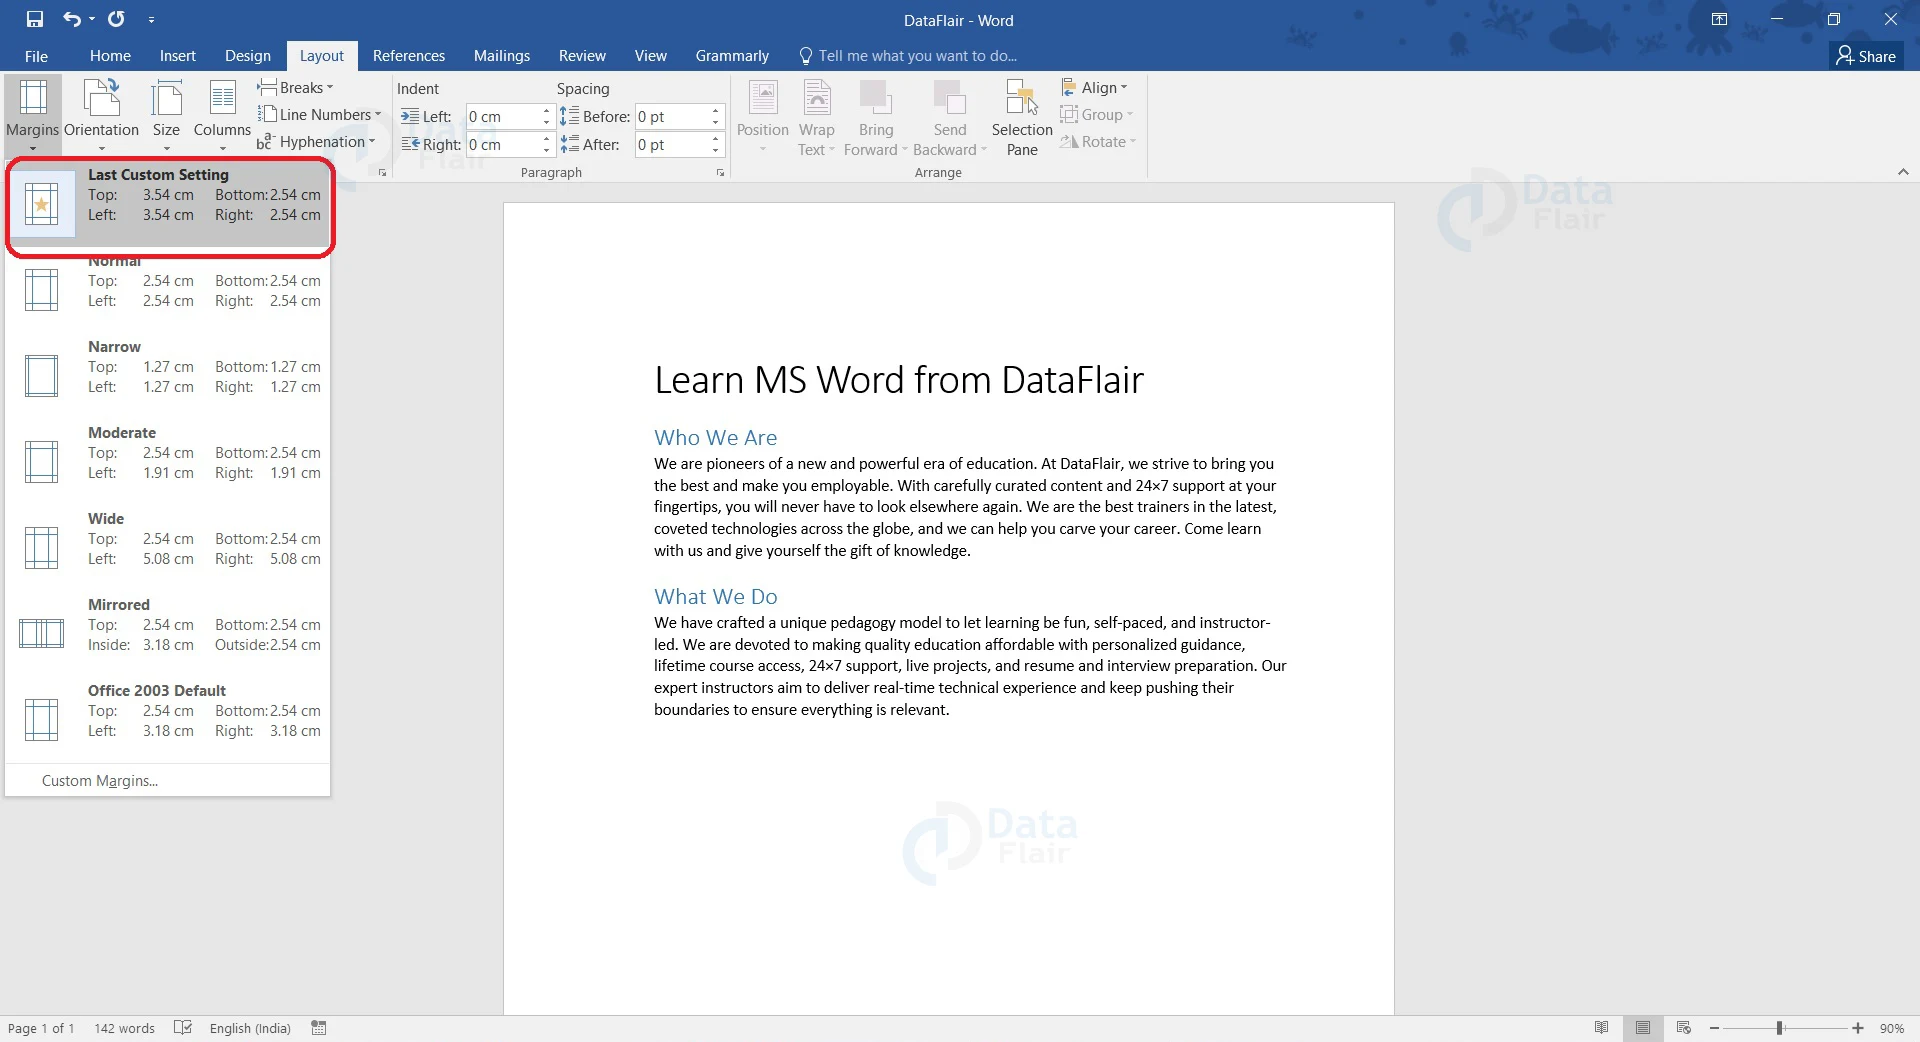
You can now click on the Margins button and you will find the last custom setting has been added.
Change Page Margins in Word using the Ruler
In Word, you can change page margins by dragging the margin settings along the Ruler. However, the recent versions of Word do not show the Ruler by default. So, you would have to make sure the Ruler is visible to change the page margins.
This method is only useful when the document is short and has a few pages. It is better to use preset margins or make custom margins for long documents as it becomes inefficient for longer documents.
Follow these steps to adjust the page margin using Rulers.
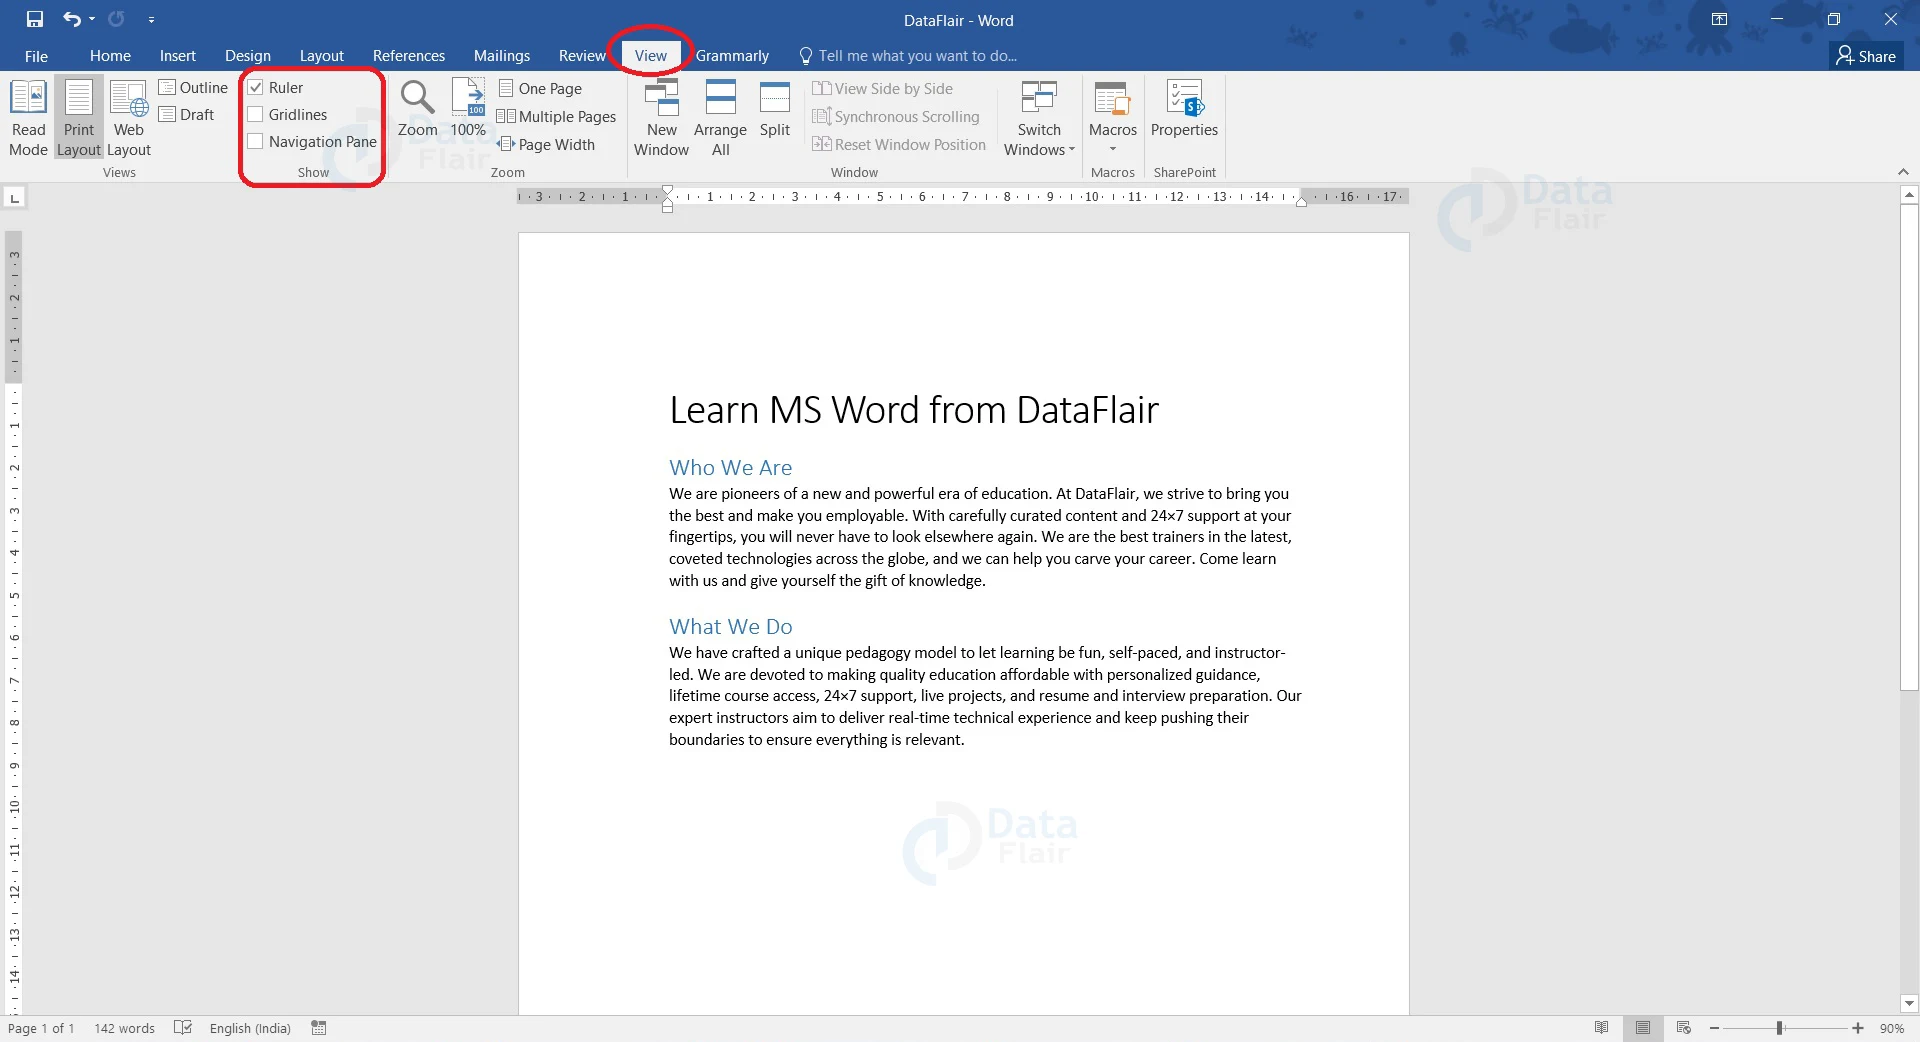
1. Go to the View tab, and select the Ruler checkbox in the Show group.
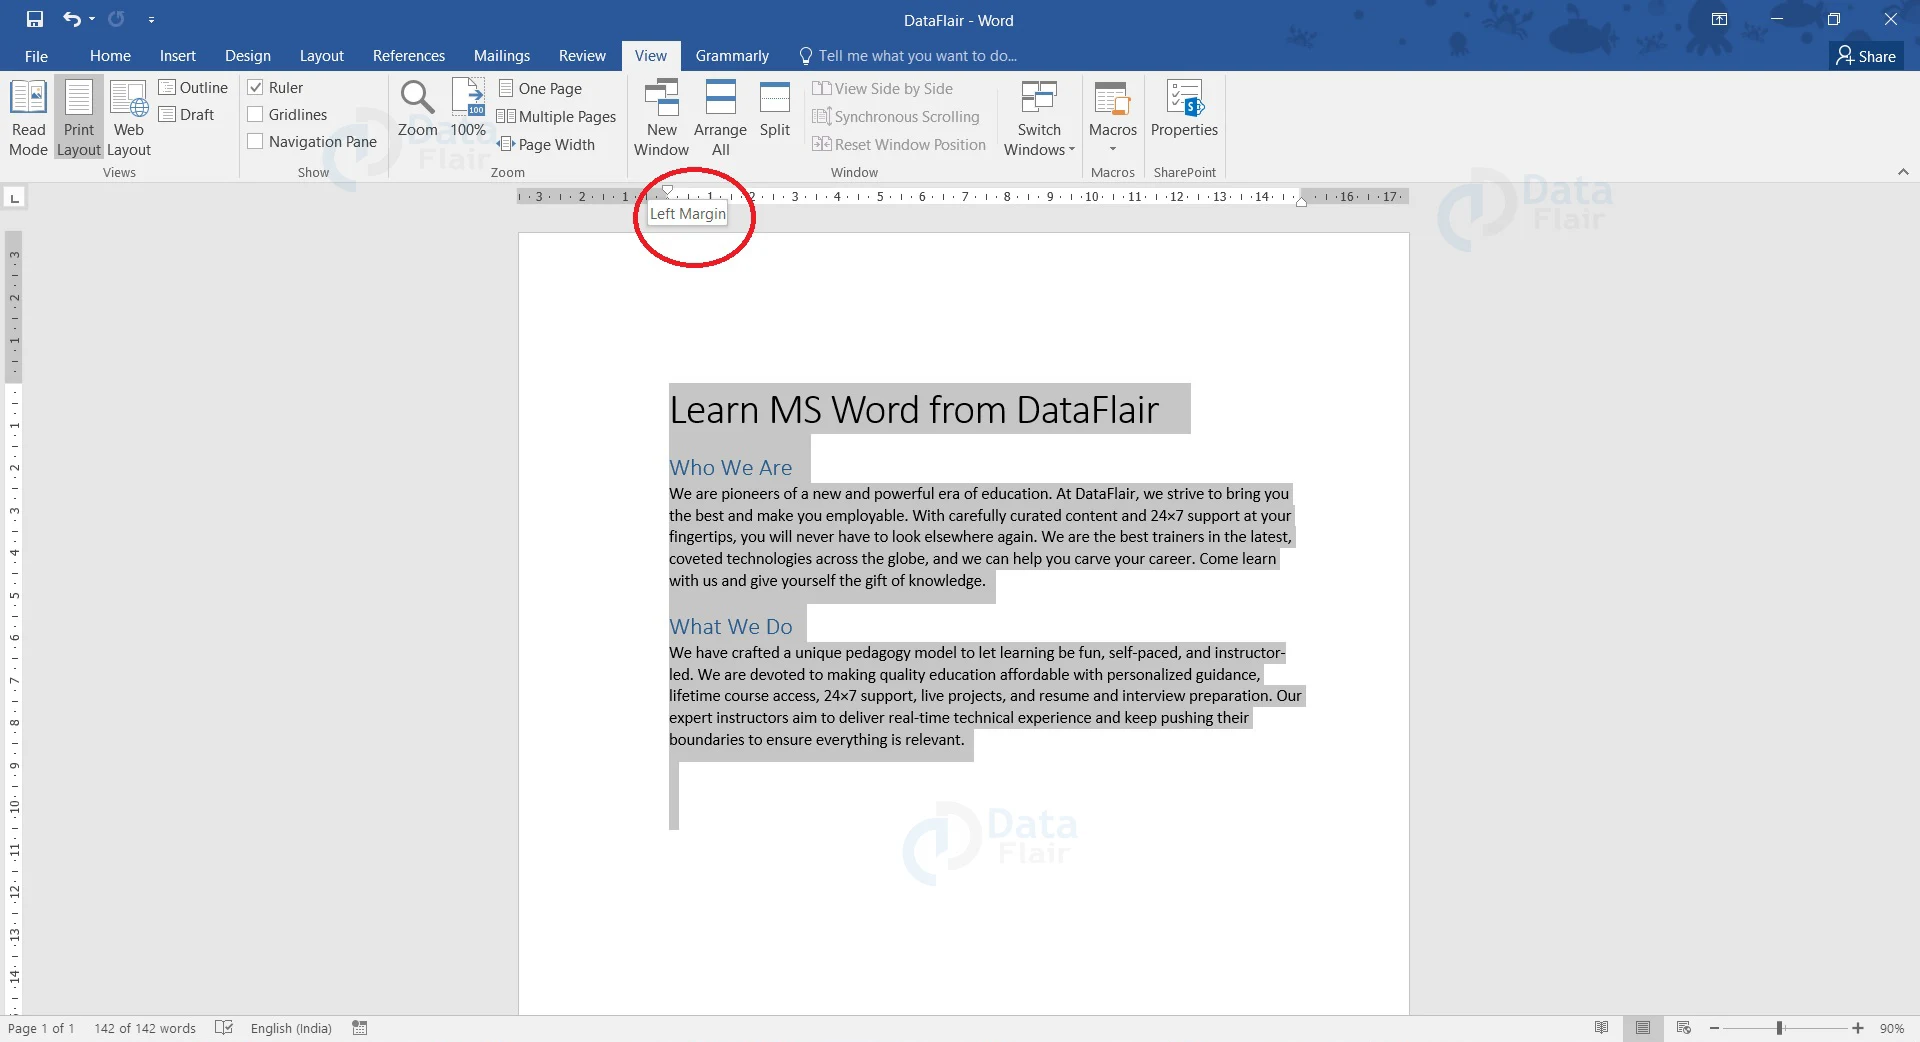
2. Use Ctrl+A keys to select the entire document.
3. Move your cursor to the grey area in any of the margins. As you hover around the boundary between the grey and white area, the mouse pointer changes to a double-sided arrow. Here, since we have gone near the left margin, it says Left Margin. Similarly, Word would also show Right Margin, Top Margin, and Bottom Margin for the document.
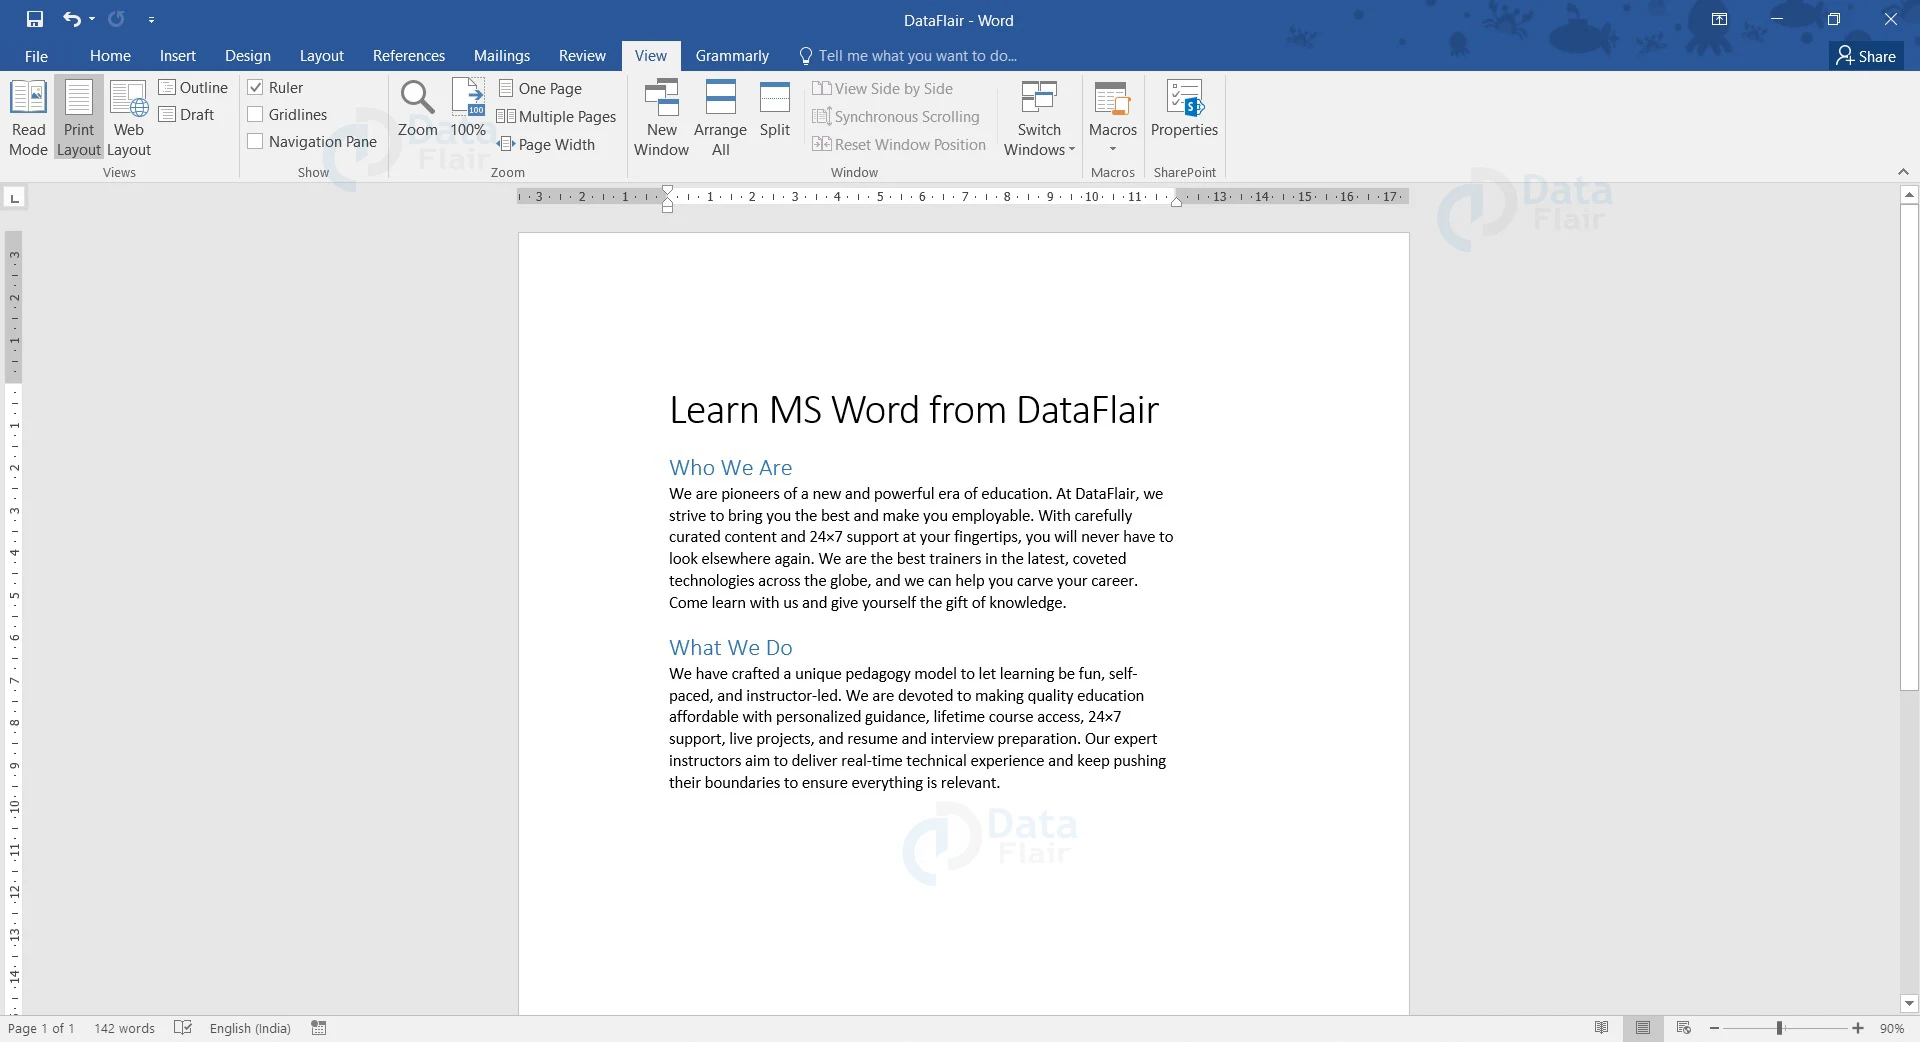
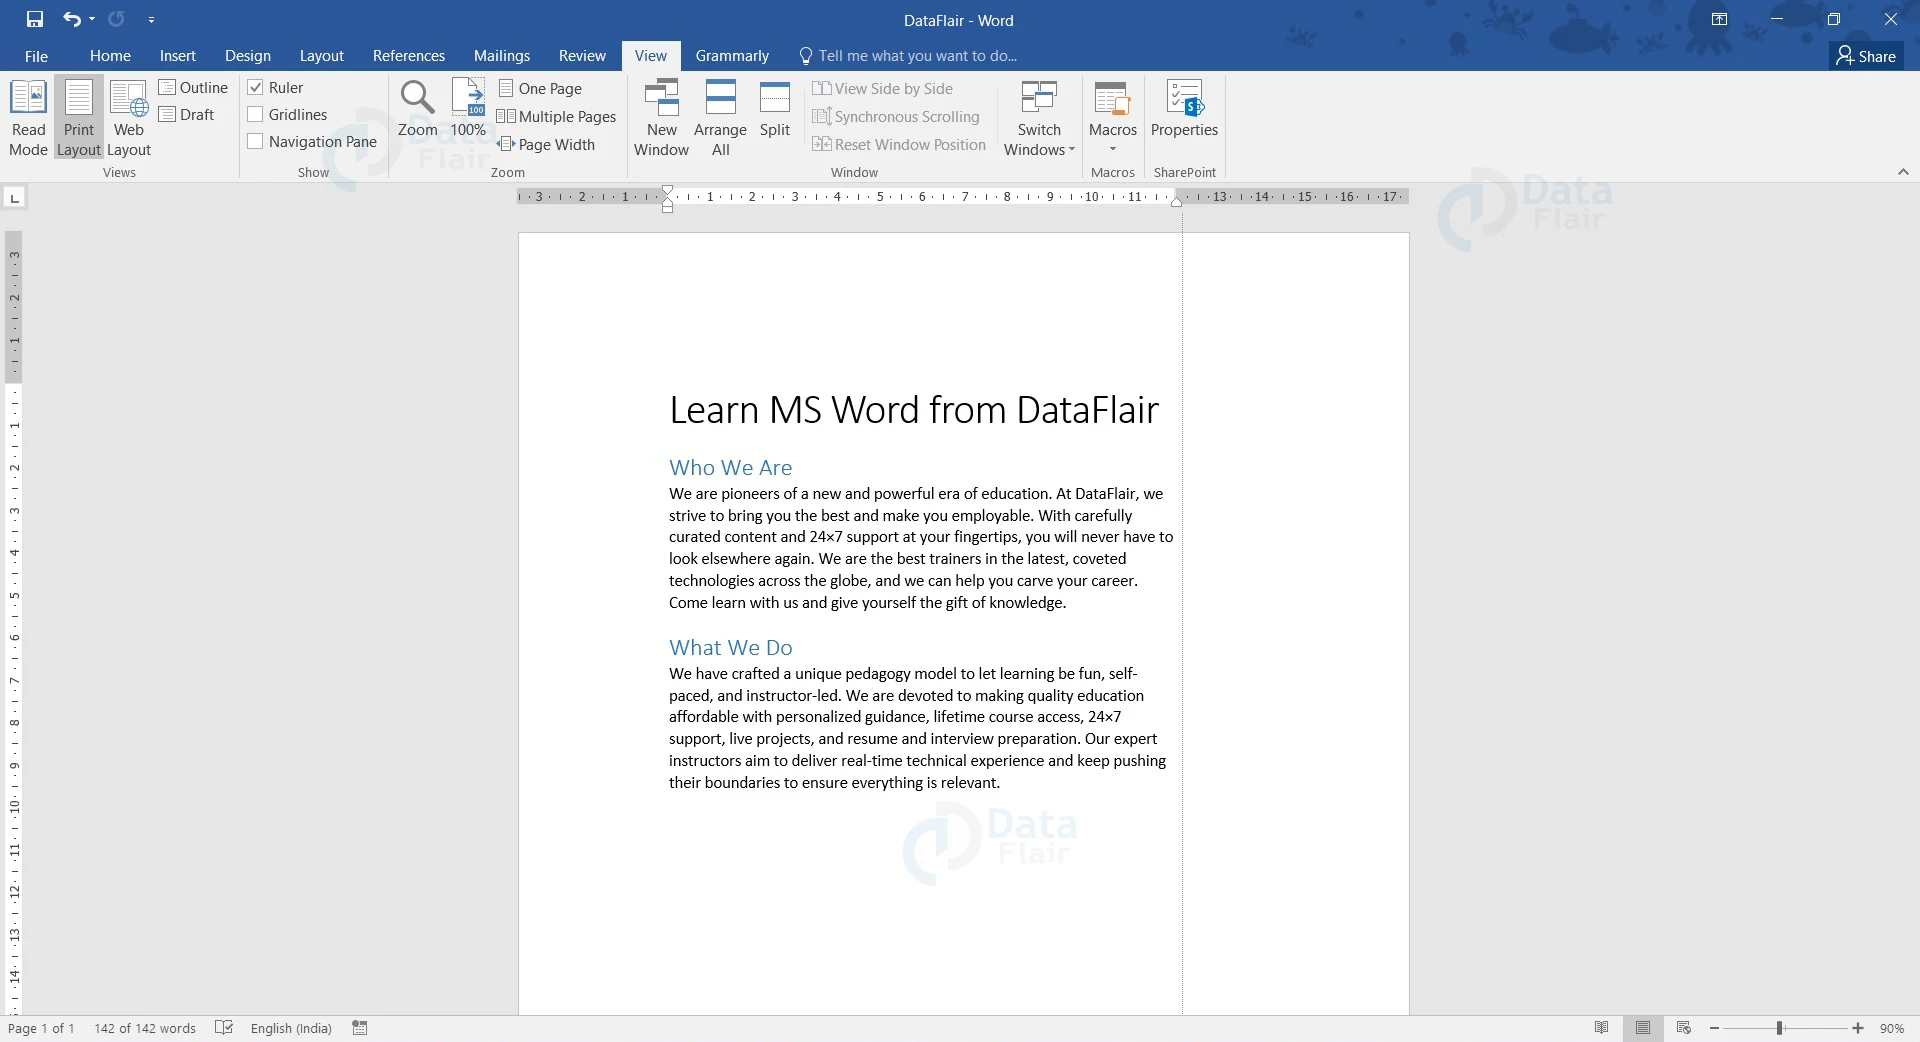
4. With the left mouse button pressed and the pointer as a double-headed arrow, slide the pointer to adjust the margin.
5. Once done, release the mouse button. The new margin has been defined.
Summary
Adding margins make a document look presentable and tidy. They are a very important element of a page while documentation. Using proper margins make your work look sophisticated and ensures a good impression on the readers.
If you are Happy with DataFlair, do not forget to make us happy with your positive feedback on Google
