React Installation in Easy Steps
Job-ready Online Courses: Dive into Knowledge. Learn More!
React is one of the most popular JavaScript libraries for building user interfaces. It provides a simple and efficient way to build complex user interfaces, making it a great choice for web developers. In this article, we will be discussing the process of React installation and getting started with your first React project.
Starting with react installation process:
React is a JavaScript library for building user interfaces. To get started with React, you will need to have a basic understanding of JavaScript, HTML, and CSS. Here are the steps to install React:
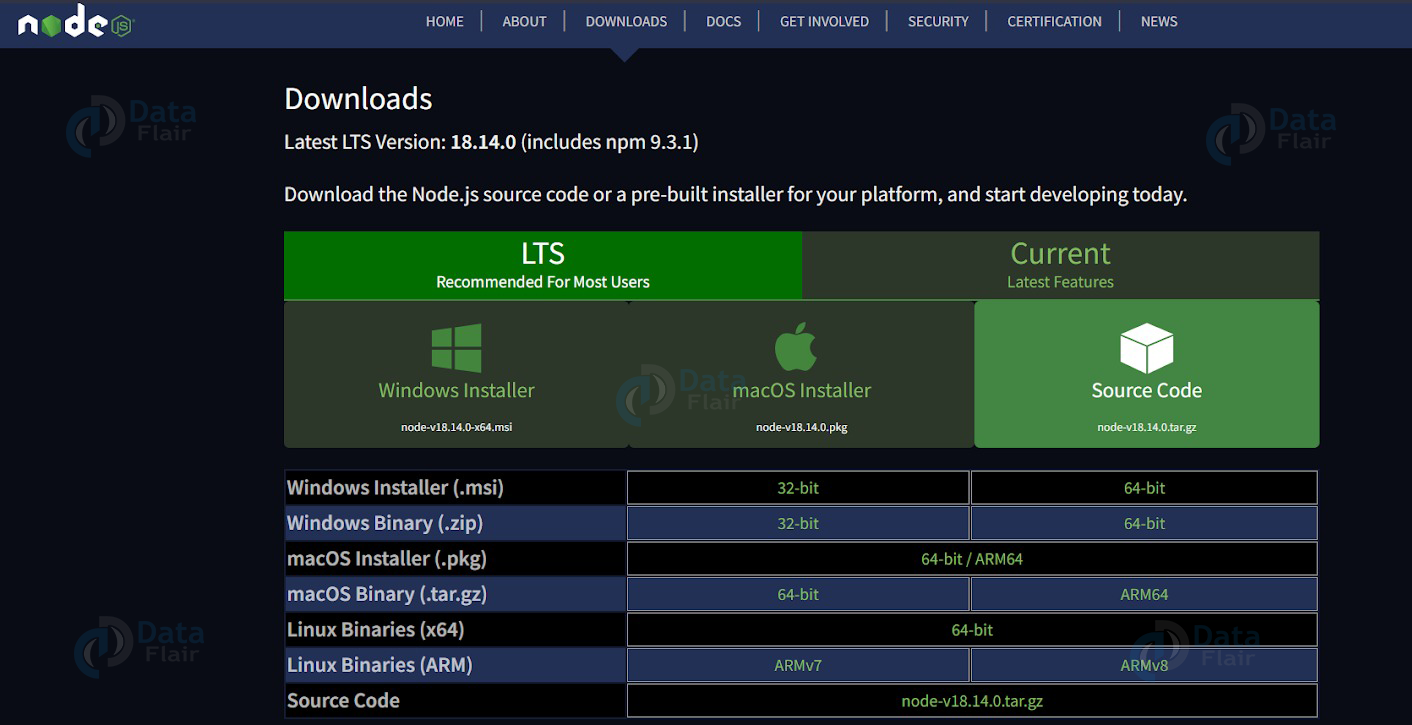
1. Install Node.js:
React requires Node.js installed on your computer. You can download the latest version of Node.js
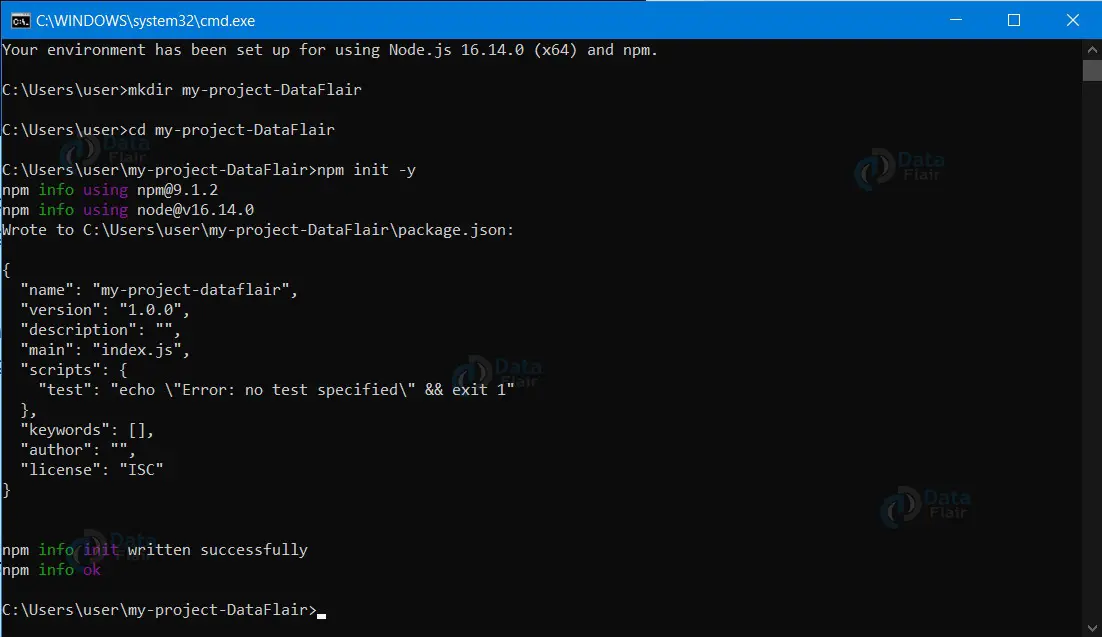
2. Create a new project directory:
Open the command line and navigate to the directory where you want to create your project. Then, run the following command to create a new project directory:
mkdir my-project-DataFlair
cd my-project-DataFlair

3. Initialize the project:
Run the following command to initialize the project with a package.json file:
npm init -y
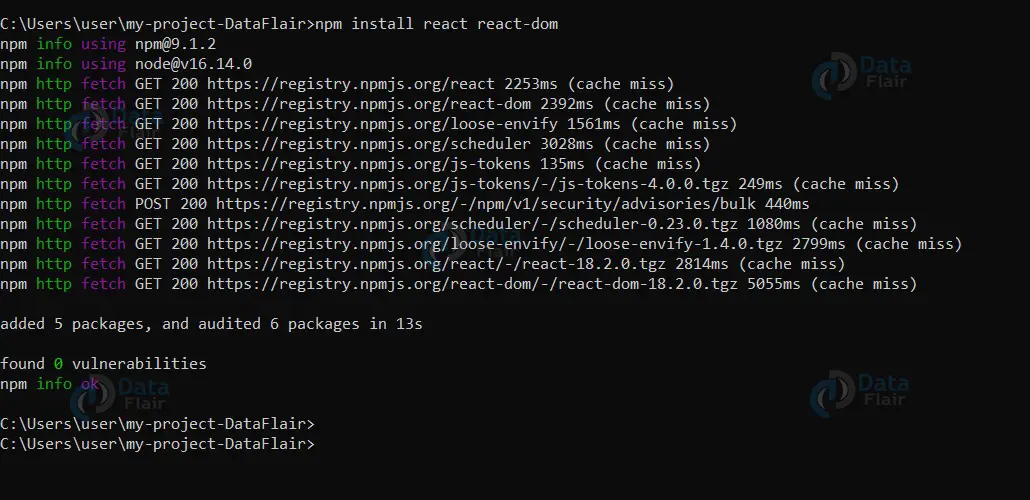
4. Install React and React DOM:
Run the following command to install React and React DOM as dependencies of your project:
npm install react react-dom
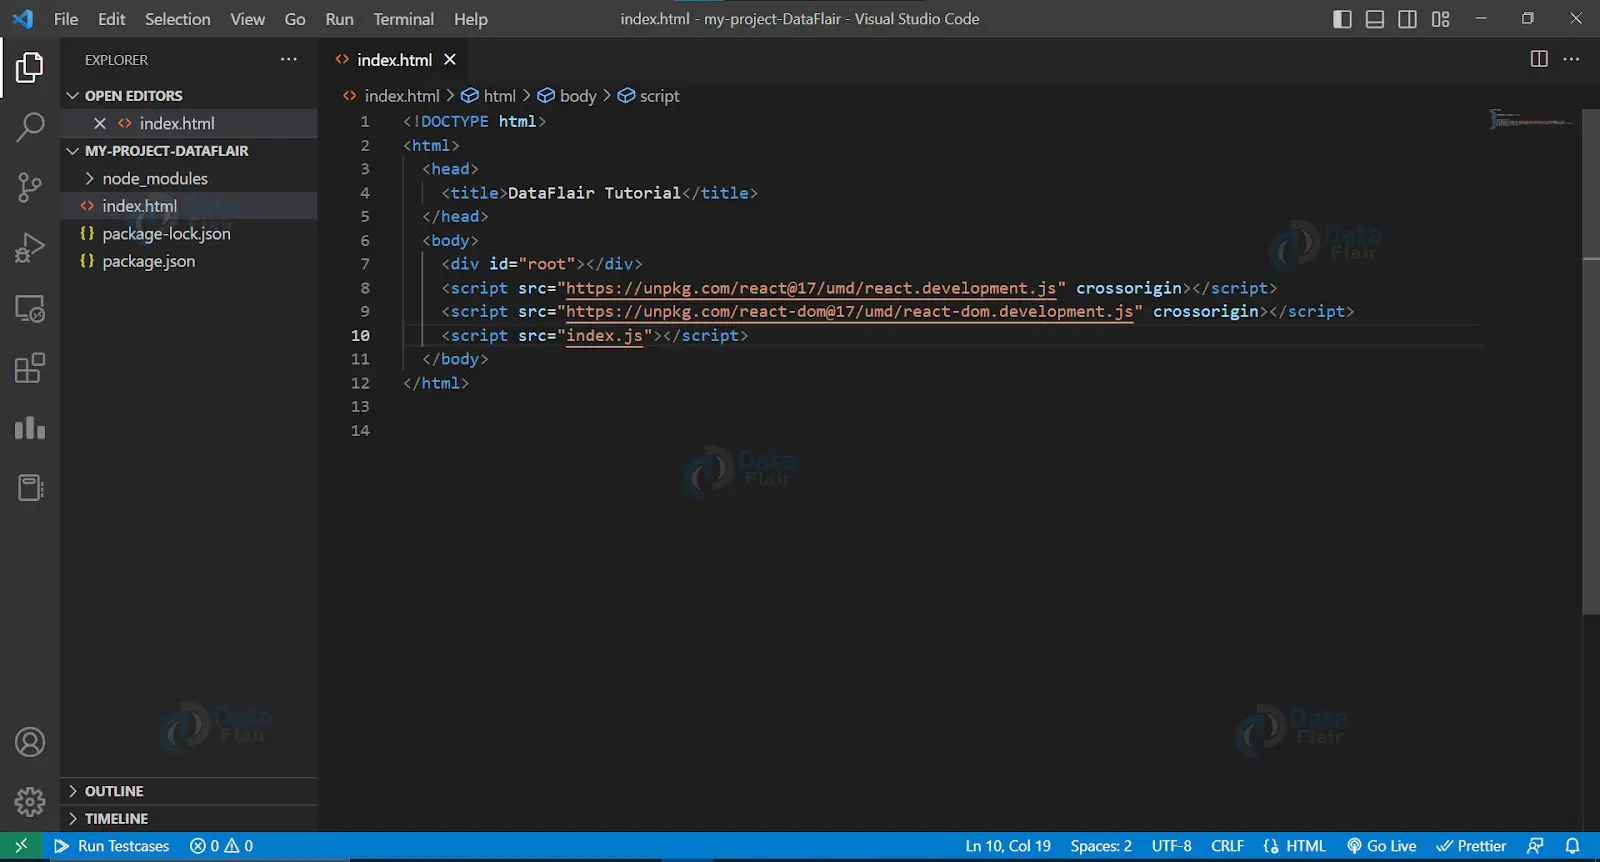
5. Create an HTML file:
Create an HTML file in your project directory and name it index.html. The following is a basic HTML file that you can use as a starting point:
<!DOCTYPE html>
<html>
  <head>
    <title>DataFlair Tutorial</title>
  </head>
  <body>
    <div id="root"></div>
    <script src="https://unpkg.com/react@17/umd/react.development.js" crossorigin></script>
    <script src="https://unpkg.com/react-dom@17/umd/react-dom.development.js" crossorigin></script>
    <script src="index.js"></script>
  </body>
</html>
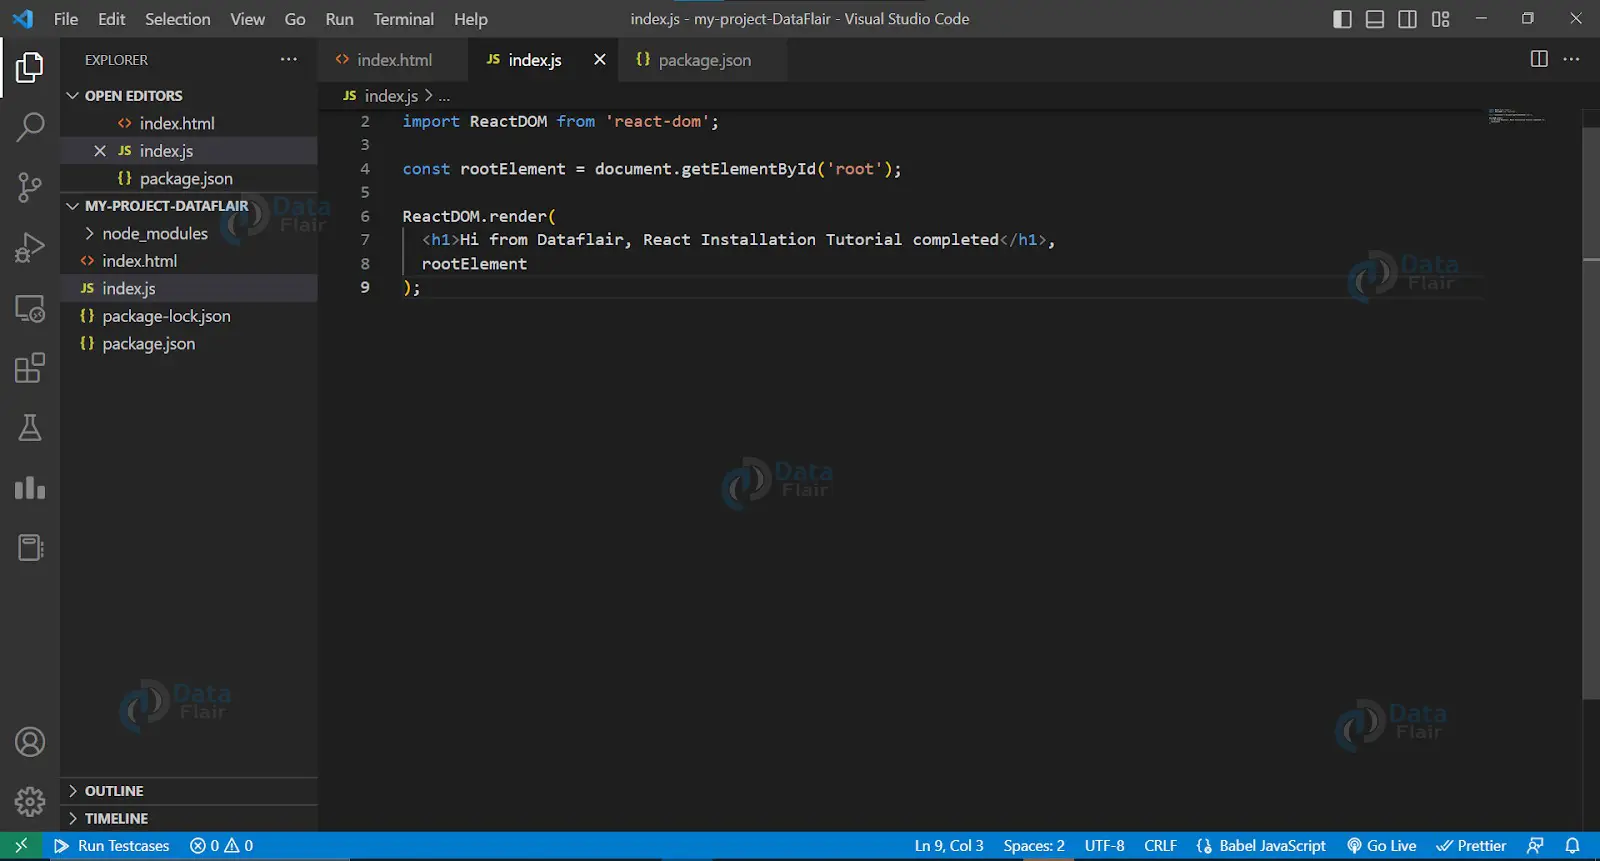
6. Create a JavaScript file:
Create a JavaScript file in your project directory and name it index.js. The following is a basic React component that you can use as a starting point:
import React from "react";
import ReactDOM from "react-dom";

const rootElement = document.getElementById("root");
ReactDOM.render(<h1>Hi from Dataflair, React Installation Tutorial completed
</h1>, rootElement);
7. Start a local development server:
Run the following command to start a local development server:
npx serve

8. Open your browser:
Open your browser and navigate to http://localhost:3000 to see your React app in action.
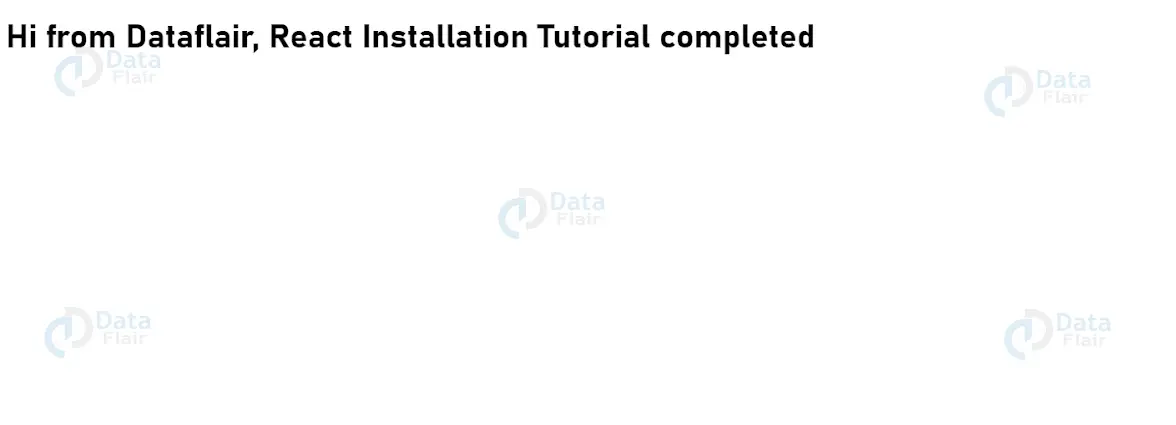
That’s it! You’ve successfully installed React and created your first React app. You can now start building more complex components and applications.
Conclusion:
In conclusion, installing React is a straightforward process that requires a basic understanding of JavaScript, HTML, and CSS. With the steps outlined in this article, you will be able to set up your development environment, install React, and create your first React project in no time. Whether you’re a seasoned web developer or just getting started, React is a valuable tool to have in your arsenal. So start exploring and building with React today!
You give me 15 seconds I promise you best tutorials
Please share your happy experience on Google


