PowerPoint Presentation Content Translation
Interactive Online Courses: Elevate Skills & Succeed Enroll Now!
Because PowerPoint is a multilingual tool, it is obvious that there would be a setting to set the default language to be used in the presentations. The instructions below will guide you through the process of changing the language type in PowerPoint (PowerPoint Presentation Content Translation). If you wish to change the language in PowerPoint, the presentation application provides three alternatives based on your requirements.
How to do Content Translation in PowerPoint?
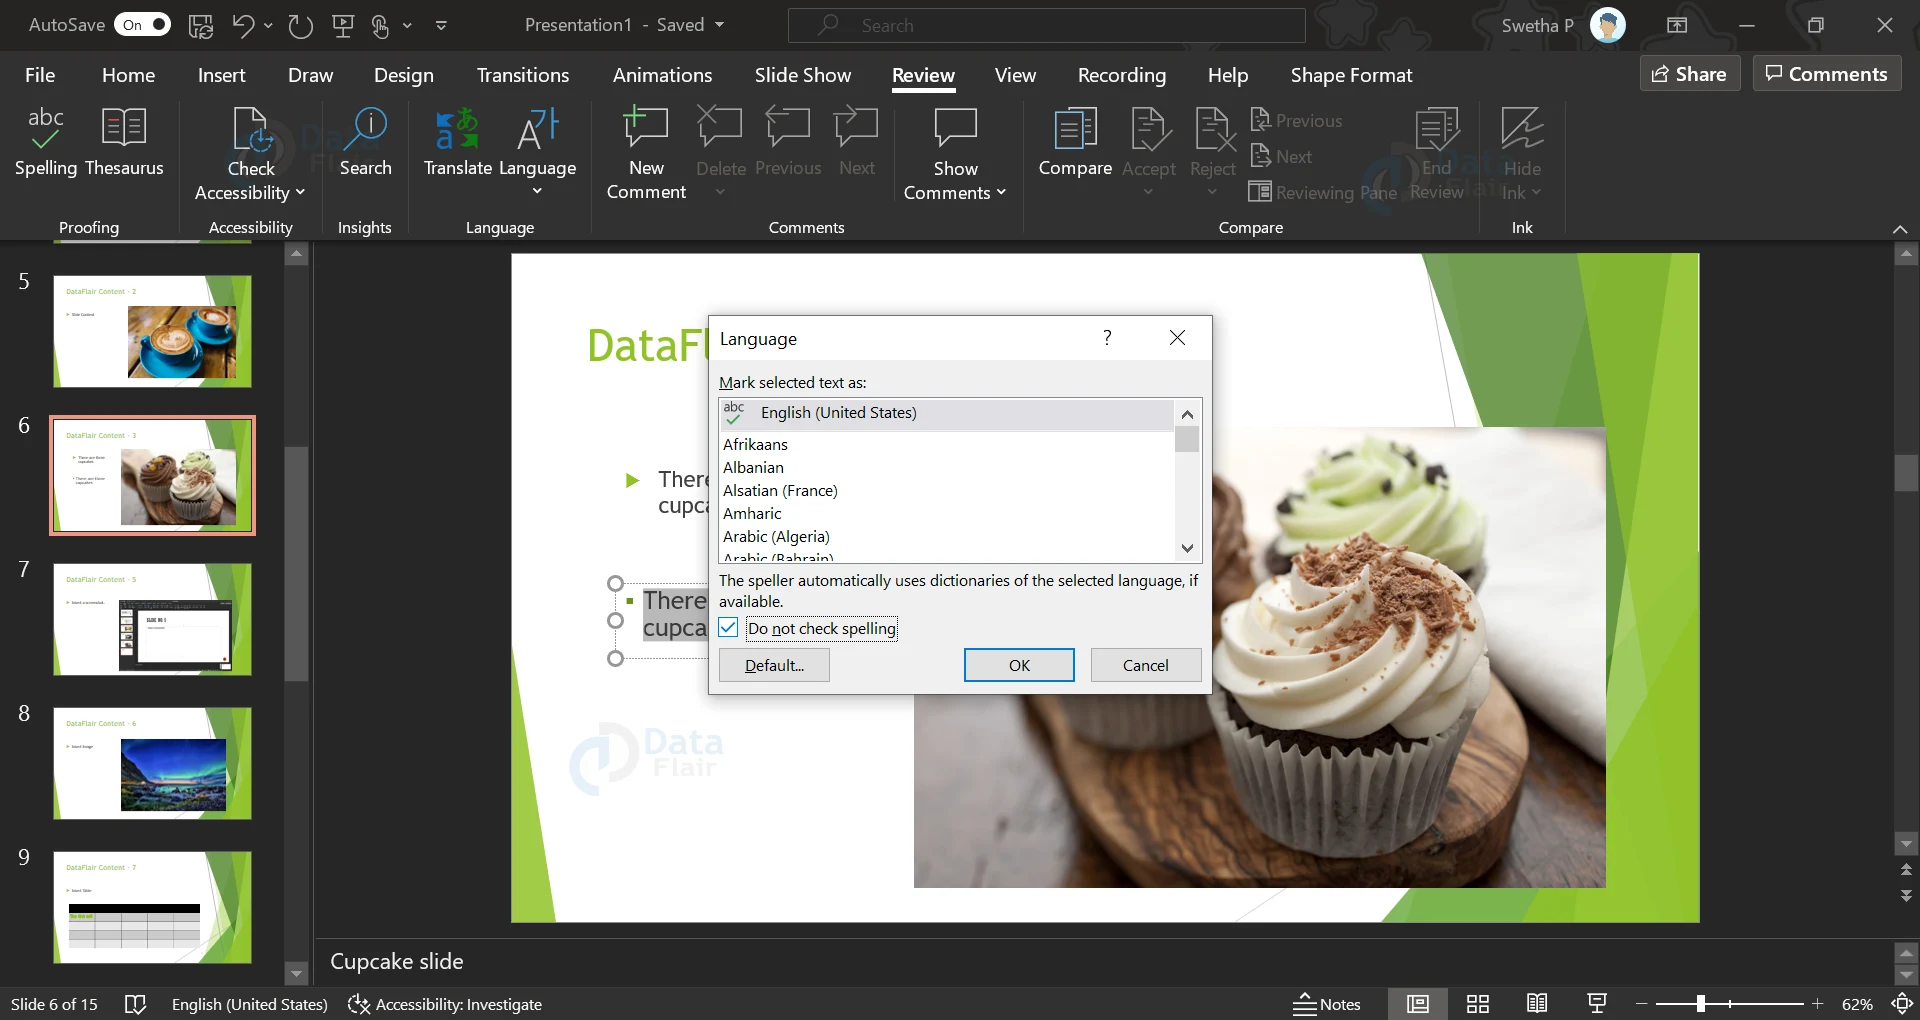
1. Select Language from the Review ribbon’s Language group.

2. If no content has been selected, you will only be allowed to specify the Language Preferences.
3. If you’ve chosen a text-based section of material, you may additionally choose the proofreading language.
4. When you click the “Set Proofing Language” button, a language dialog appears. Where you may choose from one of PowerPoint’s numerous languages. Click OK if you are just picking a language for the chosen text. If you want to use the same language throughout the presentation, choose Default. If you don’t want PowerPoint to check for spelling mistakes based on available dictionaries, you may uncheck the “Do not check spelling” item.
5. When you choose “Language Preferences,” the PowerPoint Options dialog appears, where you may modify language settings such as loading dictionaries for different languages, prioritising the display and help languages and the Screen tip language option.

How to Use the PowerPoint Text Translator Tool?
1. Open PowerPoint and go to the “Insert” tab.
2. From the dropdown menu, select Translate.
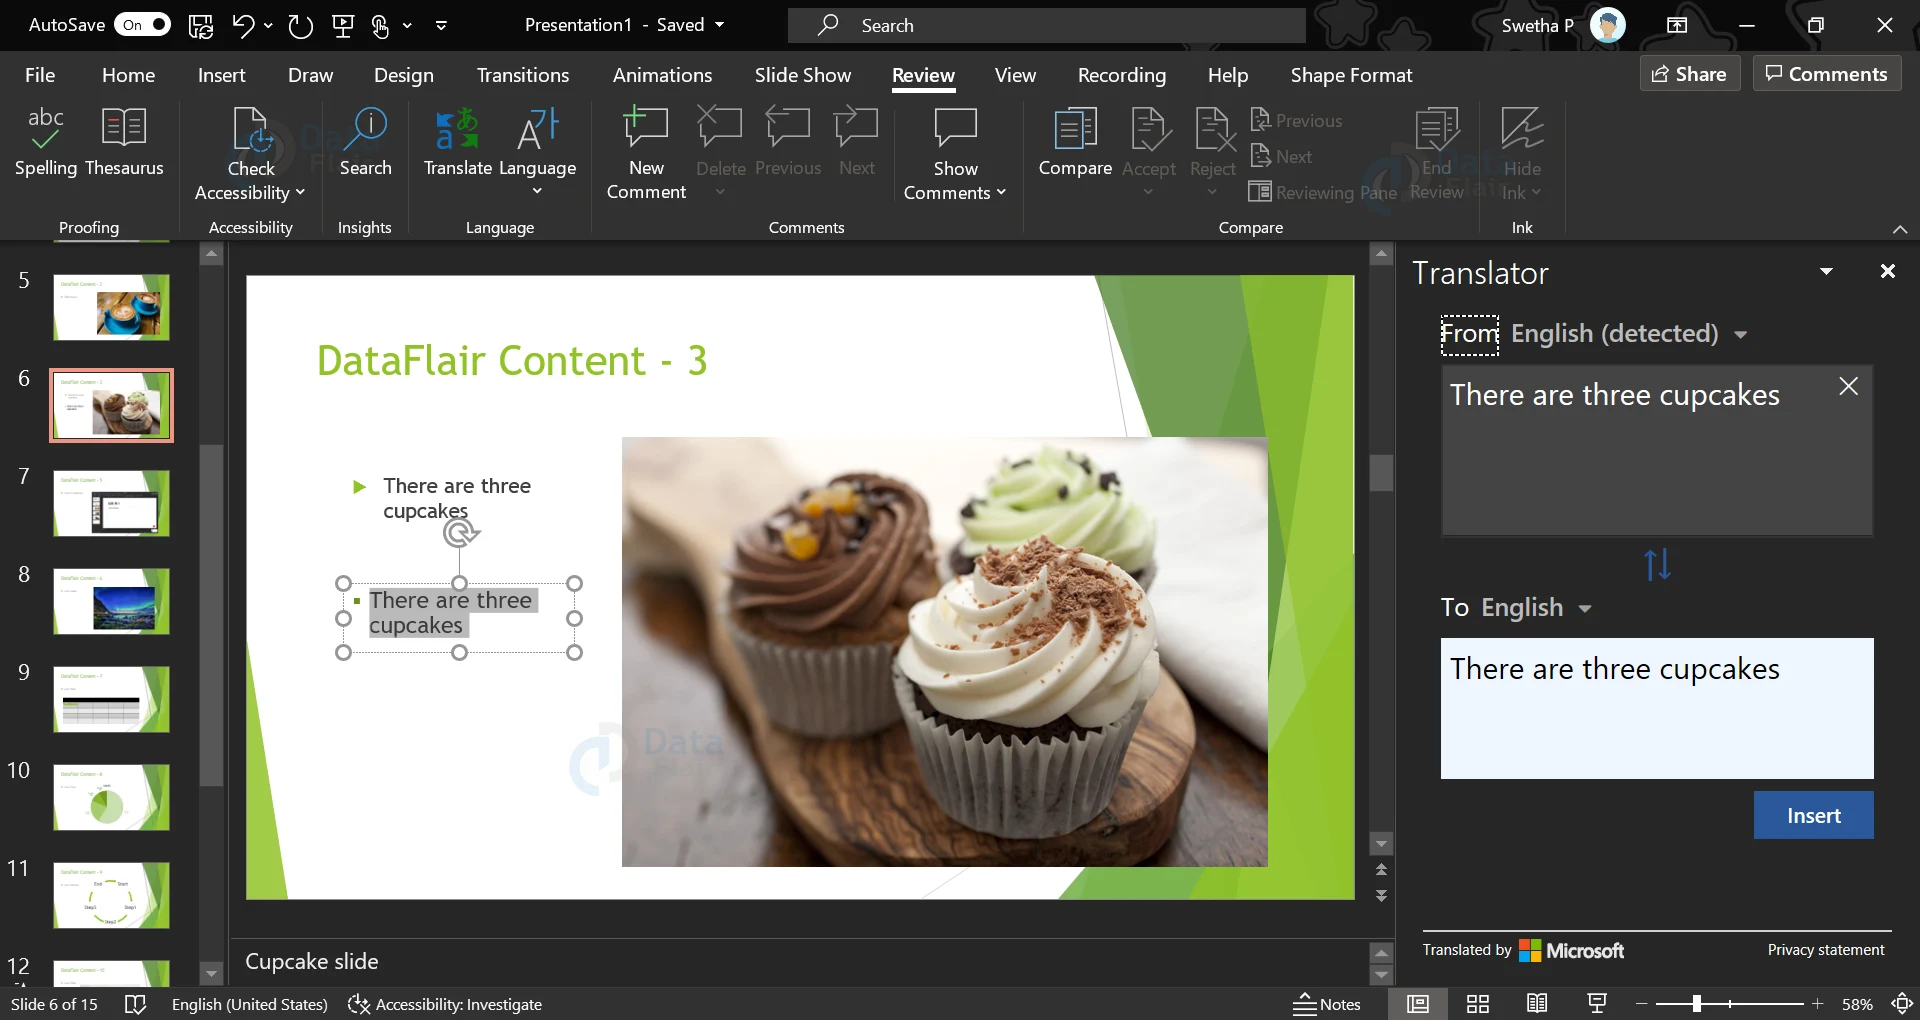
3. The “Translator” window will appear on the right side of your presentation screen.
4. Select a text box to translate by clicking on it. The text will be shown in the Translator window’s white box.
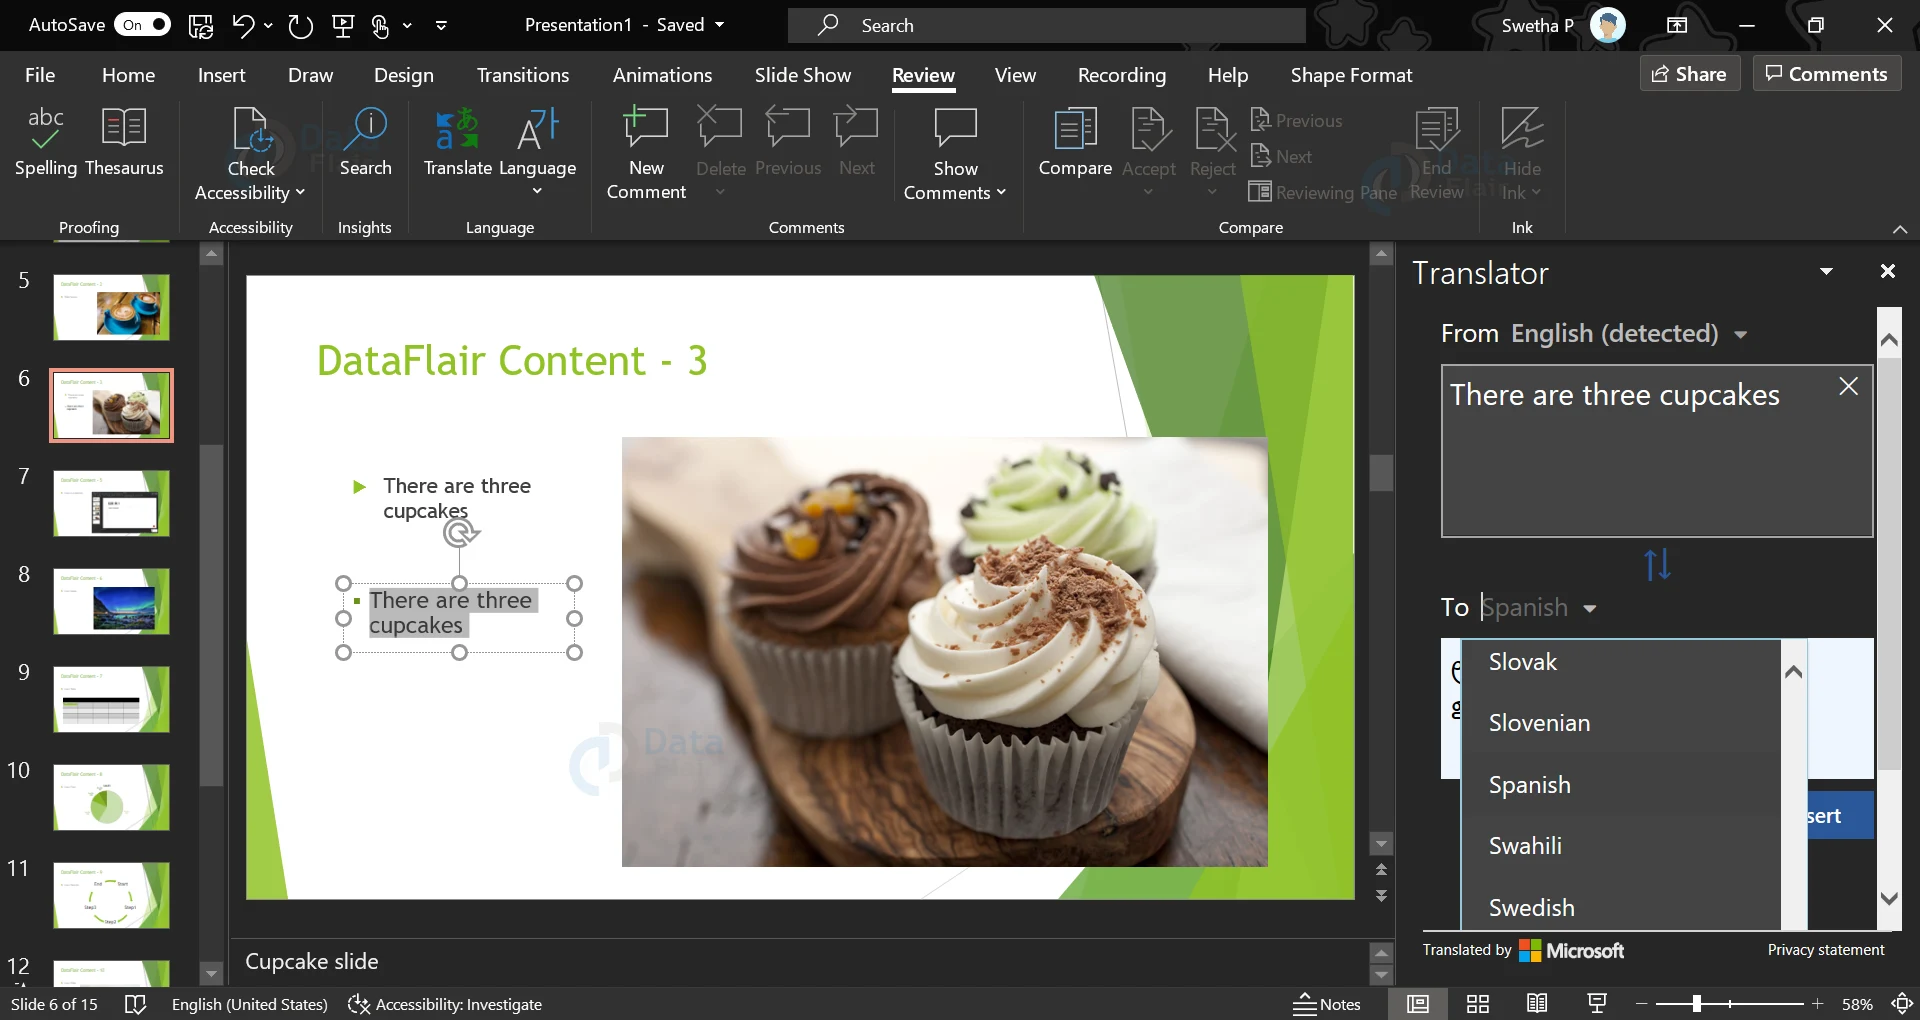
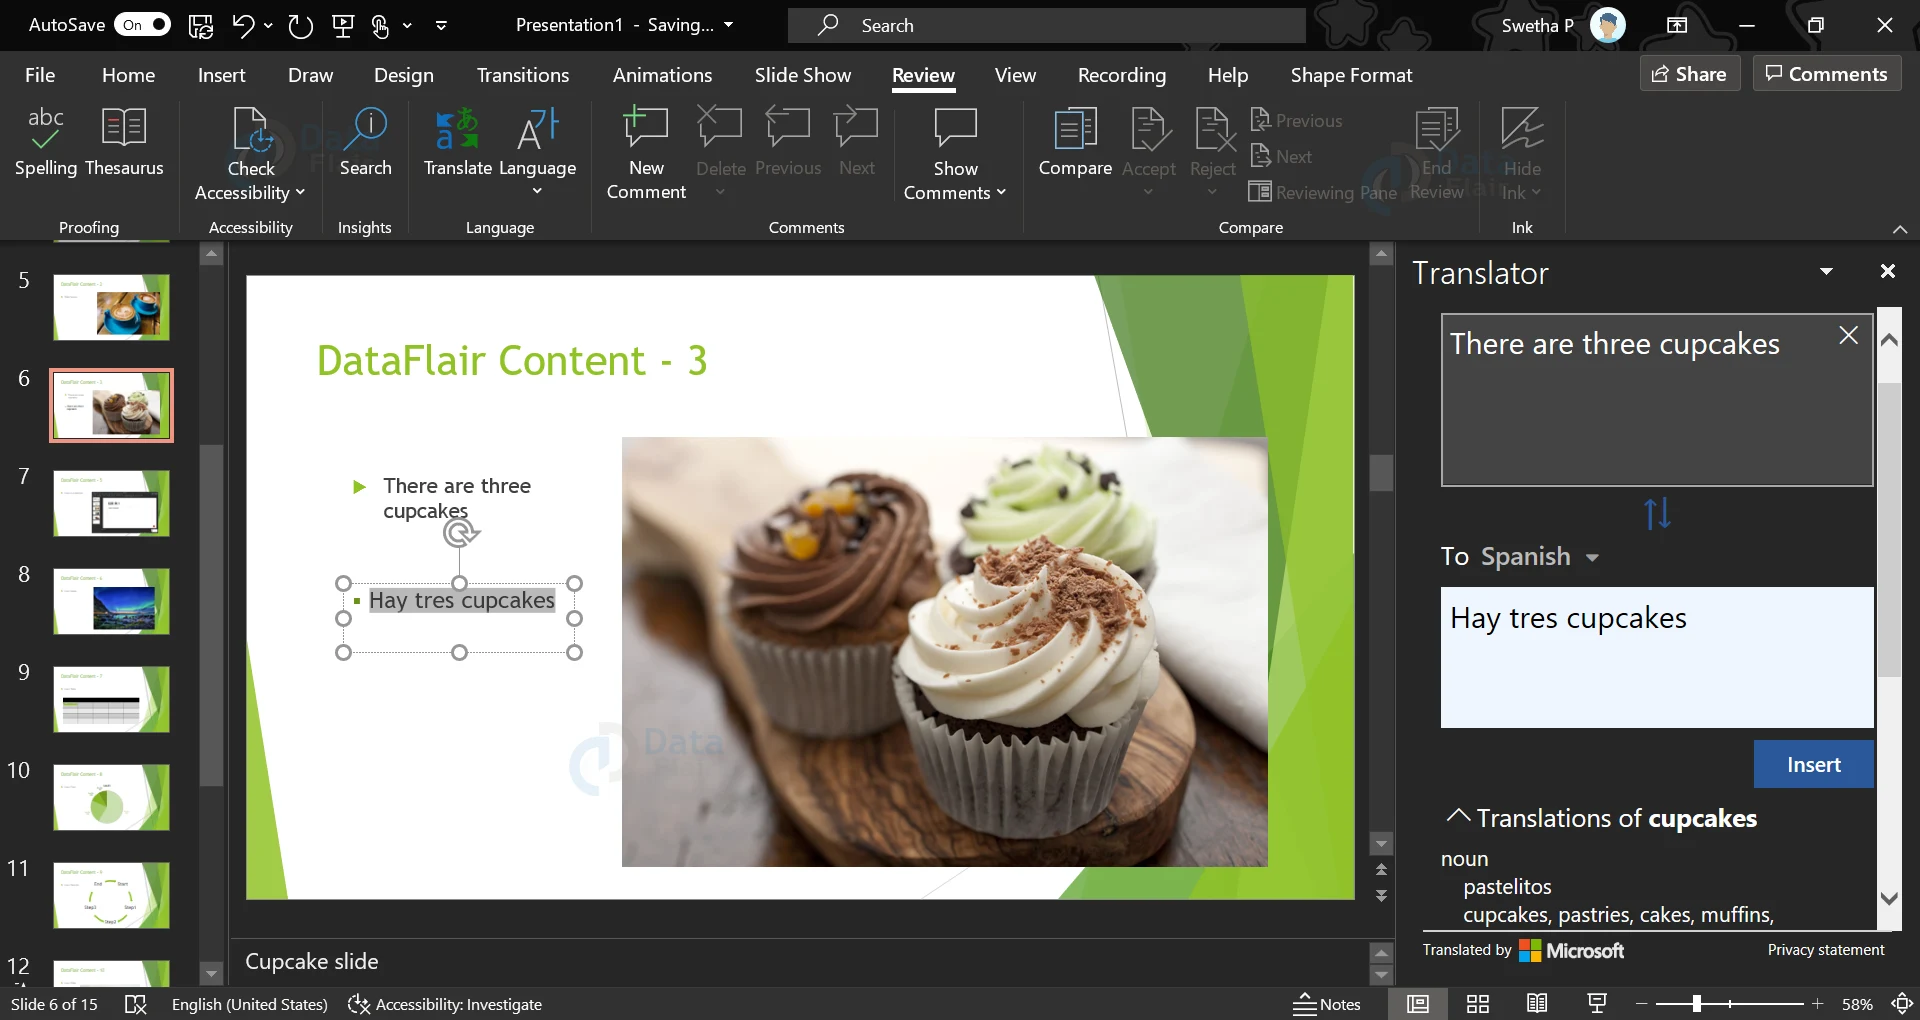
5. From the “To:” dropdown menu, choose a language. The translated text will be shown in the blue box to the right.
6. Press the “Insert” button to place the translated content in a new text box on the slide. We can then move and resize the text box.

7. Depending on the context, you may even highlight specific words or sentences with multiple translations showing below the blue box. To examine an example sentence, click the three dots.
8. When you’re ready to substitute, select “Insert.”
Summary:
Now it is evident that PowerPoint is not only useful and wonderful with designs, but is intelligent too. This feature is particularly useful when you have an audience of mixed language groups. This is useful to distribute language friendly handouts. Keep this trick in your kitty for the next time you might need it!
If you are Happy with DataFlair, do not forget to make us happy with your positive feedback on Google


