Orchestrated Recovery in Azure
Top AWS Course for AWS Certified Cloud Practitioner (CLF-C01) Start Now!!
We offer you a brighter future with industry-ready online courses - Start Now!!
In today’s article, we will discuss something related to Backup and Recovery. So, today we will learn about Orchestrated recovery in Azure. Let us begin:
What is Orchestrated Recover in Azure?
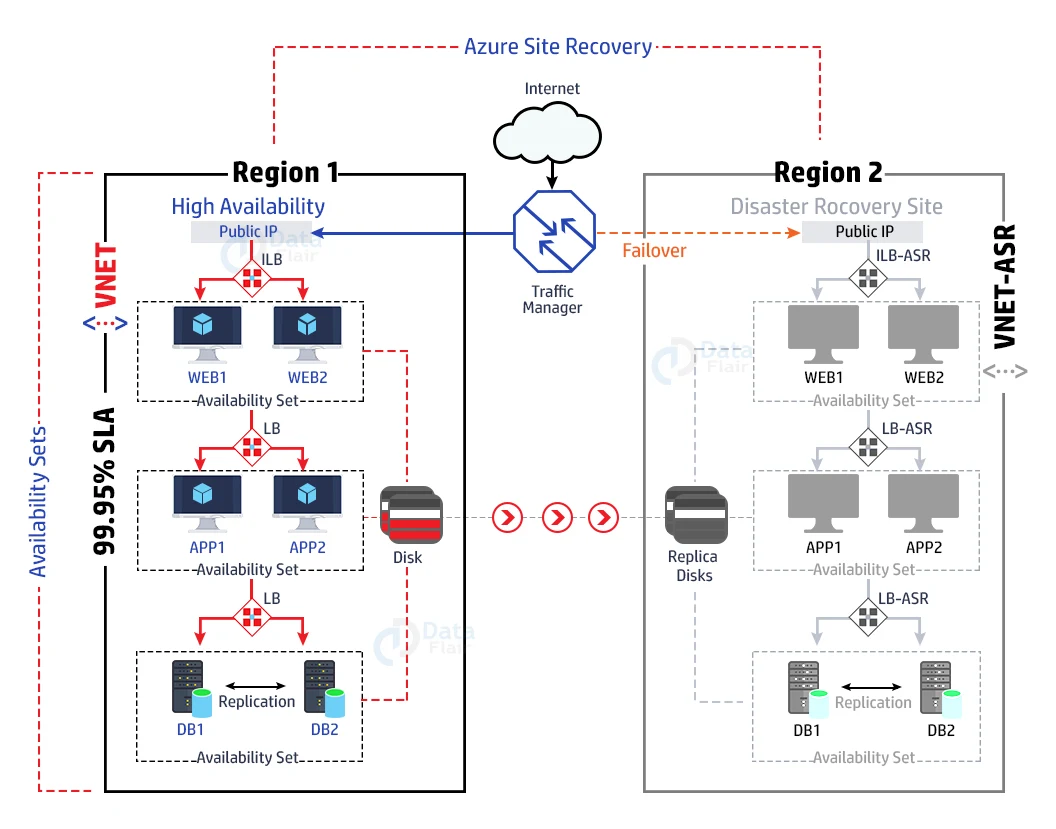
One of the characteristics of the Azure Site Recovery service is known as orchestrated recovery. Azure Site Recovery automates application recovery in the event of a primary site failure.
Even if the applications have a multi-tier workload, this recovery is done in a coordinated manner to restore them.
With multi tier systems, a coordinated recovery is required to quickly restore service, which is a difficult element of IT disaster recovery.
However, thanks to cloud computing, this has become a really simple and straightforward procedure.
To enable synchronized site recovery, you must first design a recovery plan. This can be accomplished through the Azure Management Portal.
The catastrophe recovery strategies generated can be tested without disrupting service.
Azure Site Recovery Allows One-Click Orchestrated Failover of Virtual Machines to Azure
To enable synchronized site recovery, you must first design a recovery plan. This can be accomplished through the Azure Management Portal.
The catastrophe recovery strategies generated can be tested without disrupting service.
A recovery plan to Azure can be used for planned, unplanned, and test failover DR drills. The following requirements for the user are still addressed by a recovery plan to Azure:
A group of virtual computers that failover together is defined.
Defining the virtual machine prerequisites so that the programme starts up correctly.
Automating the recovery process, as well as bespoke manual steps, so that duties other than virtual machine failover can be completed.
VMM Prerequisites
You should have at least one VMM server on every on-premises site which is deployed as a physical or virtual standalone server. Otherwise as a virtual cluster which is running on System Center 2012 R2 along with the VMM update rollup version 5.0.
Secondly, you should have at least one cloud in the primary VMM server which has to be protected and one secondary VMM server.
The primary cloud for protecting should consist of the following:
- VMM host groups
- Hyper-V clusters in every host groups
- Virtual machines available in the source Hyper-V server in the cloud environment.
Hyper-V Requirements
You should have a Hyper-V host cluster which is deployed in the primary and secondary sites that are running with at least Windows Server 2012 along with the latest updates.
SAN Prerequisites
With the help of SAN replication users can replicate guest-clustered virtual machines along with iSCSI or fiber channel storage or by utilizing shared hard disks.
The SAN prerequisites are mentioned below. They are as follows:
- Users should have two SAN arrays. One should be set up in the primary site and the second one should be set up in the secondary site.
- The network infrastructure must be set in between the arrays. Here, peering and replication should be configured. Replication licenses should be configured according to the system requirements.
- Make sure you keep configure the networking between Hyper-V host servers and storage arrays. Thus, the host can communicate with the storage LUNs with the help of ISCSI or with the help of Fiber Channel.
- The provider of SMI-5 which is offered for the array is located on a server so that the VMM server can access the network by using any IP address or FQDN.
- Every SAN arrangement must have at least one or multiple storage pools that are available to use while deployment.
- The VMM server located at the primary site will manage the primary array. Simultaneously the secondary VMM server will manage the secondary array.
Network Prerequisites
Users have an optional option to configure the network mapping to ensure that the virtual machines replica are optimally kepts on the Hyper-V host servers after the failover and then they can connect with the appropriate VM networks.
The users must note the following points:
- When the user enables the network mapping the virtual machine located at the primary location will get connected to a network and its replica which is at the target location will be connected with its mapped network.
- If the user does not configure the network mapping of virtual machines then it will not get connected to VM networks after the failover.
- Virtual Machines available on the source VMM server must be connected with a VM network. The source VM network must be linked with a logical network which is connected/associated with the cloud.
Building a Recovery Plan
When you’ve finished setting up site recovery for one of your scenarios, you’ll need to build a recovery plan in your management portal to orchestrate your recovery. Below are the steps for the same:
1: Go to the Azure Site Recovery vault you’re working within the administration portal.
2: From the top menu, choose ‘Recovery Plans.’ Depending on the scenario you select and the resources you’ve registered in the recovery vault, you’ll see a variety of possibilities.
3: If desired, you can design a recovery strategy for the site. It will also advise you if there are any necessary tasks you need to complete if you skip a step in the process.
4: In the event of a failover, the customized plan prepared here can be used to manage recovery. The services could be made available at a different location.
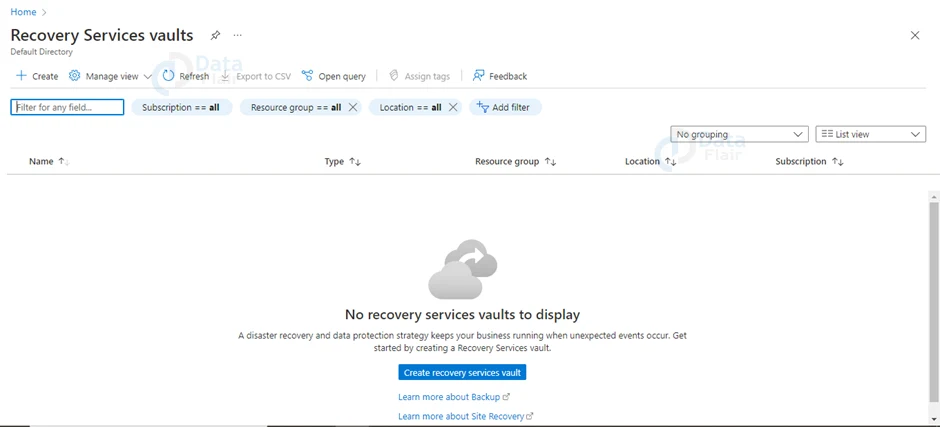
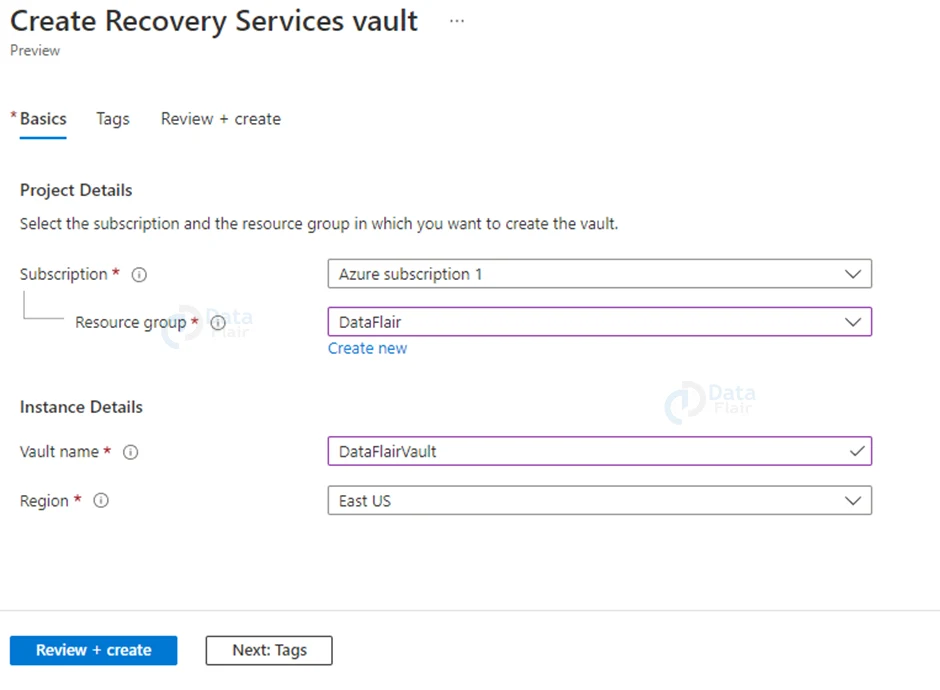
Creating a Site Recovery Vault in Azure
Below are the steps to create recovery vault in Azure:
1: Go to your Azure management site and log in.
2: Search for Site Recovery Vault. And, then Create Recovery Services Vault.
3: Type in the name and choose a region. Ascertain make sure that this vault is located in the same region as the virtual machines and networks. Click on the Create button.
Here, you must select a recovery scenario that meets the needs of the organization.Between On-premises VMM Site and Azure
On-premises virtual machines are copied to Azure in this case. For these on-premise resources, there are only a few requirements.
Windows Server 2012 R2 is used to run the virtual machine server.
At least one cloud should be protected on a virtual machine server.
At least one VMM host group and Hyper-V host server, or cluster and virtual machine on Hyper-V host server, to be present in the cloud. Setting up a site recovery system is a fairly methodical process. If you do not have all of the conditions listed above, you may have to go back after completing a few parts of the task.
When you choose this scenario from the dropdown menu, you must complete the five actions outlined in the diagram above.
Between On-premises Hyper-V Site and Azure
This option is chosen for virtual machine replication on an on-premises Hyper-V server. When the Hyper-V server is operating but VMM is not, this option is appropriate.
Prerequisites for On-Premises
- Windows Server 2012 R2 with Hyper-V role should be used as the on-site host.
- At least one virtual machine should be present in Hyper-V.
Between On-premises Site with VMWare or Physical Server and Azure
The physical servers are replicated to Azure in this case. When you need to replicate VMware virtual machines on your premises, you must also select this option from the selection.
Data is copied via the internet, for example, as a form of protection. The following phrases must be understood before you begin the deployment.
In this scenario, you will configure the following servers while setting up site recovery:
The data of the protected items is first delivered to the process server, which caches, compresses, and encrypts it. The information is then forwarded to the master target server.
This server serves as a communication hub for protected items, processes, and the master target server.
The master target server is where the data that is duplicated from protected items are stored.
Creating Azure Recovery Plan
Consider a simple three-tier virtualized application with a ‘Backend,’ ‘Middle,’ and a ‘Front’ to lead you through the experience.
Let’s make a recovery strategy for the application so that it can be retrieved into Azure as needed. Let’s call it “Recovery.”
Customizing Azure Recovery Plan

The diagram below depicts a simple three-tier application. The middleware and SQL servers are required by the frontend servers.
The SQL server would likewise be reliant on the middleware server. You must verify that the dependencies are accurately represented to ensure that the application runs correctly. This will be restored.
The virtual machines will respect the dependencies you’ve created. three levels of Groups can be used to define the application’s dependencies.
In our example, the user would make three groups, one for each tier of the programme, and then place the virtual machines into the appropriate group.
Place the ‘Backend’ in Group 1, the ‘Middle’ in Group 2, and the ‘Front’ in Group 3 for our example.
This ensures that when the programme is shut down on-premises, the Group 3 virtual machines are shut down first, followed by the Group 2 virtual machines.
In the end, the VMs in Group 1 will be shut off. This will ensure that no data is lost during the shutdown.
The boot order is also determined by the order in which the groups are formed. The virtual computers in Group 1 will be booted first, then Group 2 and lastly Group 3.
This ensures that the backend virtual machines are started before the VMs that rely on them.
When the ‘Front’ virtual machine is booted in Group 3, both the ‘Back’ and ‘Middle’ virtual machines that it depends on will be up and operating in Azure.
Initiating Failover
The plan recovers the virtual machines in Azure as IAAS virtual machines when you conduct a failover.
The strategy also guarantees that dependencies are respected and that the virtual machines are started in the correct order.
Based on the network mapping inputs, the virtual machines are connected to a virtual network.
You can see that a Finance cloud service has been created for you after the failover has been completed.
When you go to the application’s instances page, you’ll notice that the three virtual machines have been recovered as IAAS machines and are available to use.
The recovery strategy is now in a condition of ‘Commit Waiting.’ Ensure that the plan is committed so that failover can occur.
What role does Azure play in securing vital data and applications?
Azure provides a simple, secure, scalable, and cost-effective end-to-end backup and disaster recovery solution that can be linked with on-premises data protection systems.
Recover your company services in a timely and organized manner in the event of a service failure or inadvertent deletion or corruption of data.
Azure Backup and disaster recovery is easy to configure, cloud-native, highly available, and resilient.
Features of Azure Backup and Disaster Recovery
- Simplified management across the workloads and in the environment
- Built-in Security Models by Azure
- Lowered complexity and expense
- Extended solutions with Azure and partners
Azure Site Recovery
Azure Site Recovery is native disaster recovery as a service (DRaaS), and Microsoft has been named a leader in DRaaS by Gartner in the 2019 Magic Quadrant for Disaster Recovery as a Service which is based on completeness of vision and ability to execute.
Features of Azure Site Recovery
1. Simple to Set Up and Maintain
To set up Azure Site Recovery, simply replicate an Azure VM to a different Azure region using the Azure portal.
Because Site Recovery is a fully integrated offering, new Azure features are immediately updated as they become available.
By sequencing the order of multi-tier apps operating on several virtual machines, you can reduce recovery concerns.
Test your disaster recovery plan without affecting production workloads or end-users to ensure compliance. Automatic recovery from on-premises to Azure or Azure to another Azure region keeps apps available during disruptions.
2. Lowering Infrastructure costs
You can save money on implementing, monitoring, patching, and administering on-premises disaster recovery infrastructure by avoiding the need to build or run a costly backup data centre.
Furthermore, in Azure, you only pay for the computational resources you use to support your apps.
3. Lowering Downtime with Dependable Recovery
You may easily comply with industry standards like ISO 27001 by allowing Site Recovery between Azure regions.
Cover as many business-critical applications as you need with Azure’s service availability and support. Site Recovery allows you to swiftly restore your most recent data.
Conclusion
Thus, we have reached the last section of our article and today we learned about Orchestrated Recovery in Azure. It helps the users to backup and recover their data in Azure.
We hope you gained valuable information from this article.
Did you know we work 24x7 to provide you best tutorials
Please encourage us - write a review on Google


