Install Express JS in Easy Steps
Job-ready Online Courses: Knowledge Awaits – Click to Access!
Express is a popular web framework for Node.js that is widely used for building web applications. If you’re new to Express, the first step is to install it on your computer. In this article, we’ll provide a detailed guide on how to install Express.js on your local machine.
Steps to Install Express JS
Step 1: Install Node.js
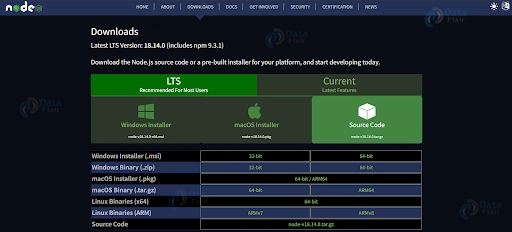
Before you can install Express, you need to have Node.js installed on your computer. Node.js is a JS runtime that allows us to run JavaScript on the server-side. To install Node.js, go to the official Node.js website and download the installer for your operating system. Once the installer has finished downloading, run it and follow the installation instructions.
Step 2: Create a new project directory:
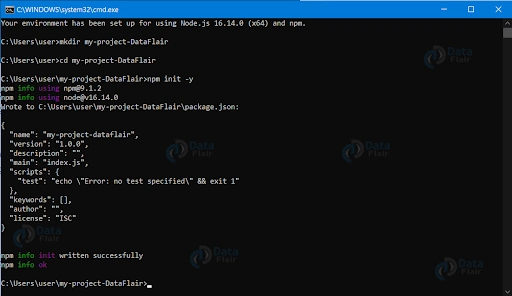
Open the command line and navigate to the directory where you want to create your project. After this, run the command below to create a new project directory:
mkdir my-project-DataFlair
cd my-project-DataFlair

Step 3: Create a new project
Once you have Node.js installed, you can create a new project to install Express into. Open a command prompt or terminal window and create a new directory for your project. Navigate into the new directory and run the following command to create a new package.json file:
npm init -y
The -y flag tells npm to use the default settings and create the package.json file without asking for any user input.
Step 4: Install Express
Now that you have a new project set up, you can install Express. Run the following command to install Express as a dependency for your project:
npm install express
This command will download and install the latest version of Express from the npm registry and add it to your project’s dependencies in the package.json file.
Step 5: Verify the installation
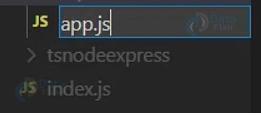
To verify that Express has been installed correctly, create a new file called app.js in your project directory and add the following code:
const express = require('express');
const app = express();

app.get('/', (req, res) => {
  res.send('Hello, world!');
});

app.listen(3000, () => {
  console.log('Server started on port 3000');
});
This code creates a new Express app, sets up a route for the root path, and starts a server listening on port 3000. Run the command below in the terminal:
node app.js
If everything has been set up correctly, you should see the following output in your terminal:
Server started on port 3000
Now open your web browser and go to http://localhost:3000. You should see the message “Hello, world!” displayed in your browser.
Congratulations, you have successfully installed and set up Express.js on your local machine! From here, you can start building more complex web applications using the many features and tools that Express provides.
An example of Express.js application code with explanations:
// Import required modules
const express = require('express');
const bodyParser = require('body-parser');
const app = express();

// Configure middleware
app.use(bodyParser.urlencoded({ extended: false }));
app.use(bodyParser.json());

// Define routes
app.get('/', (req, res) => {
  res.send('Hello World!');
});

app.get('/about', (req, res) => {
  res.send('About page');
});

app.post('/api/users', (req, res) => {
  const { name, email } = req.body;
  res.json({ name, email });
});

// Start server
const PORT = 3000;
app.listen(PORT, () => {
  console.log(`Server started on port ${PORT}`);
});
Here’s a breakdown of the code:
The first thing we do is import the necessary modules – express and body-parser.
We then create an instance of the express application by calling the express() function and assign it to a constant called app.
We configure the middleware by adding two middleware functions – bodyParser.urlencoded() and bodyParser.json(). These middleware functions parse incoming requests with urlencoded payloads and JSON payloads respectively.
We define some routes using the app.get() and app.post() methods. The first route responds to HTTP GET requests to the root URL (/) and sends a “Hello World!” response. The second route responds to HTTP GET requests to the “/about” URL and sends an “About page” response. The third route responds to HTTP POST requests to the “/api/users” URL and sends back a JSON response containing the name and email properties from the request body.
We start the server by calling the listen() method on the app instance, passing in the port number and a callback function that logs a message to the console once the server starts listening for incoming requests.
Conclusion
In conclusion, installing Express.js can be a straightforward process with the right tools and knowledge. By following the steps outlined in the article, users can quickly set up a basic Express.js application and begin building their web projects. With proper attention to detail and ongoing maintenance, developers can leverage the power of Express.js to create fast, scalable, and dynamic web applications.
Your 15 seconds will encourage us to work even harder
Please share your happy experience on Google


