How to Add and Remove Page Break in Word?
Expert-led Online Courses: Elevate Your Skills, Get ready for Future - Enroll Now!
While working on long documents with diverse topics, you might wish to separate ideas or paragraphs into different pages. While using Enter can introduce additional lines to shift to the next page, there is a tool in Microsoft Word that is better for this purpose – the Page Break tool. Let us learn more about the importance of page break and how to add or remove them in a Word document.
Why use Page Break in your Word Document?
Page breaks in a document help separate or group different lines or paragraphs into different or the same pages. While separating paragraphs into different pages, we often end up using the Enter key to insert unnecessary lines. Using Page Break avoids this and helps design a Word document properly.
Using Enter to add empty lines may shift the position of written text or media if new content is added into the document. However, using Page Break separates the paragraphs or content into different pages. So, even if new content is added, the document layout does not get messy. Besides Page Break, Word also offers other types of breaks that can be used to properly format a Word document. You can view them by clicking on the Breaks option under the Page Layout group of the Layout tab on the ribbon.
Types of Breaks in Word
In Word, there are many kinds of breaks available to the user for formatting their document. Click on the Breaks option under the Page Setup group of the Layout tab to see all kinds of breaks available in Word.
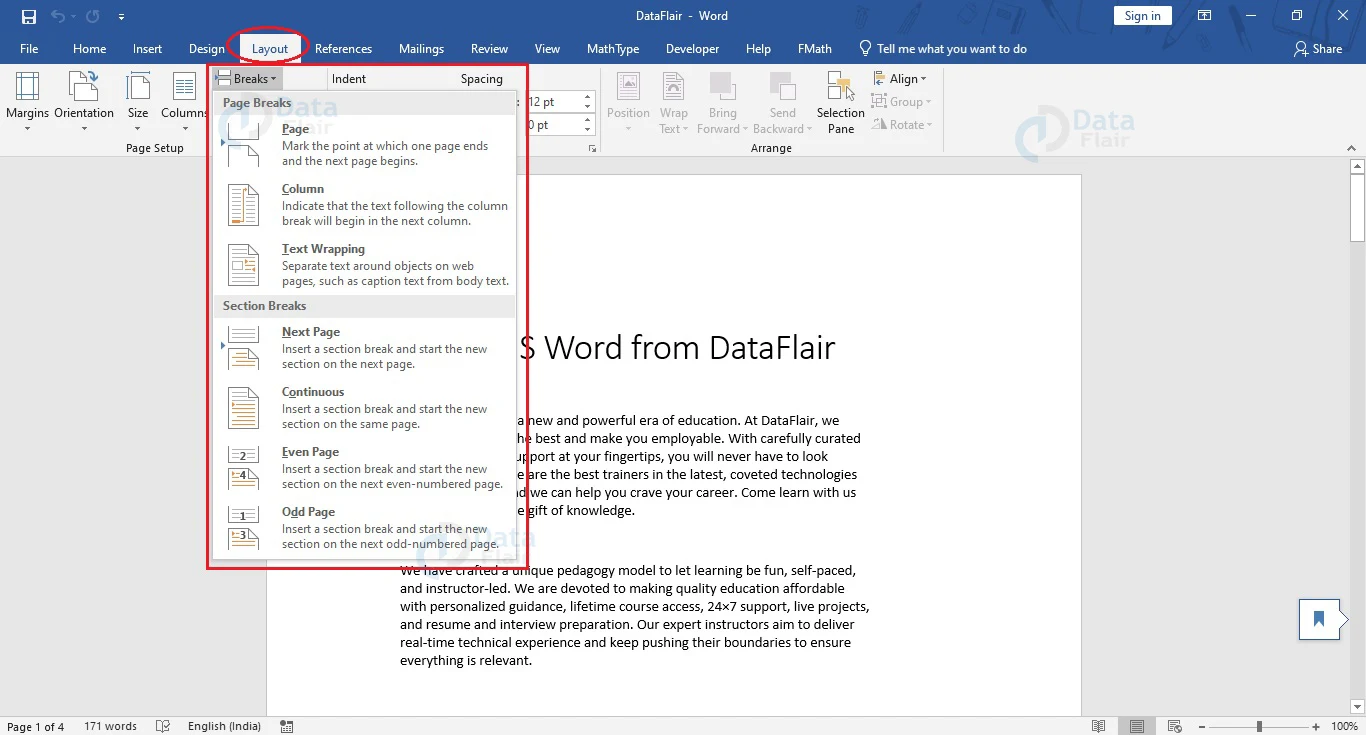
1. Page Break: This option helps separate or group paragraphs into different or a single page. There are two kinds of page breaks in Word – Manual Page Break and Automatic Page Break.
2. Column Break: This option helps move content from one column to the next column. It is useful only when the document is formatted into multiple columns.
3. Text Wrapping: This option makes a picture or other media object group together with its related caption. Any text in the document flows around the image or object, without affecting it.
4. Next Page: This option creates a new page, where a different kind of page formatting can be used.
5. Continuous Break: This option creates a new section on the same page, where a different page formatting can be used.
6. Even Page Break/Odd Page Break: This option inserts a section break and takes the user to the next even or odd page, depending on their selection. The user can format alternative pages in the document differently while using this type of section break.
How to add Page Break in a Word Document?
Page breaks are often necessary in separating different ideas or topics into different pages. The steps below show how you can insert page breaks into your Word document.
1. Place your cursor where you wish to end a page.
2. Go to the Insert tab in the ribbon and choose the Page Break option under the Pages group.
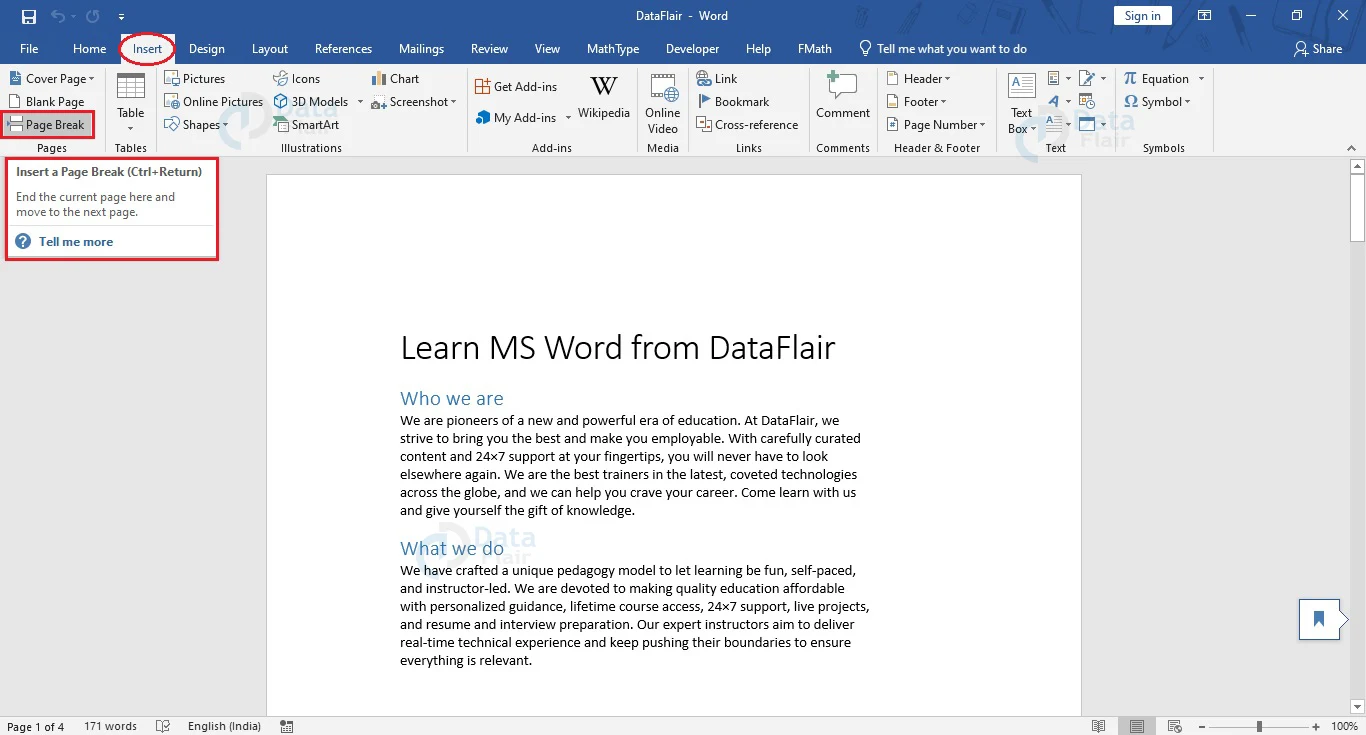
The page will end at the cursor position. Any text or media present after the cursor will move to a new page just after the initial page.

Adding Page Break from Layout Tab
To add a page break to your document from the Layout tab, follow the steps given below.
1. Place your cursor where you wish to end a page.
2. Go to the Layout tab on the ribbon and click on the Breaks option under the Page Setup group.
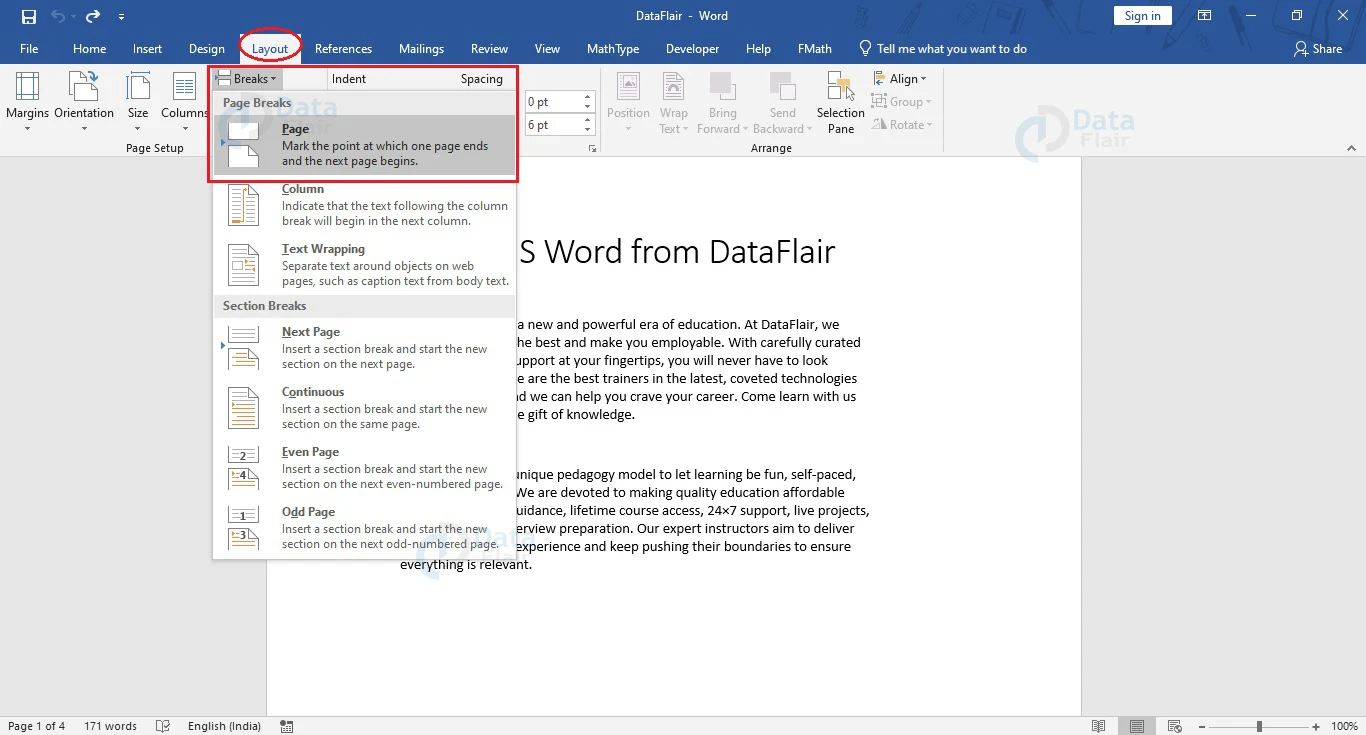
3. From the drop-down menu that opens, select Page.
This will insert a page break at your cursor position.
Adding Page Break with Keyboard Shortcut
In Word, you can also use a keyboard shortcut to insert a page break at your desired position in your Word document. Follow the steps given below to add a page break.
1. Place your cursor at the position where you wish to insert a Page Break.
2. Use the keyboard shortcut Ctrl+Enter to insert a page break. This means that the page will end at the cursor position. Any text or content after the cursor will shift to the next page.
Remove Page Break in Word Using Delete
Many times, while drafting a document, the editor may insert unnecessary page breaks to separate ideas and topics. These may not be needed in the final document, and users may have to remove them. Using the Delete key to remove page breaks is a very simple process. However, to understand where a page break has been used in a document, non-printable characters have to be visible to detect page breaks.
Follow the steps below to show non-printable characters and remove a page break.
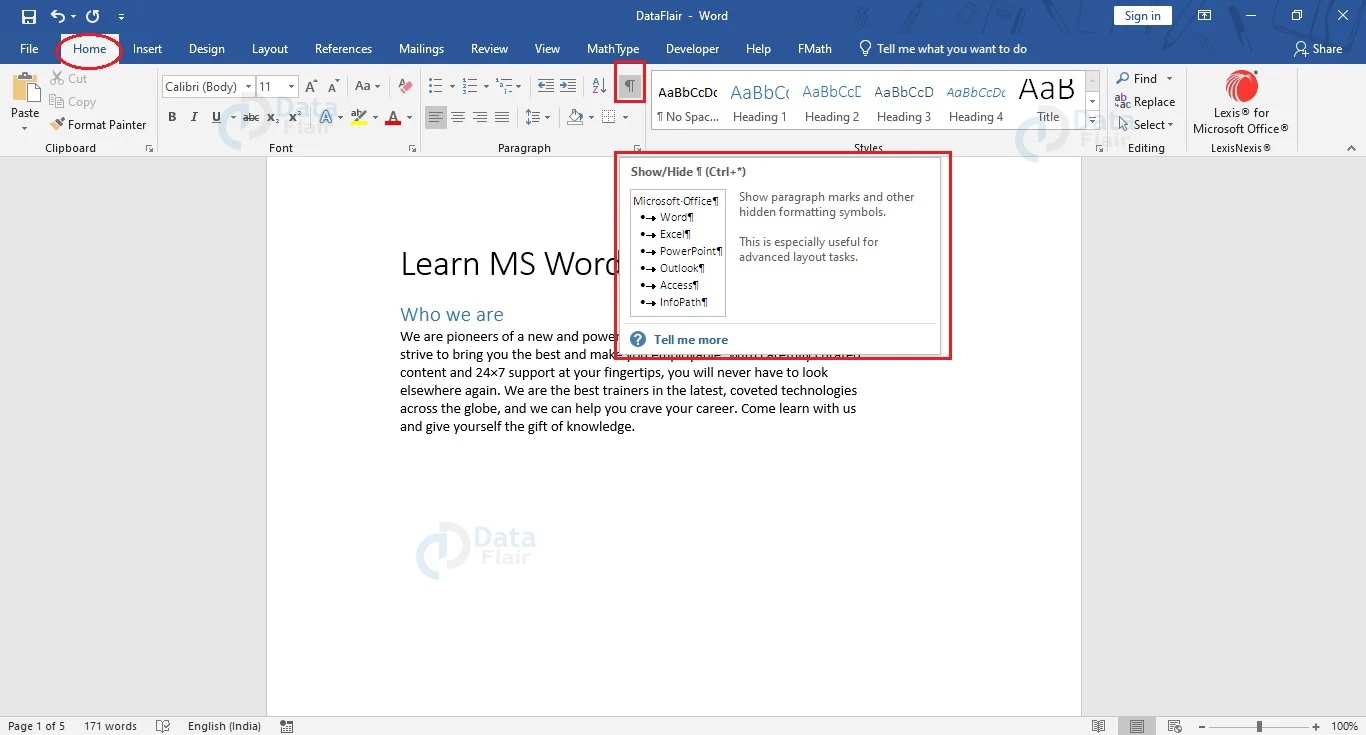
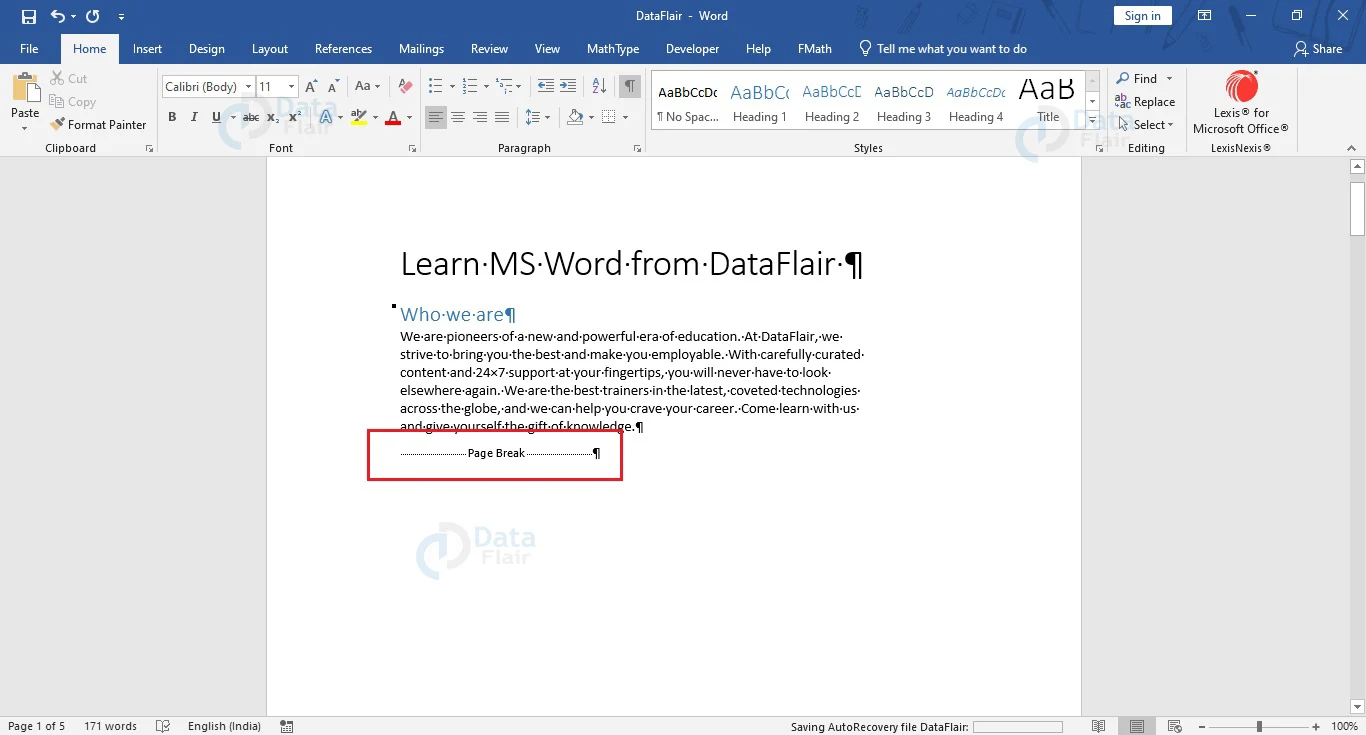
1. Click on Show/Hide button under the Paragraph group of the Home tab to view all non-printable characters. Alternatively, you can use the keyboard shortcut Ctrl+Shift+8 to view the non-printable characters.
2. Click on a Page Break to place your cursor in front of it. Use the Delete key to remove the page break.
3. Click on the Show/Hide button under the Paragraph group of the Home tab to hide all non-printable characters and continue working on your document. Alternatively, you can use the keyboard shortcut Ctrl+Shift+8 to hide them too.
Remove Page Break in Word with Find and Replace
This is a special method that can help you get rid of manual page breaks in your document. To use the Find and Replace dialog box to get rid of all manual page breaks in your document, follow the steps given below.
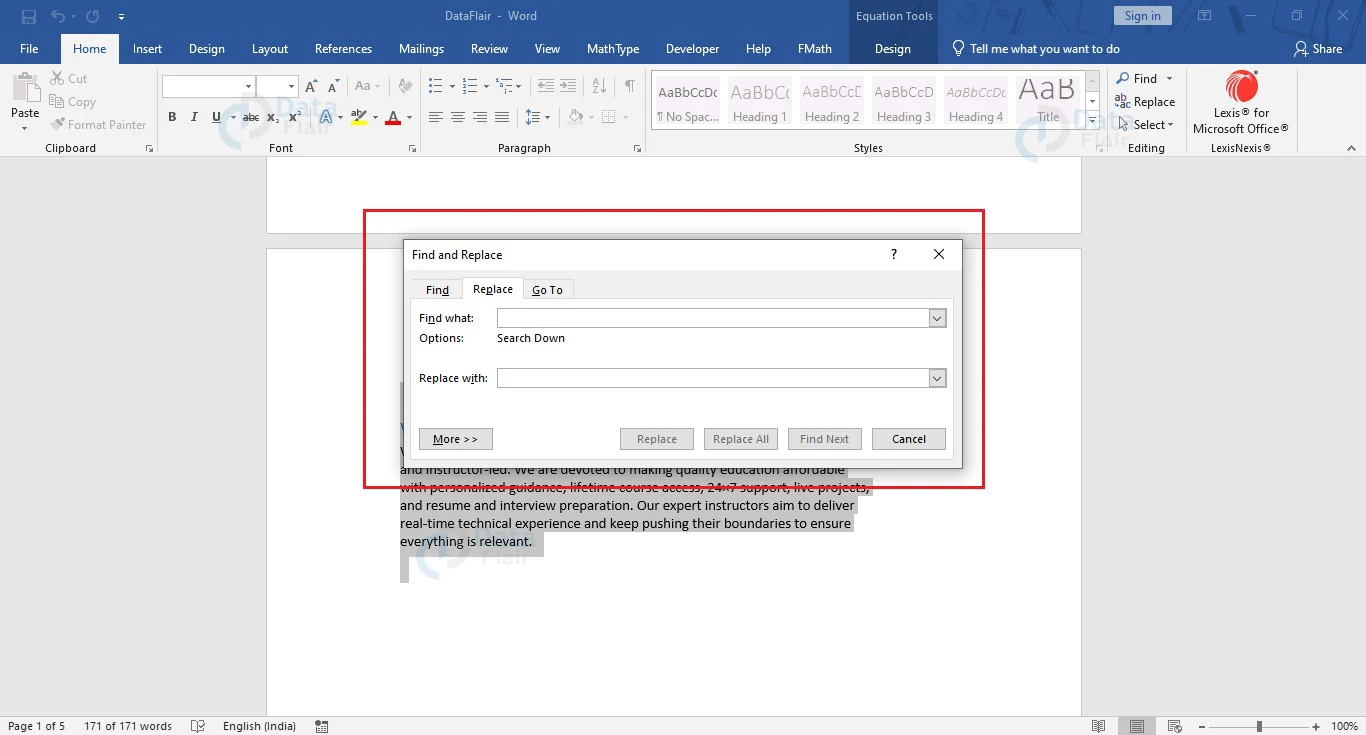
1. Select the whole document using the keyboard shortcut Ctrl+A. You may alternatively click on the left mouse button and drag through your document to select it.
2. Open the Find and Replace dialog box using the keyboard shortcut Ctrl+H.
3. Go to the Replace tab and click on the More > > button. The dialog box will expand and several options will be visible to you.
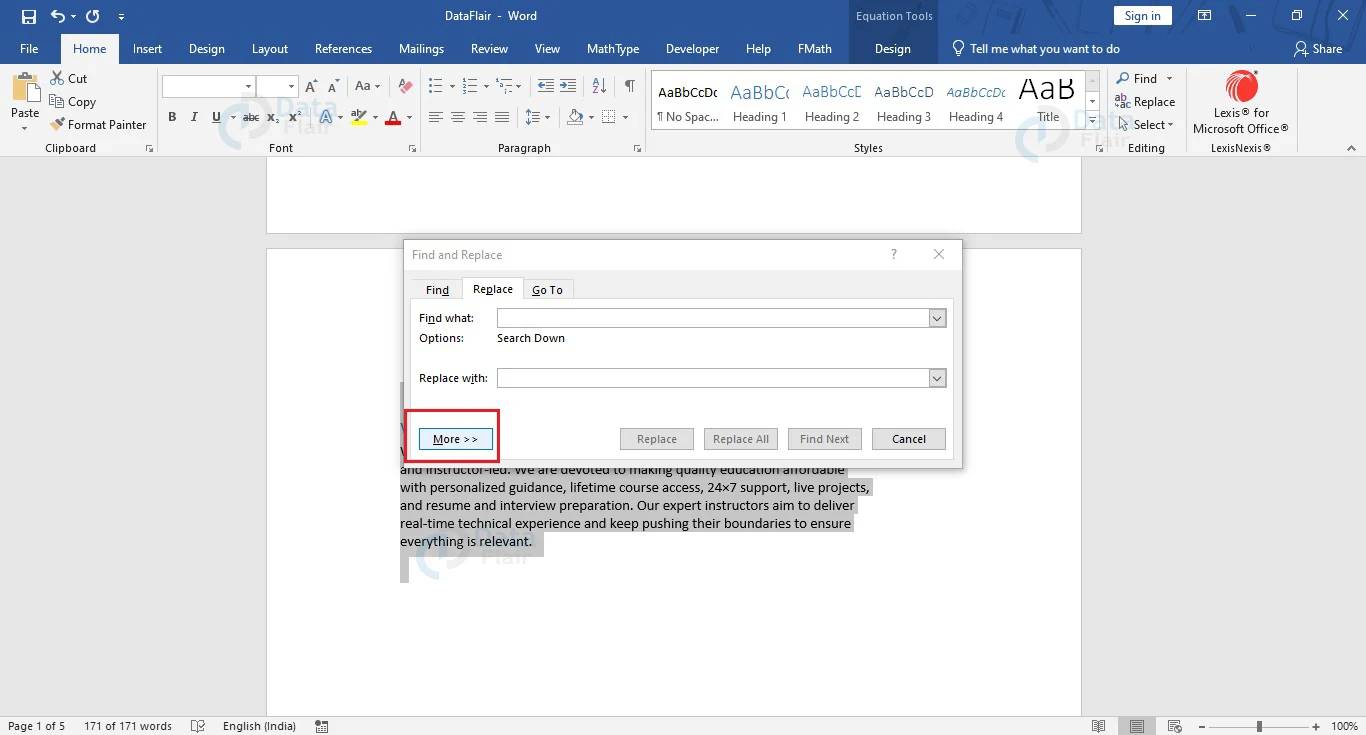
The More > > button will change to < < Less button as shown.
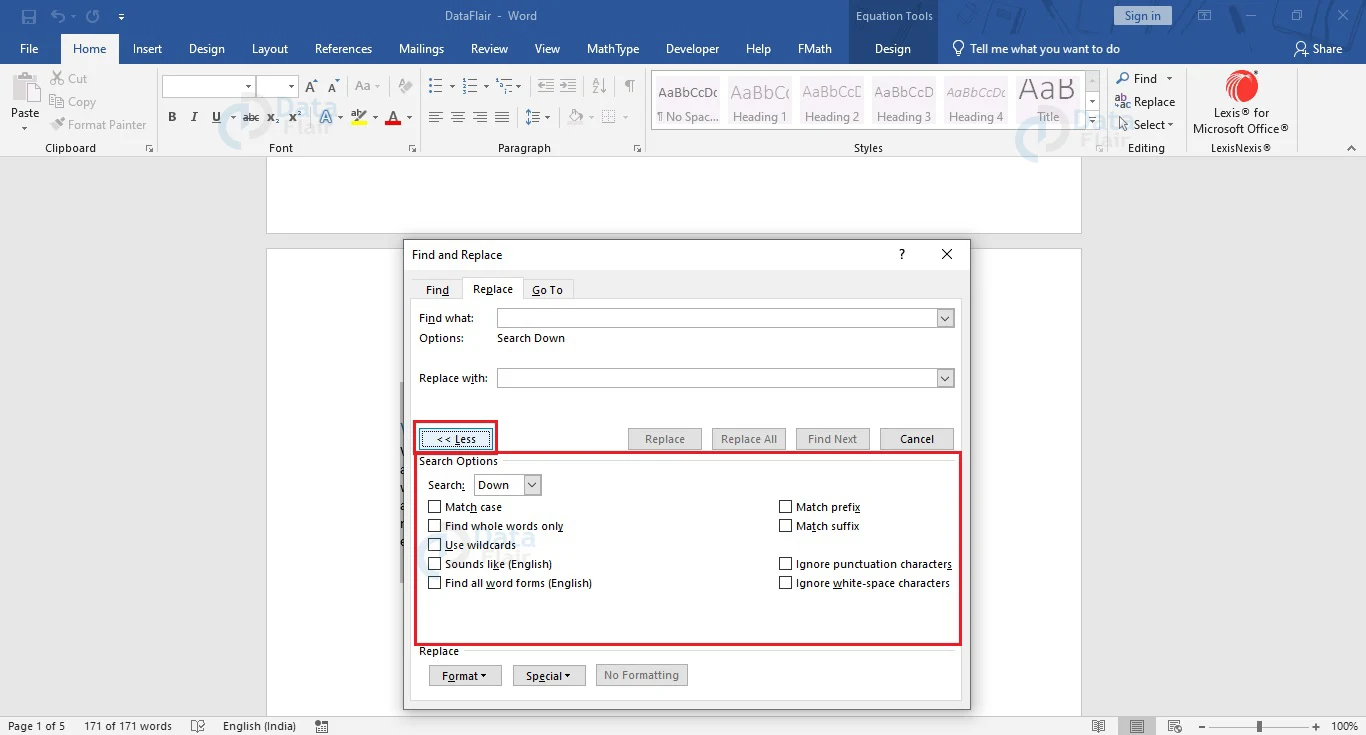
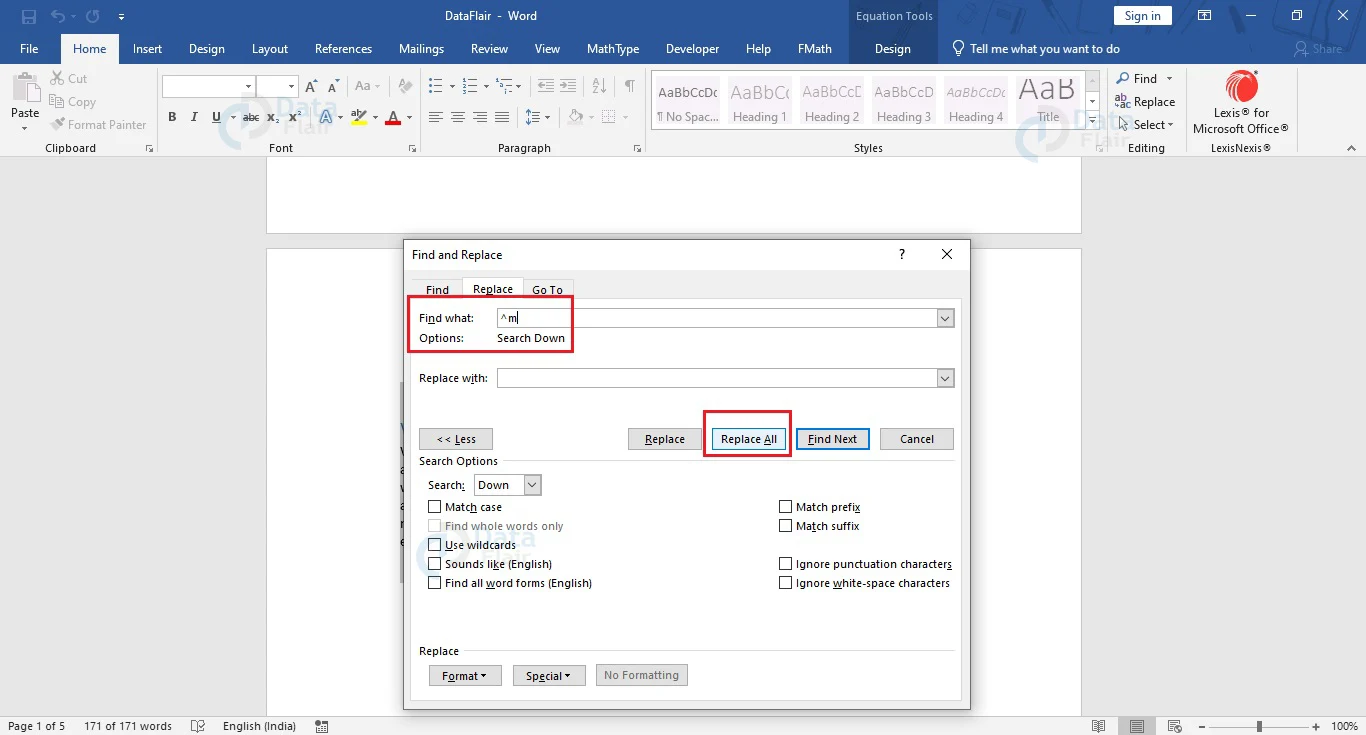
4. Click on the Special option under the Replace section. Choose Manual Page Break from the dropdown menu that appears.
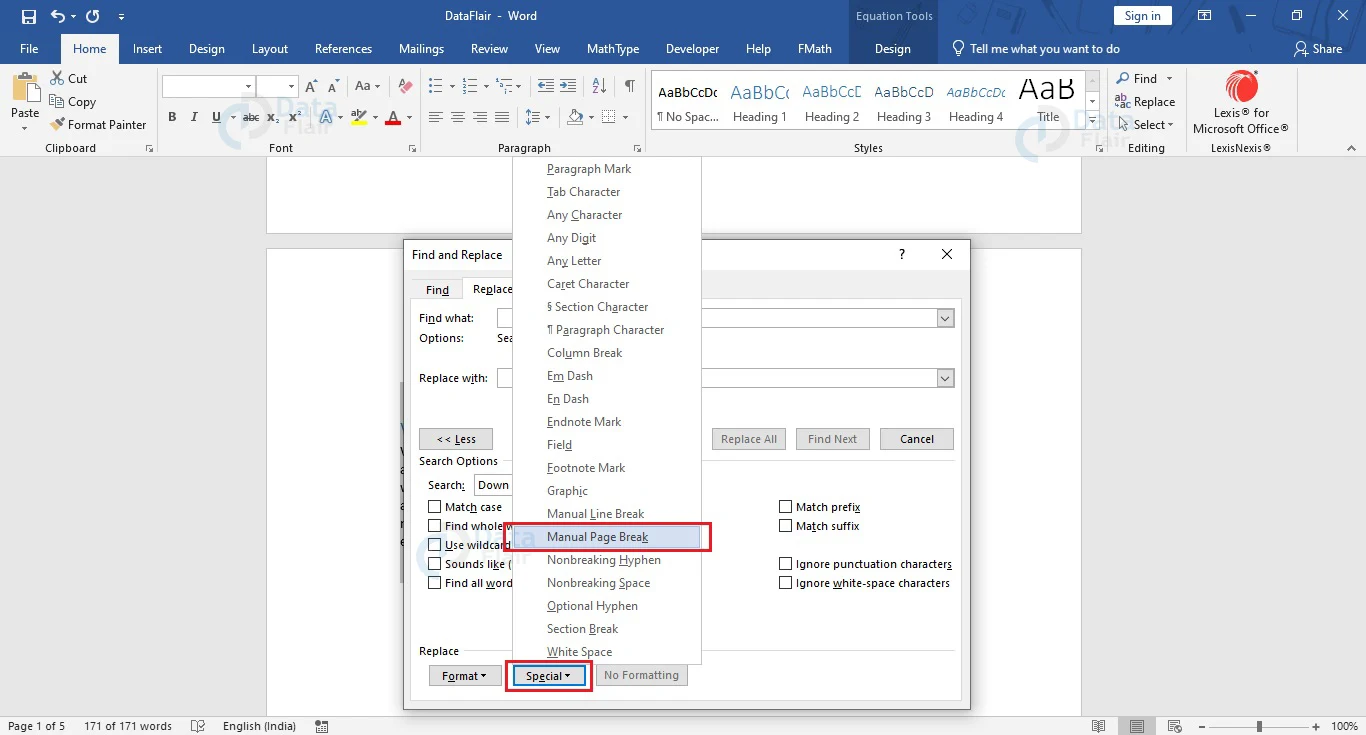
5. You will notice that the Find what: text box will have ^m written. Do not write anything in the Replace with: textbox. Click on the Replace All button.
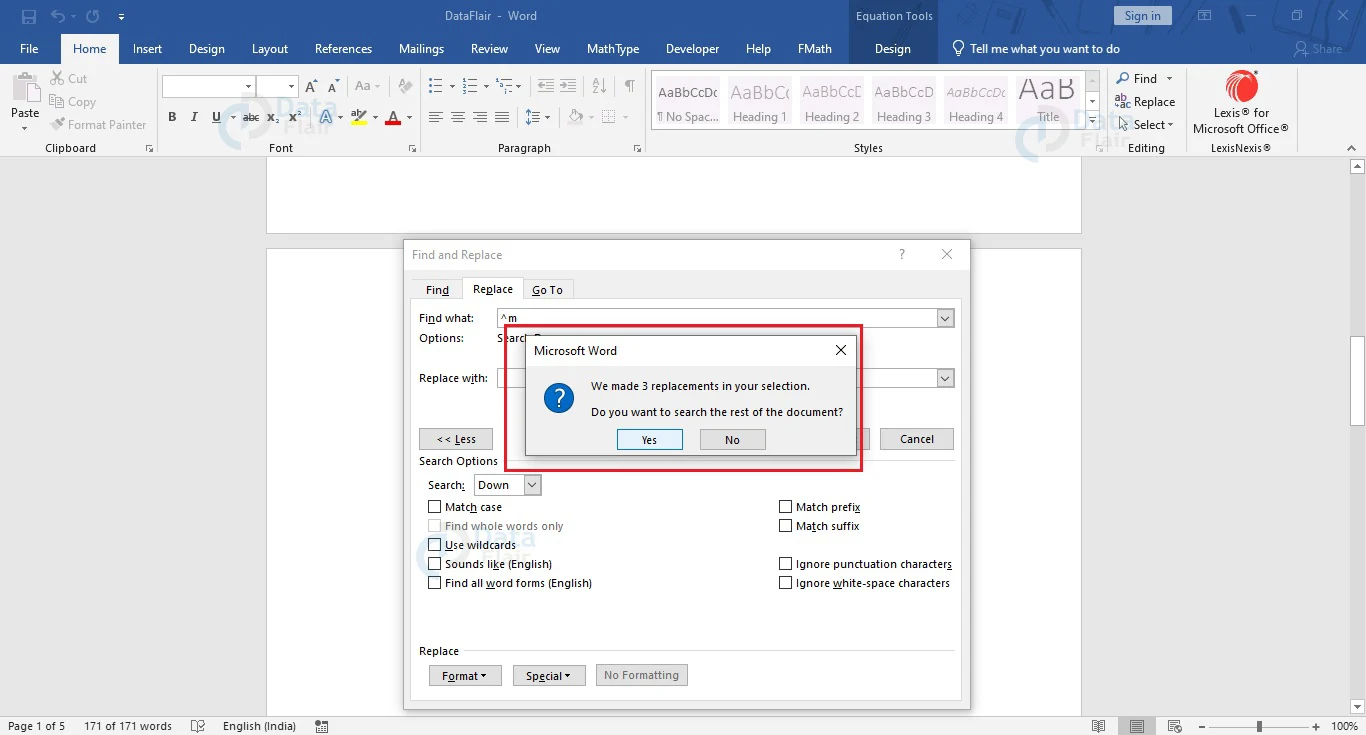
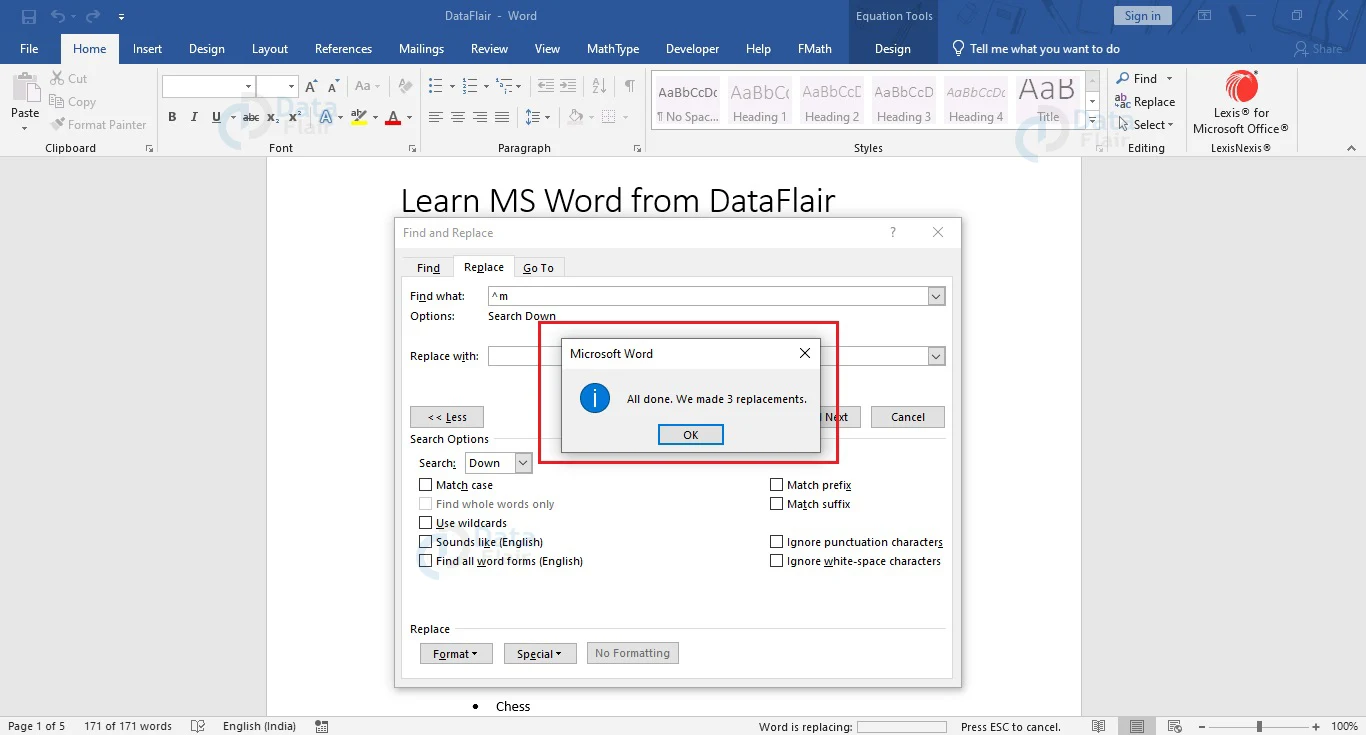
A notification will appear showing that the replacement has been successfully made. Click Yes if you want to check for something else, otherwise click on the No button. If you click on Yes, you will get a replacement confirmation, click OK to go back to the Find and Replace dialog box. Close it to go back to your document.
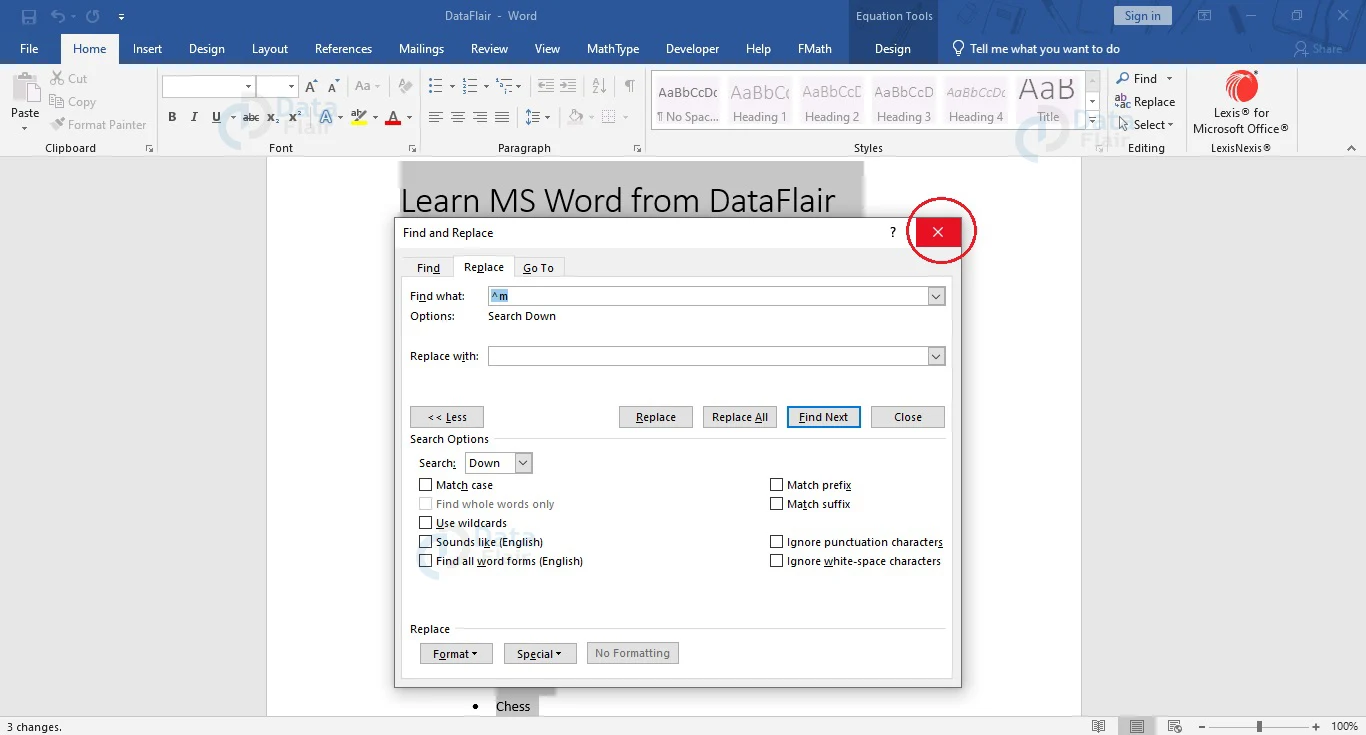
If you click No, you will be directed back to the document.
You will now observe that all the manual page breaks in your document have been removed. However, this method will not work unless Word’s Track Changes option is off. The following steps will help you turn off the Track Changes option in Word.
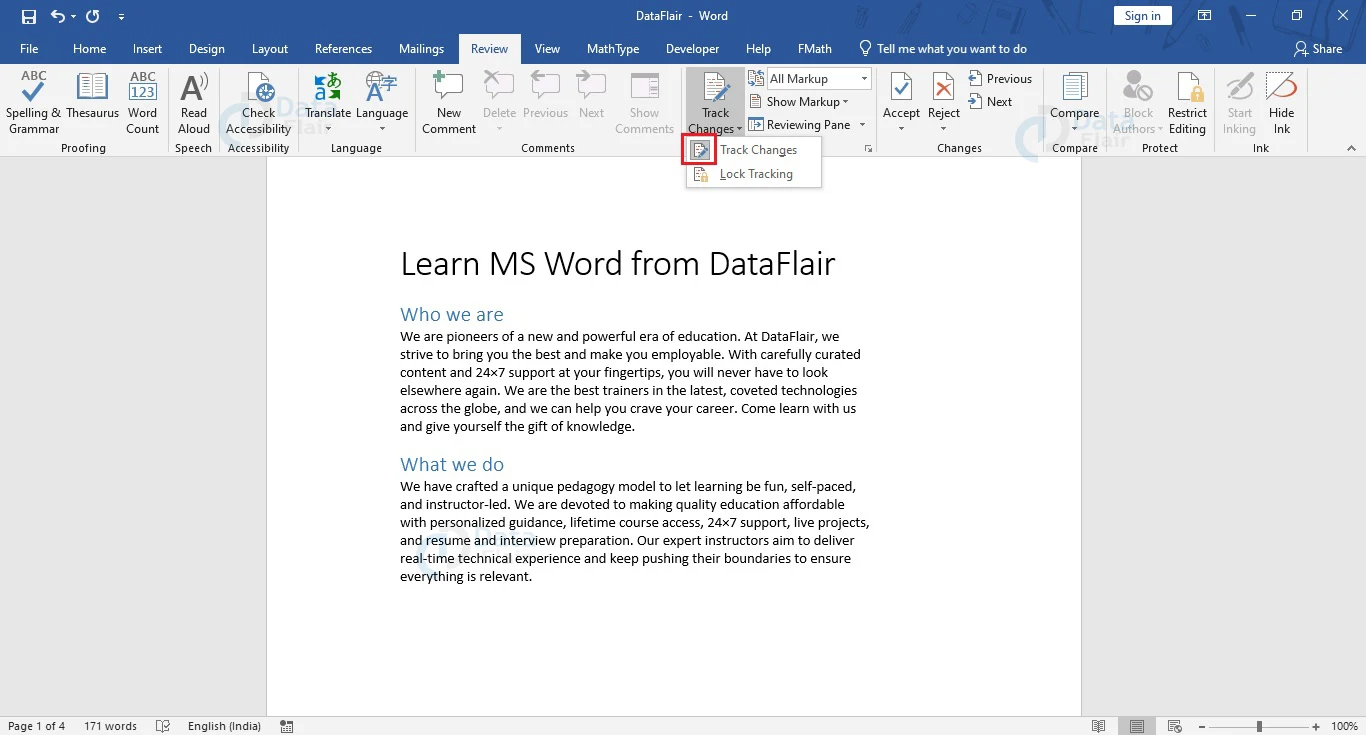
1. Go to the Review tab and click on the Track Changes button under the Tracking group in the top ribbon.
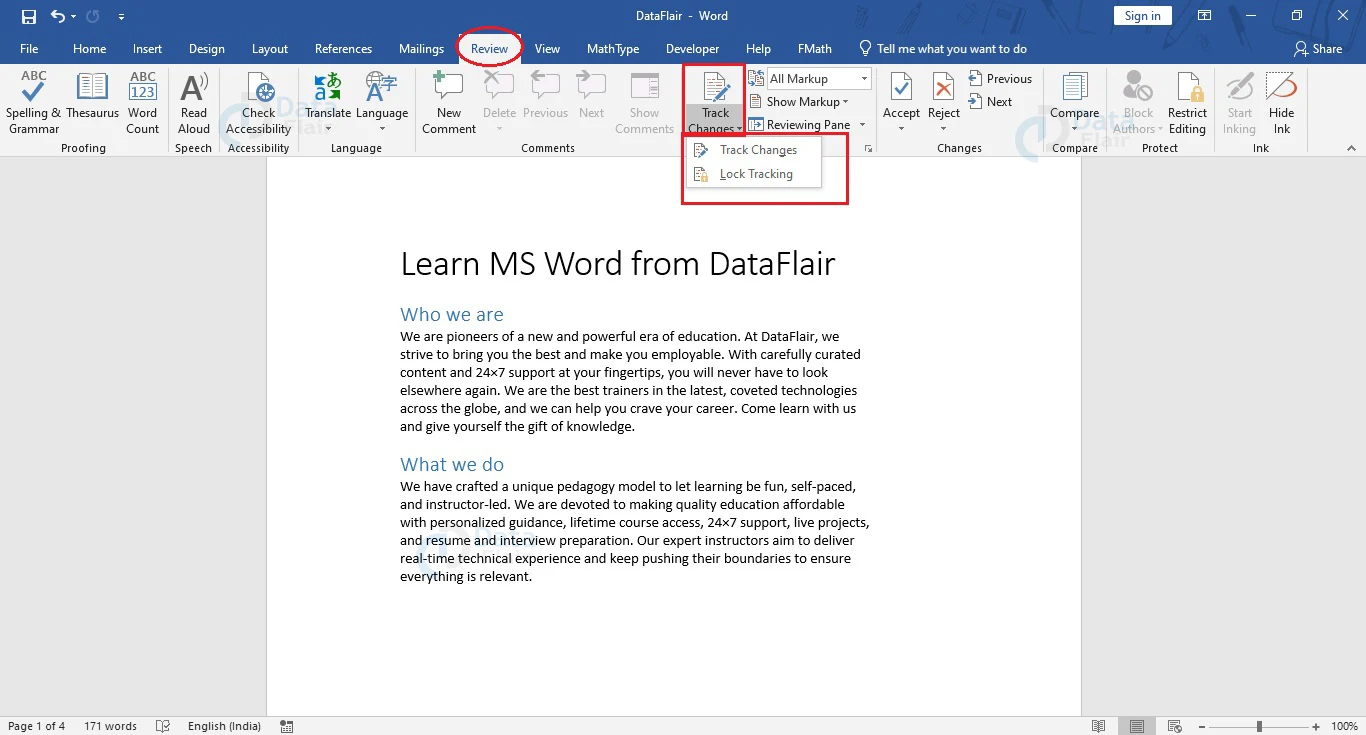
2. From the dropdown menu that appears, click on Track Changes. If this feature is on, then it will be greyed out, otherwise not. Turn off Track Changes feature to use the Find and Replace dialog box for removing manual page breaks in Word. Here, the Track Changes feature is off. If it is on, it will appear as shown below.
Manage Automatic Page Break in Word
A user cannot remove automatic page breaks. However, they can manage how Word inserts an automatic page break, to keep a cluster of lines or particular paragraphs on a single page. The following steps show how you can manage automatic page breaks in Word.
1. Select the lines or paragraphs for which you wish to modify automatic page breaks.
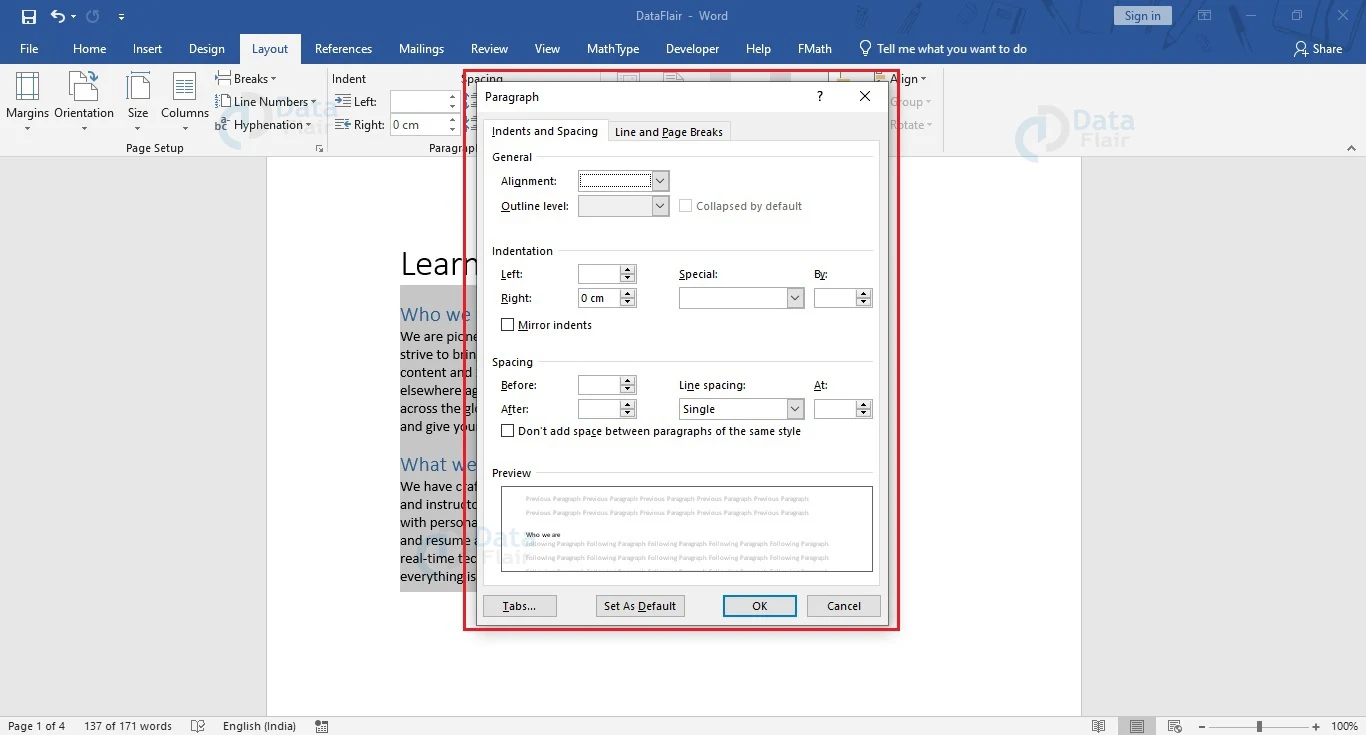
2. Open the Paragraph dialog box by clicking on the angular arrow next to the Paragraph group of the Home tab. You may also open the Paragraph dialog box by clicking on the angular downward arrow next to the Page Setup group of the Layout tab.
![]()
![]()
3. Go to the Line and Page Breaks tab of the Paragraph dialog box. Choose the appropriate option under the Pagination section. The available options are:
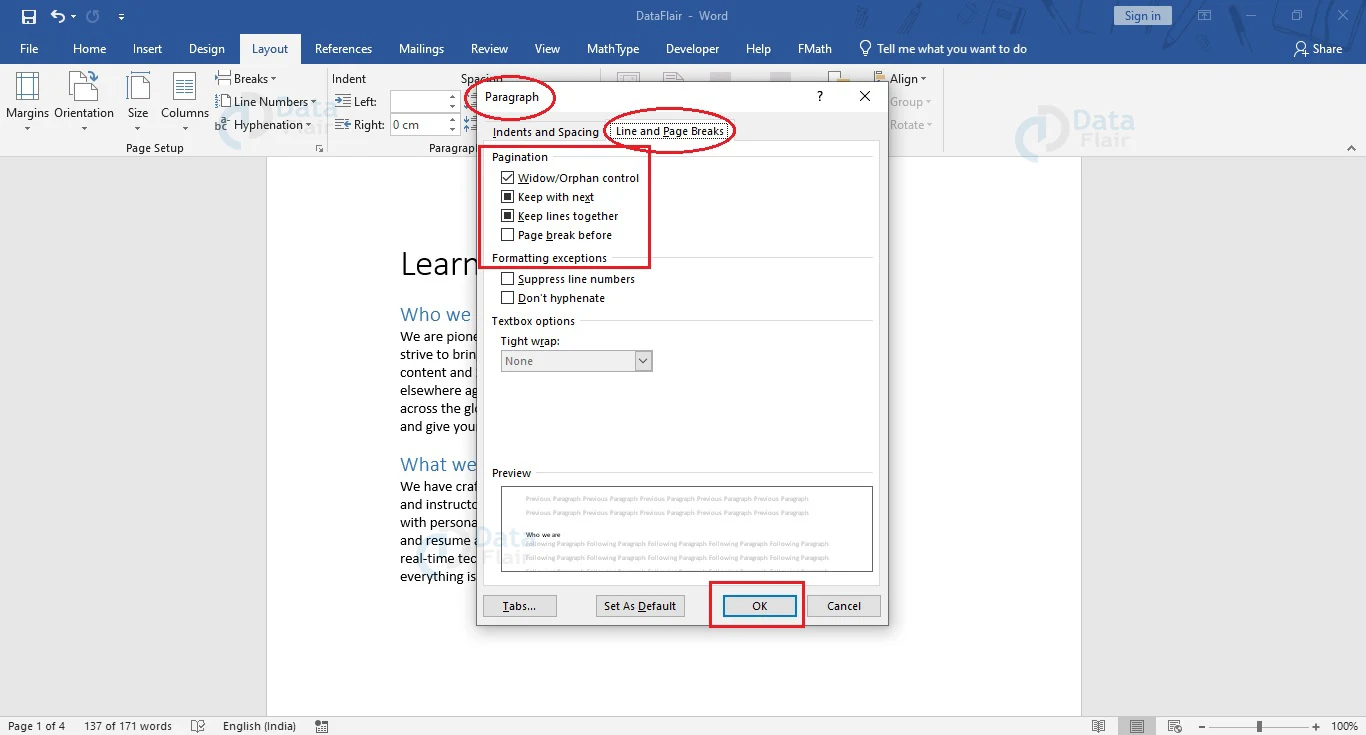
a. Window/Orphan control: This option places at least two lines of a paragraph at the top or bottom of a page.
b. Keep with next: This option keeps two or more paragraphs together and prevents breaks between them.
c. Keep lines together: This option keeps lines together and prevents page breaks in between paragraphs.
d. Page break before: This option lets the user add a page break before a particular paragraph. A new page will display the current paragraph onwards.
Using these options, you can manage automatic page breaks in your Word document.
4. Click on the OK button to confirm your paragraph setup.
Conclusion
You should try using page breaks in your document to understand how useful they are. Page breaks help the printer decide where a page ends and the next one starts. They split ideas and topics into different pages to make the presentation more elegant and smooth. This useful Word feature comes in very handy when working on extremely long documents, or when working on a document that discusses a wide range of topics.
We work very hard to provide you quality material
Could you take 15 seconds and share your happy experience on Google


