Azure Disk Configuration
Top AWS Course for AWS Certified Cloud Practitioner (CLF-C01) Start Now!!
Job-ready Online Courses: Knowledge Awaits – Click to Access!
In this azure article, we will discuss Disk configuration. It helps the users and organizations to get a smooth experience in their workloads. So, let us begin.
Azure Managed disks
Azure managed disks are Azure-managed block-level storage volumes that are used with Azure Virtual Machines. Managed discs are virtualized versions of real discs on on-premises servers. All you have to do with managed discs is define the disc size, disc type, and provide the disc. Azure will take care of the rest once you’ve provisioned the disc. Ultra discs, premium solid-state drives (SSDs), basic SSDs, and standard hard disc drives are all options (HDD).
Azure Disk Security
1. Private Links
To import or export a managed disc within your network, use the Private Link functionality for managed discs.
For unattached managed discs and snapshots, Private Links lets you establish a time-bound Shared Access Signature (SAS) URI that you can use to export the data to other regions for regional expansion, disaster recovery, and forensic analysis.
You may also utilize the SAS URI to upload a VHD from on-premises to an empty drive. You can now use Private Links to limit the export and import of managed discs to only happen within your Azure virtual network.
Your data will only transit within the secure Microsoft backbone network if you use Private Links.
2. Encryption
Two types of encryption are available on managed discs. The storage service does the first, which is Server Side Encryption (SSE). The second is Azure Disk Encryption (ADE), which you may turn on for your VMs’ OS and data discs.
3. Server-side encryption
Server-side encryption protects your data by encrypting it at rest, helping you fulfill your organization’s security and compliance goals. In all locations where managed disks are supported, server-side encryption is enabled by default for all managed discs, snapshots, and images.
(On the other hand, unless you activate encryption at the host, temporary discs are not encrypted by server-side encryption)
4. Azure Disk Encryption
You can encrypt the OS and data discs used by an IaaS Virtual Machine with Azure Disk Encryption. Managed drives are included in this encryption.
The discs are protected with industry-standard BitLocker encryption technology for Windows. The DM-Crypt technology is used to encrypt the drives under Linux.
Azure Key Vault is integrated with the encryption process, allowing you to control and manage the disc encryption keys.
Azure Disk Roles
The data disc, the OS disc, and the temporary disc are the three major disc responsibilities in Azure. These responsibilities correspond to the discs connected to your virtual system.
1. Data Disk
A data disc is a managed disc that’s attached to a virtual machine to store application data, or other data you need to maintain.
Data discs are designated with a letter of your choice and registered as SCSI drives. The maximum capacity of each data drive is 32,767 gibibytes.
The number of data discs you can attach to the virtual machine and the type of storage you can use to host the discs are determined by the virtual machine’s size.
2. OS disk
Every virtual machine has one operating system disc linked to it. The pre-installed OS on that OS drive was chosen when the VM was constructed. The boot volume is located on this disc.
Although this drive has a maximum capacity of 4,095 GB, many operating systems are partitioned by default with a master boot record (MBR).
The useful size is limited to 2 TiB by MBR. Create and attach data drives if you want more than 2 TiB for data storage.
Convert it to GUID Partition Table if you need to store data on the OS drive and need the extra capacity (GPT).
3. Temporary disk
A temporary drive is included in most VMs, but it is not a managed disc. The temporary drive is intended to solely hold data such as page or swap files, and it provides short-term storage for applications and processes. During a maintenance event or when you redeploy a VM, data on the temporary disc may be lost. Data on the temporary disc will persist after a successful standard reboot of the VM. See Azure VM sizes with no local temporary drive for more information on VMs without temporary discs.
The default temporary drive for Azure Linux VMs is /dev/sdb, while the default temporary disc on Windows VMs is D:. Unless you enable encryption at the host, the temporary disc is not encrypted by server side encryption.
Azure Managed Disk Snapshots
A managed disc snapshot is a read-only, crash-consistent entire copy of a managed disc that is saved by default as a standard managed disc. You can back up your managed drives at any moment with snapshots. These snapshots exist in their own right, separate from the original disc, and can be used to generate new managed discs. Snapshots are charged according to the size that was used.
For example, if you take a snapshot of a managed disc with a provisioned capacity of 64 GB and real utilized data size of 10 GB, the snapshot is only invoiced for the 10 GB of used data.
The Azure use report will show you the size of your snapshots that have been used. For example, if a snapshot’s used data size is 10 GiB, the consumed amount will be 10 GiB/(31 days) = 0.3226 in the daily usage report.
1. Images
A managed custom image can also be created on a managed drive. You can make an image from a generic (sysprepped) VM or from a bespoke VHD in a storage account. This method creates a single image.
All managed disks connected with a VM, including the OS and data drives, are included in this image.
This managed custom image allows you to create hundreds of virtual machines (VMs) using your custom image without having to copy or manage any storage accounts.
2. Images Versus Snapshots
It’s critical to recognise the distinction between photos and snapshots. You can create an image of a deallocated generic VM using managed discs.
All of the drives associated with the VM are included in this picture. This image includes all of the discs and can be used to create a virtual machine.
A snapshot is a duplicate of a captured disc at a certain point in time.
It only applies to one disc. You can take a snapshot or an image of a VM with only one disc (the OS disc) and construct a VM from either the snapshot or the image.
A snapshot is unaware of any disc other than the one it includes.
This makes it difficult to employ in scenarios that require numerous drives to work together, such as striping.
Snapshots would have to be able to communicate with one another, which is currently not possible.
Azure Disk Allocation and Performance
The following figure shows real-time bandwidth and IOPS allocation for drives, with three possible IO paths:
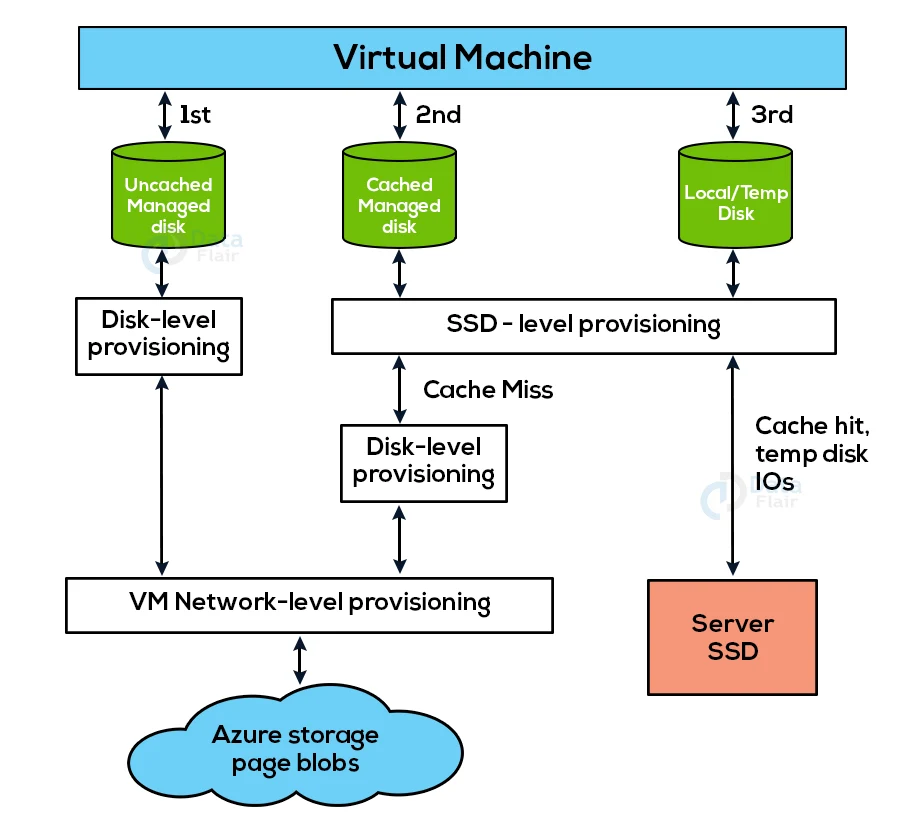
The uncached managed disc path is the first IO path. If you’re using a managed drive and have the host caching set to none, you’ll follow this route.
An IO that follows this path will be provisioned at the disc level first, then at the VM network level for IOPs and throughput.
The cached managed disc path is the second IO Path. Cached managed disc IO is designated SSD-level provisioning in the diagram because it uses an SSD near to the VM that has its own IOPs and throughput supplied.
When a cached managed disc requests a read, it first checks to see if the data is available on the server SSD. If the data isn’t present, a cached miss is made, and the IO is then performed for IOPs and throughput via SSD-level provisioning, disk-level provisioning, and then VM network-level provisioning.
When the server SSD performs reads on cached IO on the server SSD, it generates a cache hit, and the IO is then executed depending on SSD-level provisioning.
Writes initiated by a cached managed disc always take the cached-miss path and must go via SSD, disc, and VM network-level provisioning.
Finally, the local/temp disc is accessed using the third way. This feature is only available on VMs that have local/temp discs. For IOPs and throughput, an IO using this path will use SSD-Level Provisioning.
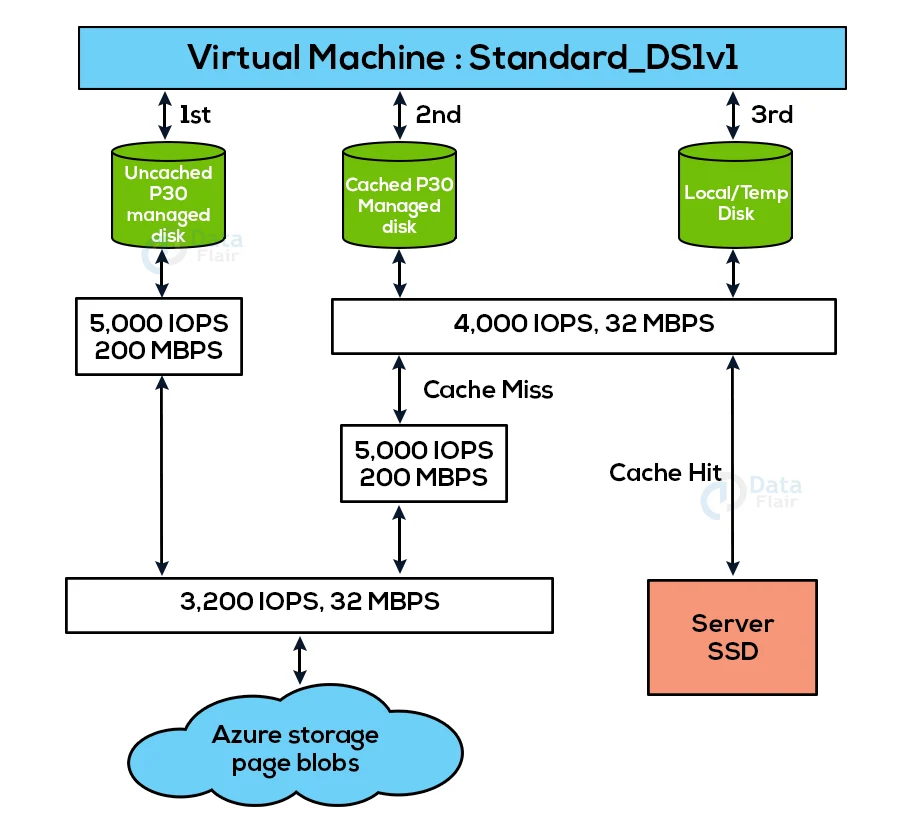
Because of constraints at the SSD and network levels, a Standard DS1v1 VM is unable to achieve the 5,000 IOPS potential of a P30 drive, regardless of whether it is cached or not.
For disc traffic, Azure uses a prioritized network channel, which takes precedence over other low-priority network traffic.
In the event of network contention, this allows discs to maintain their intended performance.
Similarly, Azure Storage uses automatic load balancing to tackle resource contention and other difficulties in the background.
When you create a disc, Azure Storage assigns appropriate resources and uses proactive and reactive resource balancing to accommodate traffic levels.
This also ensures that discs can meet their IOPS and throughput requirements. The VM-level and Disk-level metrics can be used to monitor performance and set up alerts as needed.
Benefits of Managed disks
1. Highly Durable and Available
Managed discs are built to provide 99.999 percent uptime. Managed discs accomplish this by storing three copies of your data, ensuring great durability.
If one or even two replicas fail, the remaining replicas help to ensure data permanence and a high tolerance for failures.
With an industry-leading ZERO percent yearly failure rate, Azure has continuously delivered enterprise-grade durability for infrastructure as a service (IaaS) disc.
2. Simple and Scalable VM Deployment
You can build up to 50,000 VM discs of a type in a subscription per region using managed discs, allowing you to construct thousands of VMs with just one subscription.
This functionality further improves the scalability of virtual machine scale sets by allowing you to use a Marketplace image to produce up to 1,000 VMs in a virtual machine scale set.
3. Integration with Availability Sets
Managed discs are used in conjunction with availability sets to ensure that the discs of the VMs in an availability set are sufficiently isolated from one another to prevent a single point of failure. Automatically, discs are put in various storage scale units (stamps).
Only the VM instances with discs on those stamps fail if a stamp fails due to hardware or software failure.
Consider the following scenario: you have a five-VM application that is part of an Availability Set. Because the discs for those VMs aren’t all stored in the same stamp, if one goes down, the other stamps will continue to run.
4. Integration with Availability Zones
Availability Zones, a high-availability feature that protects your applications from datacenter outages, are supported by managed discs.
Within an Azure region, Availability Zones are distinct physical locations. Each zone is made up of one or more data centers that are powered, cooled, and networked independently.
All enabled regions must have a minimum of three independent zones to ensure resiliency. Azure’s Availability Zones provide an industry-leading 99.99 percent VM uptime SLA.
Azure Backup support
Azure Backup can be used to build a backup job with time-based backups and backup retention settings to defend against regional disasters. This allows you to restore VMs or managed discs whenever you want. It now supports disc capacities up to 32 terabytes (TiB).
Azure Disk Backup
Azure Backup (preview) is a native, cloud-based backup service that secures your data on managed discs.
It’s a straightforward, safe, and cost-effective solution that lets you set up protection for managed discs in just a few minutes.
Azure Disk Backup provides a turnkey solution for managing snapshot lifecycles for managed discs by automating the creation of snapshots on a regular basis and storing them for the length specified in the backup policy.
Granular Access Control
You can provide specified permissions for a managed disc to one or more users using Azure role-based access control (Azure RBAC).
Read, write (create/update), delete, and retrieve a shared access signature (SAS) URI for a managed disc are just a few of the operations available.
You can give people access to only the operations they need to do their jobs. If you don’t want someone to copy a managed disk to a storage account, for example, you can deny them access to the managed disk’s export action.
Similarly, if you don’t want someone to copy a managed disc using an SAS URI, you can deny that access to the managed disc.
Uploading Vhd
Transferring your vhd to an Azure managed disc is simple with direct upload.
You used to have to go through a more extensive process that included storing your data in a storage account. There are fewer steps now.
Uploading on-premises VMs to Azure is simpler, as is uploading to large managed drives. The backup and restoration process is also simplified.
It also saves money by allowing you to upload data to managed discs without having to attach them to virtual machines. Direct upload allows you to upload vhds up to 32 TiB in size.
Child Elements
| Setting | Description |
| Disable Encrypted Disk Provisioning | Specifies whether Windows encrypts blank discs that have hardware-based encryption capabilities. |
| Disk | The disc configurations to be applied to a disc on the destination computer are specified here. |
| WillShowUI | Indicates whether the disc configuration UI should be displayed in Windows Setup. |
Valid Configuration Passes
WindowsPE is a valid configuration pass for Disk Configuration in Azure.
Parent Hierarchy
Microsoft-Windows-Setup | DiskConfiguration
The Microsoft-Windows-Setup component includes options for selecting the Windows image to install, configuring the drive on which Windows is installed, and configuring the Windows PE operating system.
Some of the options in this component are only applicable to Windows PE, while others apply to the installed Windows image. Each option specifies which operating system it applies to.
Applies To
Load your image into Windows SIM and search for the component or setting name to see if it applies to the image you’re building.
XML Examples
Manual Configuration
The XML output for the DiskConfiguration parameter in Windows Setup explains how to specify that you will manually configure disc partitions through the disc configuration UI:
<DiskConfiguration>
<WillShowUI>Always</WillShowUI>
</DiskConfiguration>
How to Add Data Disks in Azure Virtual Machine
Follow the below steps to add data disks in Azure virtual machine:
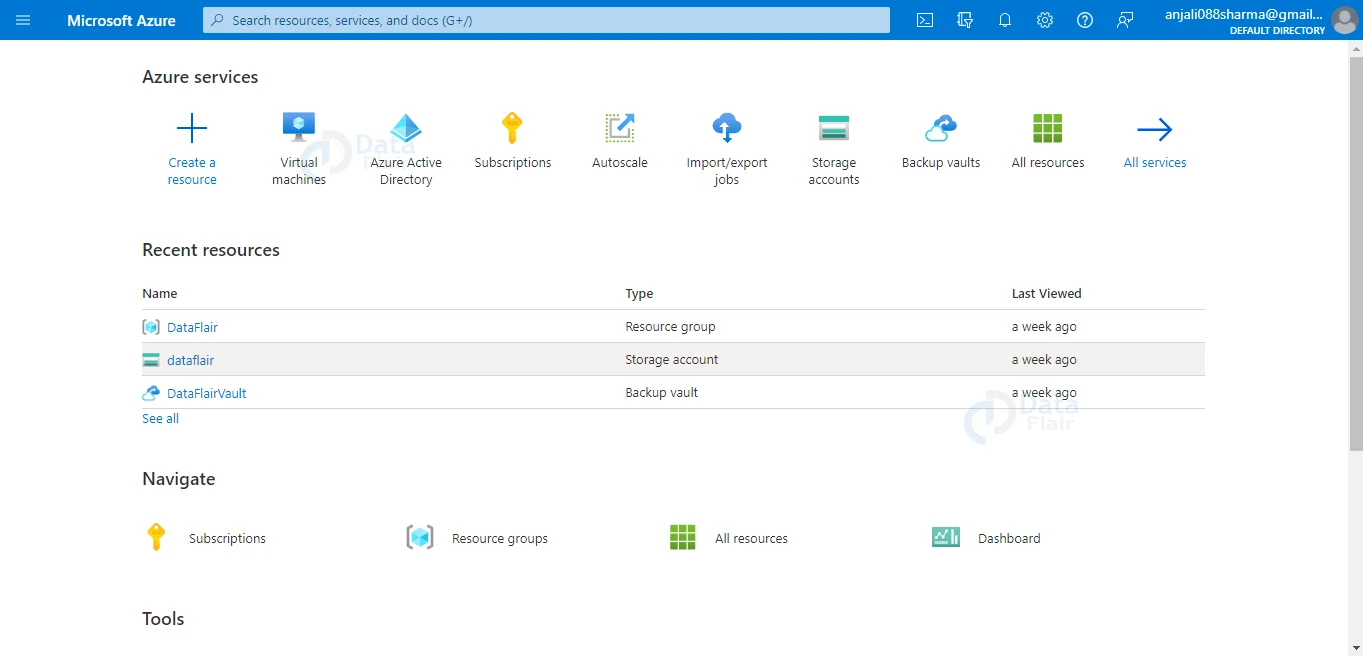
1: Go to the Azure portal.
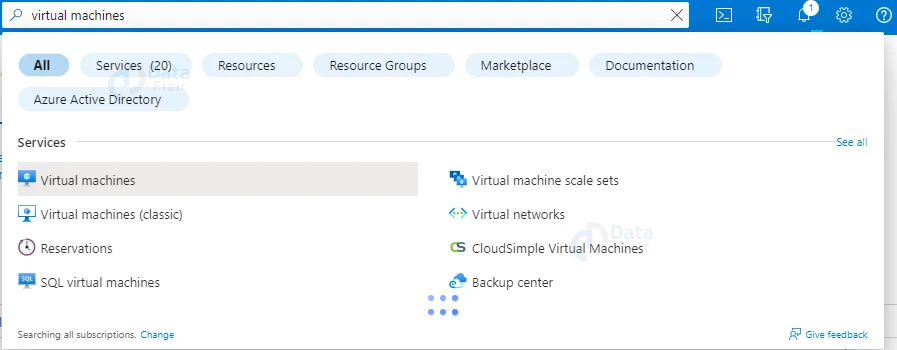
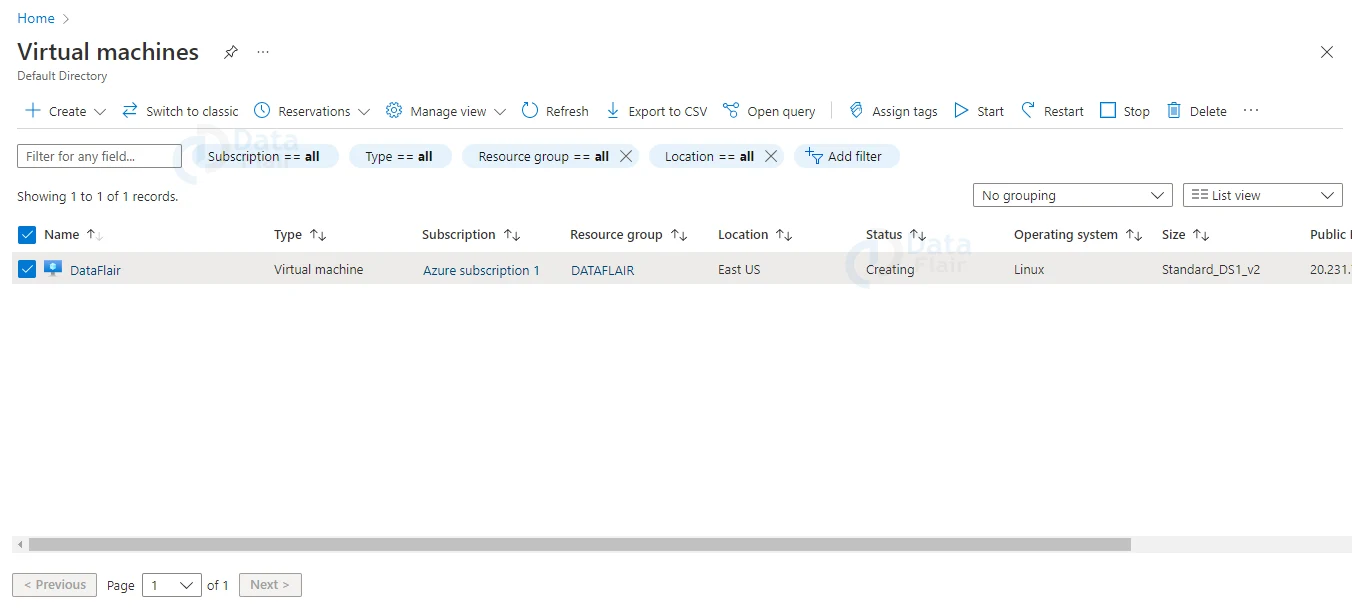
2: Search for and select Virtual machines.
3: Choose a virtual machine from the drop-down menu.
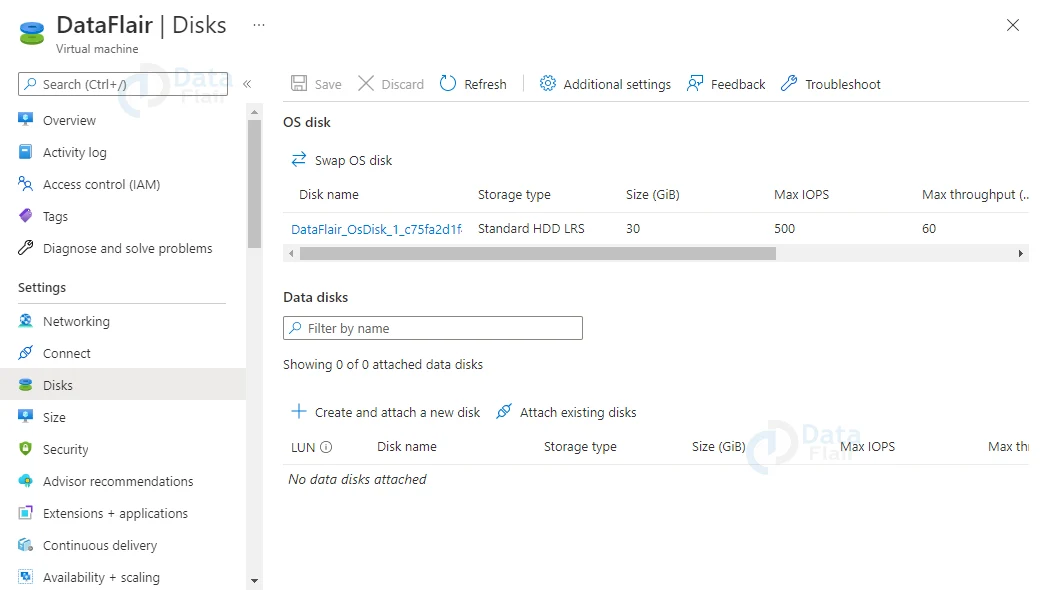
4: Select Disks from the Virtual Machine window.

5: Select Create and attach a new disc from the Disks window.
6: Make your selections in the new disk’s drop-down menus and give it a name.
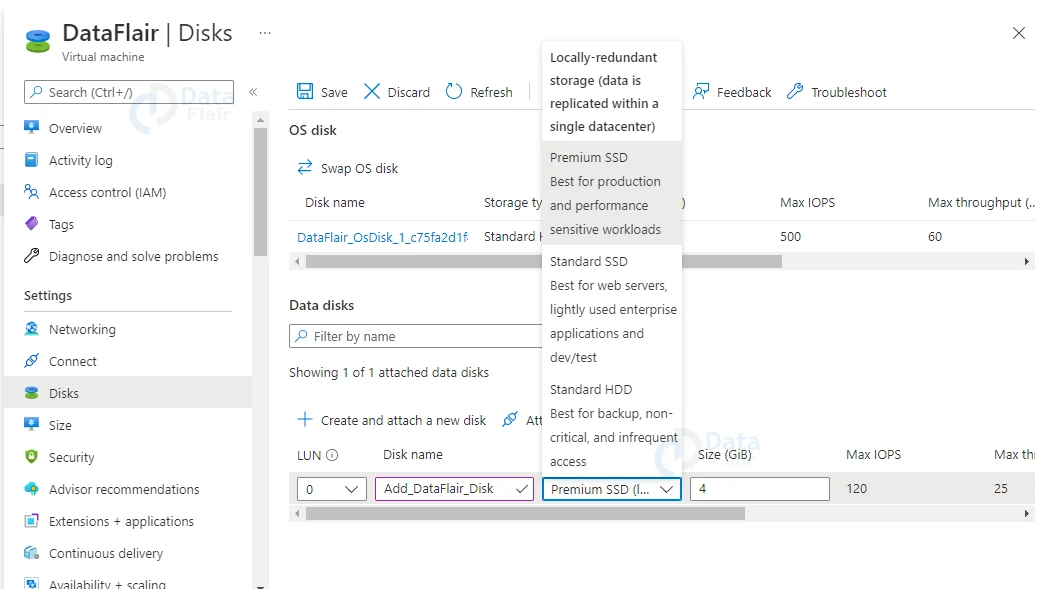
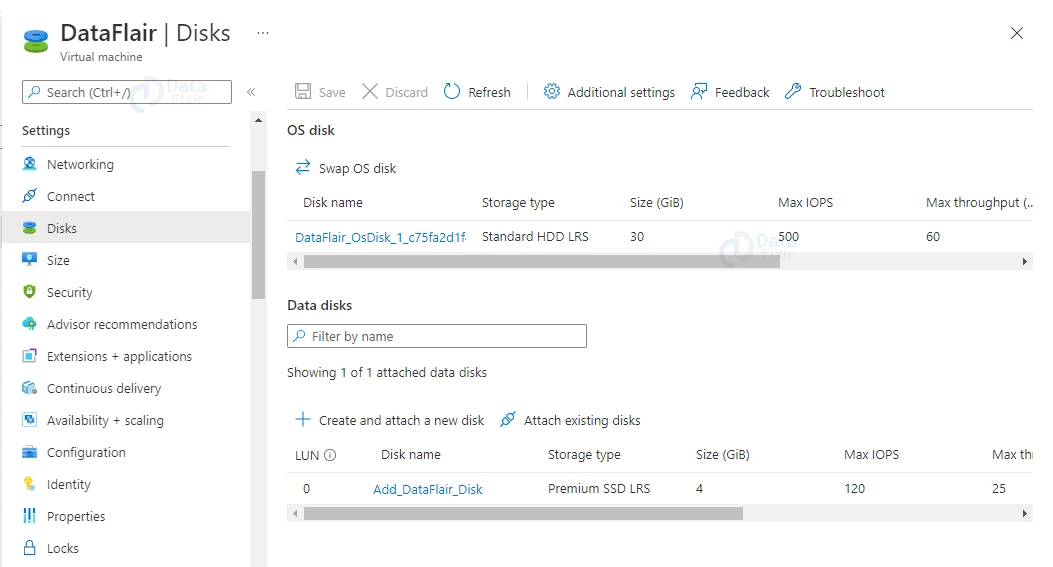
7: To create and attach the new data disc to the VM, select Save.

In the Notifications tab it will showcase that the virtual machine is updated which means the new disk is attached.

Remove a disk from Azure Virtual Machine
Follow below steps to remove disk from azure virtual machine:
1: Create an Administrator account on portal.azure.com.
2: Locate the Virtual Machine from which you want to remove a disc. All resources under your subscription will be displayed if you select “All Resources” from the left menu.
3: When you’ve located your virtual desktop, go to “Disks” and choose it.
4: Click on the “X” icon to delete the disk.

5: Click on the Save button.

You will notice the virtual machine will be updated in the notification panel which means the selected disk is deleted.
Conclusion
Thus, we have reached towards the last section of the article. And we believe you enjoyed the Disk Configuration article and this will help you to clear your certifications.
Your 15 seconds will encourage us to work even harder
Please share your happy experience on Google


