Azure Compute Module
Free AWS Course for AWS Certified Cloud Practitioner (CLF-C01) Start Now!!
FREE Online Courses: Your Passport to Excellence - Start Now
Microsoft Azure is very popular for storage and its compute module. As in our previous article we have already talked about Azure’s storage services and in today’s article, we will be talking about the Compute Module that is offered by Microsoft Azure. So let us begin.
Microsoft Azure Compute Services
Azure provides several ranges of computing solutions that are used by industries for developing applications, testing, deploying the applications. This service supports the following solutions mentioned below. They are as follows:
- Windows Server
- SQL Server
- Oracle
- IBM
- SAP
Along with that Azure also consists of a variety of services that are capable of running virtual machines. Every service offers multiple solution options depending upon the requirement. Below, we have mentioned the list of most promising services.
- Virtual Machines
- Container Instances
- App Service
- Azure Functions are also known as serverless computing
Now, let us look at each solution in a detailed manner.
Microsoft Azure Virtual Machines (VMs)
First of all, let us understand what virtual machines are, so in simple words, virtual machines are logical systems that work exactly similar to physical systems. Virtual Machines consist of a virtual processor, memory, storage and networking resources.
Virtual Machines VMs are capable of hosting operating systems and it is similar to running in a physical system.
Along with that, users can run multiple operating systems on virtual machines for testing purposes.
These VMs are capable of running operating systems, the users can run and install their favorite software and do their work. These users can customize the software, storage, memory and all the features.
Microsoft’s Azure Virtual Machines (VMs) can help the users to easily create their Virtual Machines in the Cloud.
Azure provides VMs in infrastructure as a service (IaaS) and it can be used for multiple purposes.
The users get complete control over the environment and operating system in their VMs. Thus, this capability allows the users to lower the expenditures and continue all their tasks seamlessly.
Microsoft Azure Virtual Machine Scale Sets
After seeing the virtual machines now let us have a look at the virtual machine scale sets which is the second most popular compute module offered by Microsoft Azure. Basically, Azure Compute resources that users can use to deploy and manage the set of identical Virtual Machines.
If we talk of identical VMs set it means that all the VMs will have the same factors such as memory, processor, storage etc. Along with that VMs, scale sets support the auto scaling feature and there is no requirement of any pre-provisioning.
And, thus this feature helps the users to build a large scale of services which helps to resolve issues like compute, big data and containerized workloads. And, if there is a rise in demand multiple VMs can be added automatically.
Similarly, if the demand decreases the VM instances will be removed. This process can be manual, automatic or both.
Microsoft Azure Containers and Kubernetes
The third popular Azure’s Compute Module is Containers Instances and Kubernetes Service where the users can launch the compute resources and manage the containers.
One of the best features of containers is that they are lightweight, virtualized and have application environments.
They are specially designed to lower the time-consuming process.
They can be quickly built, scaled out and can also be stopped easily and dynamically. Also, the user has the facility to run several instances of a containerized application over a single host machine.
Microsoft Azure App Service
The fourth Compute Module offered by Microsoft Azure is known as App Service. Basically, it comes under the Platform as a Service (PaaS). It helps the users to quickly develop, deploy and scale the enterprise grade web, mobile and APIs running on any device or platform.
The users can be attentive and successfully complete the requirements related to performance, scalability, security and compliance in a completely managed platform while having infrastructure maintenance.
Microsoft Azure Functions
Azure Functions is the next core computing service that is offered by Microsoft Azure. Basically, Functions focuses on the code which runs the service and it does not focus on any platform or any infrastructure.
Azure Functions are mainly utilized when the users want to perform their task at a specific period or at an event with the help of REST Request, timer or with the message from any other Azure Service. The user’s tasks get successfully completed within a few seconds.
In simple words, we can say that the developer can directly run their code without depending upon any infrastructure.
Listing Computing Models
Follow below steps to list computing models:
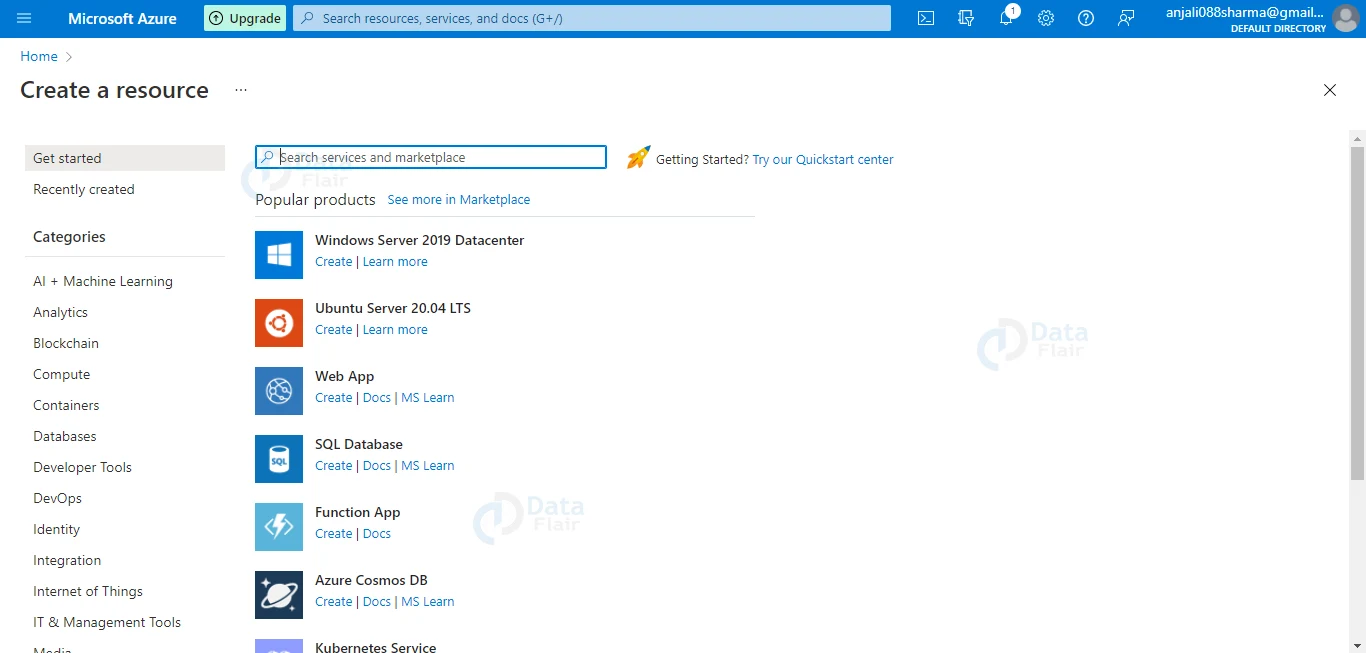
1: The administrator should firstly login to their Azure account
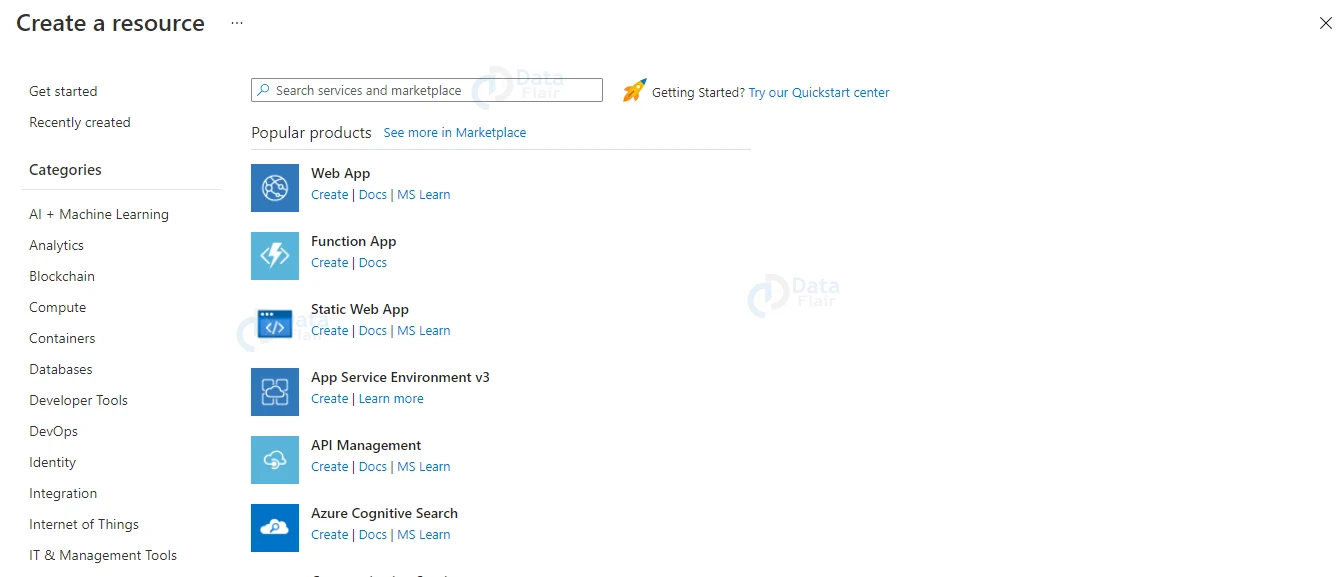
2: In the second step the administrator should click on the “New” button option which is visible at the bottom left corner of the screen and then drags the cursor towards the “Compute” option.
Once the administrator completes these steps the list of computing models will be listed on the screen.
Creating a Web Application
Follow below steps to create a web application:
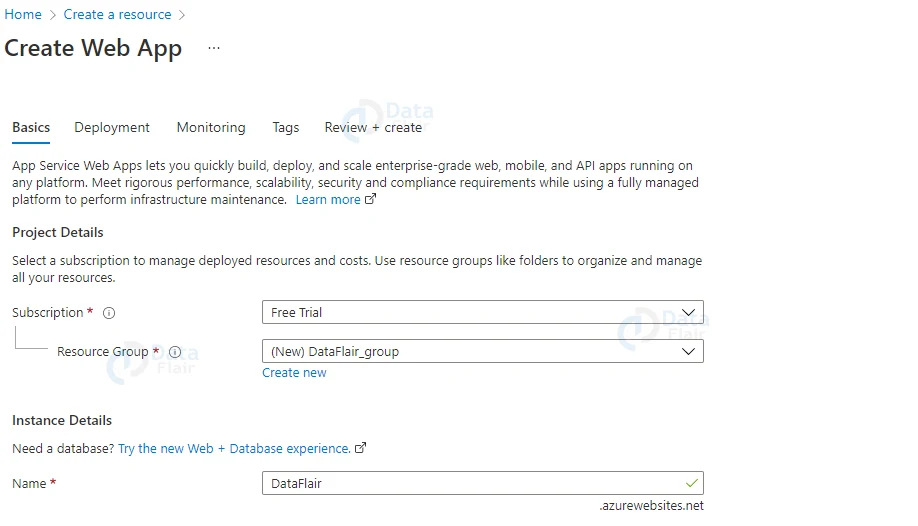
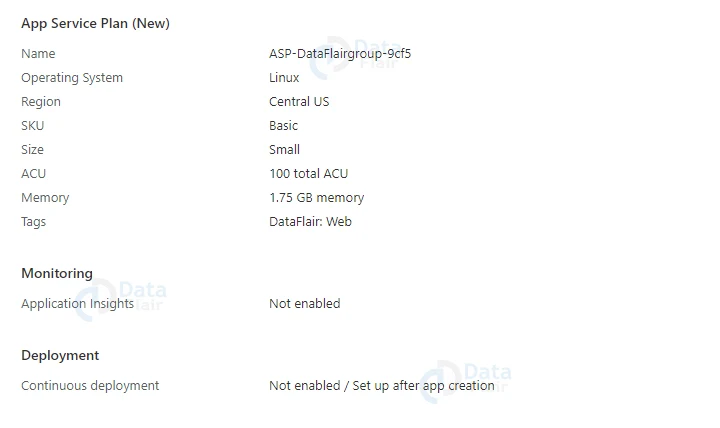
1: Firstly, the administrator should click on the Web App option and in the Web App option click on create option.
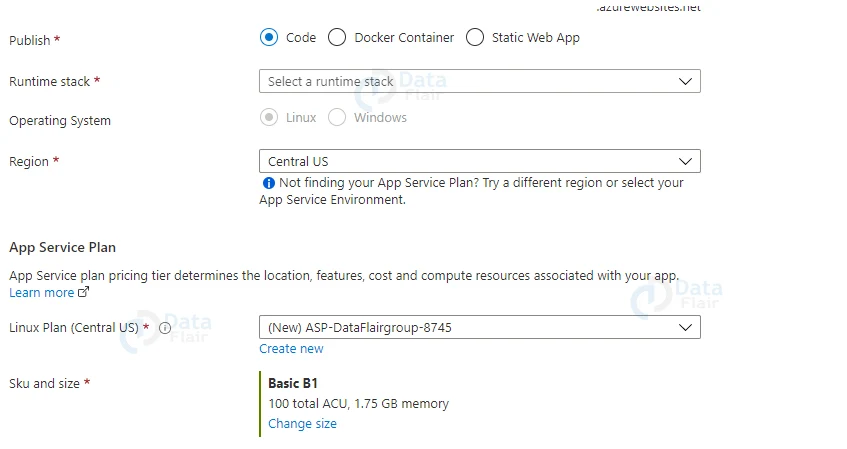
2: In the second step, the administrator should provide the name, region and other following details.
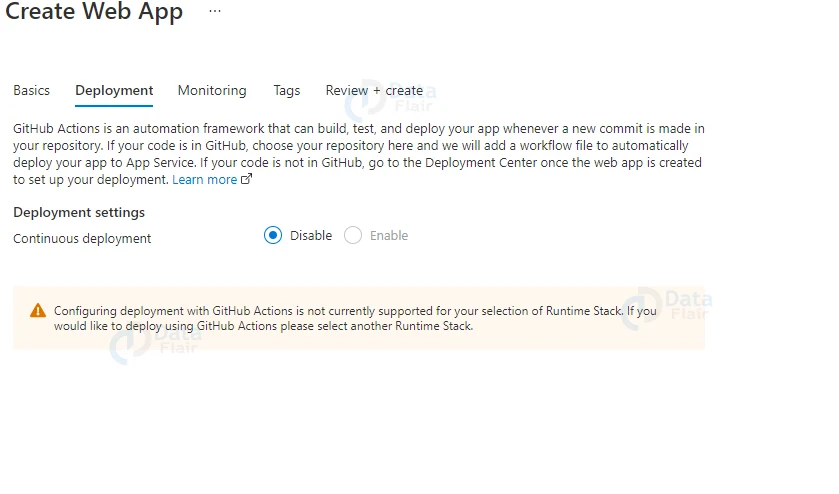
3: In the next Deployment step the administrators can choose the continuous deployment or not. For a free trial account it is disable.
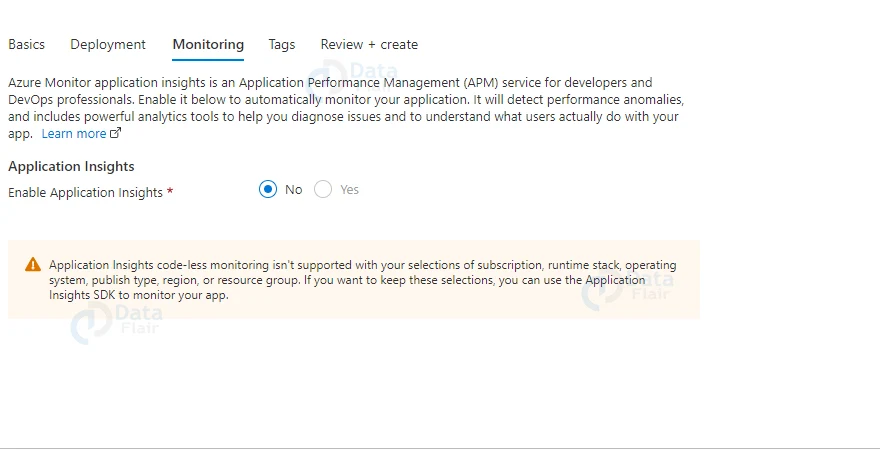
4: Now in the Monitoring section the administrators can enable application insights But this feature is also not available for Free Trial account.
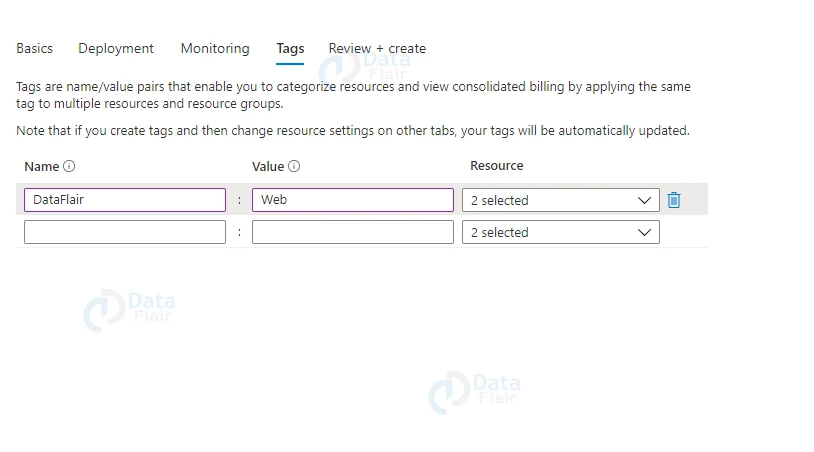
5: Provide the tags for the Web Application.
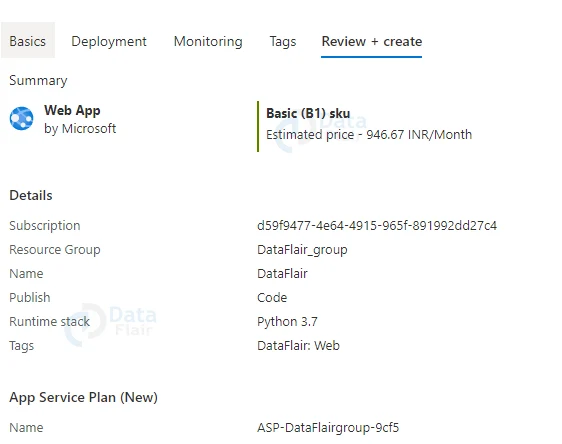
6: Lastly, check all the settings and create the web application
Creating a Virtual Machine
Below are the steps to create virtual machine:
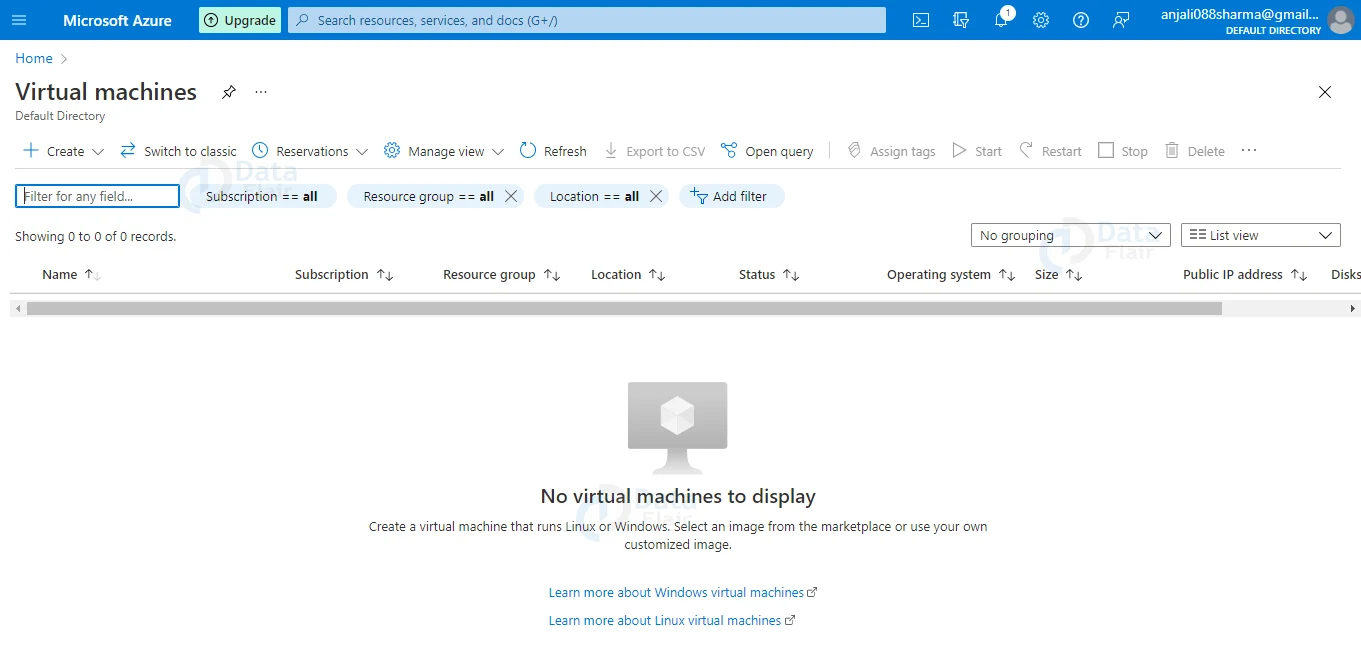
1: In the first step the developer is to click on the “Virtual Machines” option from the list.
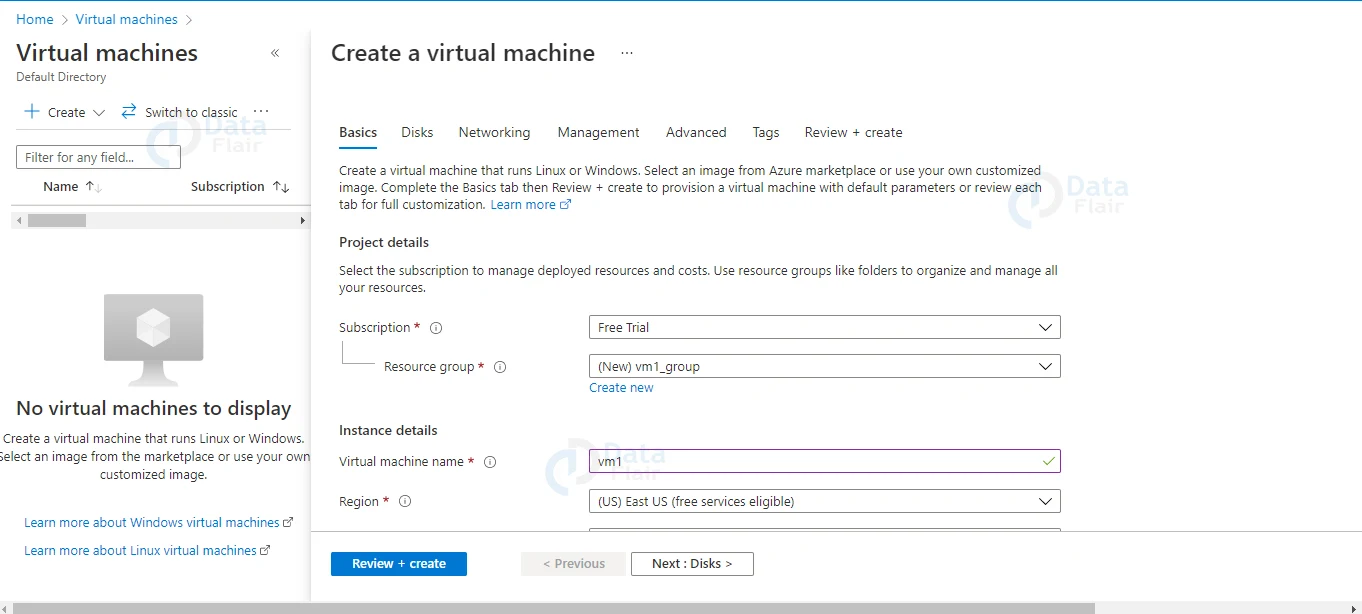
2: In the next step the developer should click on the “Create Virtual Machine” option.
3: Then, the developer must provide the name for the VM.
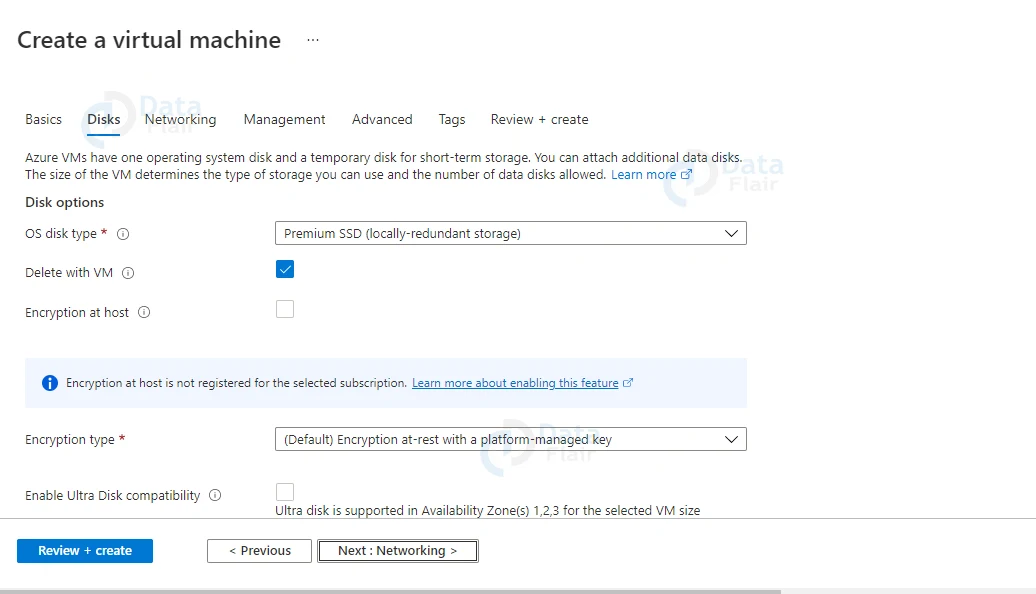
4: Now, select the disks.
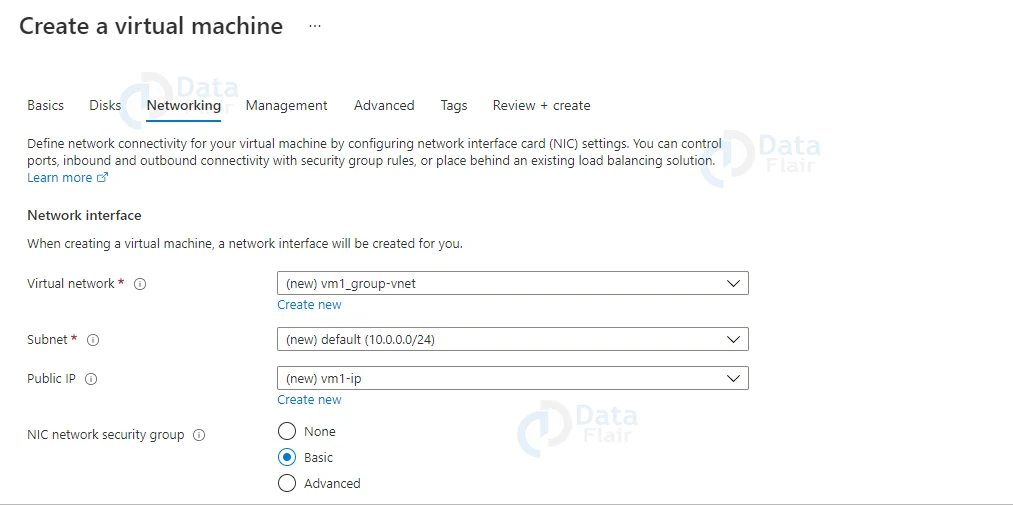
5: Configure the network settings
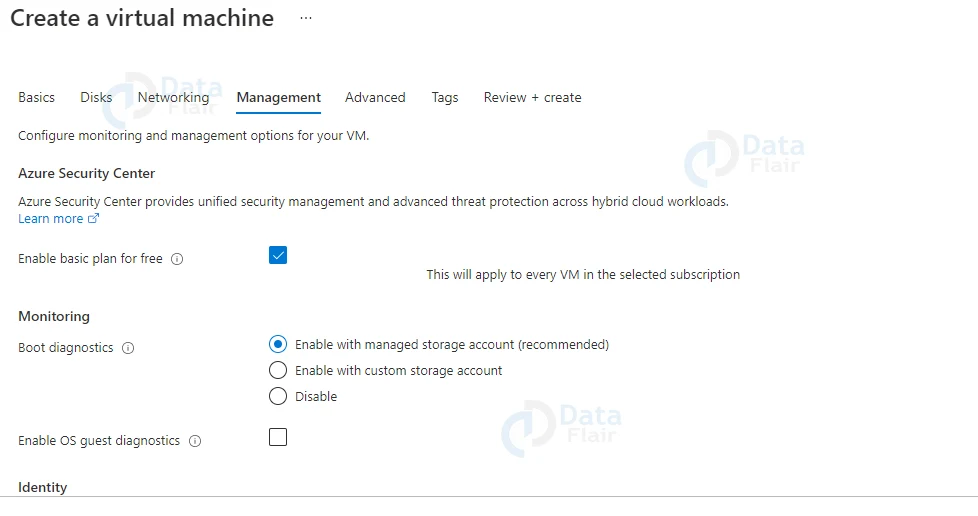
6: Now, one should configure the management settings. In the free account the basic plan will be selected. And then choose the monitoring option according to the requirements followed by the Identity.
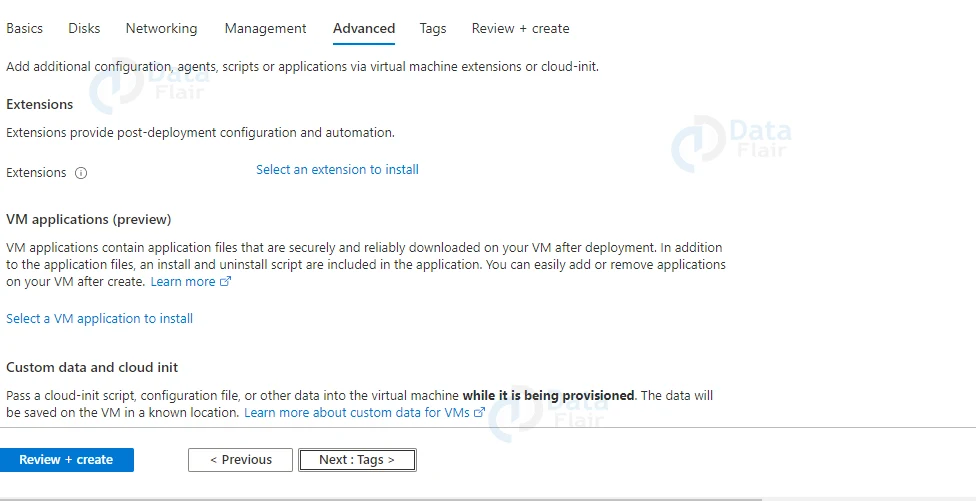
7: In the Advanced step the developers can add the extension to install
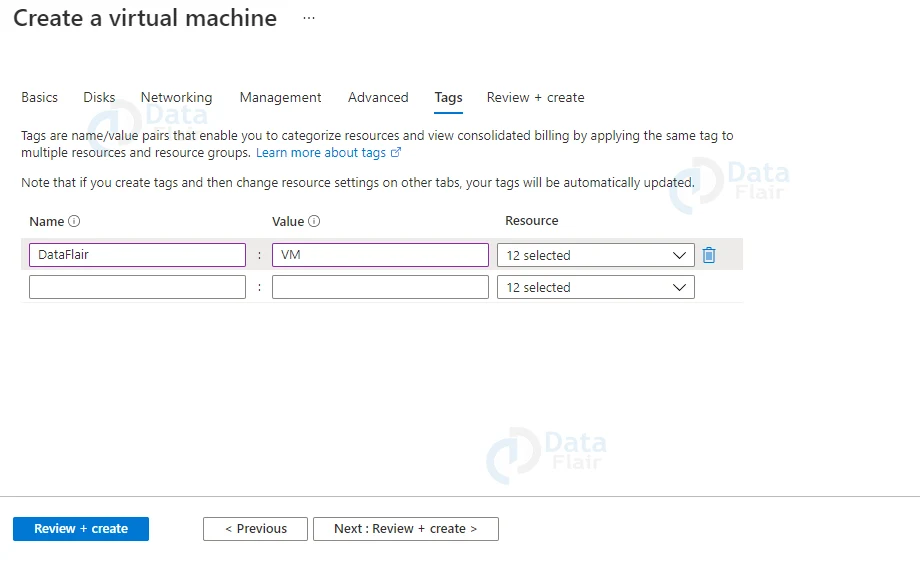
8: In the next Tag step the developer should provide the name tags for the VM.
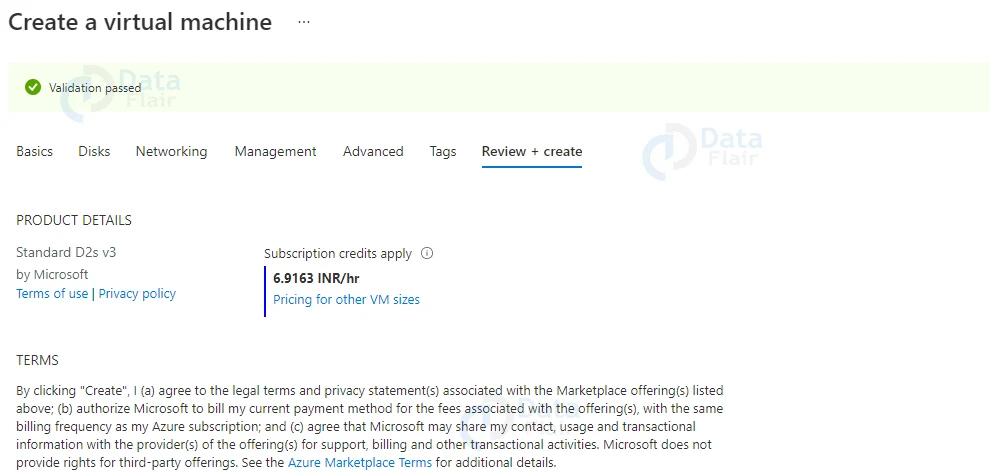
9: Review the VM and then create the VM. Once you are done after few seconds the VM will be created.
Conclusion
Thus, in this article, we have seen all the compute modules available for the users in Microsoft Azure. The users can refer to this article and get all the information about Microsoft’s Azure Compute Module. After reading this article we hope you can choose your required Compute Module to manage their workloads.
Did you like this article? If Yes, please give DataFlair 5 Stars on Google

