How to add or remove Line numbers in Word document
Job-ready Online Courses: Knowledge Awaits – Click to Access!
How to Add or Remove Line Numbers in a Microsoft Word document?
Often while reviewing or going through your document, you might need to refer to specific lines or paragraphs. Having line numbers can be of great help to you and your collaborators. In Word, you can add line numbers to your whole document or just to specific parts of it. After your document is complete and ready for presentation, you have to remove the line numbers, and that is possible too. Let us see how to insert and remove line numbers from a document in Word.
Add Line Numbers to the Entire Document in Word
To insert line numbers into your whole document, follow the steps given below. Applying line numbers to the whole document can be very useful while reviewing your whole document.
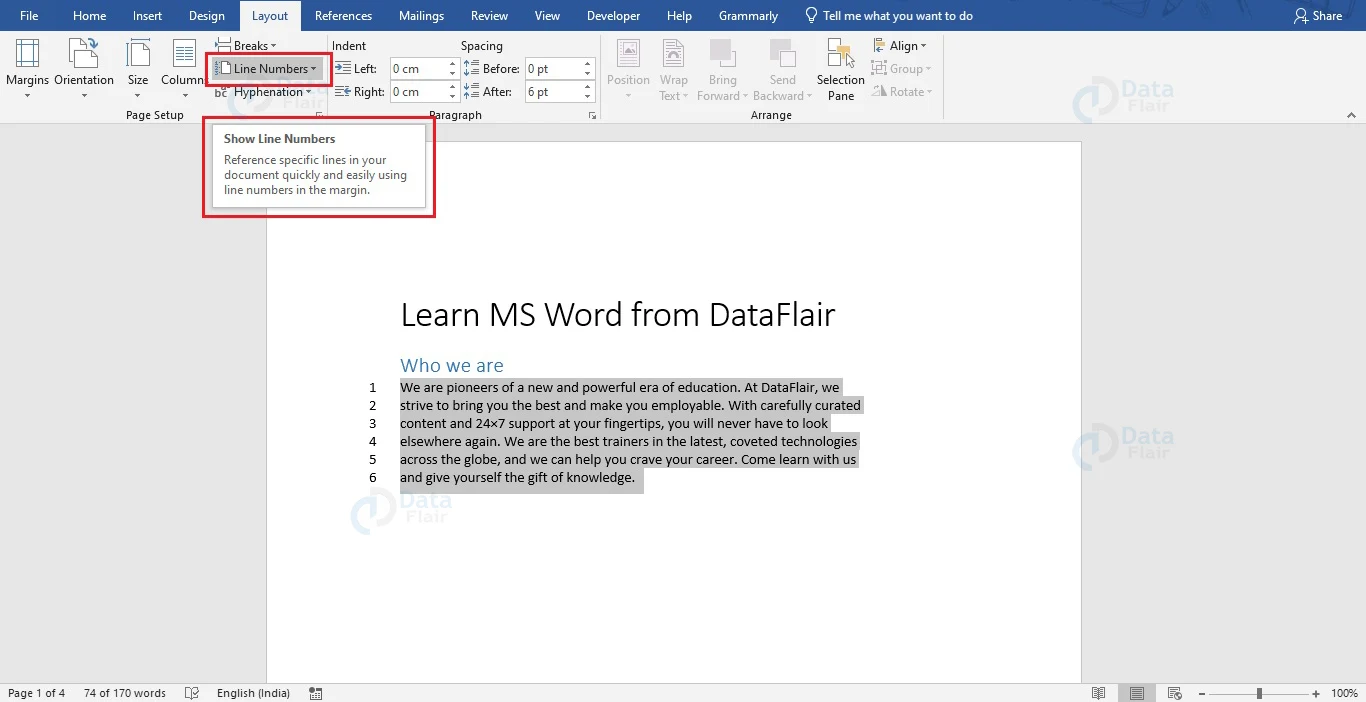
1. Select the whole document by using the mouse or by using the Ctrl + A keyboard shortcut.
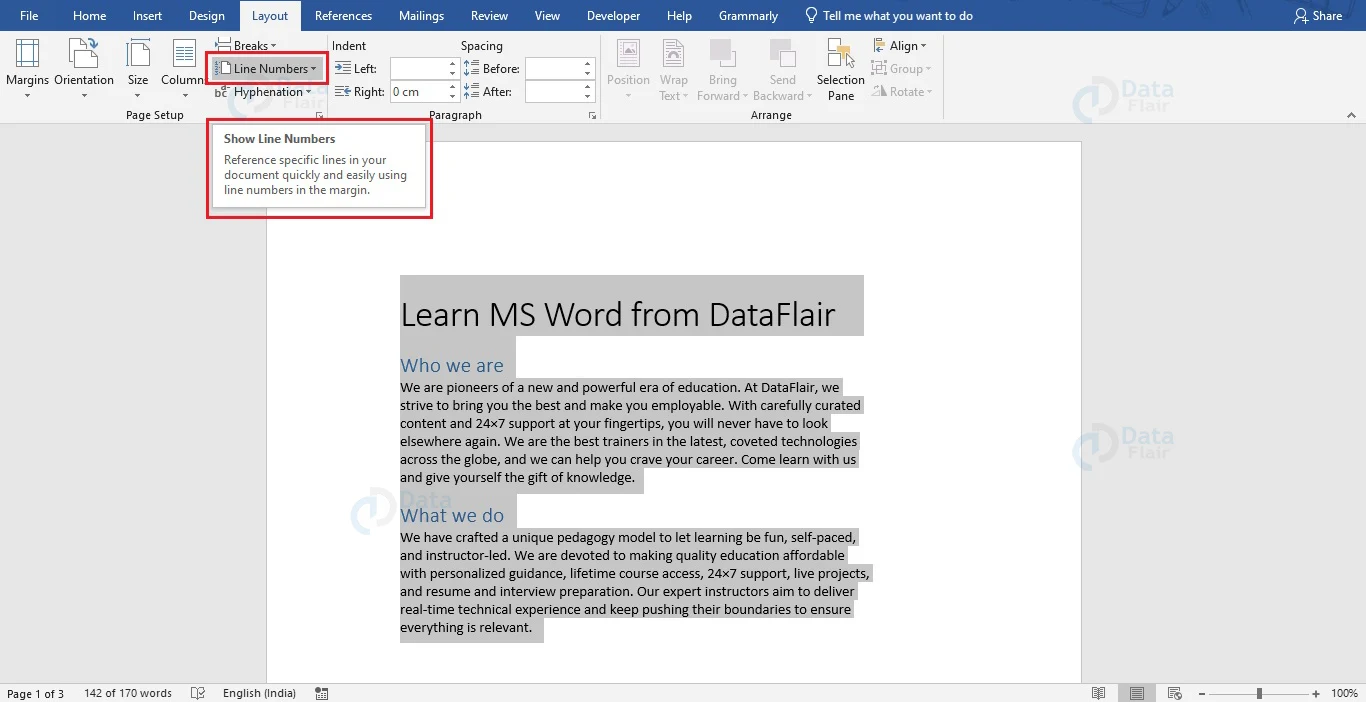
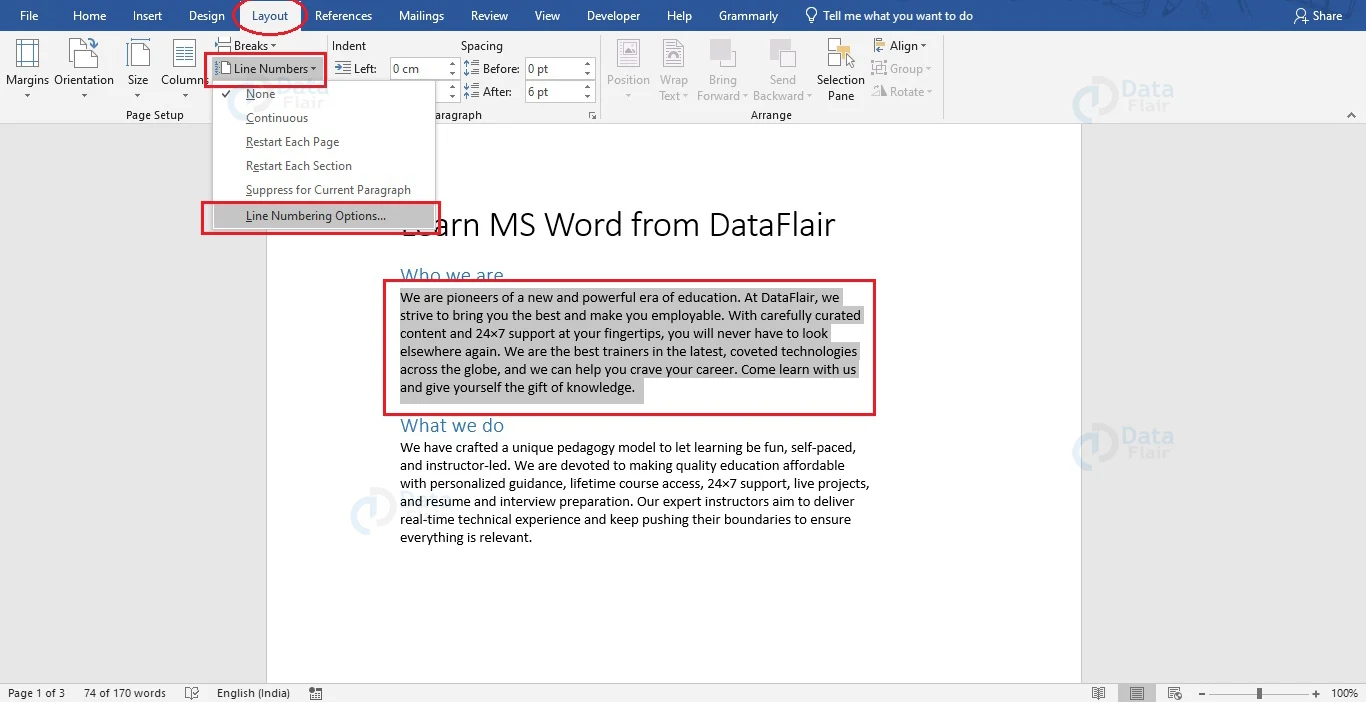
2. In the Layout tab, click on the Line Number option under the Page Setup section. The associated drop-down menu will appear.
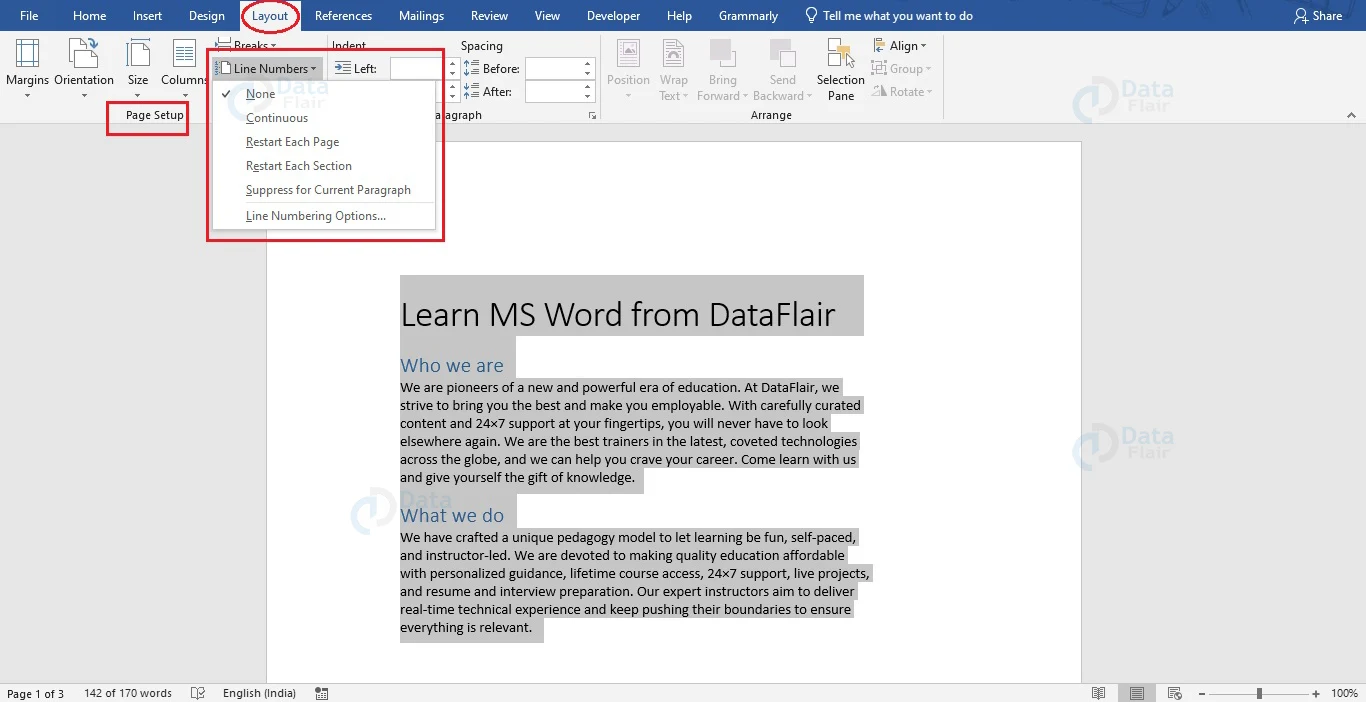
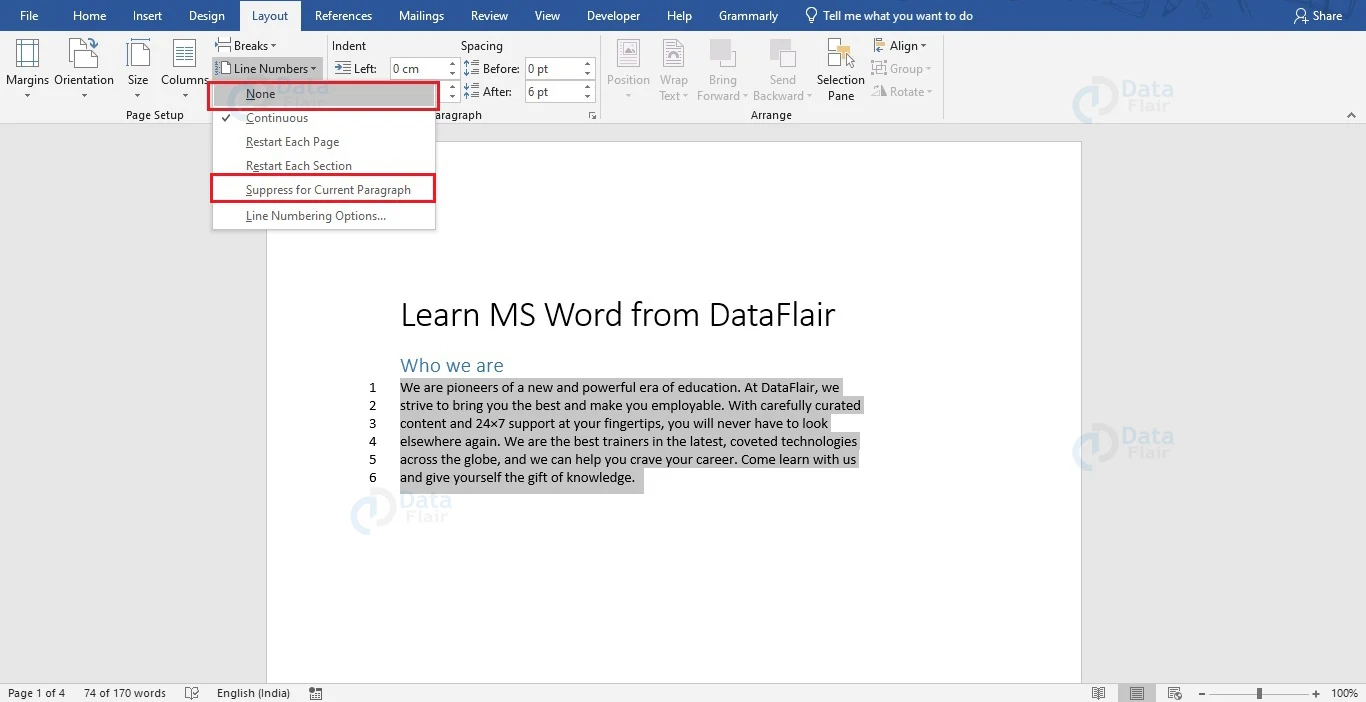
3. From the dropdown menu, choose the appropriate option from the options that appear.
a. None: Lets you remove line numbering for the document.
b. Continuous: Lets you add continuous line numbering throughout your document.
c. Restart Each Page: Line numbering restarts at the beginning of every page.
d. Restart Each Section: Line numbering restarts at the beginning of every section.
e. Suppress for Current Section: Lets you remove line numbering for the current section.
For normal line numbering of your document, choose the Continuous option.
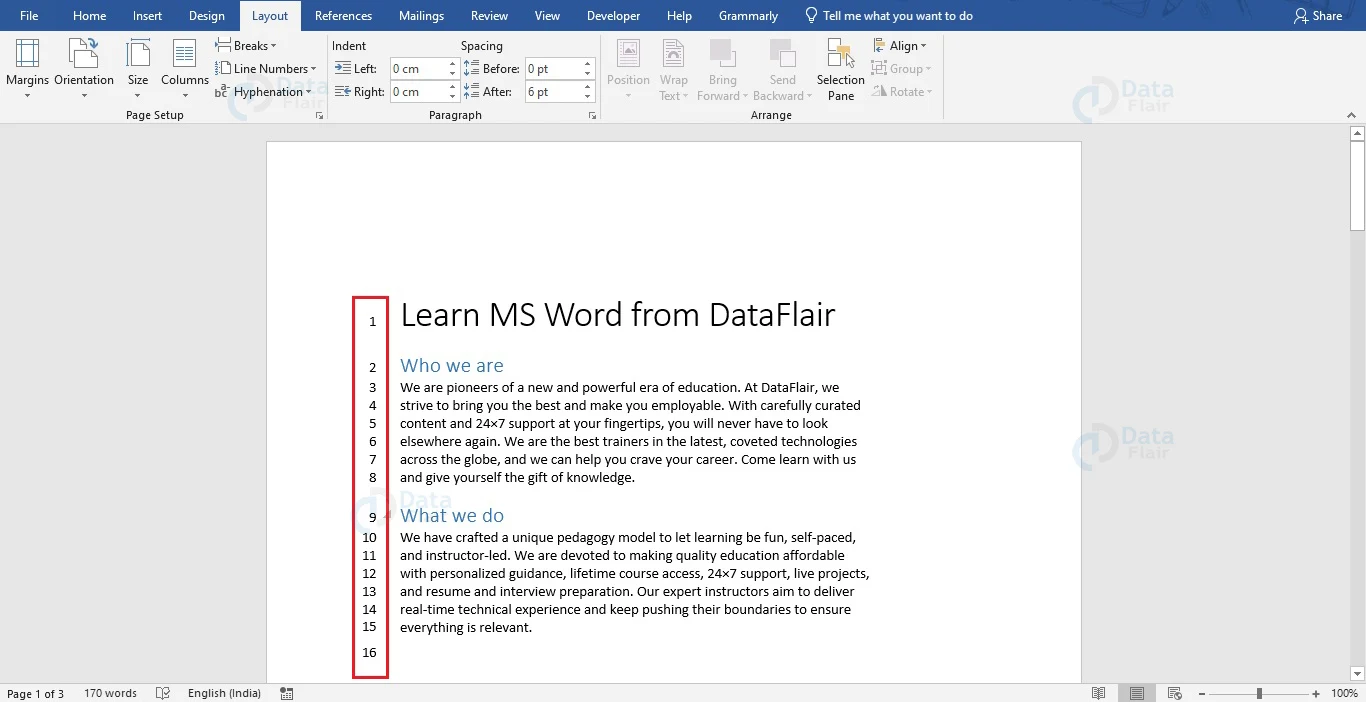
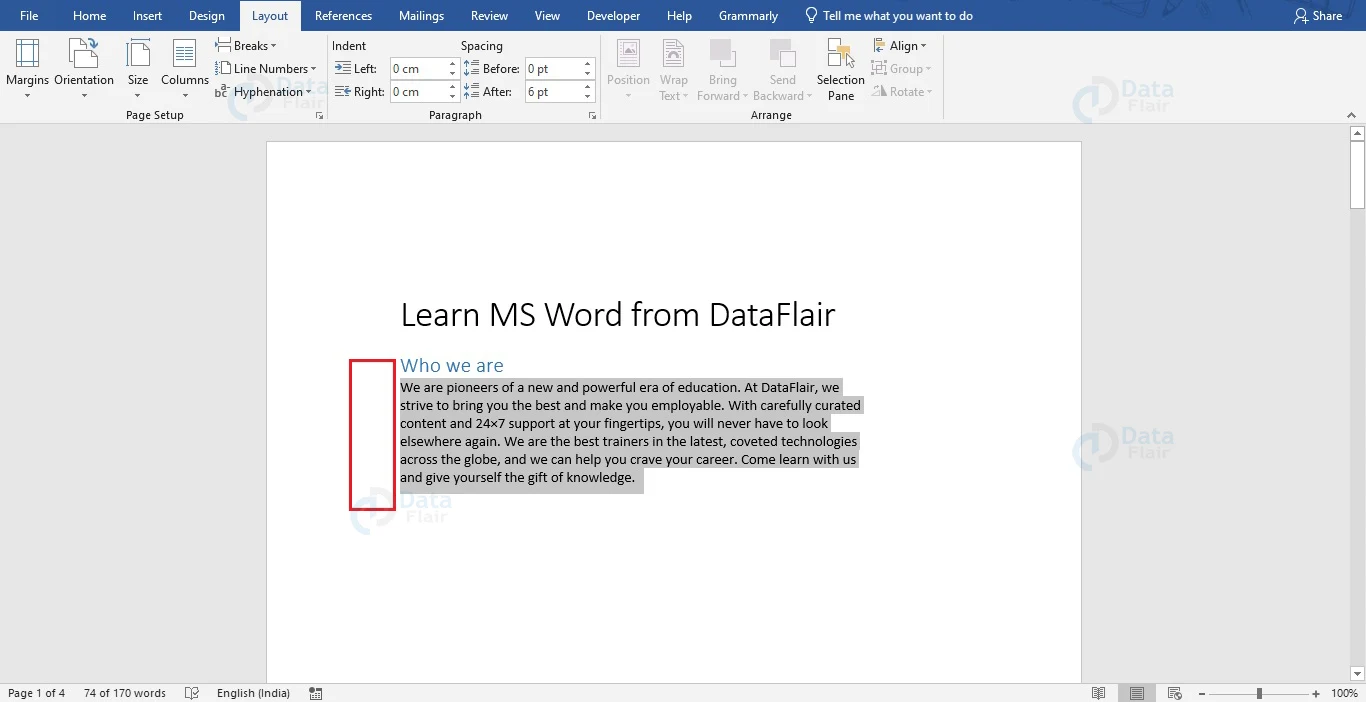
You would now notice that line numbers have been added for your whole document.
Add Line Numbers to a Selected Text in Word Document
1. Select the part of your document where you wish to apply line numbering.
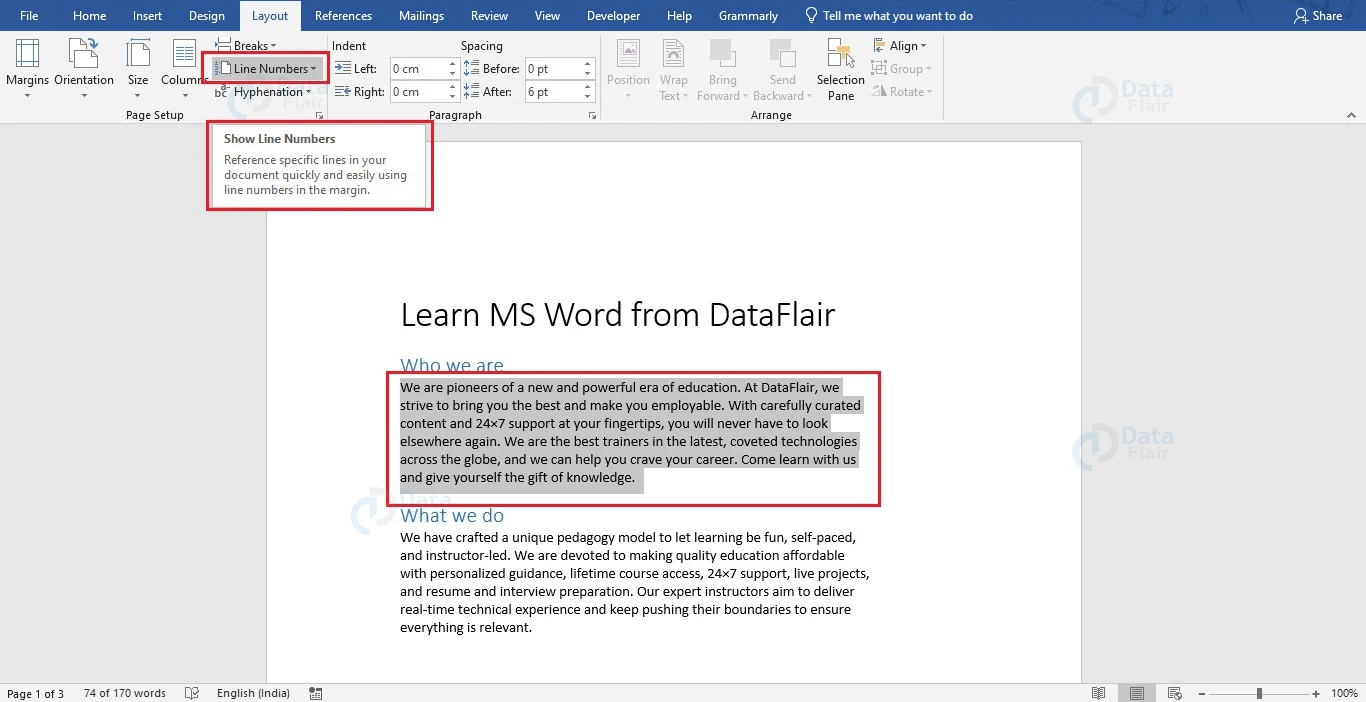
If you wish to add line numbers to multiple sections, you can select the various sections of your document by pressing on the Ctrl key and selecting using the mouse.
2. In the Layout tab, click on the Line Number option under the Page Setup section. The associated drop-down menu will appear.
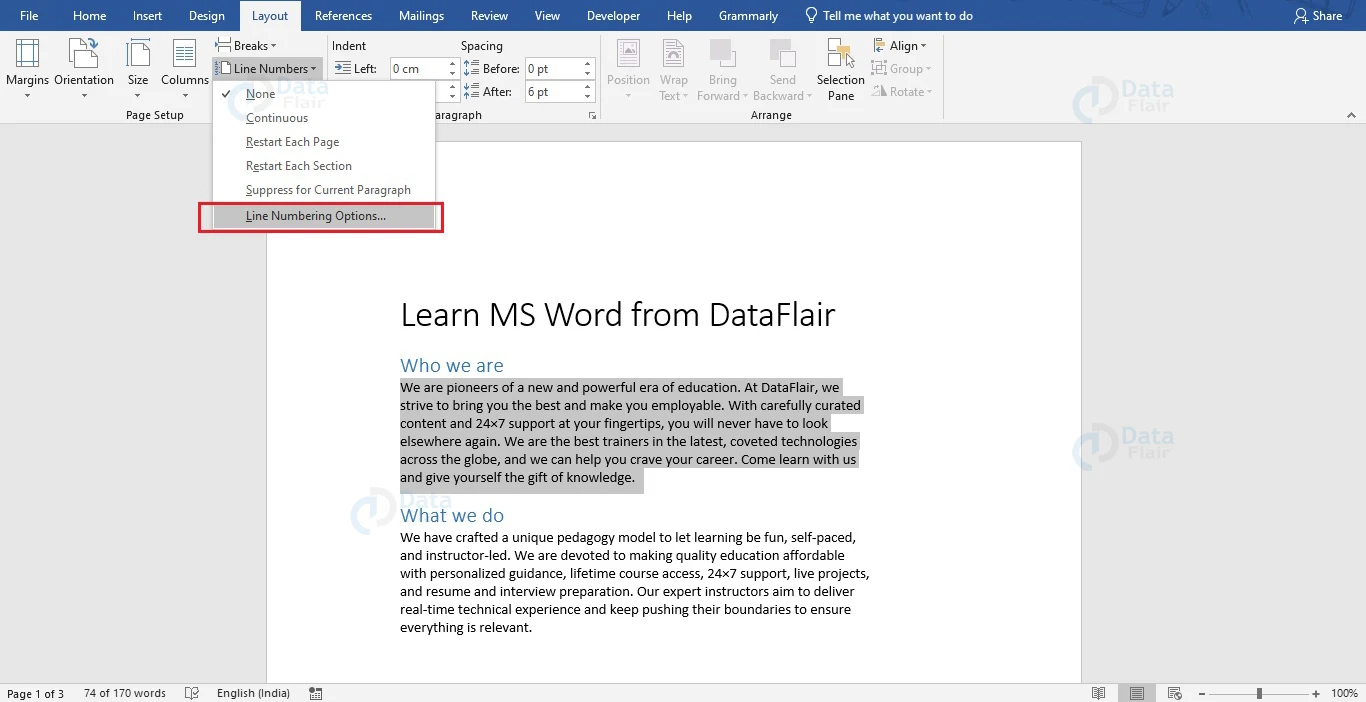
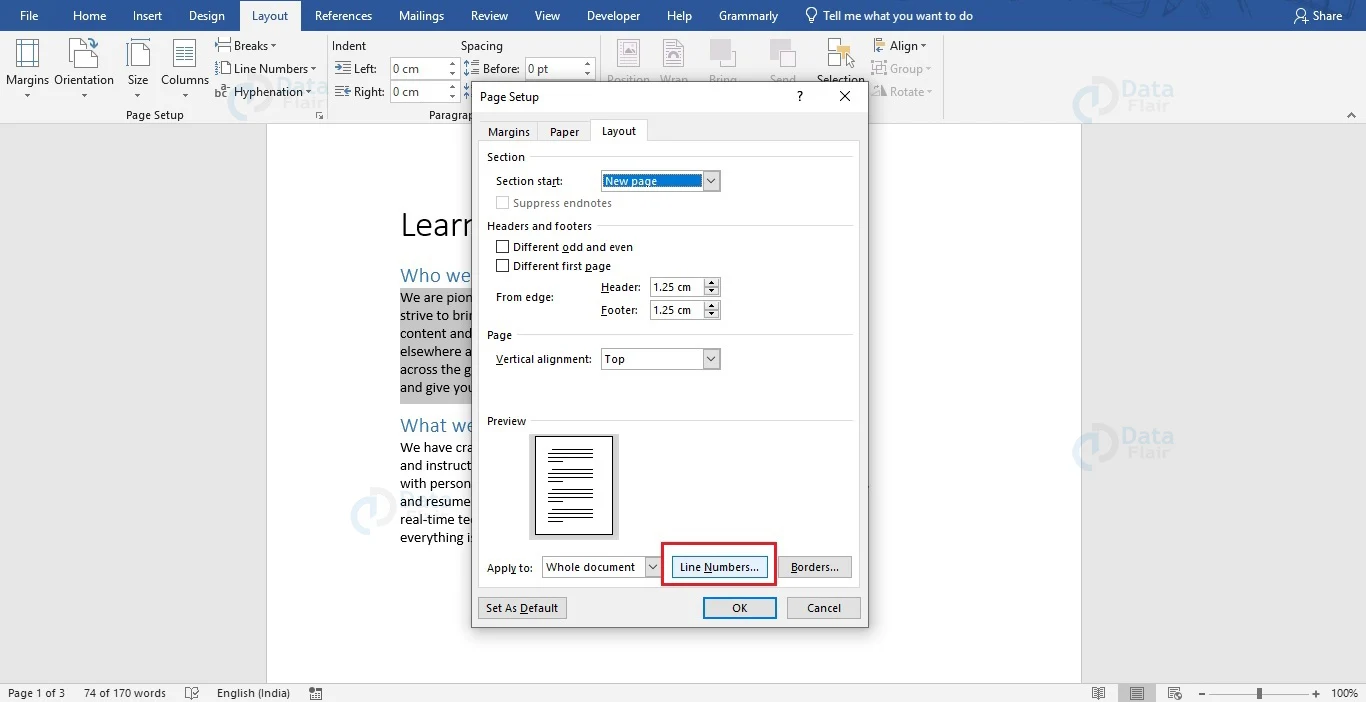
3. From the drop-down menu that appears, choose Line Numbering Option… .The Page Setup dialog box will appear.

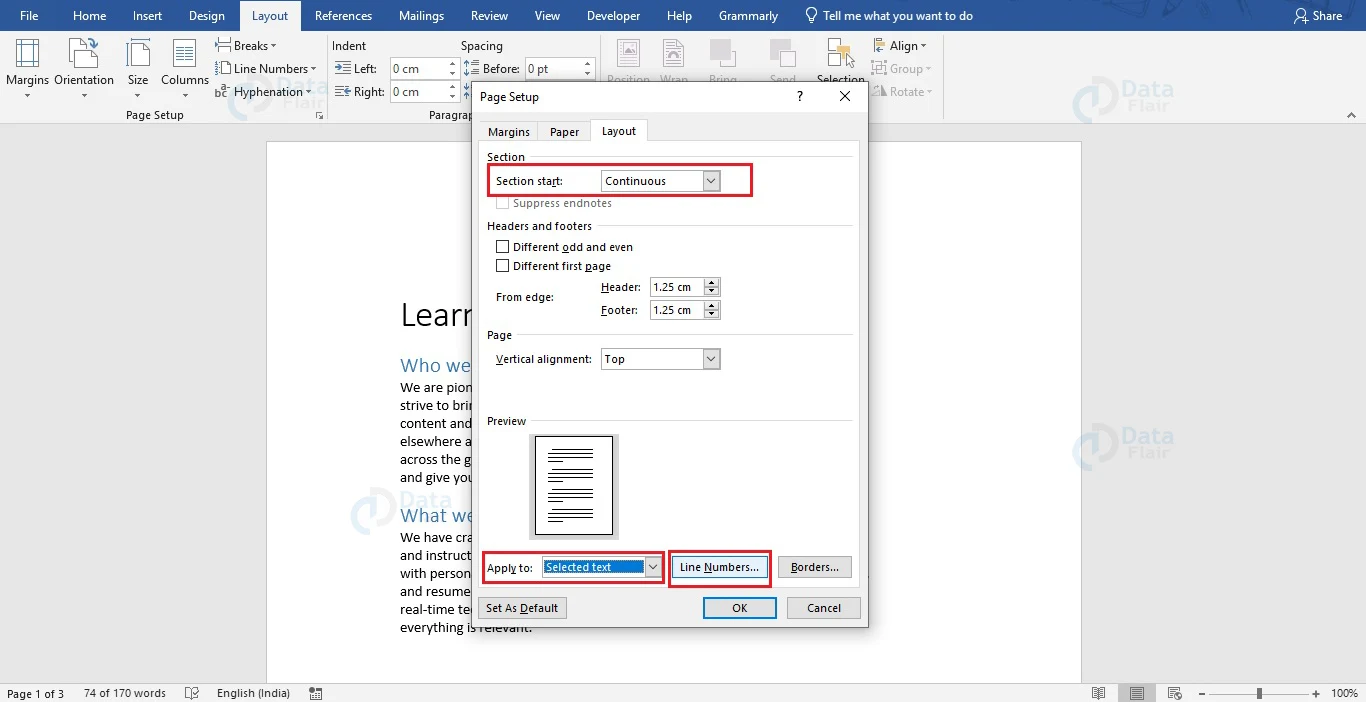
4. Go to the Layout tab and choose Continuous in the Section start: field of the Section group. In the Apply to: field, choose Selected text and click on the Line Numbers… button.
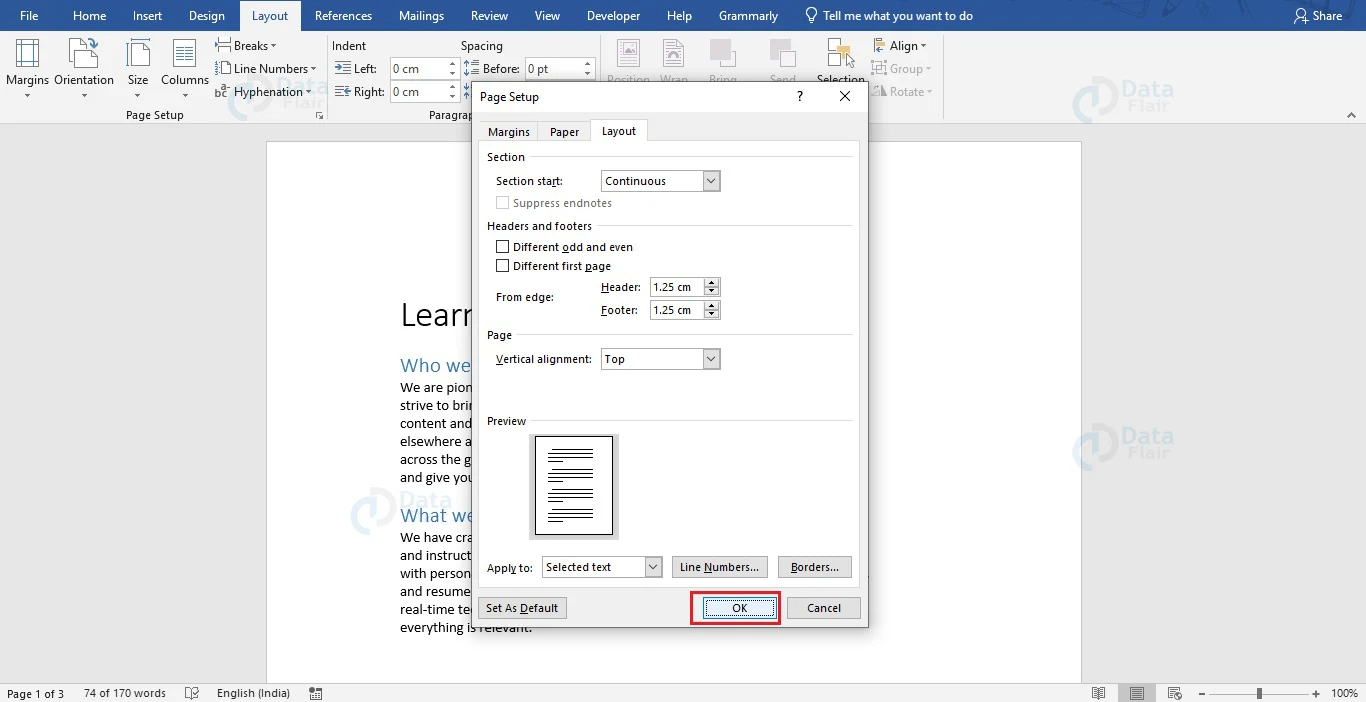
5. The Line Number dialog box appears. Select the Add line numbering checkbox and select the Continuous radio button and click OK.

6. Click on the OK button at the bottom of the Page Setup dialog box to exit from it.
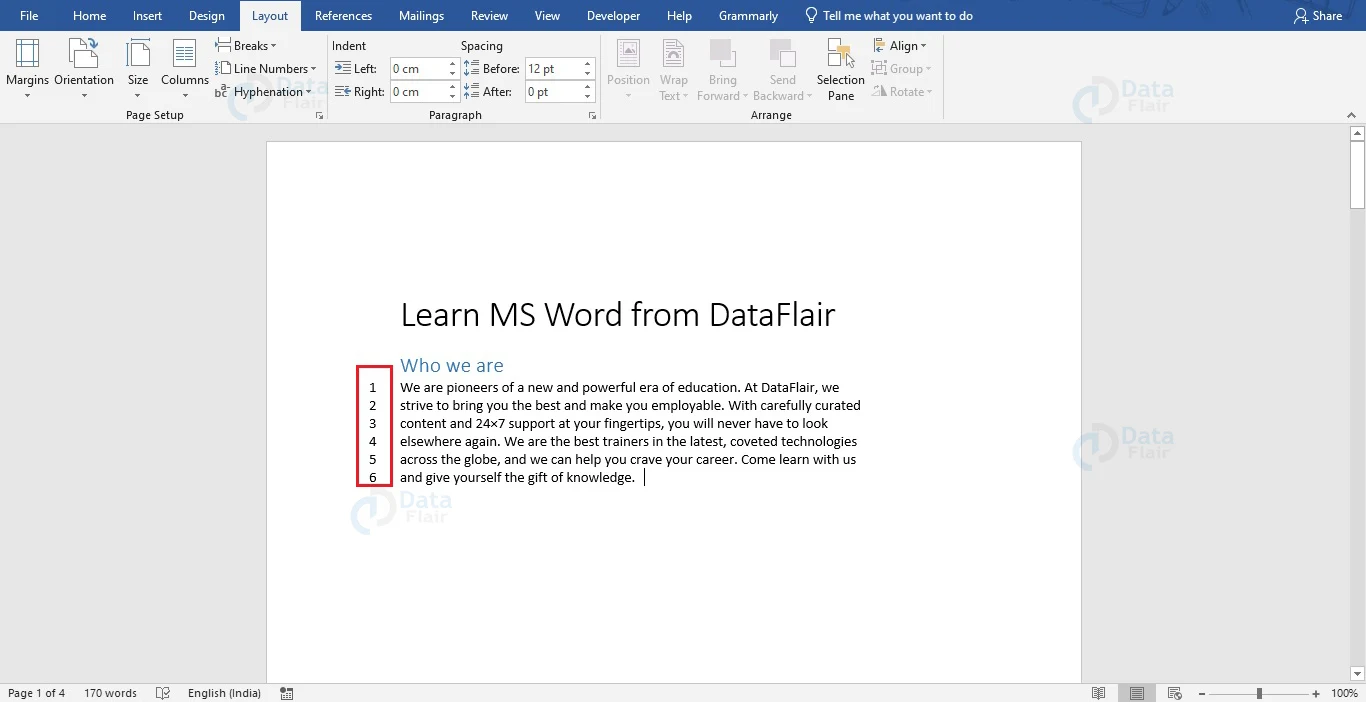
You will now notice that line numbers have been added to the selected part of your Word document.
While using line numbering in Word, you will notice the following:
1. A table is counted as a single line.
2. In the case of figures, it is considered a single line.
3. Text boxes in Word are considered to be a single line. However, if it is wrapped by text, then those lines of text are counted. Though there may be more than a single line of text within the Text Box, they are not counted in line numbering.
Customize Line Numbers Behaviour in Word Document
In Word, you can format the line numbers to count in a specific pattern as well as a few other changes. To format your line numbers, follow the steps mentioned below.
1. Select the whole document or a part of your document for which you wish to use line numbers.
2. In the Layout tab, click on the Line Number option under the Page Setup section. Choose Line Numbering Option… from the drop-down menu that appears.
3. From the Page Setup dialog box that appears, click on the Line Numbers… button.
4. A tiny Line Numbers window appears where you can format how your line numbering behaves.
5. Check the Add line numbering checkbox to perform any formatting action. You can make the following customizations to your line numbering.
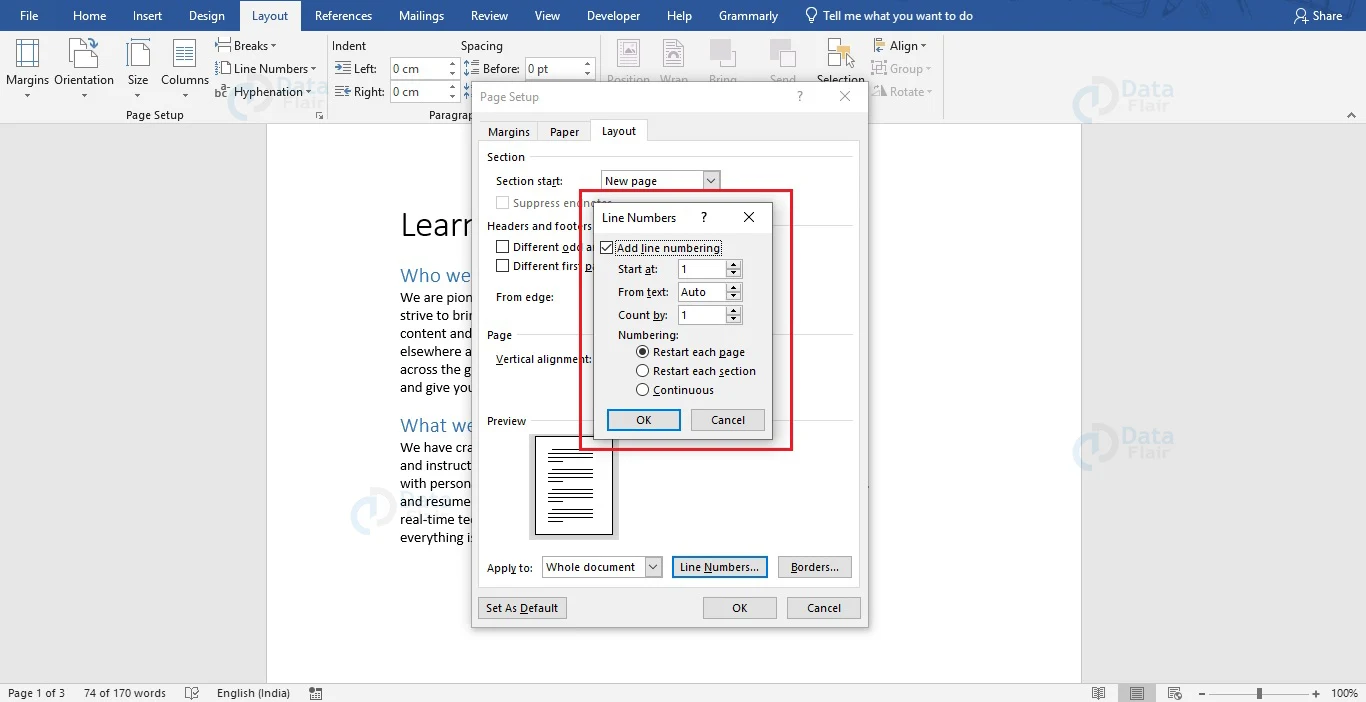
a. Start at: Allows you to start from any number other than 1.
b. From text: Allows you to select a specific spacing for the line numbers in relation to your text.
c. Count by: Instead of numbering every line, this option lets you choose to display line numbers at a fixed interval of lines.
d. Numbering: Allows you to choose how the numbering appears – available options are Restart each page, Restart each section, and Continuous.
6. Click on OK to exit from the Line Numbers dialog box. Click OK again to apply line numbering according to your formatting.
Now you would observe that the line numbering in your document is behaving exactly as you have set it up.
Format Line Numbers in Word
If you wish to, you can change the appearance of line numbers such that they stand out and are easy to differentiate from normal text. To change the appearance of line numbers in Word, follow the steps given below.
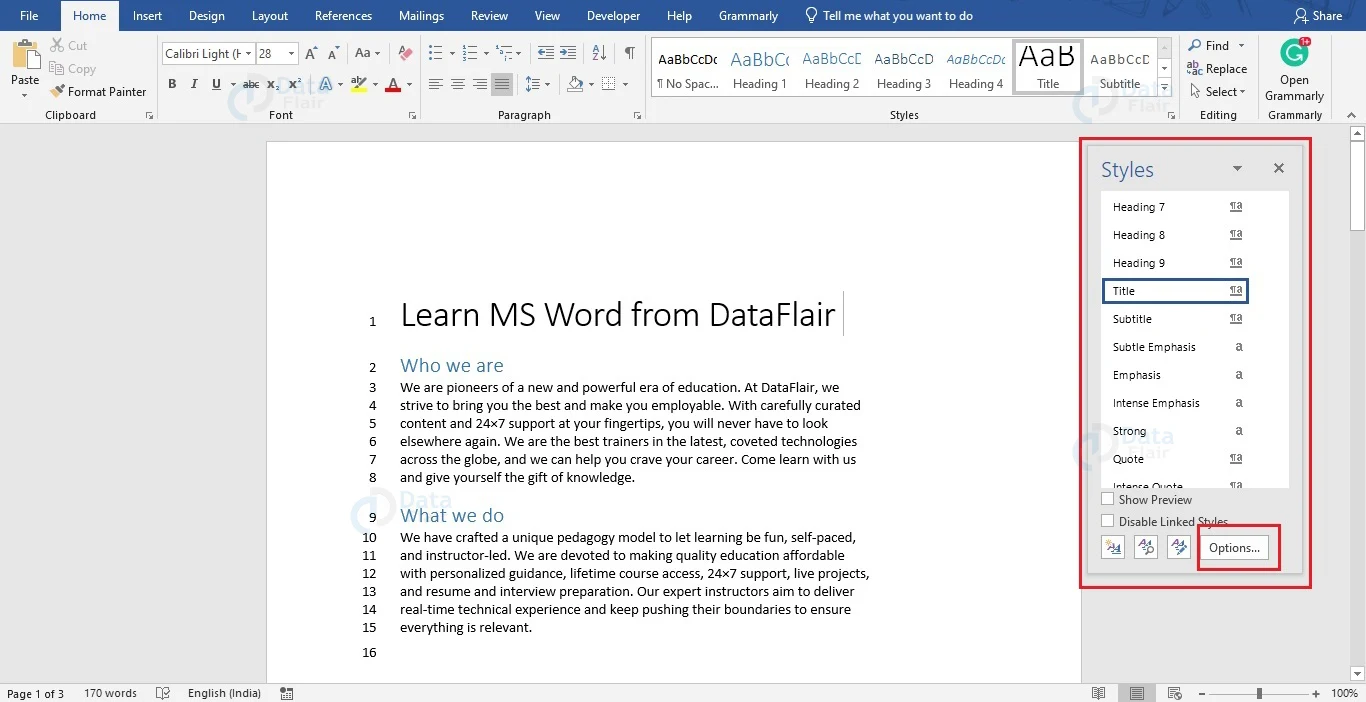
1. After adding line numbers to your document, click on the arrow to the bottom right of the Styles group of the Home tab to open the Styles pane.
![]()
2. Choose the Options… button to the bottom right of this panel. The Style pane Options dialog box opens up.
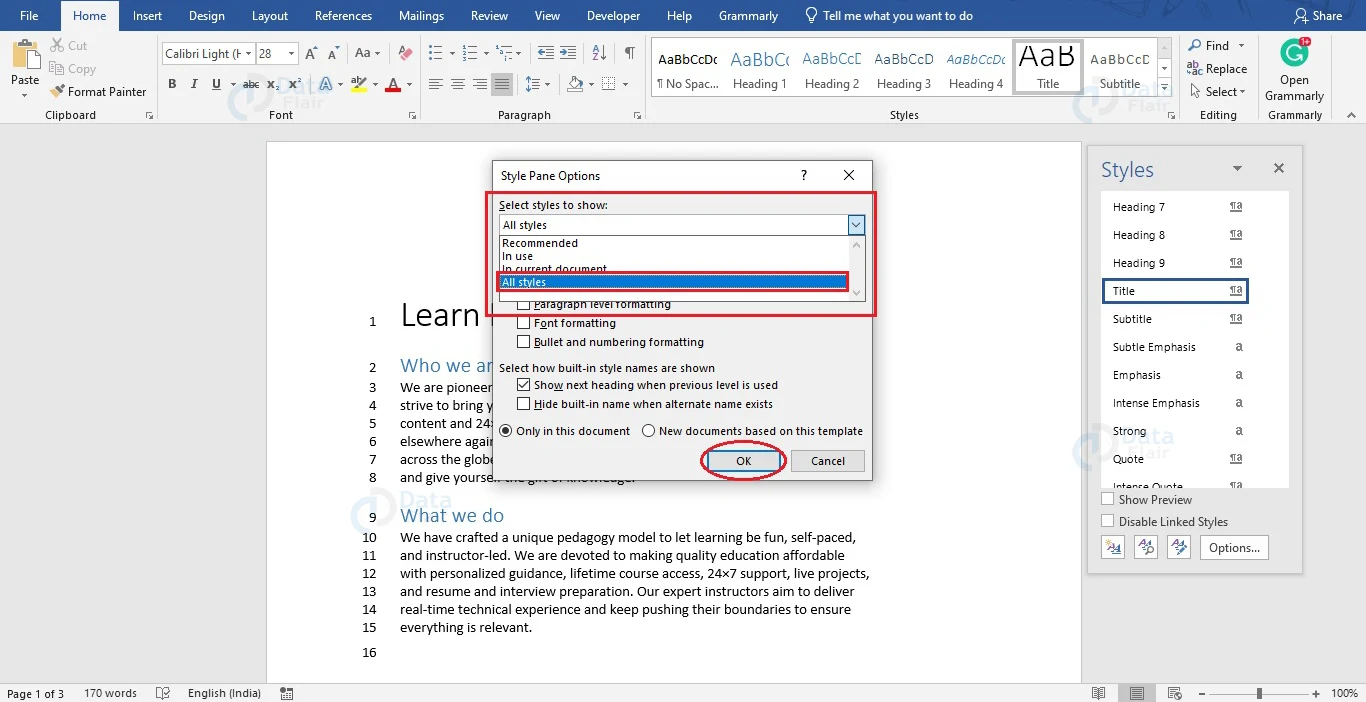
3. Under the Select styles to show: choose All styles from the dropdown menu and click on OK.
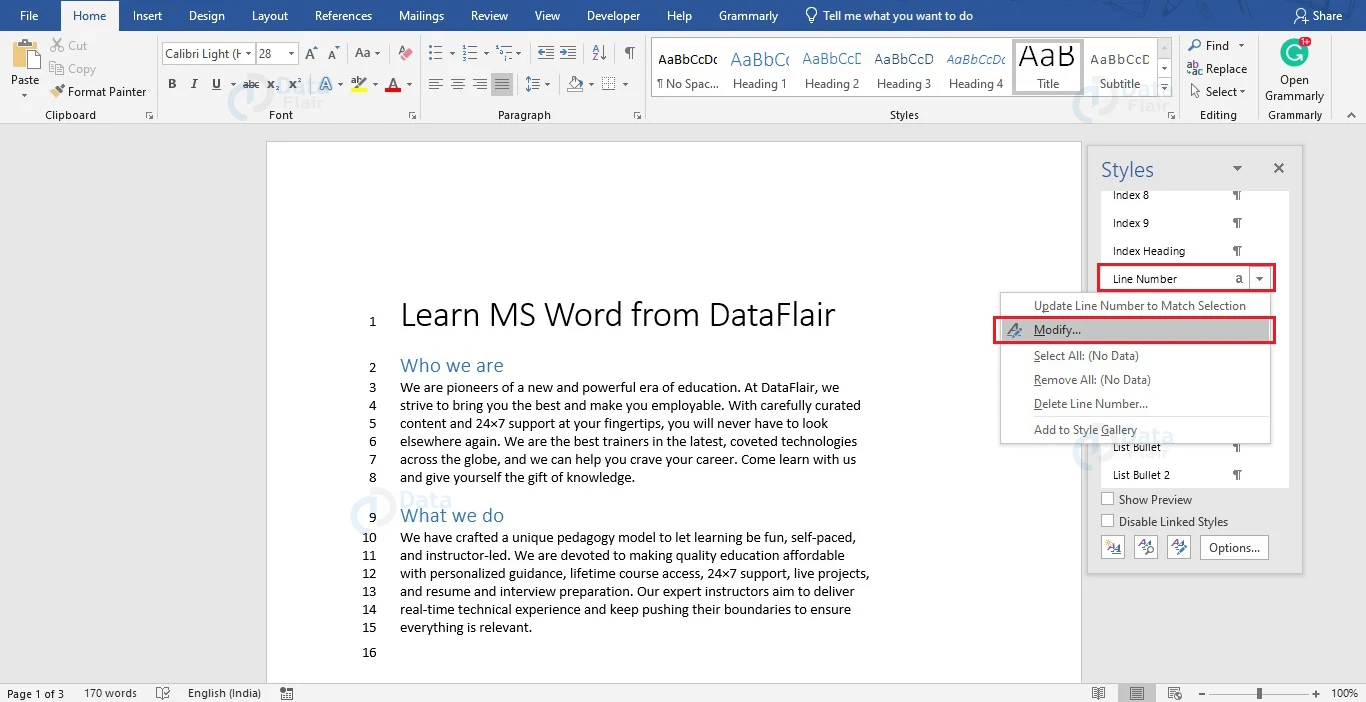
4. In the Styles pane, go to Line Numbers click on the right mouse button. From the menu that appears, choose the Modify… option.
5. In the Modify Style dialog box, change the font size, style, color, and others as you see fit and press on OK.
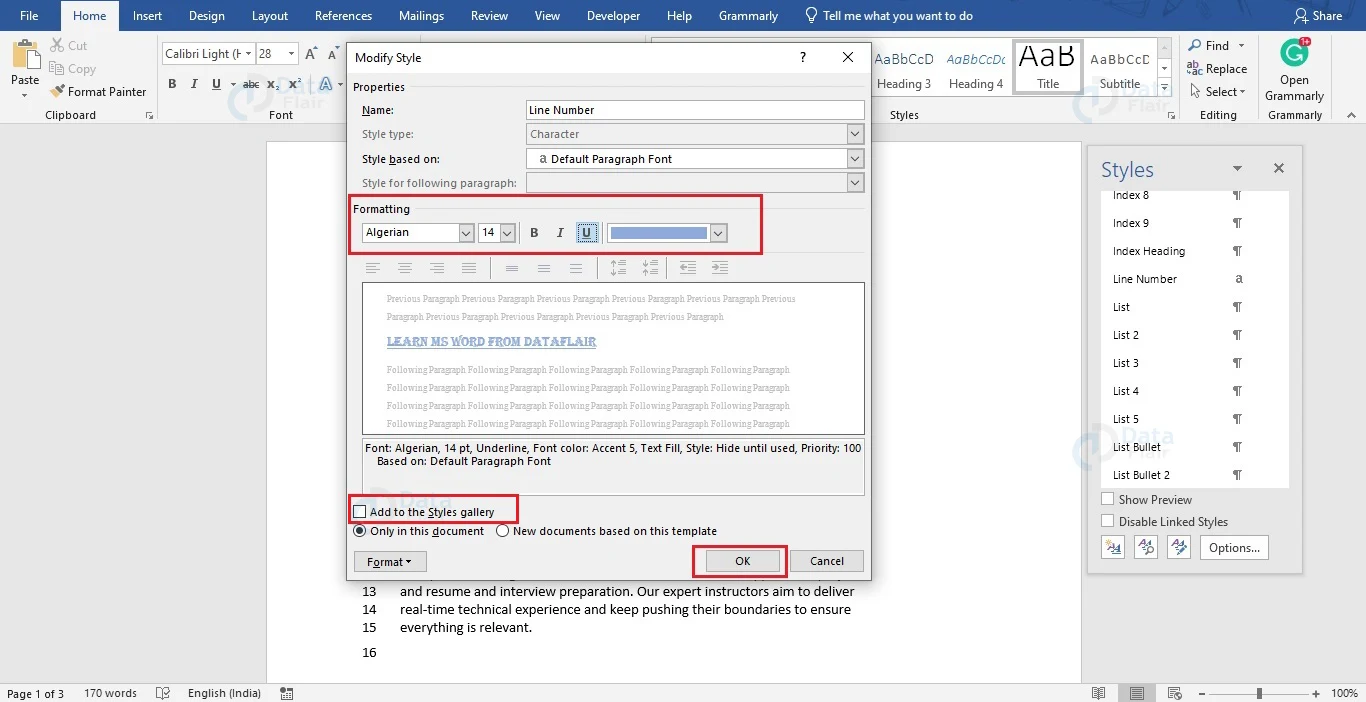
If you wish to make this a new style template, you can choose to save this style by checking the checkbox next to Add to the Styles gallery.
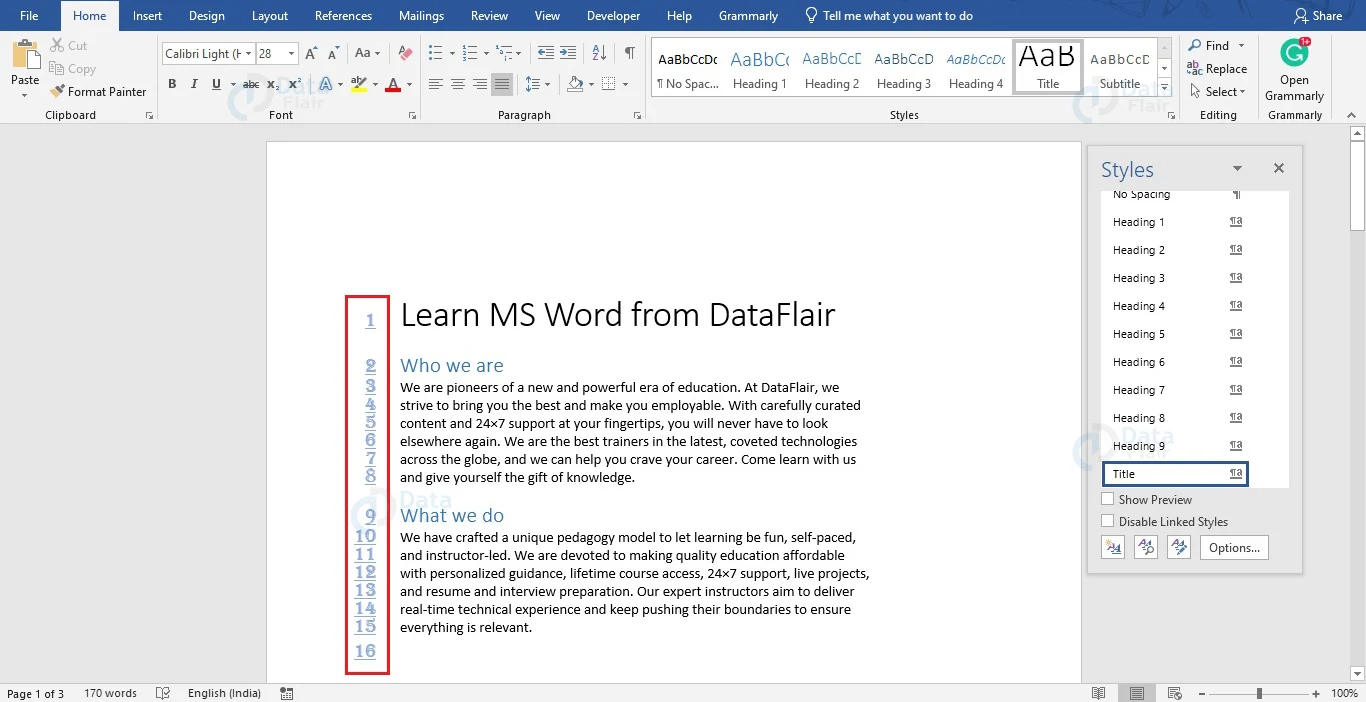
Now you would see that the appearance of line numbers has changed to how you have formatted them.
Remove Line Numbers in Word
After you are done with your work or before submission, you might wish to remove the line numbers from your whole document or from a part of it. To remove line numbers in Word, follow the steps given below.
1. Select the whole document by using the mouse or by using the Ctrl + A keyboard shortcut. If you wish to remove the line numbering of a particular part of your document, only select that part.
2. In the Layout tab, click on the Line Number option under the Page Setup section. The associated drop-down menu will appear.
3. From the dropdown menu that appears, choose the None option to remove line numbers from the whole document. You may also choose the Suppress for Current Paragraph option to remove line numbers for a particular paragraph.
You would now notice that line numbers are no longer present in the selected text of your document.
Conclusion
As stated before, line numbers come in handy when looking for particular sections of the text. Also, they are useful for numbering lines of poetry or literature of some sort. It can be very helpful while drafting legal documents as all the lines need to be numbered. They also give an exact numbering of the lines which is important when we print only certain portions of the document. Try out this feature in Word to become better acquainted with it and understand its uses and purpose.
You give me 15 seconds I promise you best tutorials
Please share your happy experience on Google


Thank you for your knowledge sharing
Its helpful for me
thanks again