


We offer you a brighter future with industry-ready online courses - Start Now!!
In our last chapter, we discussed Upgrade QlikView Server. Here, we will learn about QlikView Sheet and Object. Moreover, we will discuss how to add, promote, demote, remove QlikView sheets and its properties. Along with this, we will study QlikView Sheet and Object Association.
So, let’s start QlikView Sheet and Object Tutorial.
QlikView Sheet and Object
Whenever you open a QlikView document, what you see in front of you is a sheet. The first sheet that opens is titled MAIN. Every document will have at least one sheet and that is MAIN, you can add more if you want. The significance of having sheets in QlikView is that you can categorize your work by having separate sheets and have it all saved as one document.
This gives the analyzer clarity and allows easy analysis of large and complex data sets. Within these sheets, there is a wide range of sheet object options available. Your data will display in many ways using these objects.
What is QlikView Sheet?
You can do a lot many customizations with Qlikview sheet. In this section, we will learn how to add, promote, demote, remove QlikView sheets and about sheet properties.
a. How to Use QlikView Sheet?
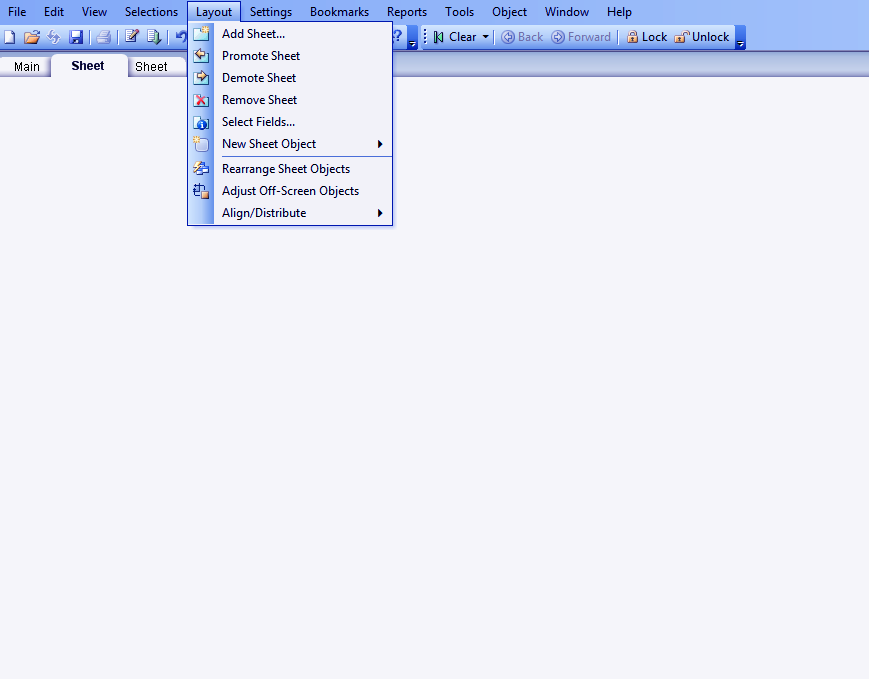
- To add a new sheet beside the Main, go to LAYOUT and select ADD SHEET. A new sheet will add. The same LAYOUT menu gives you several other options like Promote (move one position up), Demote (move one position down), Remove (delete the whole sheet in QlikView), Select filed, add a new sheet object etc., which do as their name suggests.
Do you know What is QlikView Database Connection and Inline Data?
How to Use QlikView Sheet?
- Once a new sheet opens, you can edit the tab’s name, change the tab’s colour. Right-click keeping your cursor on the tab and you will see a TABROW PROPERTIES option. You can change the font of the tab title from there.
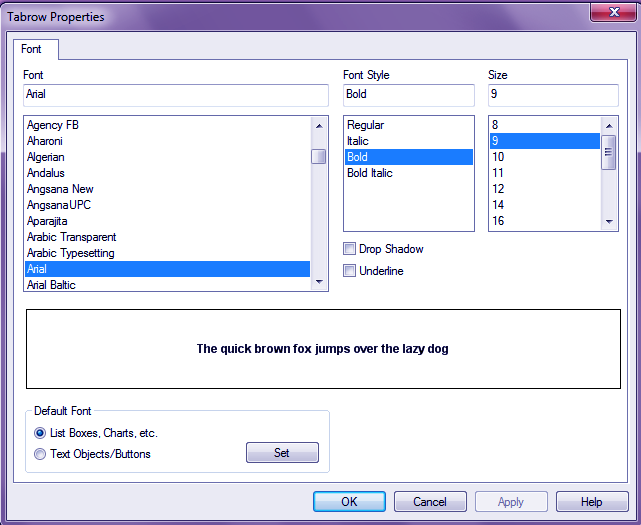
QlikView Sheet and Object – Tabrow Property
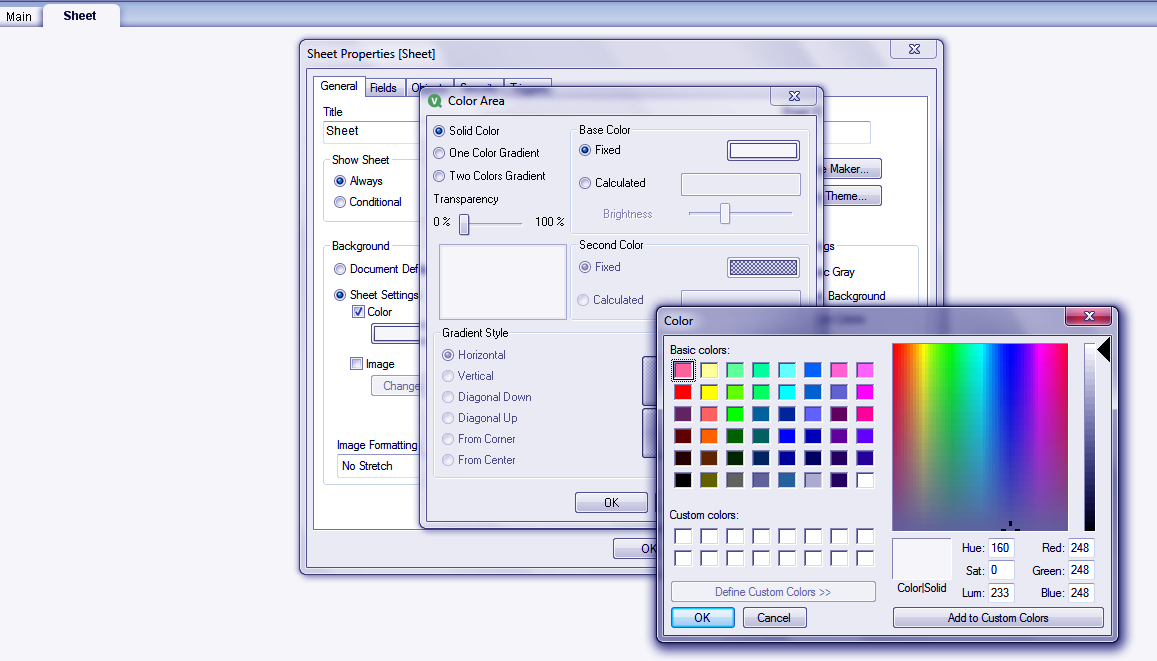
- You can also change the entire sheet’s color even add an image in the backdrop. Right-click anywhere on the sheet to get the PROPERTIES option.
QlikView Sheet and Object – Property Option
Along with these options, you can perform many other modifications in the sheet.
QlikView Sheet and Object – Modification in Sheets in QlikView
b. Navigating in QlikView Sheet
While starting to navigate on the sheets, you get to manipulate it in many ways by using different properties settings. One such settings tab opens when you right-click on the tab where the name of the sheet is mentioned. You can change the sheet tab properties using the given commands in the table below.
- Tabrow Properties… – This option opens a dialog from which you can choose a font for the tab. Only the ‘Truetype’ fonts can be used.
- Sheet Properties… – This option selects the sheet and opens the Sheet Properties dialog where you can set sheet specific parameters such as the sheet background, the fields to display, the default font and the object look etc.
- Copy Sheet – It makes a complete copy of the entire sheet with all its sheet objects. Such copies sheet will be named “Copy of Sheetname” and stored as the last sheet in the document.
- Promote Sheet – Using this option you can move the sheet one step further to the left.
- Demote Sheet – Using this option the sheet will be moved one step further to the right.
- Help – This opens context-specific help.
- Remove – This option first makes the sheet active, then removes it.
Read about QlikView Join Functions – Types & Examples
c. QlikView Sheet Properties
When you right-click anywhere on the active sheet, the QlikView sheet properties dialog box opens. In this properties window, you can access many properties for the sheet and make changes as per your choice. We will discuss all the sheet properties tab one by one below,
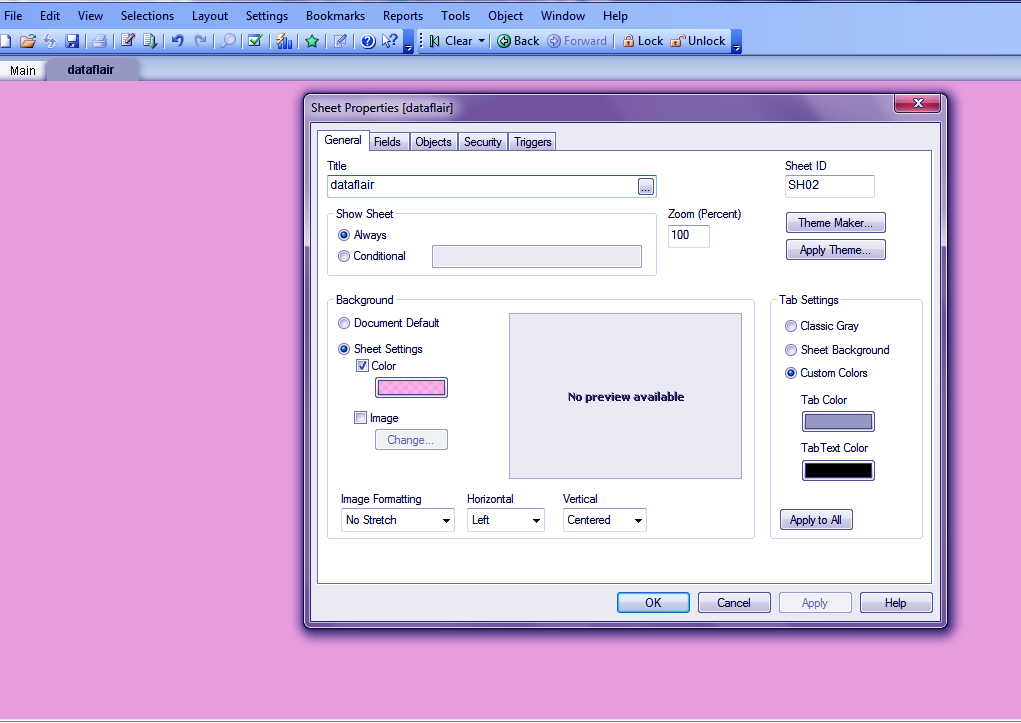
i. General Tab
The first tab you’ll see is the general tab where you can make general changes in the sheet-like change the title, image formatting etc. There are many sections within the general tab like Title, Show sheet, Tab settings, Sheet ID, Background etc.
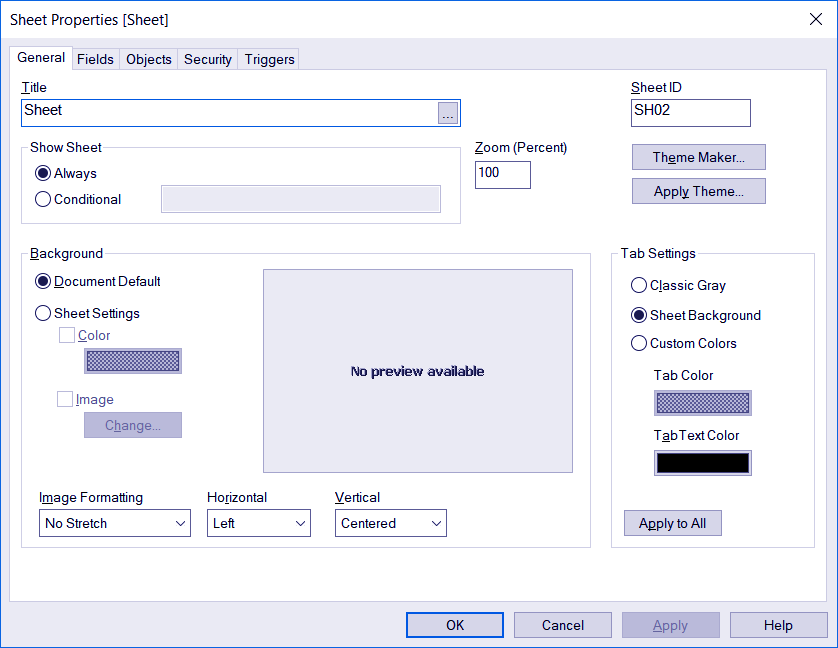
QlikView Sheet Properties – General Tab
The sheet ID section tells which number of the sheet it is. If it is the second sheet the sheet ID will be SH02.
-
Through the show sheet section, you can put a display condition on the sheet. The option in this section is discussed below-
- From the Always option, the sheet will always be displayed.
- And from the Conditional option, the sheet will be shown or hidden depending on a conditional expression which will be evaluated.
-
The tab settings section lets you change the sheet background settings
- From the Classic Gray Select option, you can use a gray tab coloring with black text.
- From Sheet Background the tab color can be set to the color of the sheet.
- Using the Custom Colors option, you can specify a custom Tab Color and Tab Text Color.
- And from the Apply to All option you can apply the tab color settings to all sheets of the document.
Do you know the Features of QlikView 12.2
-
You can also format the QlikView sheet or sheet image using tabs given at the bottom of the general tab. The options available in this section are discussed below –
- No Stretch option displays the image as it is.
- Fill option stretches the image and fills according to the sheet dimensions.
- Keep Aspect option stretches the image as much as possible while retaining the correct aspect ratio.
- Fill with Aspect option also stretches the image with regard to the correct aspect ratio and fills the rest of the space by image croppings.
- Tiled If you use this option then the image will be tiled the as many times as space allows.
-
With the help of background section options, you can choose the layout of the sheet background. You can either keep it at document default, select a colour or an image.
ii. Fields Tab
Through the fields tab, you can select which fields from the available fields you want to display in the objects made on the QlikView sheet. We can add, remove, all add together, promote, or demote field
Show Fields from Table – From here, you can set which fields will appear in the Available Fields list section. The drop-down list displays the option AII Tables by default. The option AII Tables (Qualified) shows only the fields which are qualified by the name of the table(s) they occur in.

QlikView Sheet – Field Tab
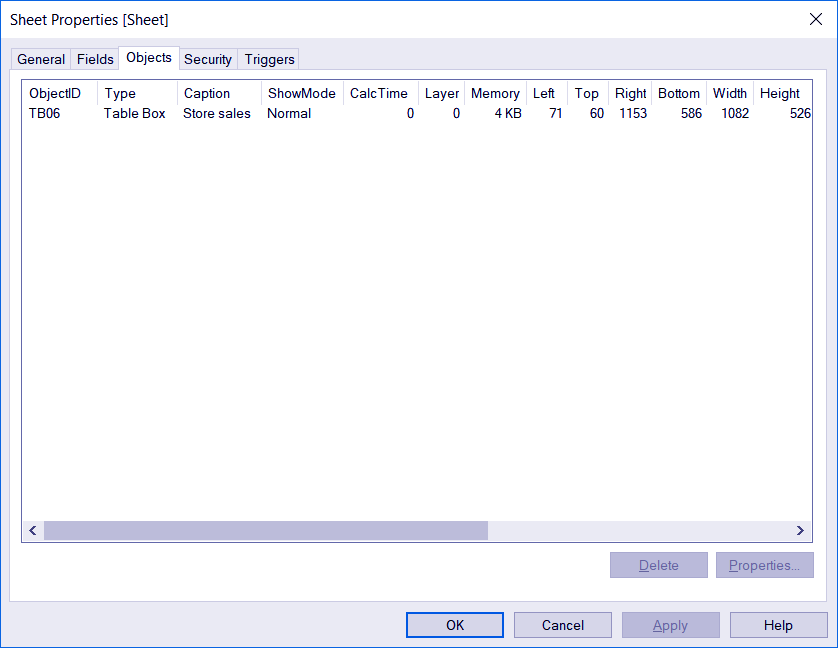
iii. Object Tab
This tab is like a log or record of all the sheet objects present on the active sheet in QlikView. It is proving to be very useful as this tab shows all the objects whether they are hidden or have show conditions applied on them. Refer to the table given below to study about different record columns and their purpose.
- Object ID – It lists the unique Object ID of every existing sheet object. Linked objects have the same object ID.
- Type – This option clarifies the object type.
- Caption – It gives the text (if any) that is displayed in the caption of the object.
- ShowMode – It indicates whether the object is normal, minimized, maximized, hidden or has a show condition.
- State – This display which states the object is in.
- CaIcTime – This gives the time in milliseconds needed for the last recalculation of the object’s contents.
Follow this link to know How to Create QlikView Master Calendar?
- Layer – This option is to set layers on the Sheet Object Properties: Layout page where Bottom, Normal and Top for the numbers -1, 0 and 1.
- Memory – This tells the amount of transient memory needed for the last recalculation of the object’s contents.
- Left, Top, Right, Bottom – These are the current positions of the indicated edge of the sheet object.
- Width, Height – This gives the size dimensions of the object, expressed in pixels.
- Left (Min), Top (Min), Right (Min), Bottom (Min) – This gives settings for the current position of the object when iconized (=minimized).
- Width (Min), Height (Min) – From here you can set the dimensions of the object’s icon.
QlikView Sheet – Object Tab
iv. Security Tab
Through this tab you can access the administrative security privileges (if allowed) to change the sheet security properties. All the options provided are checked by default, you can make changes accordingly.
- Add Sheet Objects – For permission to add new sheet objects.
- Remove Sheet Objects – For permission to remove any of the sheet objects.
- Move/Size Sheet Objects – For permission to change the layout of existing sheet objects.
- Copy/Clone Sheet Objects – For permission to add a copy of existing sheet objects.
- Access Sheet Object Properties – For permission to access the Sheet Properties dialog.
- Remove Sheet – For permission to delete the sheet.
- Access Sheet Properties (Users) – For permission to access the different property pages of sheet objects.

QlikView Sheet – Security Tab
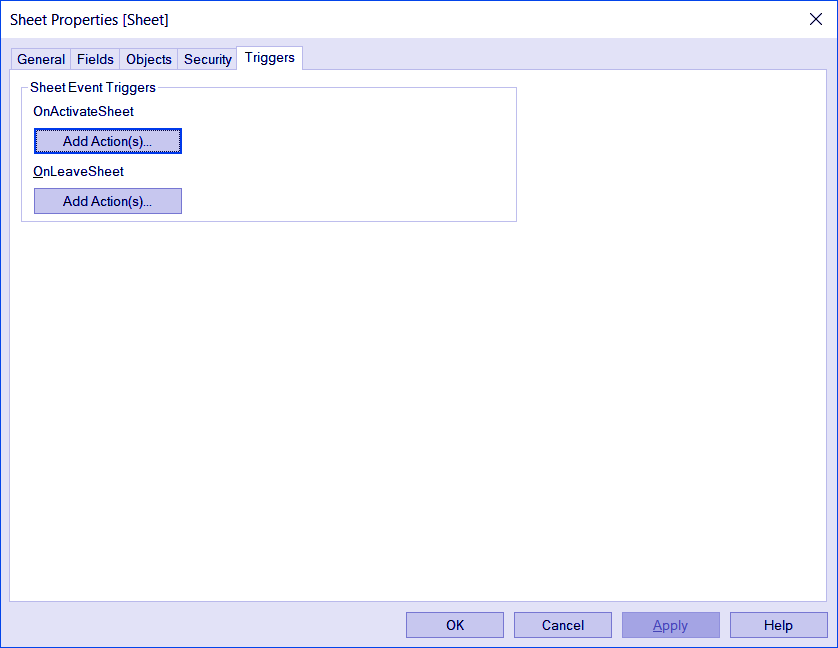
v. Trigger Tab
With options given in triggers tab, you can add actions on active or on leave QlikView sheet. You can also specify if you wish to invoke macros on the active sheet.
Sheet Event Triggers lets you set actions to trigger on change of active sheet. Some of them are given below.
- Pressing the Add Action(s) button for either event opens Actions page from where you can add an action to the event.
- The Run Macro option which is used to assign existing macro name or type any name for which you later can create a macro in the Edit Module dialog.
Let’s explore the Different Ways to Implement Data Loading in QlikView
Some Sheet Event Triggers are configurable, such as given below:
OnActivateSheet: The action will be executed upon sheet activation.
OnLeaveSheet: The action will be executed upon sheet deactivation.
QlikView Sheet – Trigger Tab
What is QlikView Object?
The most unique thing about sheet is the QlikView object it offers to the users called as QlikView sheet objects. This QlikView object is basically tools to visualize and present data in different ways. When you right click on the sheet, there rolls down a sheet object menu offering several other options along with the one of creating a new sheet object. Given below are the options available in the sheet objects menu.
- Properties option pens the Sheet Properties dialog from where you can set the parameters defining the sheet.
- Select Fields option opens the Sheet Properties: Fields page from where you can select the fields to be used in the sheet objects.
- New Sheet option opens a cascading menu which lists sheet objects.
- Copy Sheet option makes a complete copy of the sheet containing all the sheet objects.
- Paste Sheet Object option pastes a sheet object, previously copied to clipboard, on the sheet which can also be done using the common shortcut keys Ctrl+V.
- Paste Sheet Object as Link option pastes a linked object on the sheet. The object linked shares all attributes and object ID.
- Print option opens the Print dialog where print settings can be specified.
- Copy Image to Clipboard option copies a bitmap picture of the sheet area to the Clipboard.
- Export Image to File option opens a dialog for saving and attaching an image of the current sheet to a file. We can save the image in extensions like bmp,jpg, gif or png.
- Help option opens QlikView help dialog.
- Remove option removes the sheet and all its sheet objects in it.
Do you know How to Create QlikView Data Files?
To add a QlikView sheet object into a sheet, go to LAYOUT and select NEW SHEET OBJECT or just simply right-click anywhere on the sheet to get a drop-down menu. Put your cursor NEW SHEET OBJECT to get the entire list of sheet objects available.
QlikView Sheet Objects
The QlikView sheet objects available are-
Let us discuss each object one by one-
-
List Box- Through list box, you can select one field or column from the table currently loaded in Qlikview document script. The dialogue box is shown in the screenshot below you can see we have selected the field to display as Product_Subcategory and have also entered a title for the box.

QlikView Object – List Box
-
Statistics Box– This box has all the options to perform a statistical operation on any field of a table. You get to select from a wide range of available statistical functions. You can also apply multiple functions on one field at the same time. you will see the results separately within the statistical box. Here’s how the statistics box property window looks.
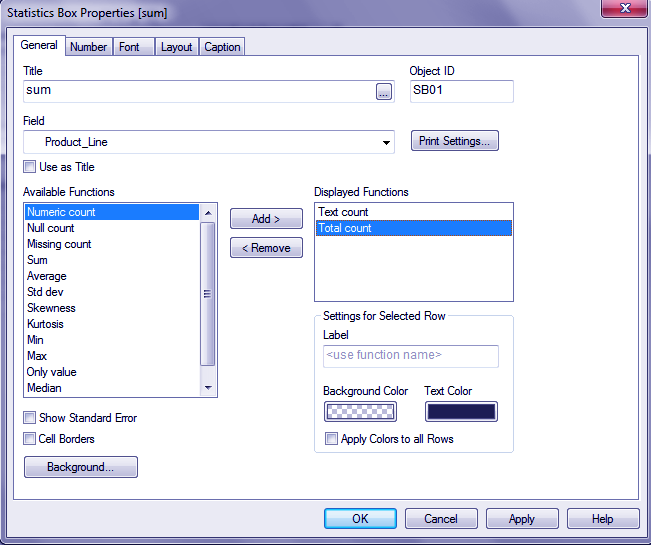
QlikView Object –statistics Box
-
Multi-Box- A Multi Box allows you to create a small table in which you can select the fields to display. This box will only display the field names and beside their name will be a drop-down menu to access the entire list. As you can see in the image below we have selected the fields from the available fields option. You can promote or demote a field in a multi-box.
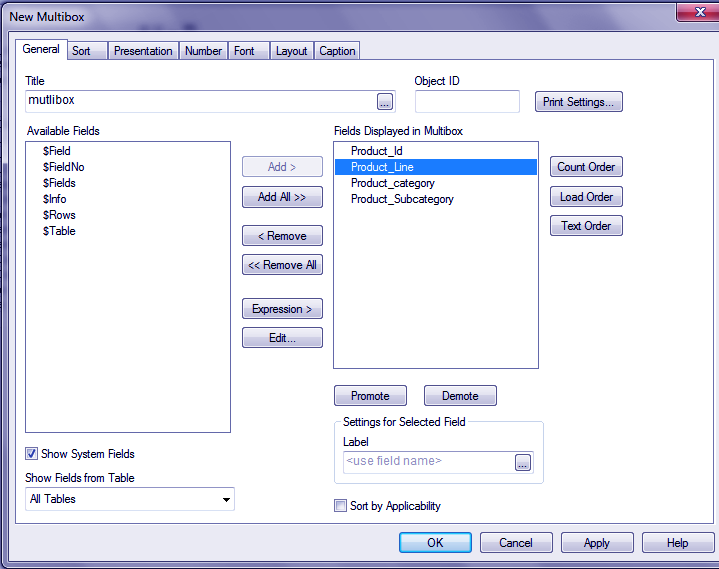
QlikView Object – MultiBox
-
Table Box- Table Box is probably the most used sheet object in QlikView. In our previous data loading tutorials, we have seen how to create a table box almost every time.
Read about – Best QlikView Books for Beginner to developers

QlikView Object – Table Box
-
Chart- Using the Chart object you can display your data in the form of a chart. This tool lets you choose from many kinds of charts and apply suitable calculation conditions on the data. You can also choose fields from the table so that we can take data from those fields and plot against each other while creating a chart.
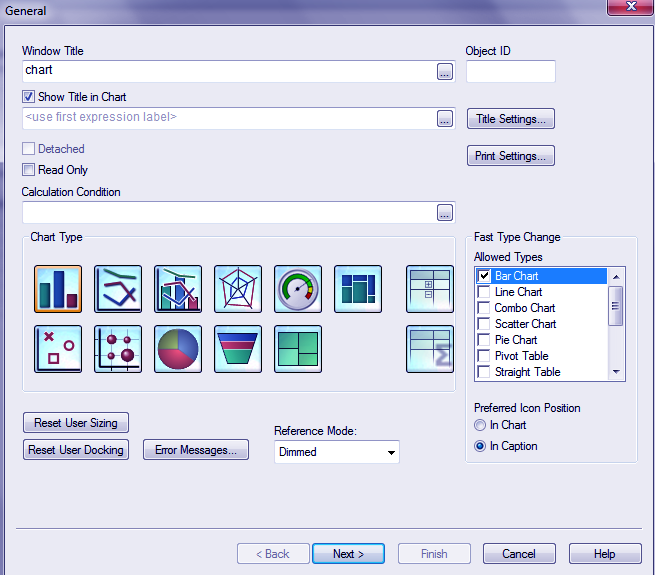
QlikView Object – Charts
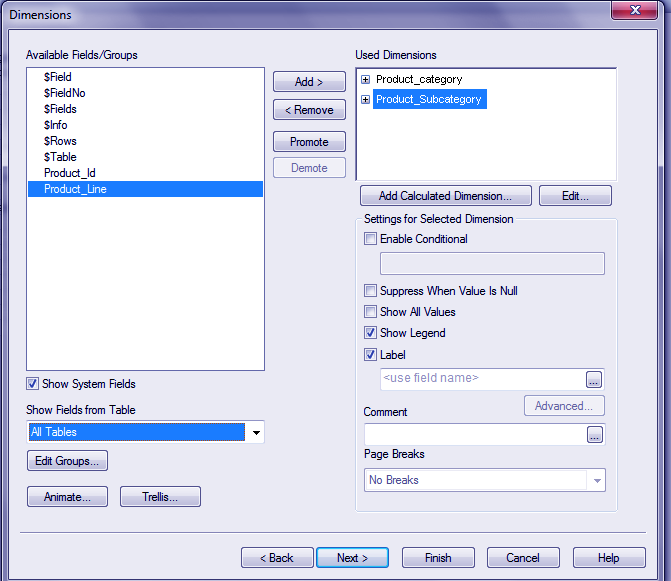
QlikView Object – Charts
-
Input Box- Through the input box, you can enter or define a variable. Upon clicking on the right side of the ‘=’ sign, you can change a value or enter a new value for a defined variable.
-
Current Selection Box- The current selection box will display the currently selected fields or row data by you. It makes it very easy for you to analyze the data with the help of current selection box. As soon as you remove the selections from your table, the box will get empty.
Read about – Major Features of QlikView Script Editor
-
Button- The button object allows you to take control of many actions from a button. You can change the font, style, hue, action to perform by the button etc through the properties window. This object makes functioning within QlikView very smooth. Actions related to bookmarks, layout, selection, printing and many more can do.
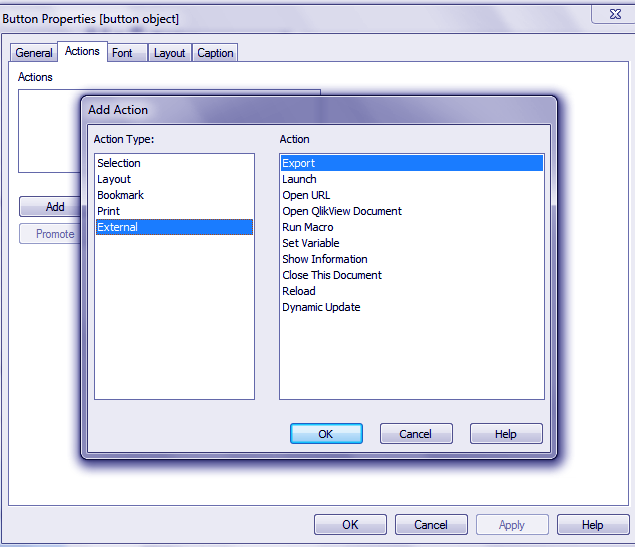
QlikView Object – Botton
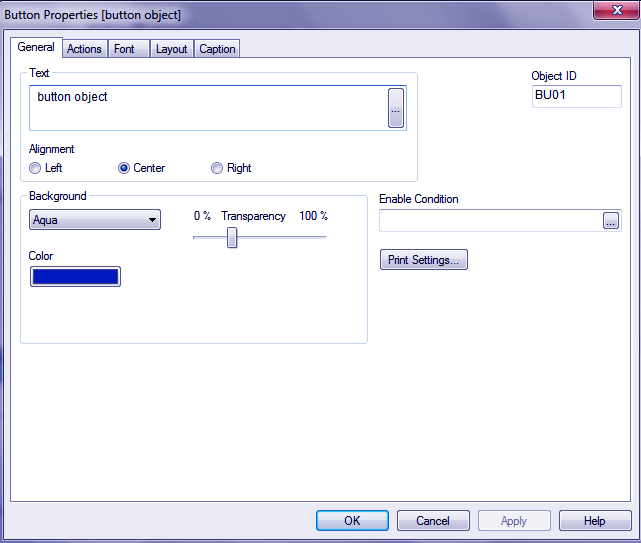
QlikView Object – Botton
-
Text Object- A text object can use to add some descriptive text about a table or to explain some data insight.
-
Line /Arrow Object- The lines and arrows can use for several purposes. They offer visual clarity to the user by horizontally or vertically dividing the sheet. An arrow may use to point on something noteworthy or some object.
-
Slider/Calendar Object- This unique feature provides a sliding bar where the scaling will be according to the data from the field you choose.
You can control the table with this slider easily.
-
Bookmark Object- Bookmark object is for tagging an important bookmark on a sheet for immediate use.
-
Search Object- You can search for Qlikview documents and files with the help of this object.
-
Container Box- A container box is like a big carton box where you keep everything together. You can assimilate and access multiple sheet objects from the container box. Below is the screenshot of the property window of a container box.

QlikView Object – Container Box
Follow this link to know about QlikView Vs Power BI
QlikView Sheet and Object Association
All the data being displayed in these QlikView sheet objects comes from one source usually i.e. it is part of the same QlikView document. Following the associative model that we have studied about in our previous sessions, these sheets and objects are also associative.
This means that if you select one column from the entire table, all the sheet objects will instantly filter their data and display only that which is related to the data in the column selected by you. Try and understand this concept by the screenshot provided below.

QlikView Sheet and Object Association
We select the Product ID ‘pr5’ and all the sheet object’s data filtered and only what is left is the data and statistics related to ‘pr5’.
So, this was all about QlikView Object and Sheet. Hope you like our explanation.
Conclusion
Hence, this was all about Qlikview sheet and object. Both of these are a very crucial part of QlikView as all the work progresses further by knowing well about hows and whats of sheets and objects. Still, have a confusion? Feel free to ask in the comment section.
Related Topic – Business Intelligence