


Expert-led Online Courses: Elevate Your Skills, Get ready for Future - Enroll Now!
In this tutorial, we are going to learn about Data Extracts and the process of creating it in Tableau. Data extracts hold a crucial spot in learning Tableau, as it allows you to work efficiently with your data in Tableau. Tableau Data extracts are primarily used when we do not need to use the complete data present at the data source but only want a part or subset from it.
So, here we will learn everything we need to know about Tableau data extracts and how to create and use them.
Tableau Data Extracts
Data extracts are a part of data taken into Tableau’s local storage from the data source. The data extracts are also referred to as the subsets of data from the main data source. Such data subsets are of great importance while working in Tableau, as they optimize Tableau’s performance, speed and offers flexibility to handle large sets of data easily.
When we make a Tableau data extract, a local copy of that portion of data gets saved in Tableau’s memory. Working and managing data in the form of such extracts is much easier than having to manage the entire data from a live connection.
When we are working with Tableau data extracts as the main source of data in Tableau, we can also refresh the data from the data source. The refresh can be done in two ways:
- Either we can refresh the entire data subset in a certain time interval
- Or we can have incremental data refresh where only newly added data gets updated in the extract file.
Data extracts in Tableau are saved as a .TDE file which is the Tableau Data Extract file.
Advantages of Tableau Data Extracts
1. The data extracts support large data sets or subsets that can be up to millions or billions of rows of data.
2. The data extracts are used to optimize Tableau’s performance because they speed up working with data by providing a local copy of data from its source. This saves a lot of time while working with large data sets.
3. As we avoid going through a lot of processes that we normally do when working with a live data connection, in Tableau data extracts. Tableau’s performance gets improved significantly.
4. Tableau data extracts allow us to use advanced Tableau functionalities which we normally cannot use with data from live data connections or at the original data source. We can manipulate or modify the data saved in an extract file by applying filters, calculations, conditions or limits which gives us a lot of analytical freedom and flexibility.
5. The Tableau data extracts allow us to use data offline. We do not need to have continuous access to the data source in order to work with it. Using data offline is possible due to a local copy of data extracts getting saved in Tableau’s memory.
How to Extract Data in Tableau
Follow the steps given below to learn how to extract data from a data source in Tableau.
Step 1:
In the first step, we are on the Data Source page. Notice on the top right corner of this page, there is a Connection section. Here, we are given two options to make a connection with the data source, that is, Live and Extract.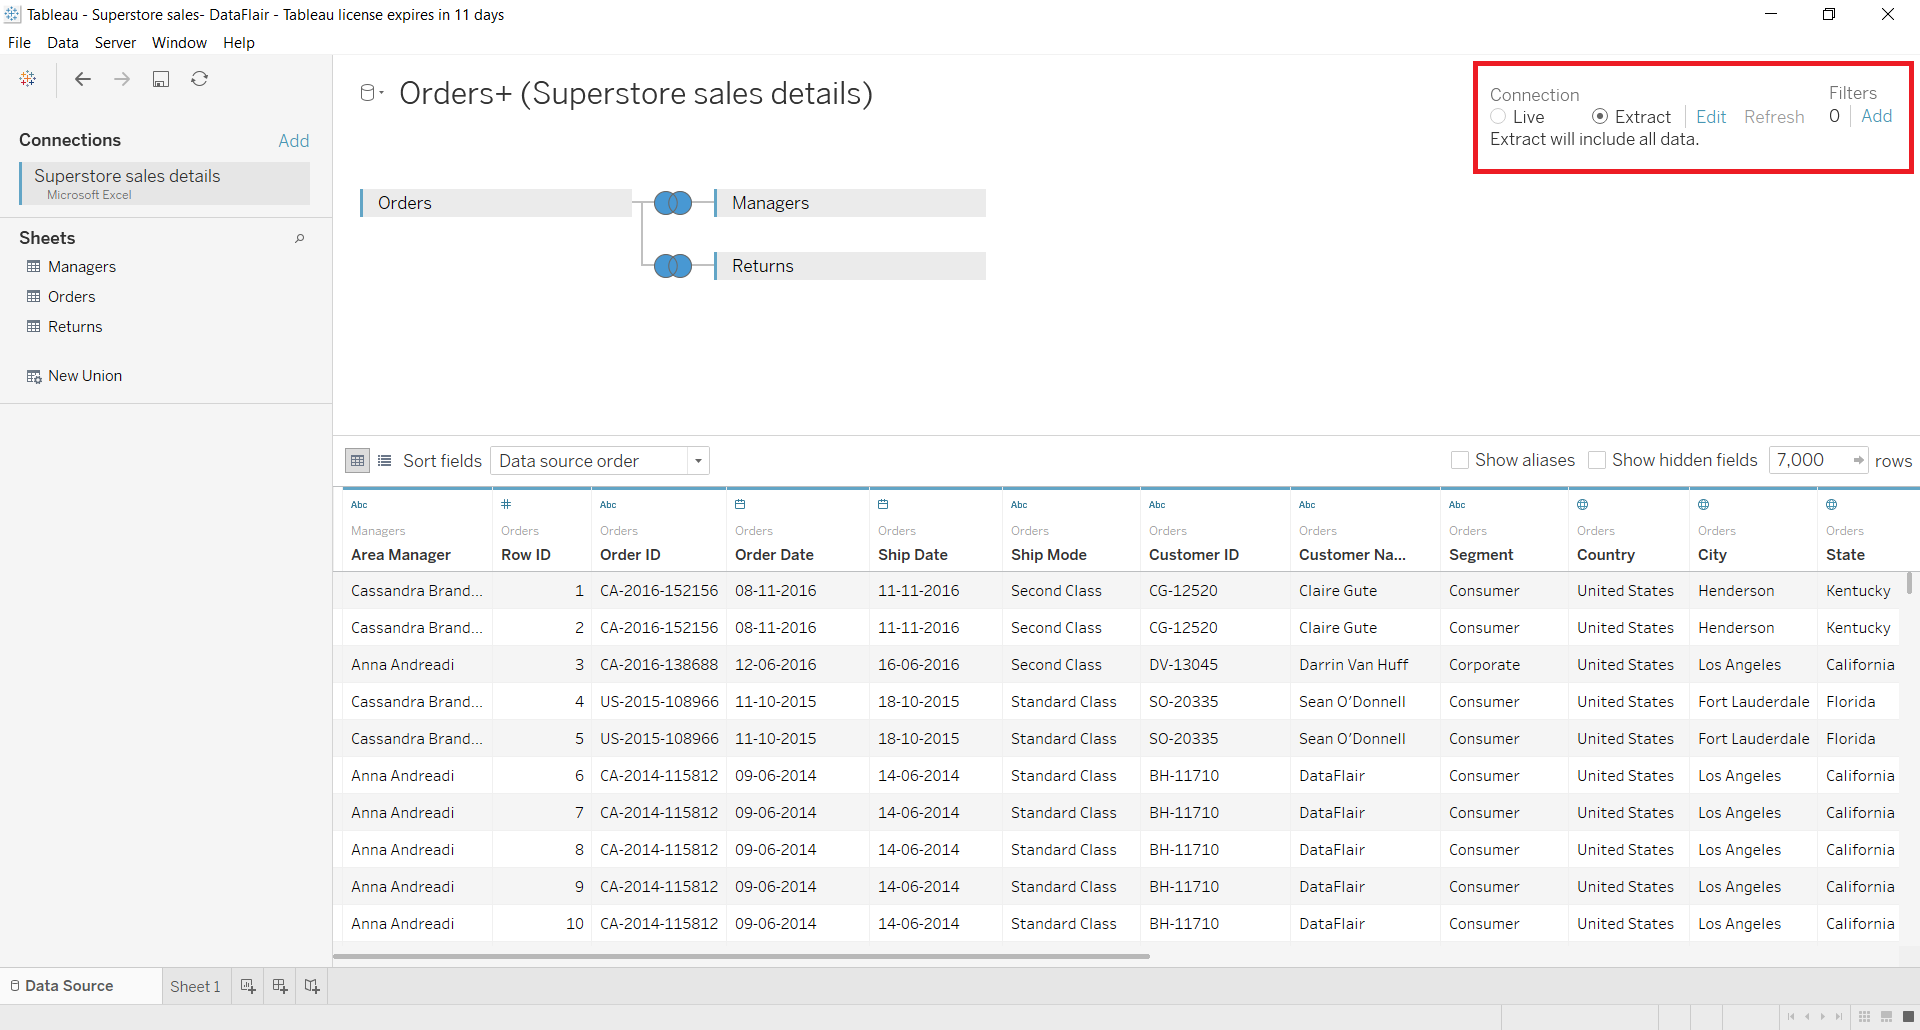
Select the Extract option to begin the process of extracting data from a data source. Also, if we do not wish to extract a selected set of values from the data source, we can simply select the Extract option and move forward. But, if we want a specific set of values from the data source, we need to select the Edit option given right next to the Extract option.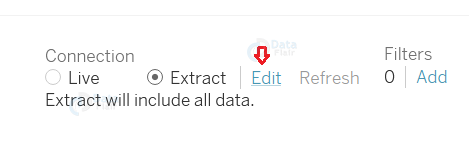
Step 2:
An Extract Data window will open, from where you can select the data values you wish to have in the extract by applying filters, aggregations, selecting rows etc. In this window, you get a range of options to set the extraction process as per your requirements. You can choose from single or multiple tables, add a filter, set aggregation on selected data values, number of rows, etc.
We will discuss the options given in this window in detail, in the steps to come.
Step 3:
You can select a set of values to be extracted by the use of filters. You can extract filtered data from the data source by applying the filter conditions of your choice in the Extract Data window.
To apply a filter on the data source values, click on Add.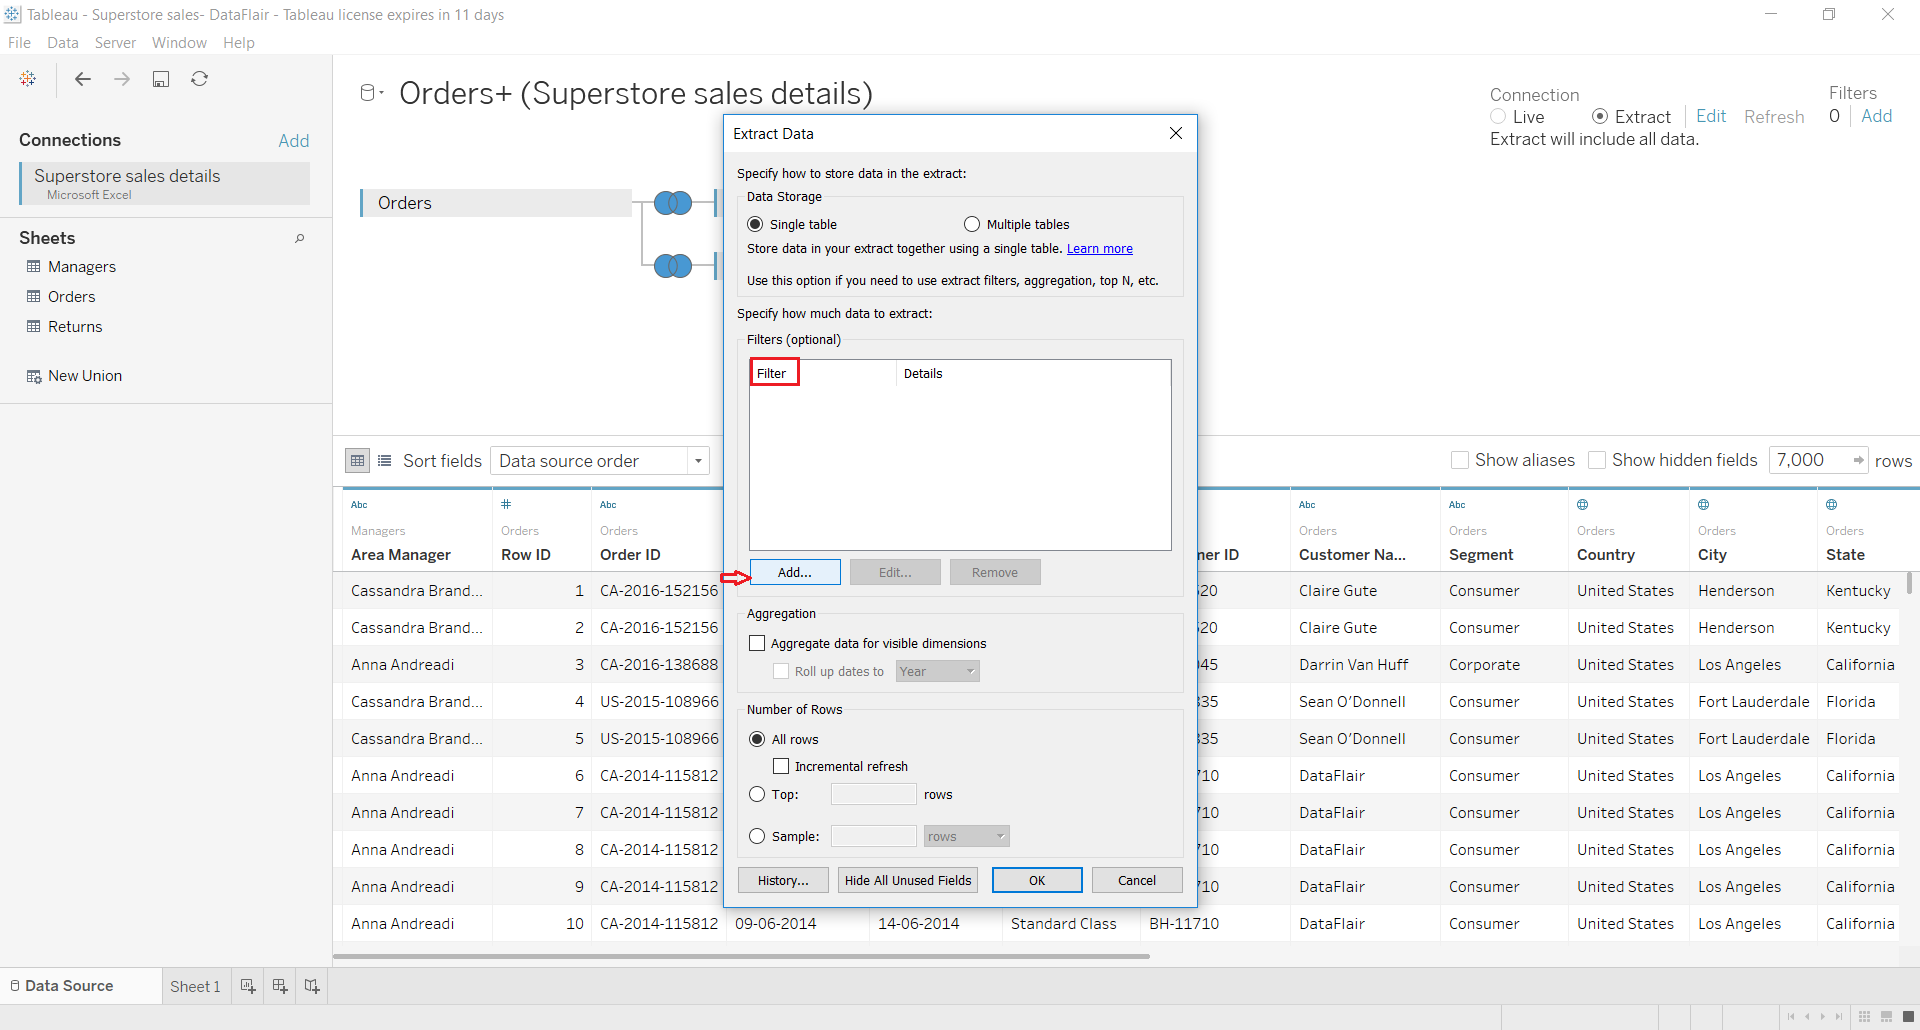
Now, a complete list of available fields in a data source will appear. You can select a field from here then click OK.
Step 4:
Next, a list of values from that field will open. You can select the values that you wish to keep or exclude from the extract. To exclude field values, select values from the list and then check the Exclude column.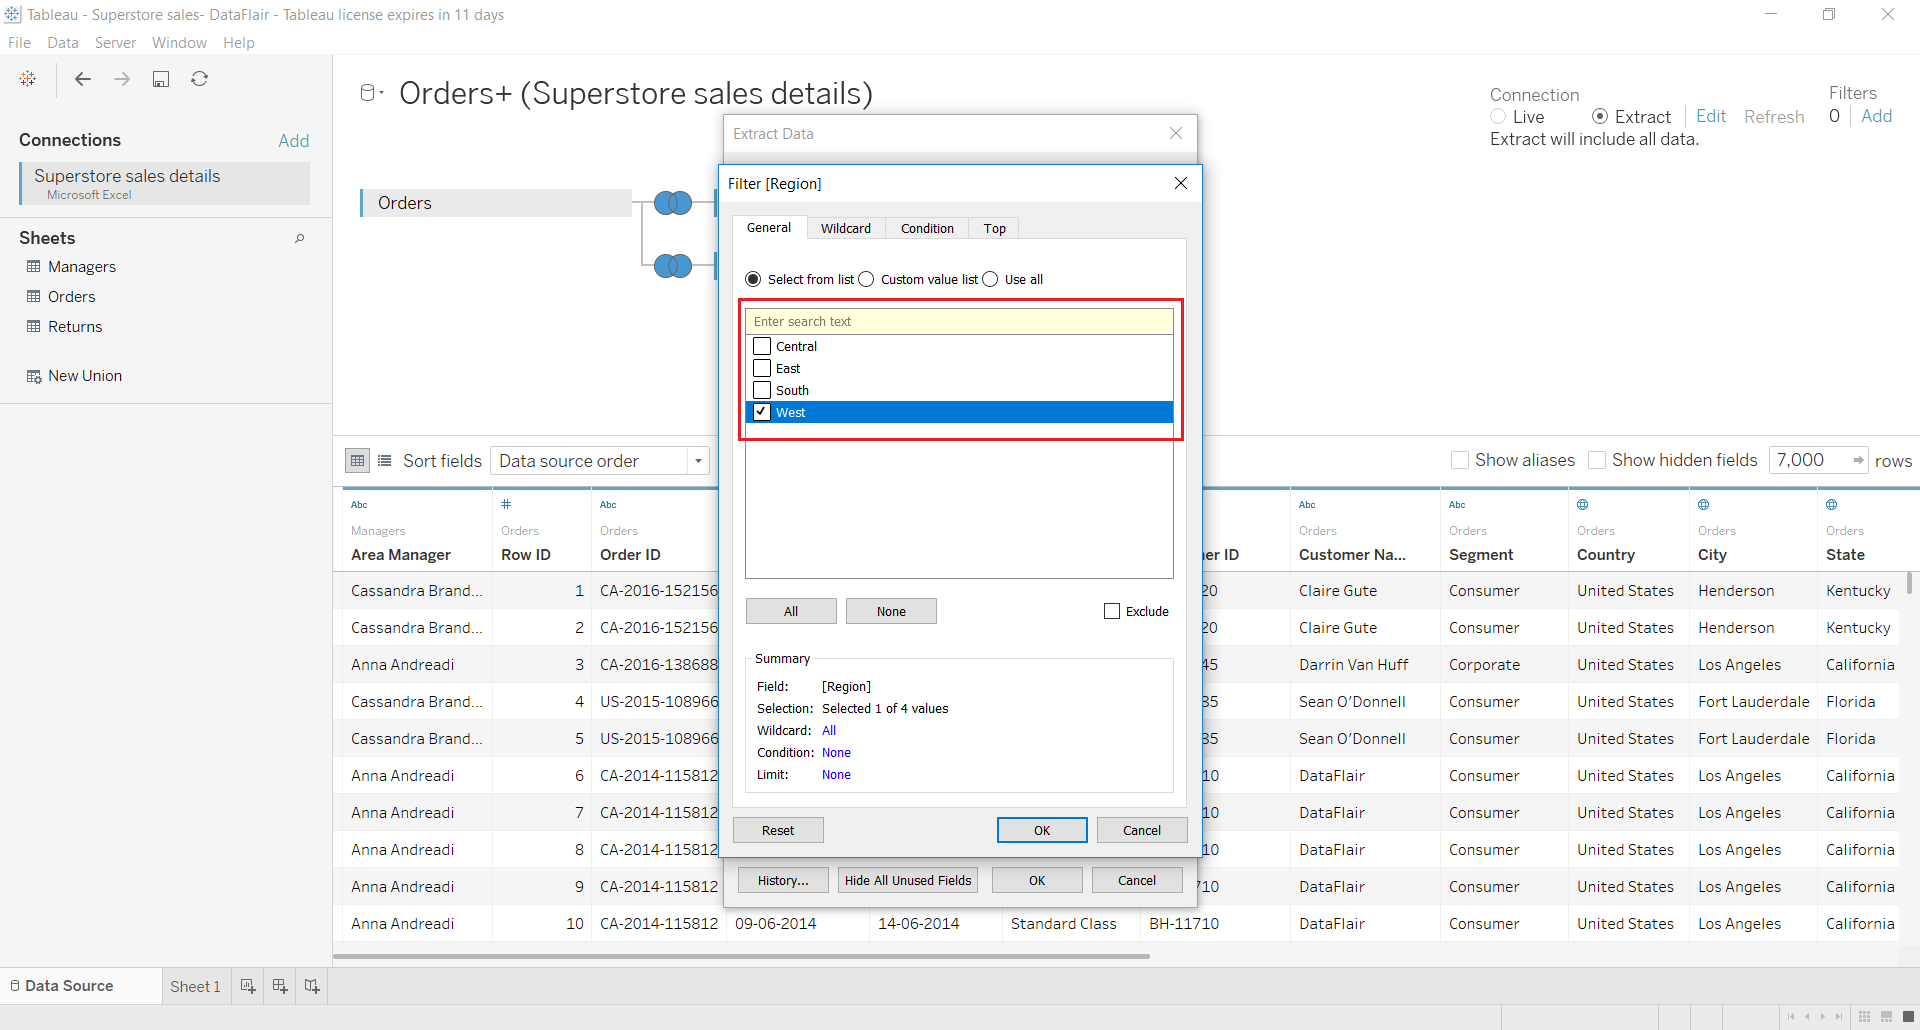
This was the General tab of the filter window.
We can also apply filters using the Wildcard tab. Here you enter a value and set conditions on them such as Contains, Starts with, Ends with, or Exactly matches.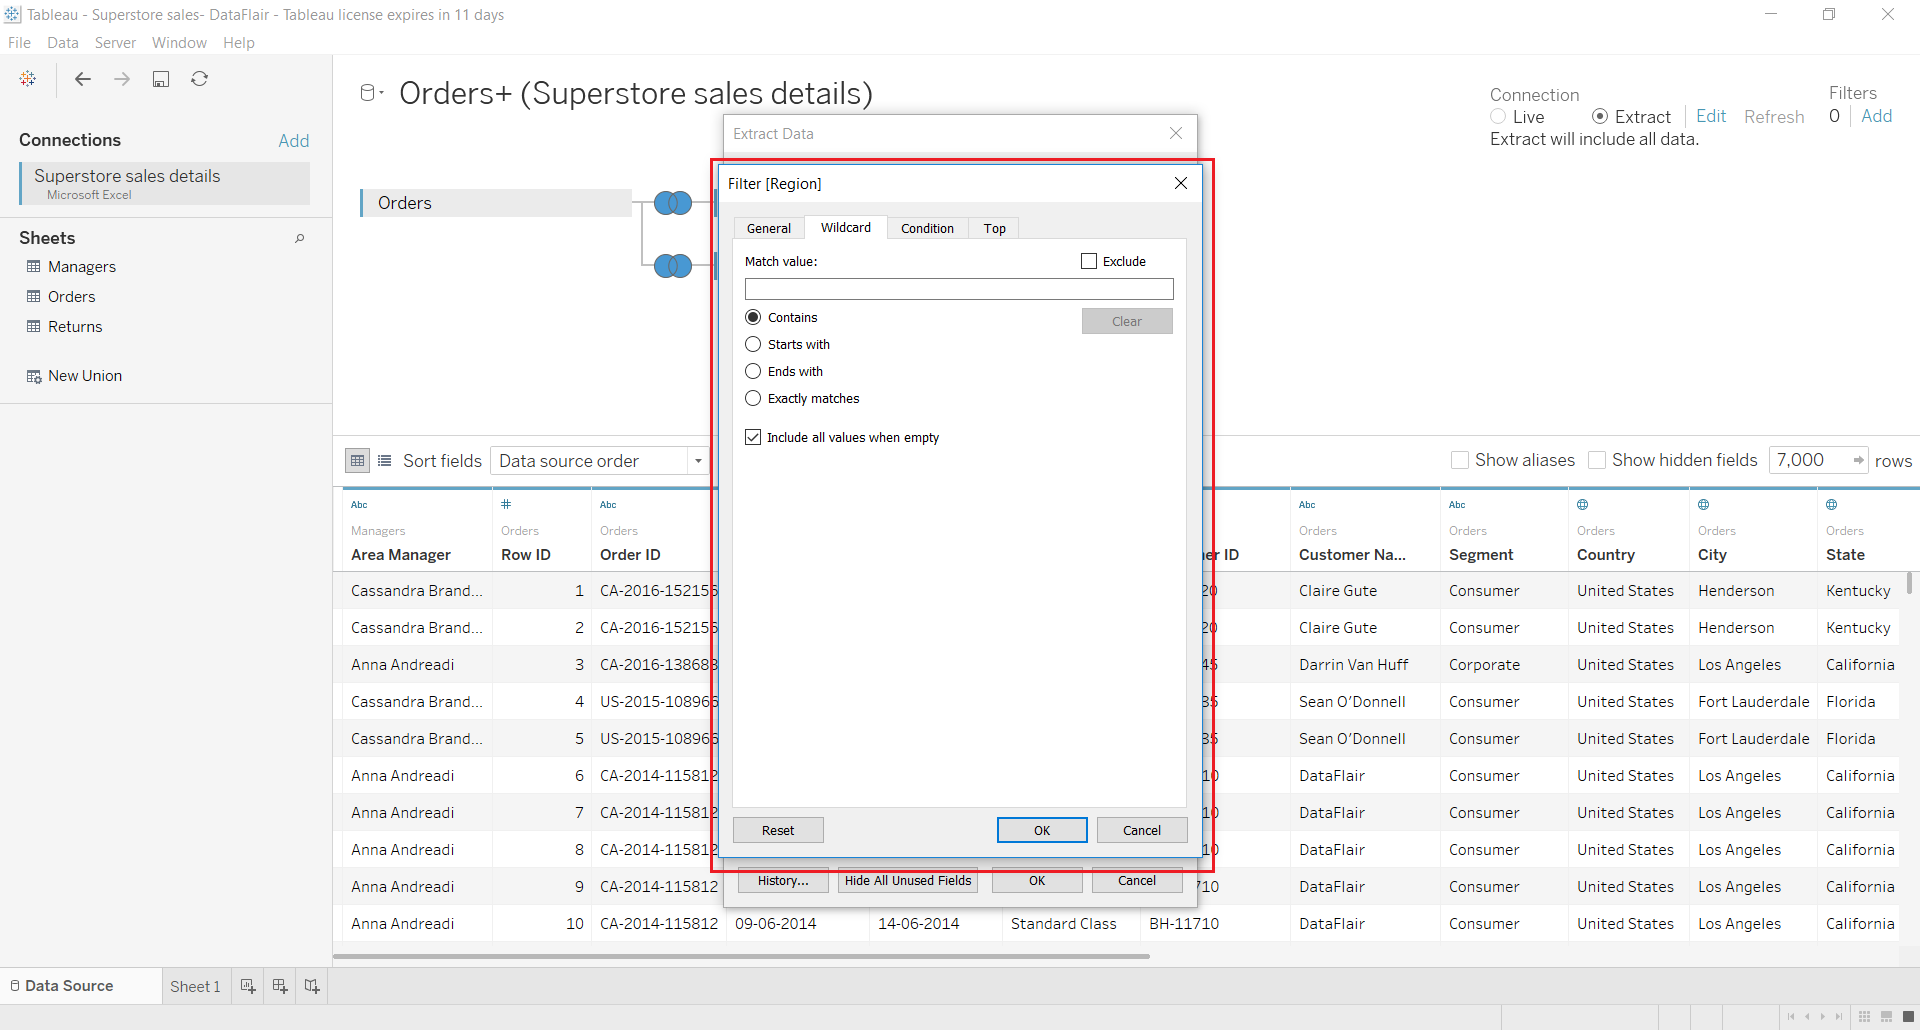
Or you can enter specific filter conditions by field or by formula from the Condition tab of the filter window.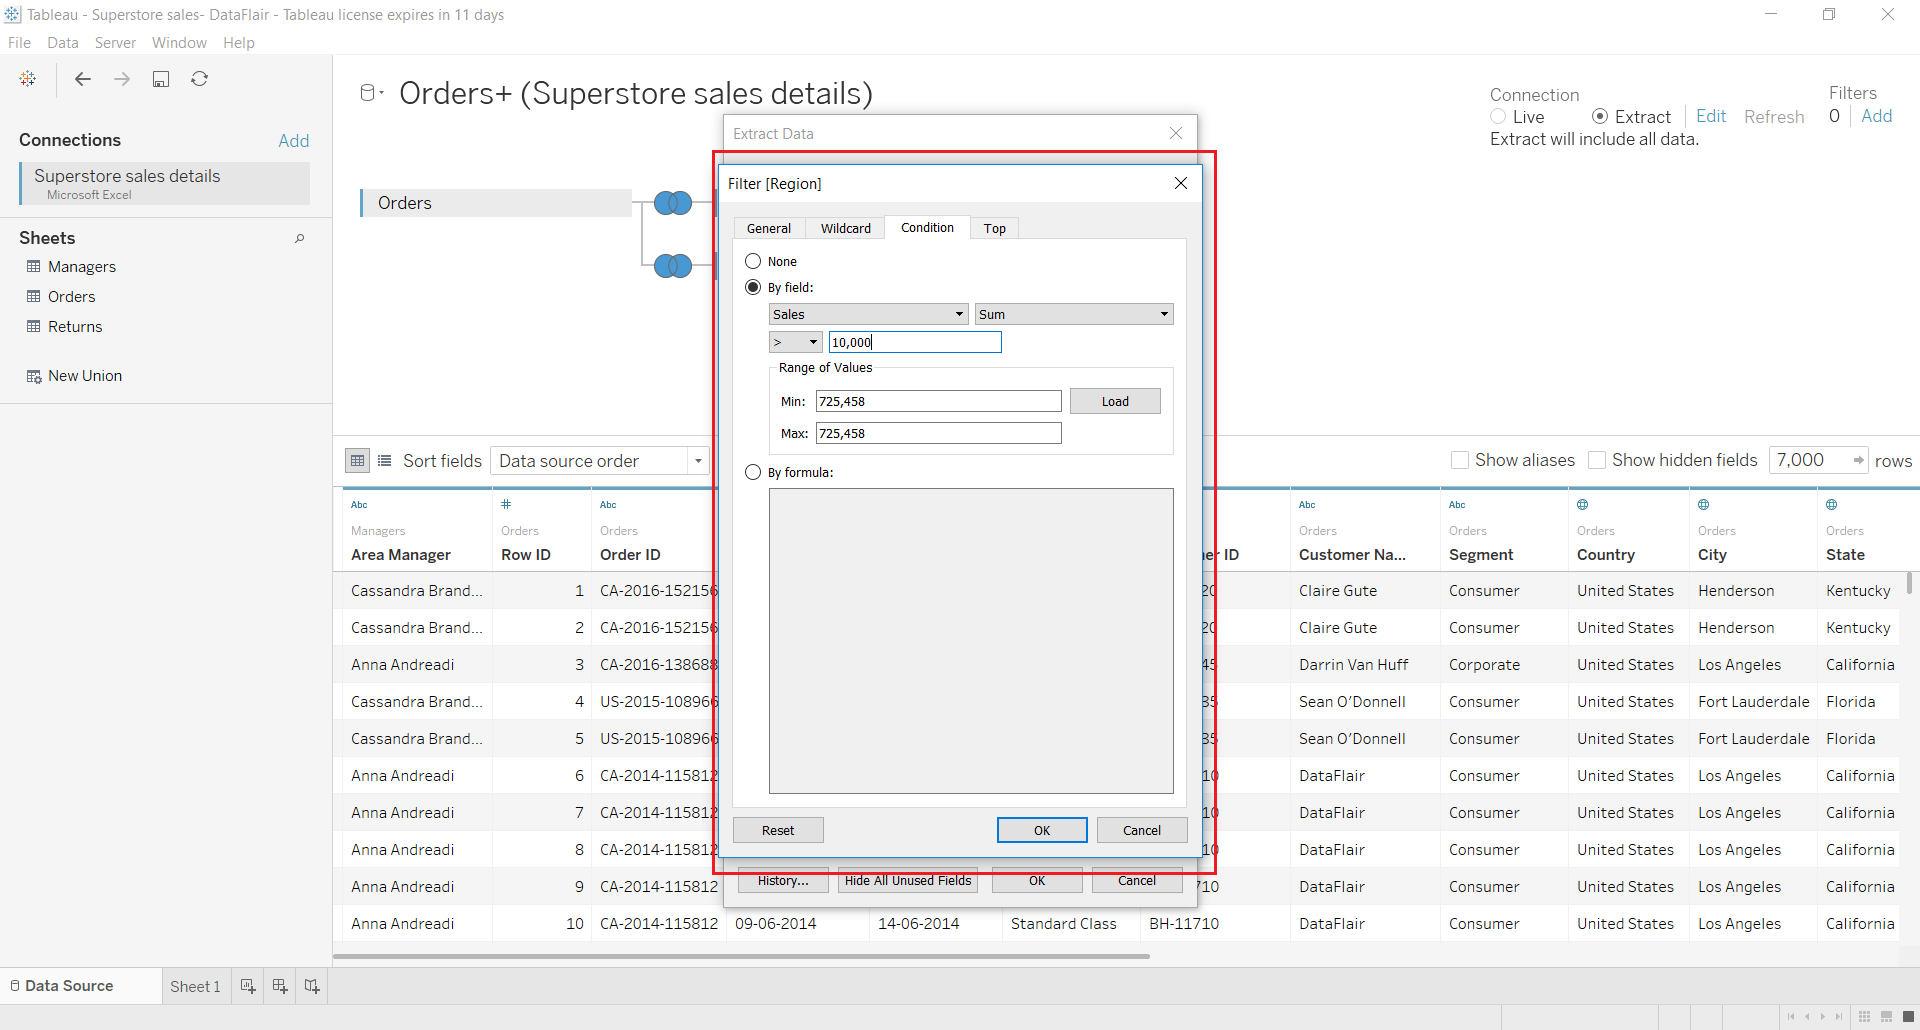
Another tab present in the Filter window is the Top tab. You can set a filter condition to take only the top 100 or top 1000 values etc in the data extract from the options given in this tab.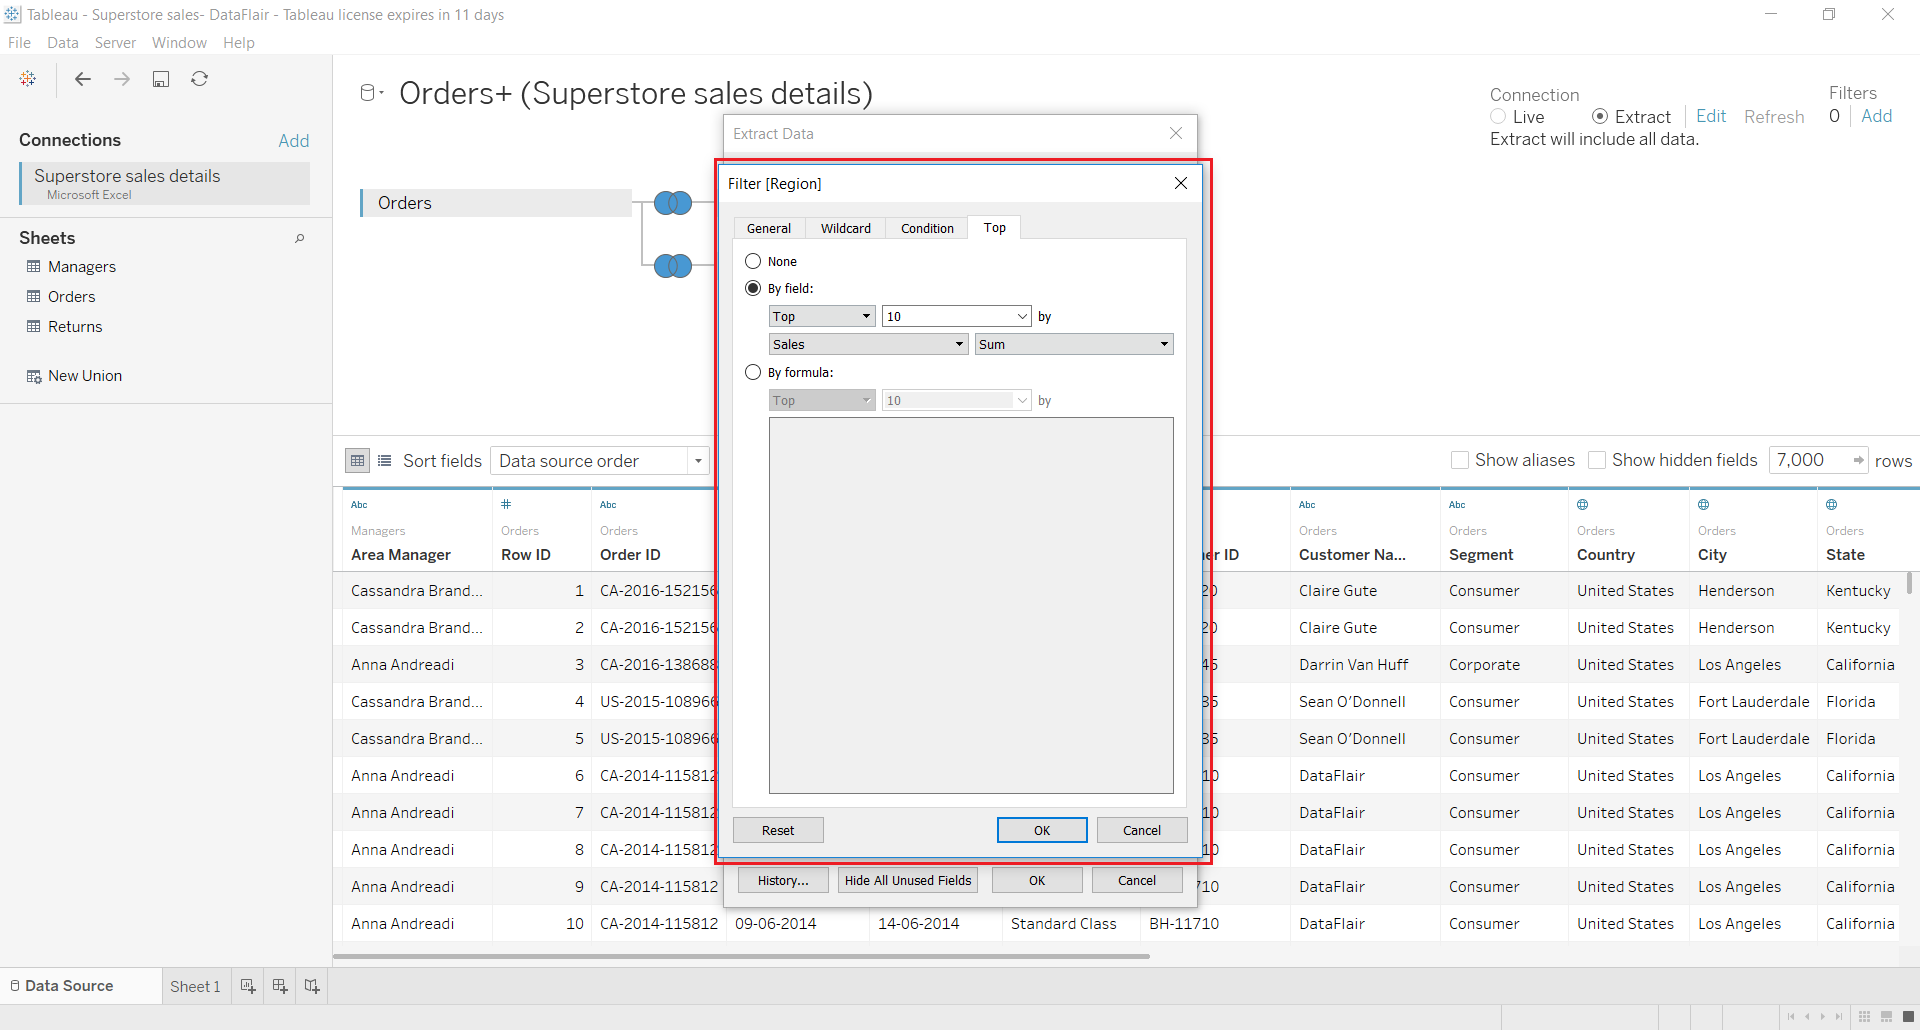
Step 5:
Once you apply all the filters, you can see the filter summary on the General tab.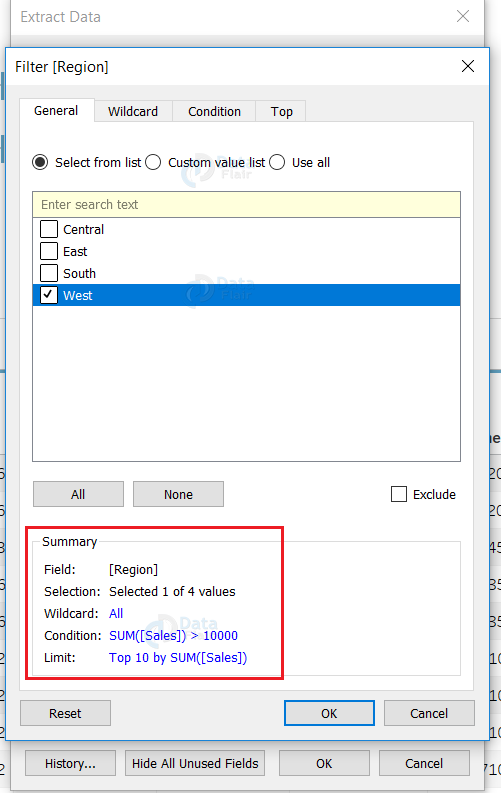
Step 6:
In addition to applying filters to create a data extract, we can apply aggregation on the selected values. An instance of aggregating data values during data extraction is shown in the screenshot below.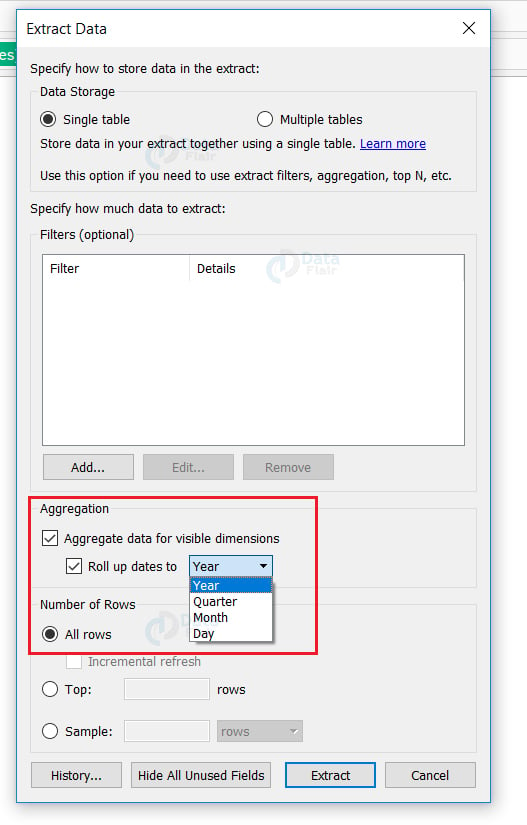
Another important option given in the Extract Data window is for rows of fields. From this section, we can set the number of rows that we want to fetch in our extract from the data source. You get a range of options such as selecting All rows with the option of an incremental refresh every time new data gets added at the source. Or you can select a selected number of top few rows to include in the extract or give a sample number of rows to extract.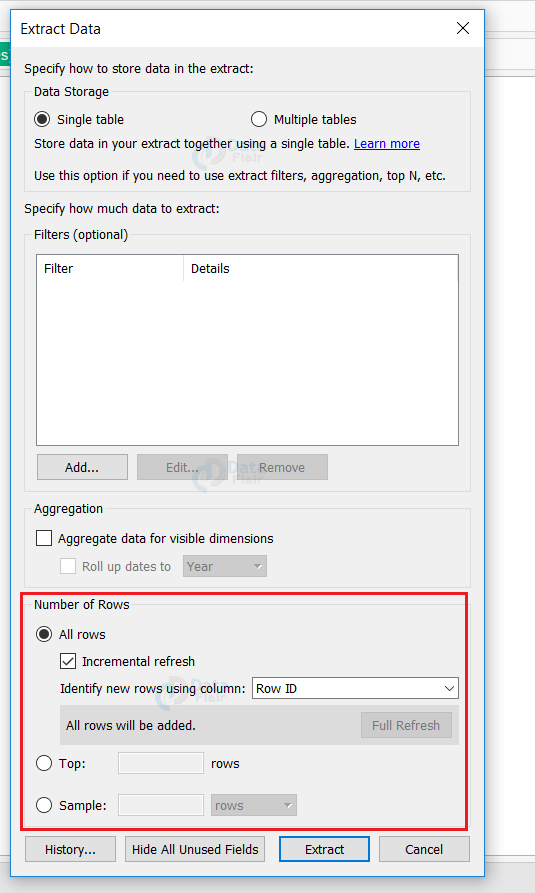
Step 7:
Once you have set all the conditions to create a data extract from the data source, it gets uploaded into Tableau’s memory. And then it is ready for you to use it in your data analysis process.
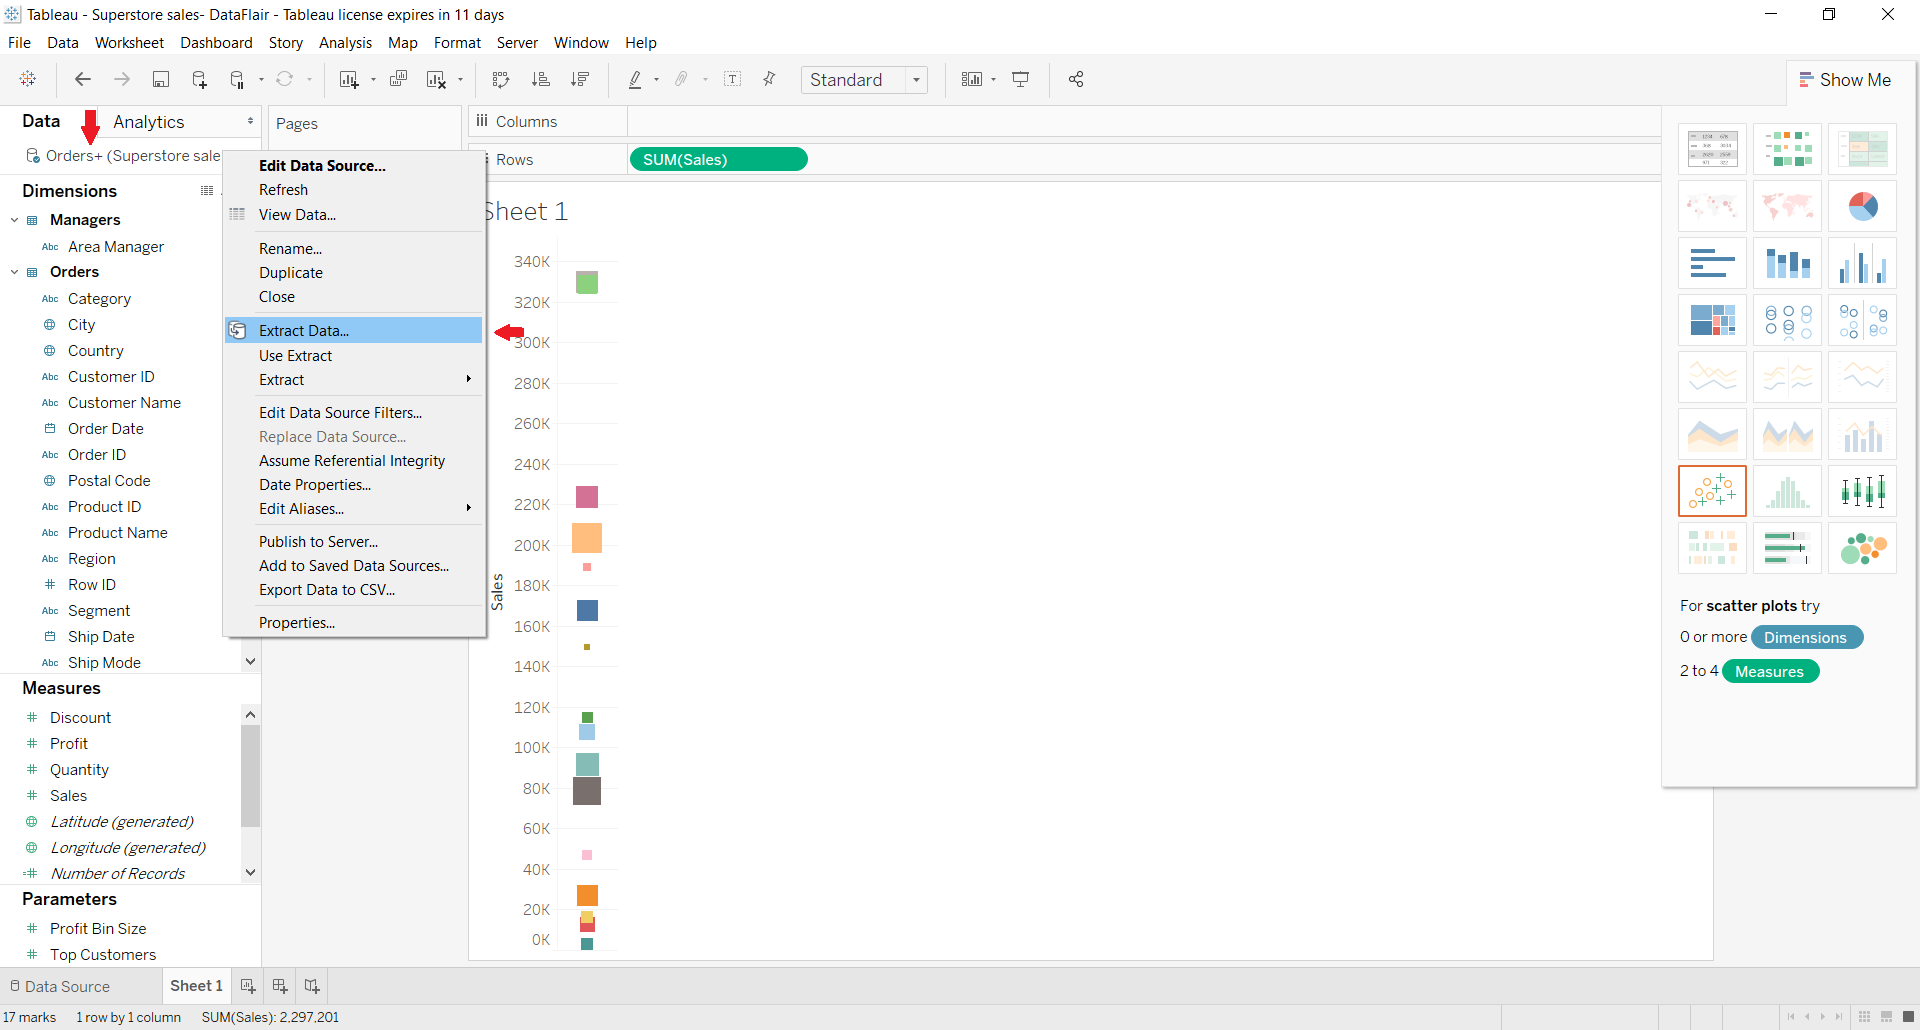
To manage the Tableau data extracts, right-click on the name of the data source present in the Data pane. A list of options related to the data source will appear. Here, we have three to four options related to our data extract relevant to that data source. You can manage your existing extracts from here.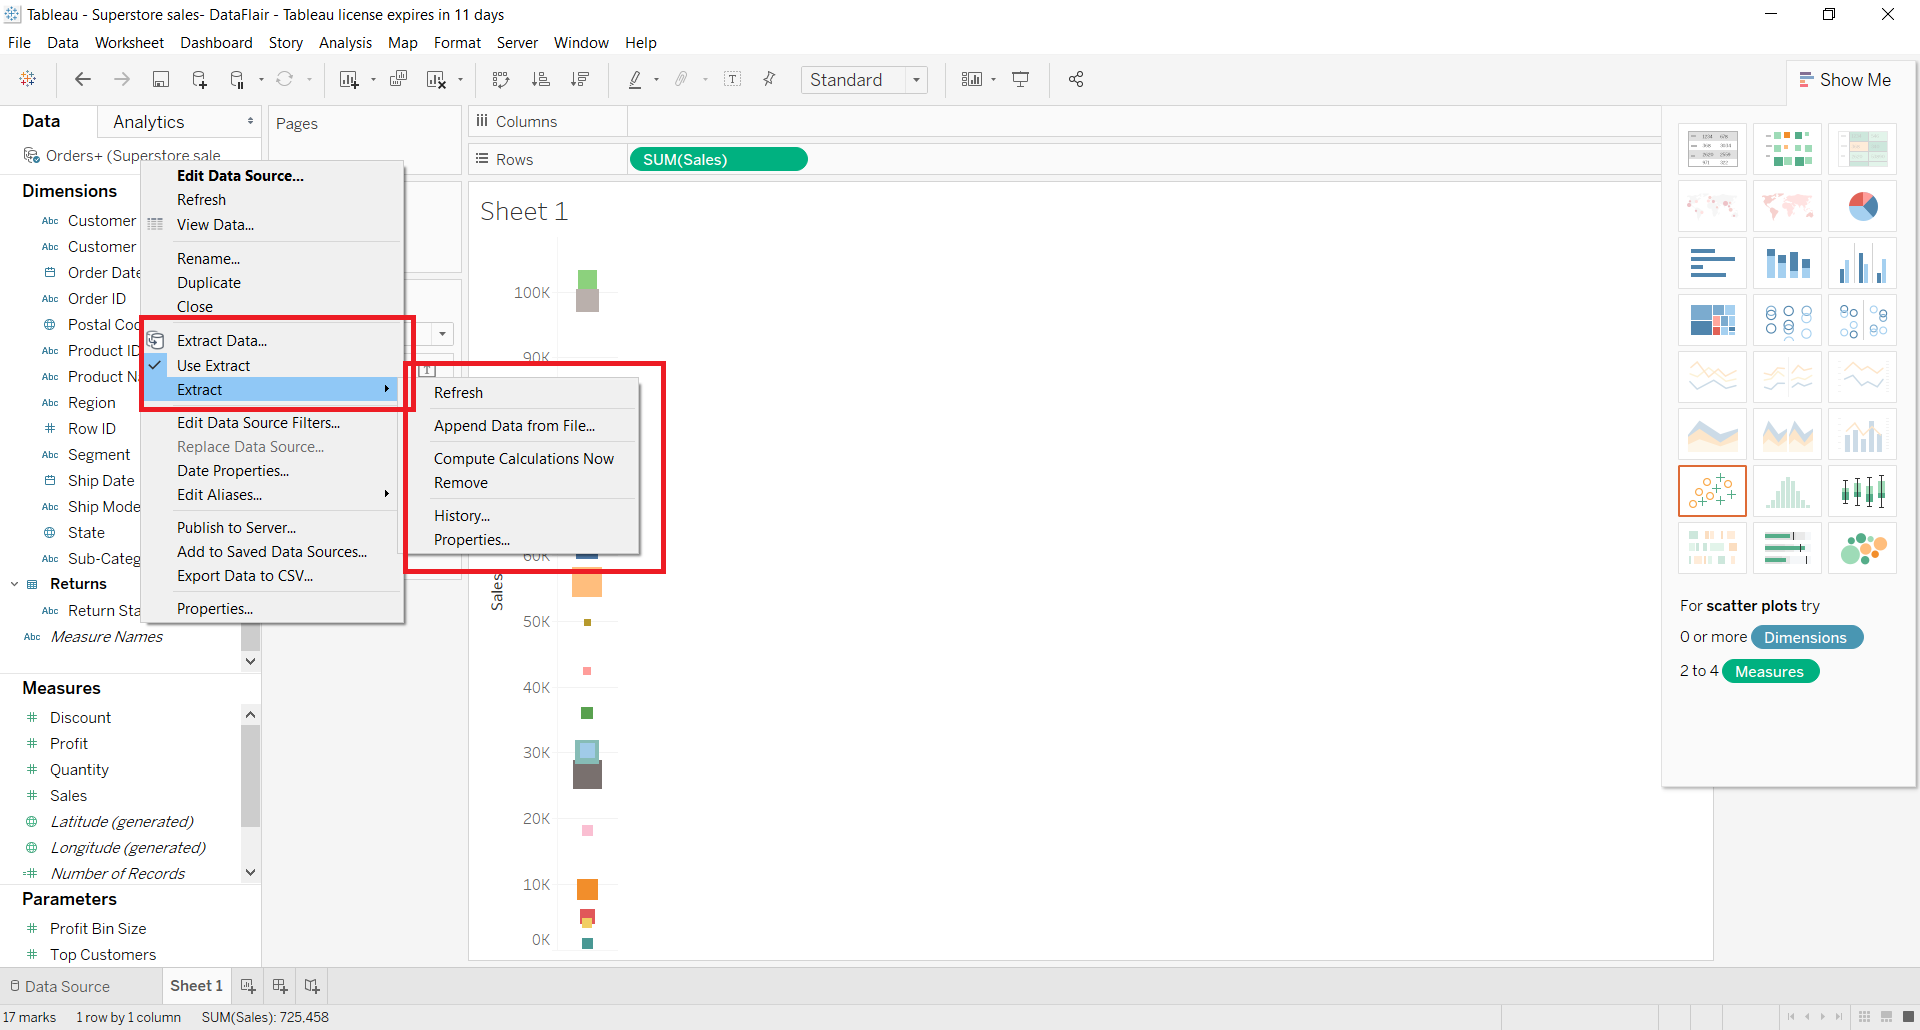
Step 8:
We can initiate the process of creating data extracts in a few more ways.
- Click on the Data tab present on the toolbar. Then select your data source and select Extract Data.. option from the list that opens.
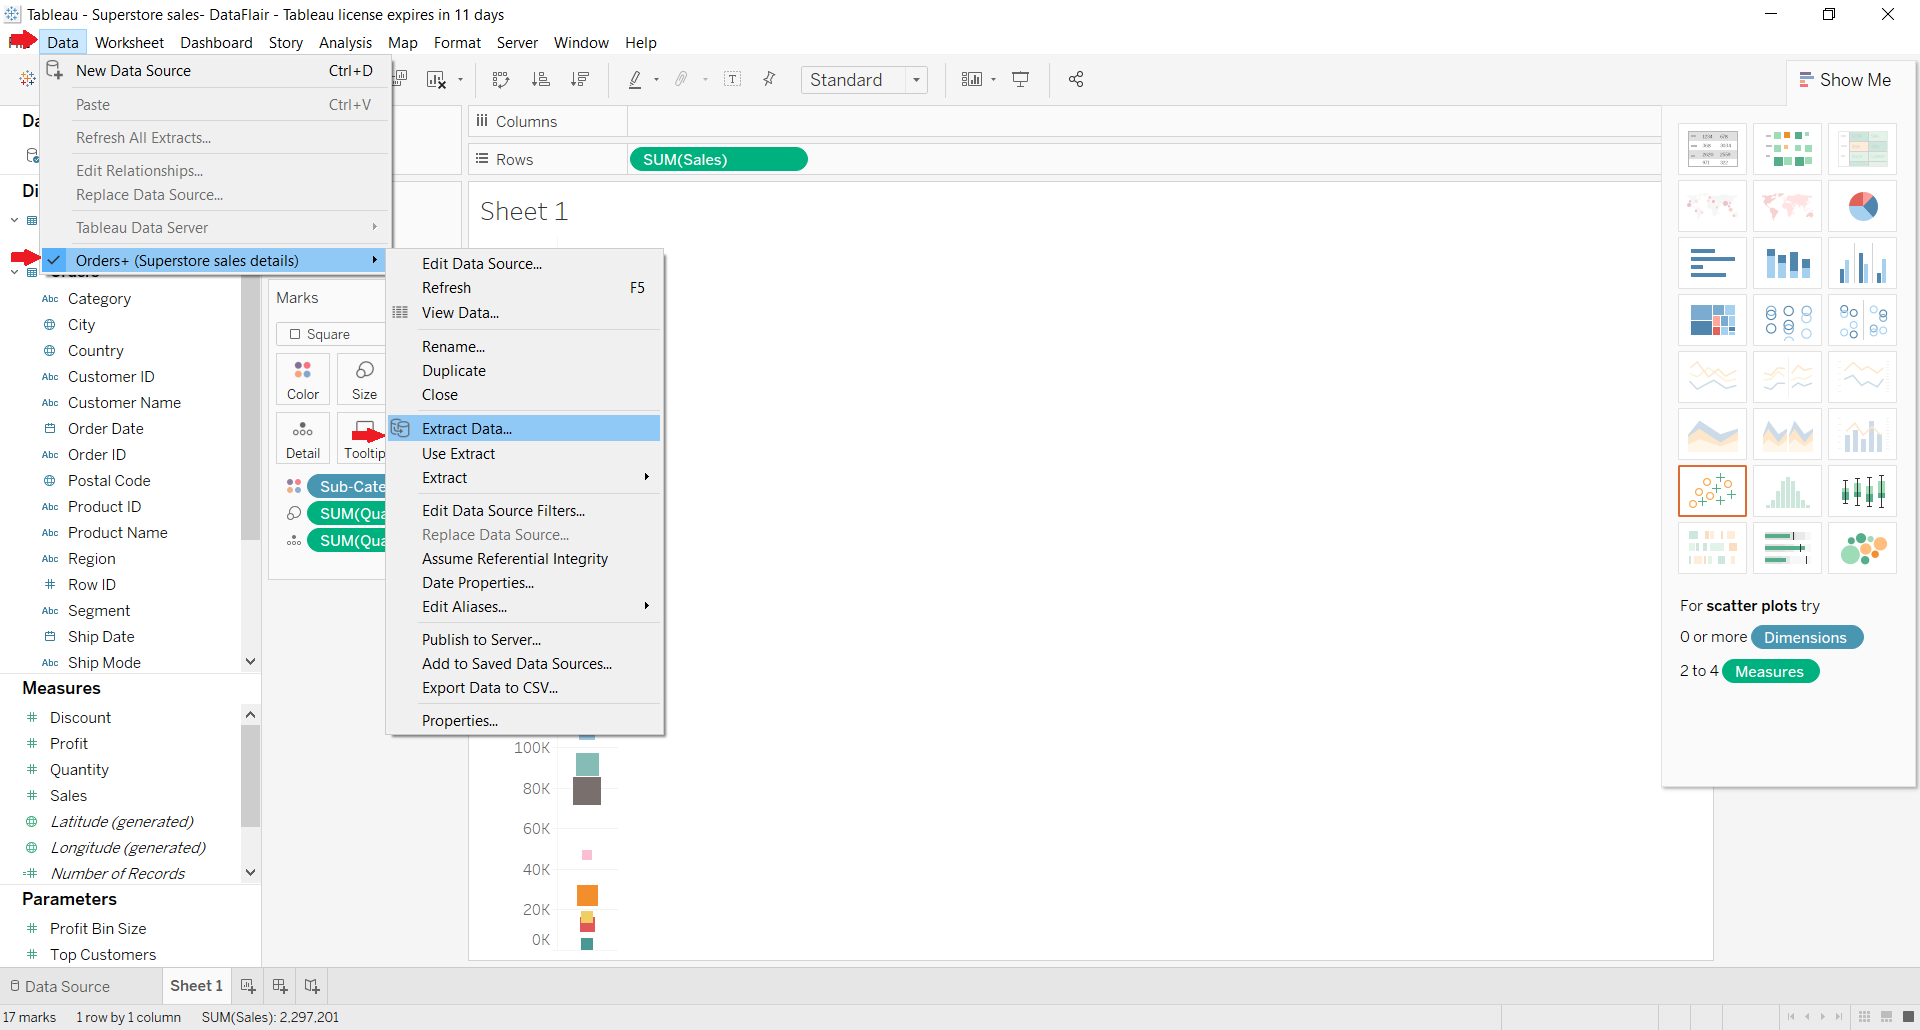
- Another way is to simply right-click on the active data source present in the Data pane and select Extract Data.
Step 9:
From the Use Extract option, you can use the data extract fields and values into Tableau’s visualizations. An example of this is shown in the screenshot below.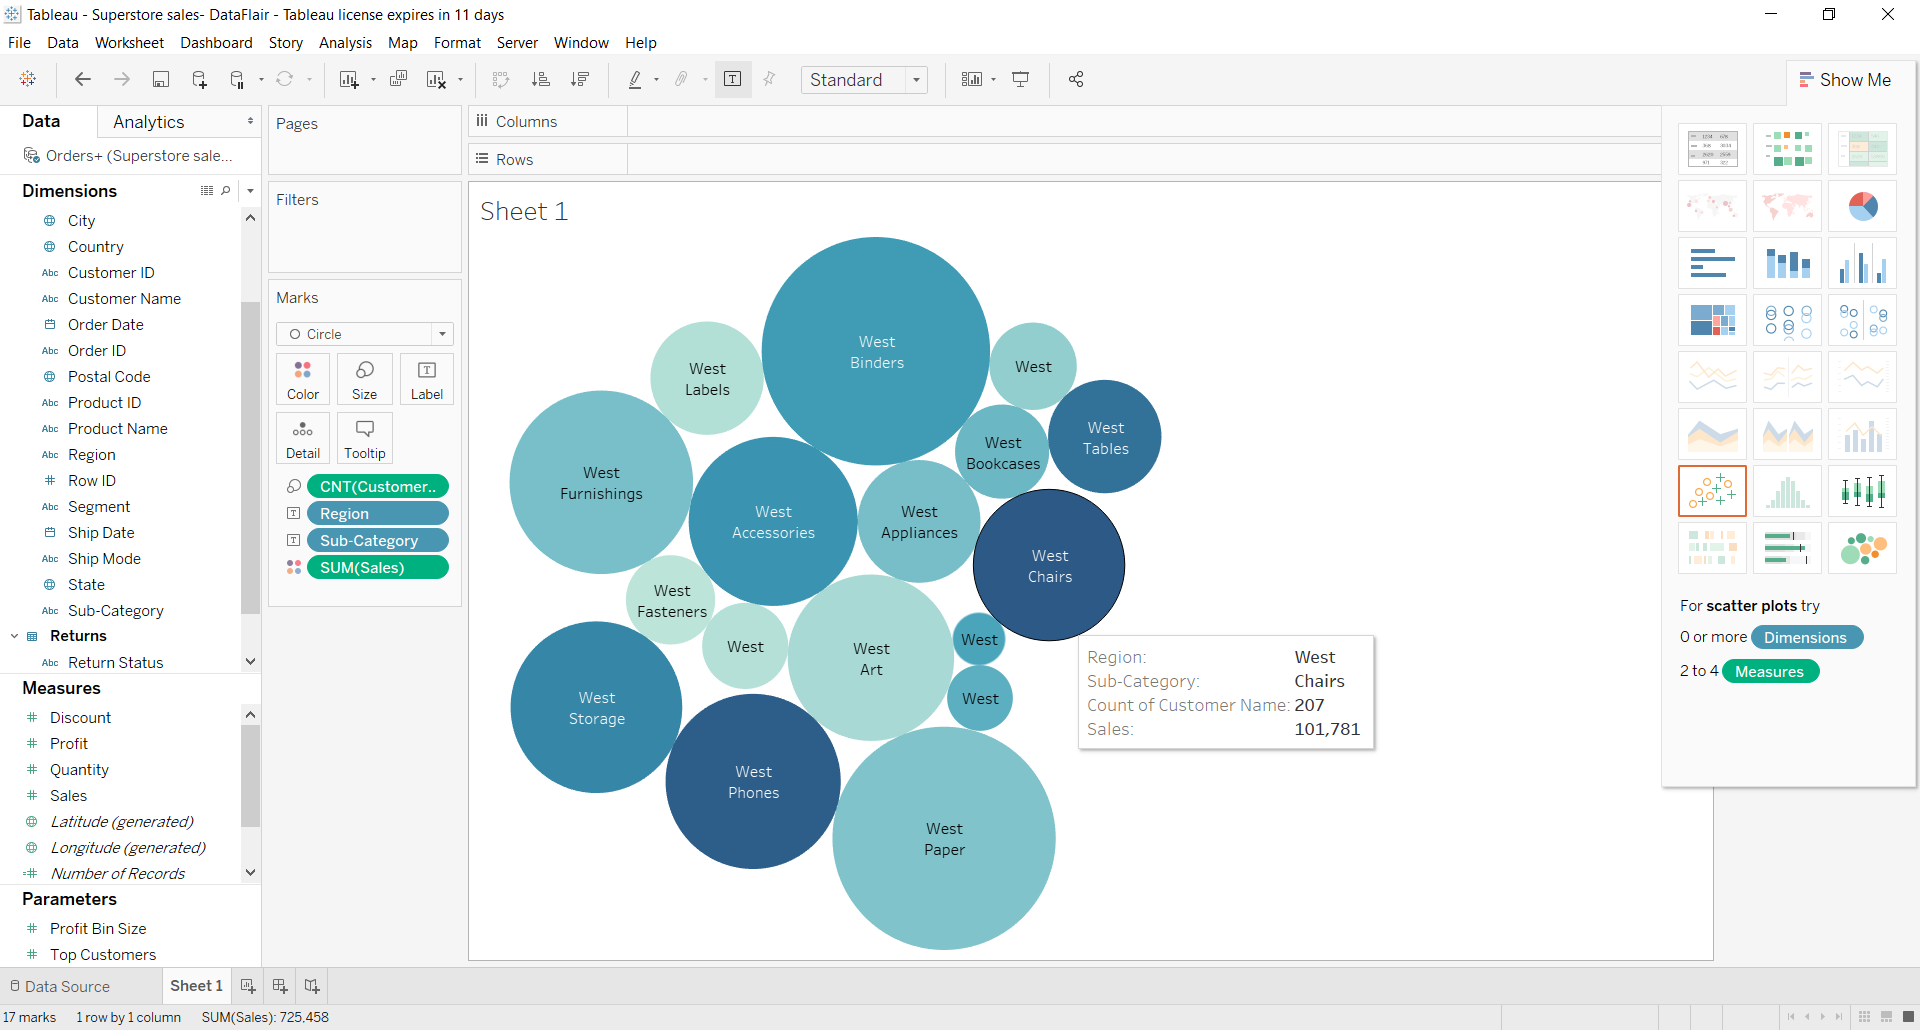
Summary
Thus, in this tutorial, we learned about the significance and use of Tableau data extracts. Data extracts are subsets of data that come in handy at many times while working in Tableau. We also learned about creating Tableau data extracts and using them in different scenarios.