


Placement-ready Courses: Enroll Now, Thank us Later!
In this tutorial, we are going to learn about the gateway used in Power BI. We will start by learning the major concepts of the gateway. Then move on to understanding the types of gateway, its architecture, use, and installation process.
What is Power BI Gateway?
Power BI Gateway is a software that is required to access data situated in an on-premises network. Gateway act as a gatekeeper for the on-premises data source. If anyone needs to access on-premises data from a cloud or web-based app, the request goes through the gateway. All the connection requests are attended by the gateway and access is granted based on their authentication and requirements.
Gateways do not transfer data from the on-premises source to the client platform. But it connects that platform directly to the on-premises data source. The client can directly access data from its on-premises location to use it for making reports, dashboards and data analysis. Gateway is used to facilitate connections between a single data source or multiple data source to the on-premises data source.
Wait a minute! Do you know – How to Create Power BI Dashboard
Types of Power BI Gateway
You can select from two available types of gateways:
- Standard Mode
- Personal Mode
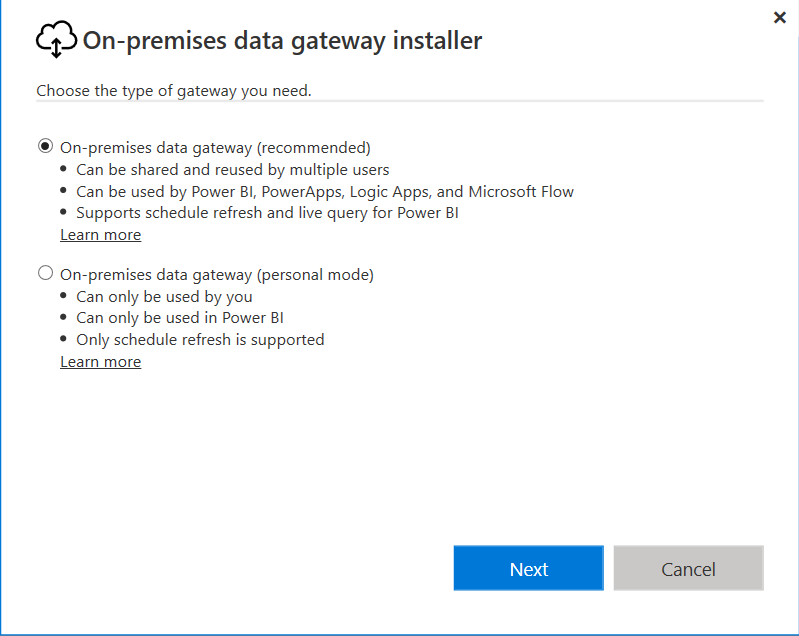
On-premises Data Gateway (recommended/standard):
This version of the on-premises data gateway allows connection with multiple on-premises data sources for more than one user. You can use the data in Power BI, Azure Analysis Services, Azure Logic Apps, Microsoft Flow, PowerApps, etc. You can establish direct connections to multiple data sources just by once installing this type of data gateway. This data gateway is recommended for complex scenarios where multiple users need to access multiple data sources.
On-premises Data Gateway (personal mode):
The personal mode of on-premises data gateway is used by only one user to connect to different data sources. It is recommended when only one person needs to access the data sources. To create reports and dashboards using Power BI, the user cannot share its access privilege with other users.
Power BI Gateway Architecture – Working
Power BI gateway functions act as a mediator between cloud services and On-premises data sources. On-premises data gateways run as a Windows service. This Windows service gets registered with the Gateway Cloud Service through Azure Service Bus.
Understand the architecture and working of data gateways with the help of the diagram and points given below:
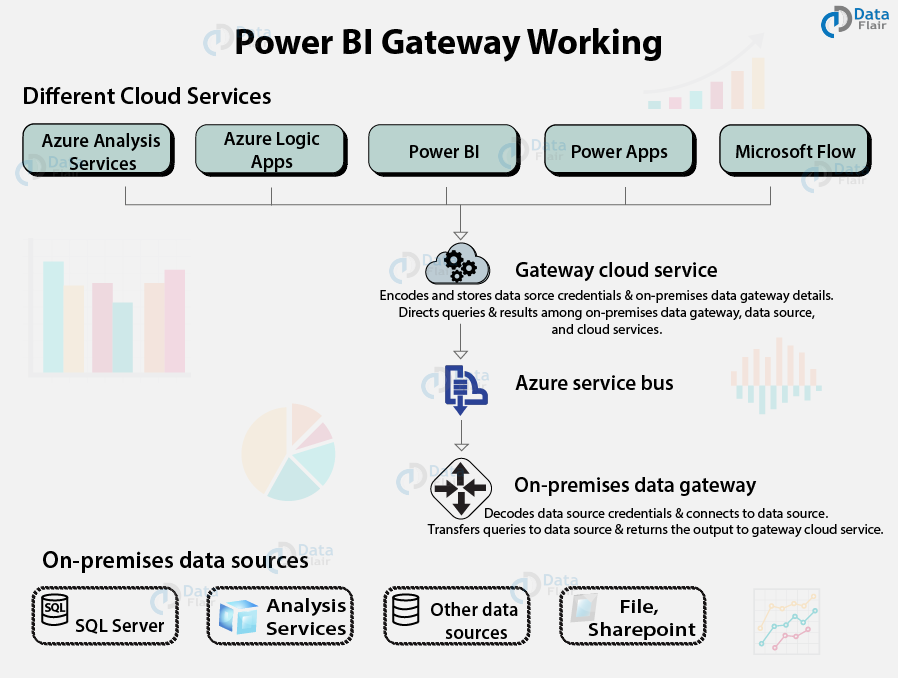
Mainly, the architecture is divided into three sections:
- Cloud Services
- Gateway Services
- On-premises Data Sources
- A cloud service, say Power BI, creates a query which requires data from an on-premises data source.
- This query from cloud services goes to Gateway Cloud Service with encrypted credentials.
- The Gateway Cloud Services processes and analyses the request and forwards it to the Azure Service Bus. You don’t need to configure Azure Service Bus separately as it is managed by Power BI by default.
- The Azure Service Bus keeps all the requests to be sent forward to the On-premises data gateway. The On-premises data gateway decrypts the credentials for the data source and connects the user to the data source.
- Also, the On-premises data gateway forwards the query sent from Cloud Services to the On-premises data source.
- The data query is executed at the data source which can be SQL Server, files, SharePoint, SSAS, etc.
- Result of the query is returned to On-premises data gateway by the data source. The On-premises data gateway sends the result back to the cloud service via Azure Service Bus.
How to Use Gateway in Power BI
You will be ready to use the data gateway in Power BI by following the four steps given below:
- Install a gateway in your system.
- Add users to the gateway who need to access data from On-premises data sources.
- Connect to on-premises data sources. This step is important because this is how users can use data from On-premises data sources for data analysis and report generation.
- Refresh on-premises data to keep the data in reports and dashboards up to date.
How to Install Power BI Gateway
You can install the gateway application on any server on a local domain.
Prerequisites
Make sure your system possesses the specifications given below that are necessary requirements to install a data gateway for Power BI:
- .NET 4.5 Framework
- Windows 7 (64-bit version)/ Windows Server 2008 R2 or later
- 8 core CPU
- 8 GB memory
- Windows 2012 R2 (64-bit)
The Process to Install Power BI Gateway
Follow the steps given below to install data gateway for Power BI in your system.
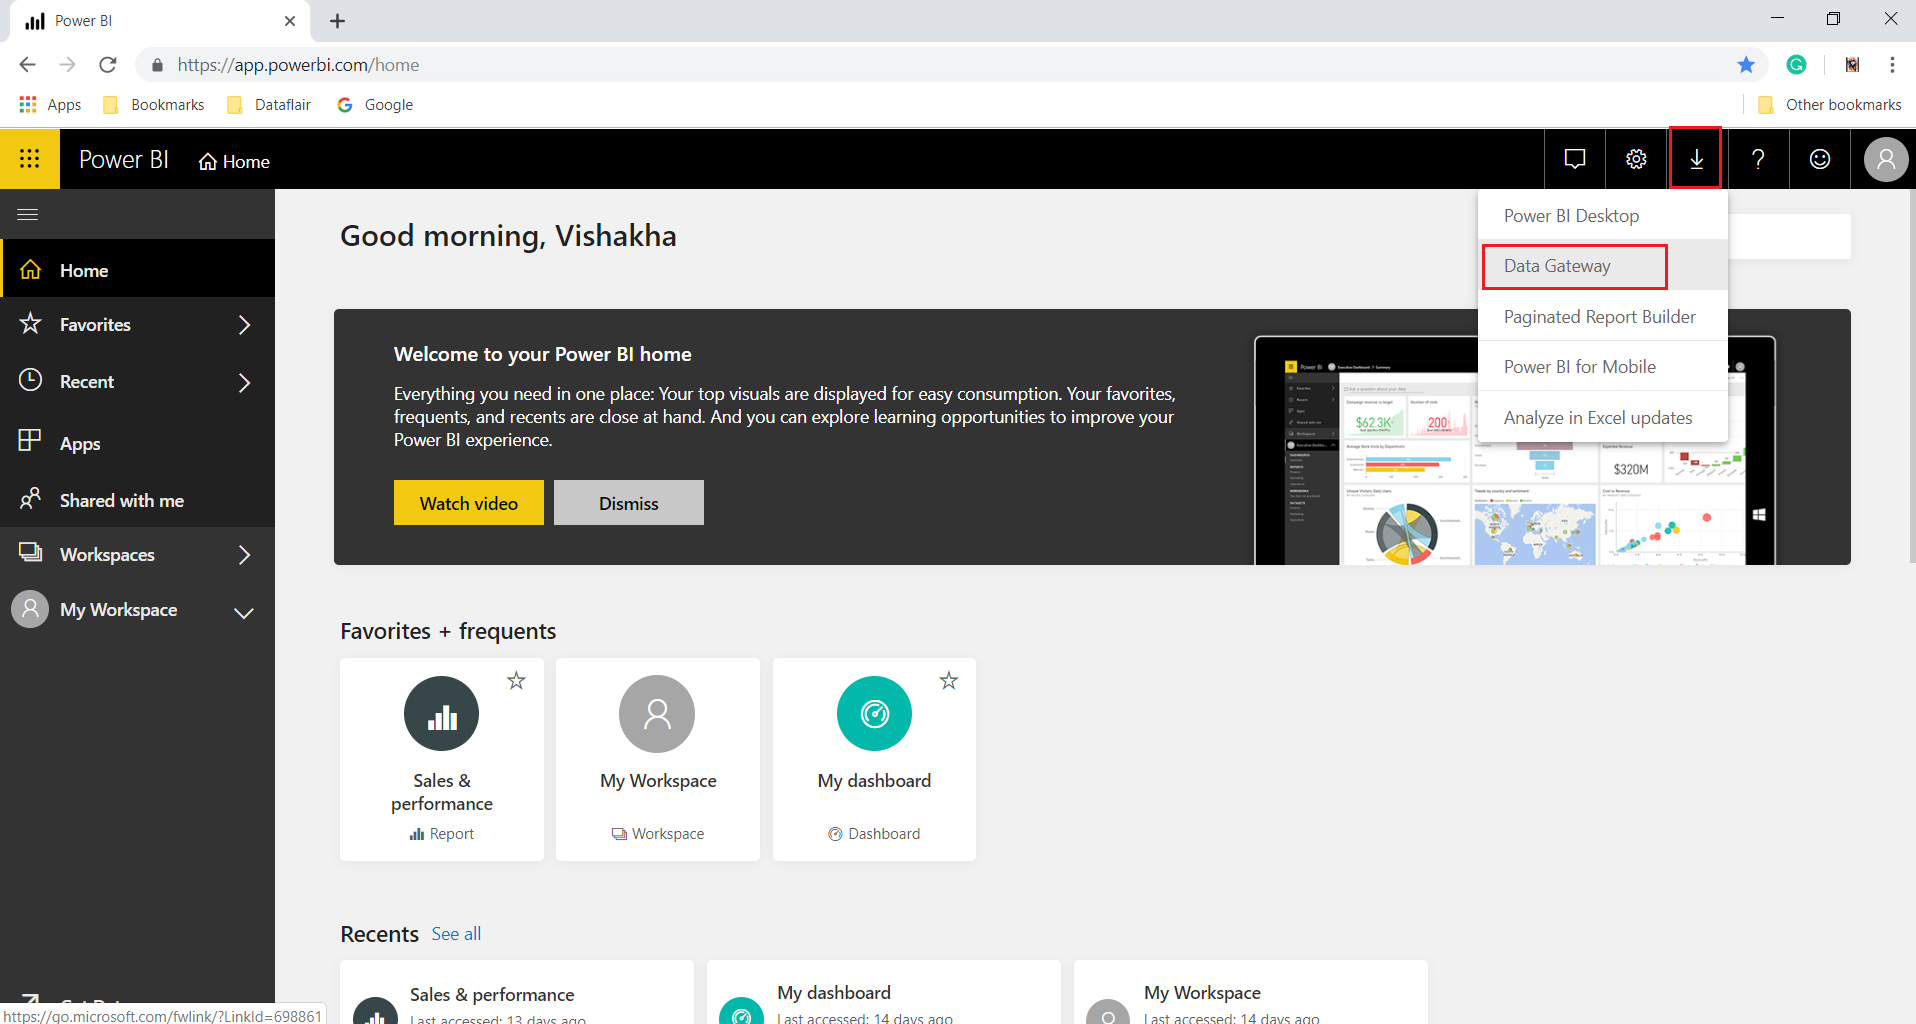
Step 1: Go to your Power BI workspace and click on the download arrow. Click on Data Gateway option.
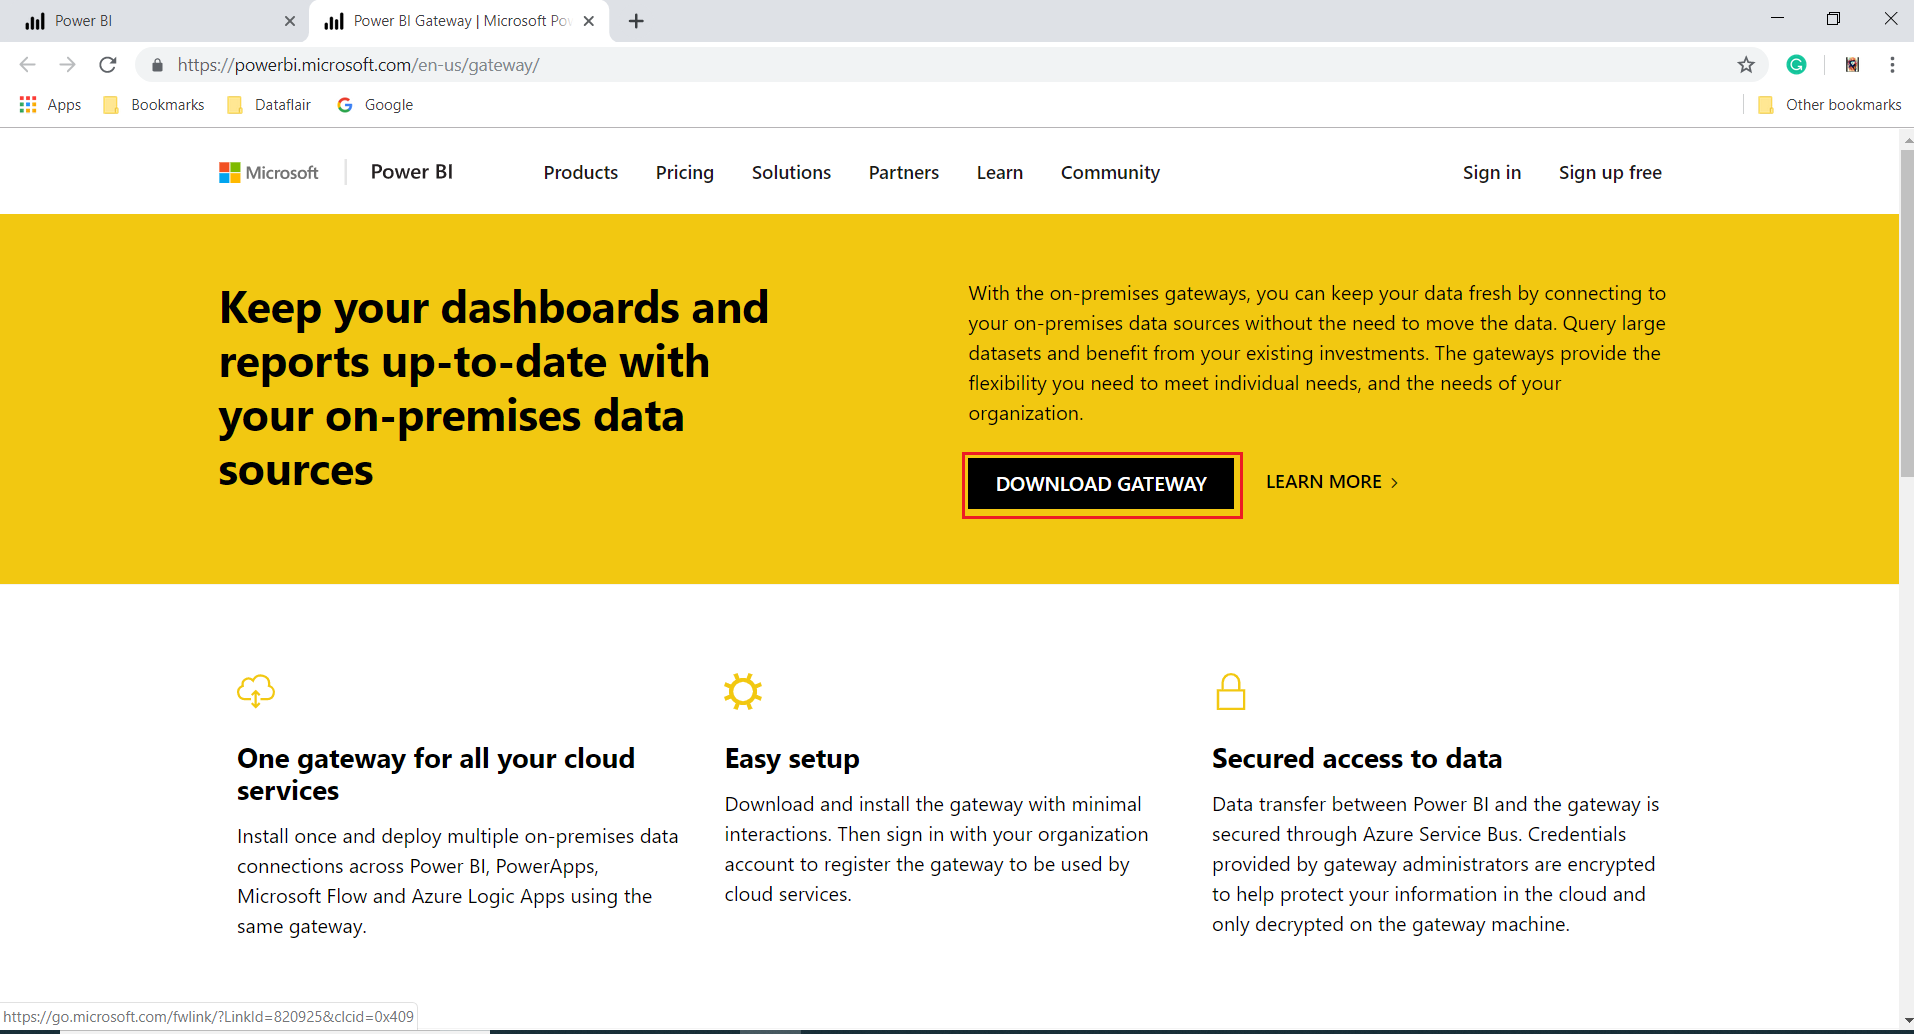
Step 2: A download page for data gateway will open. Click on DOWNLOAD GATEWAY option.
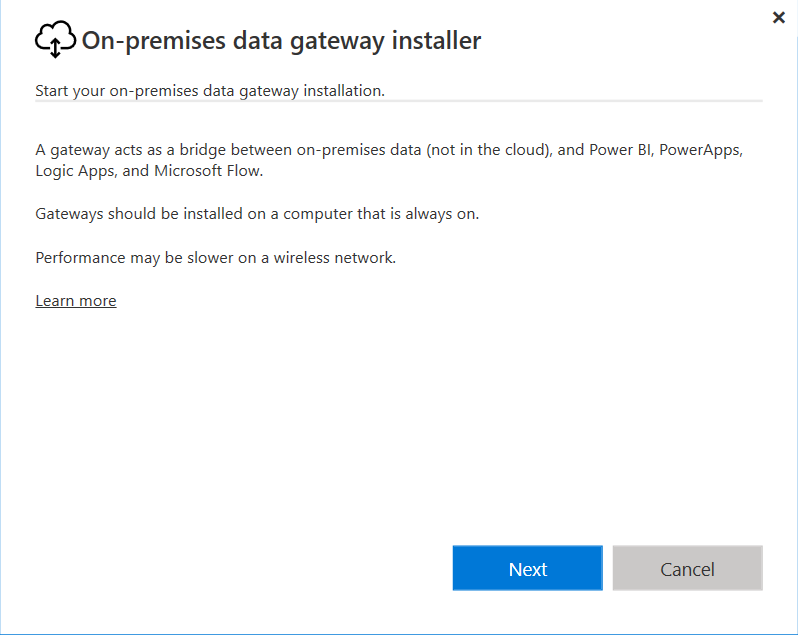
Step 3: The installation wizard opens. Click on Next.
Step 4: Select a gateway type then click on Next.
Step 5: You can either keep the default installation path or enter a new one. Check the terms and conditions box then click on Install.

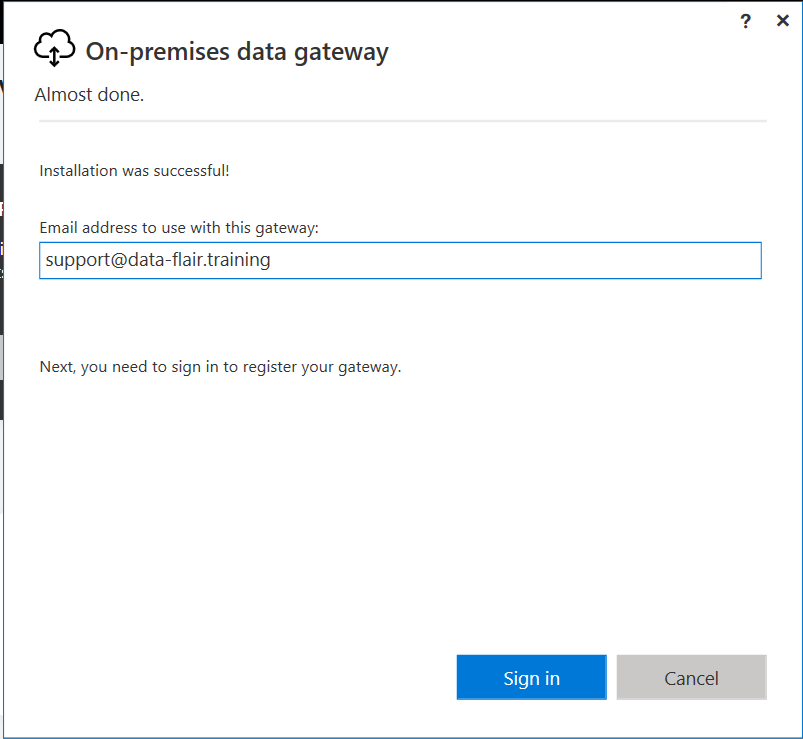
Step 6: Enter the email address of your Power BI account. Click on Sign In.
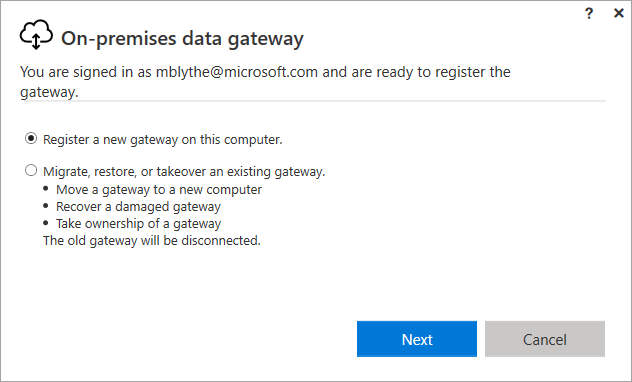
Step 7: In this step, select Register a new gateway on this computer. Then click on Next.
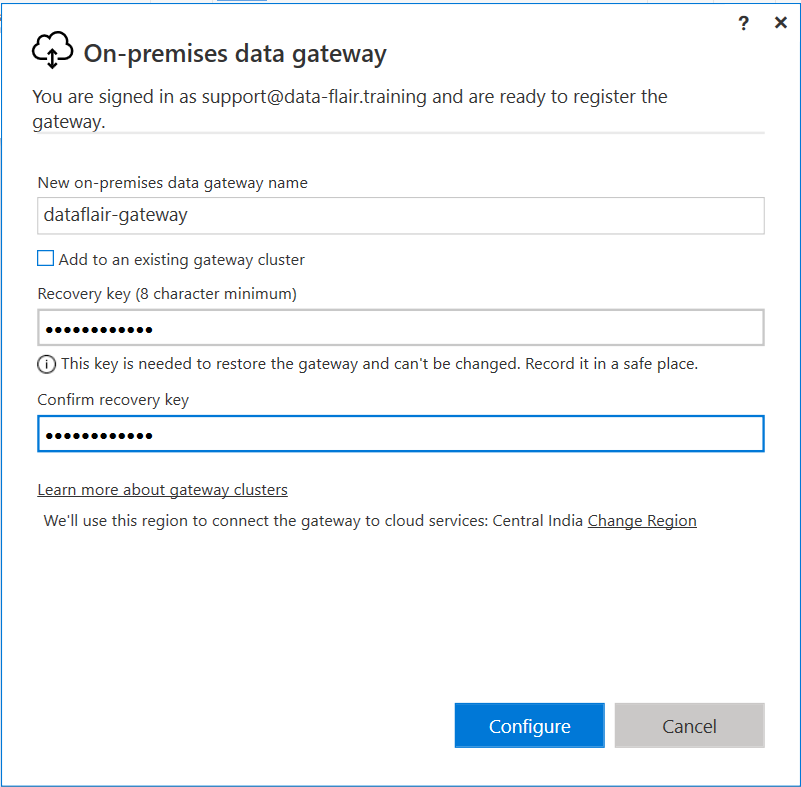
Step 8: Enter a name for the gateway and create a recovery key. Click on Configure.
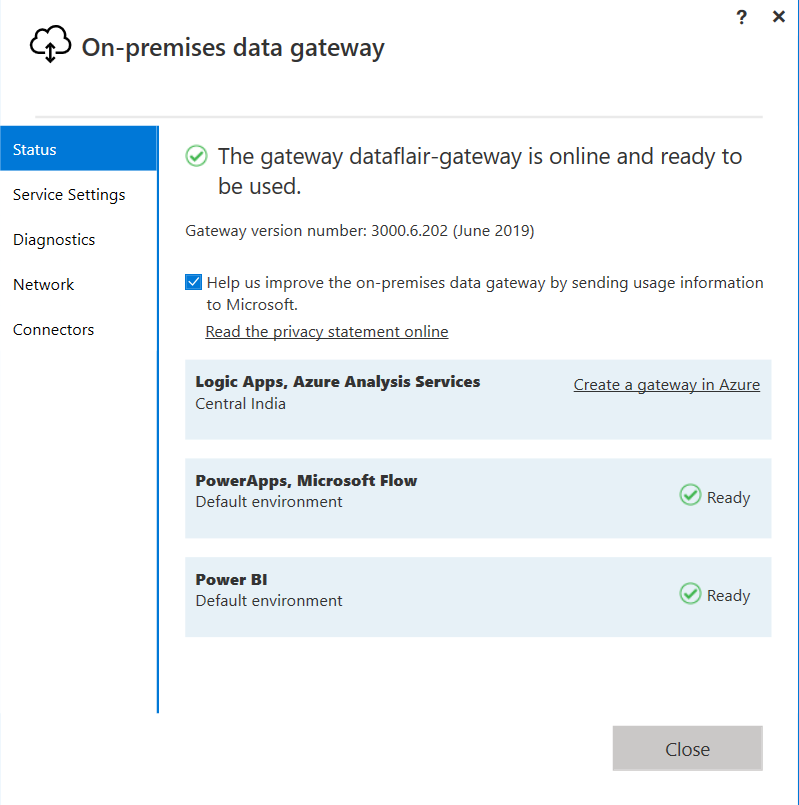
Step 9: The next window will show the confirmation status of installation along with other information such as the services to use this gateway with.
Adding a Data Source for Gateway
In the previous section, we learned about how to install or create a new gateway for Power BI. Moving on, we will see how to add a data source for that gateway. We need to add an On-premises data source. We will connect to this data source from a cloud-based service via the gateway. Power BI Workspace is our cloud-based service.
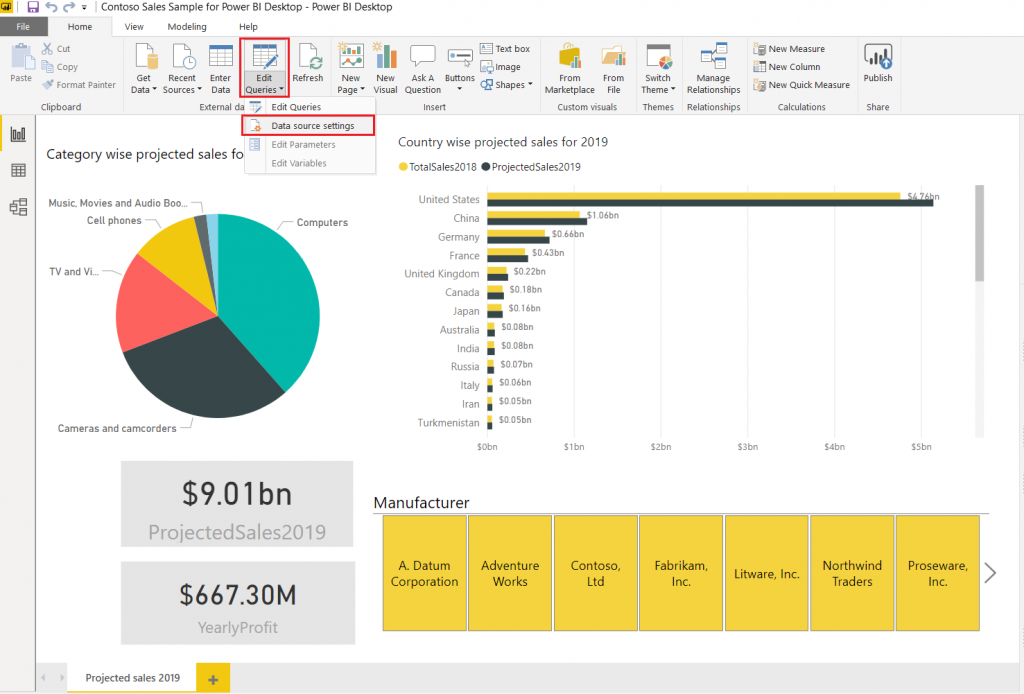
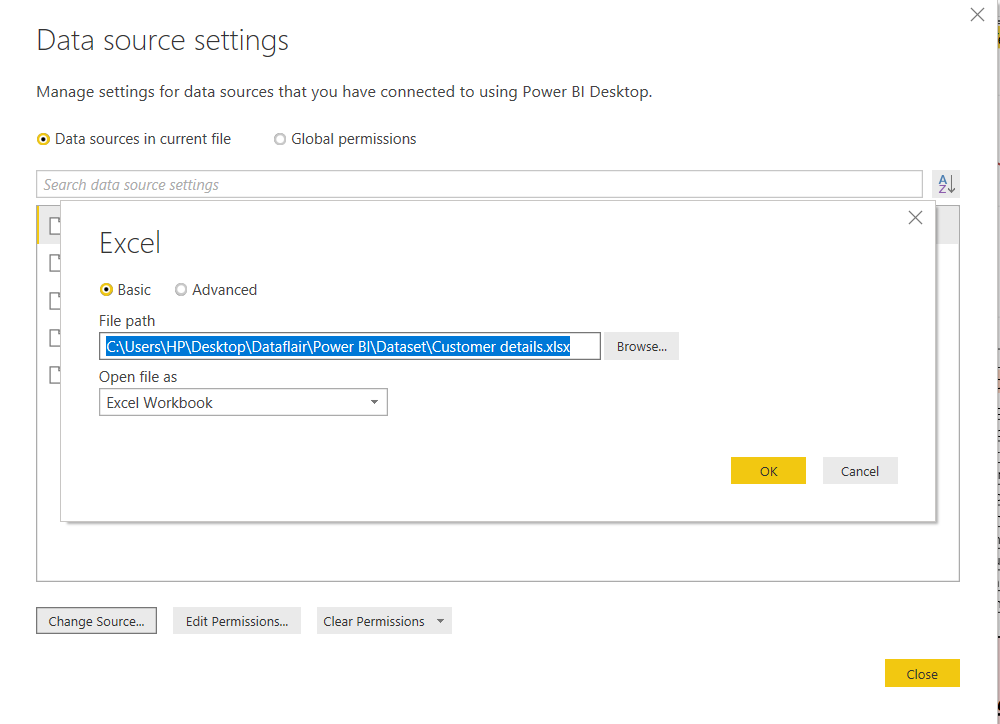
- To begin adding a data source, open a .pbix that is a Power BI file residing in your system. Once the Power BI file opens in Power BI Desktop, go to Edit Queries option in the Home tab. Then select Data source settings option.

This will open all the paths of all the data sources being used in that Power BI file. Select a data source that you want to add as a gateway data source. Then click on Change Source.. option.
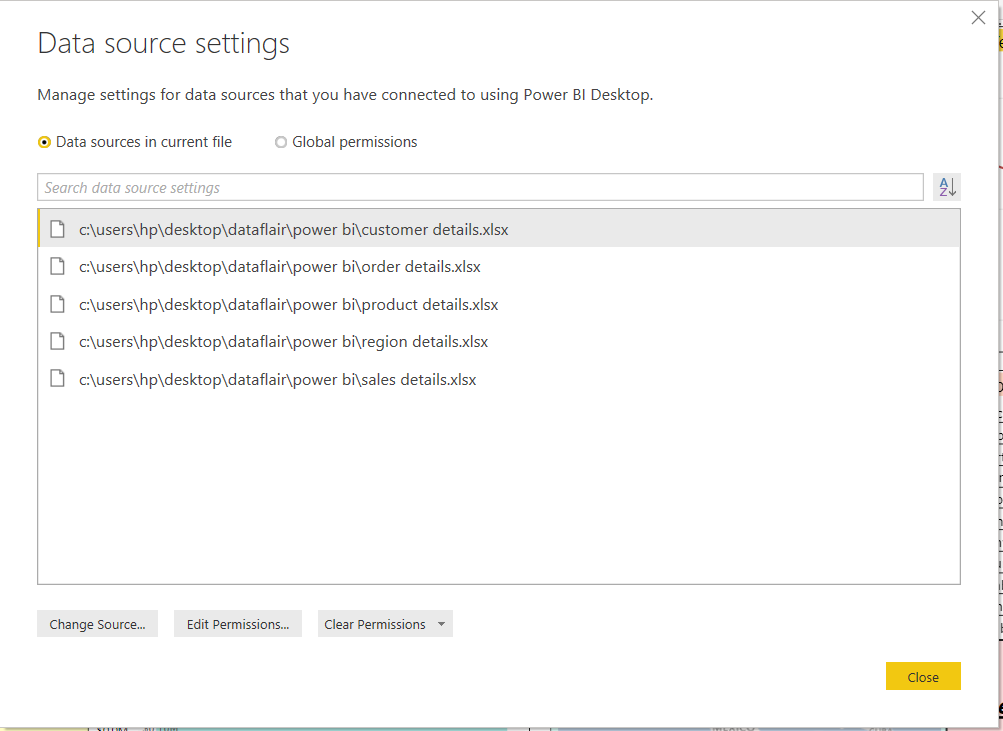
- A small dialog box will open where you will find the complete file path. Copy the file path from here.
- Open Power BI Service/Workspace on the web. Now, we will add the data source under a gateway so that we can access that data source on Power BI Service which is hosted on the web.
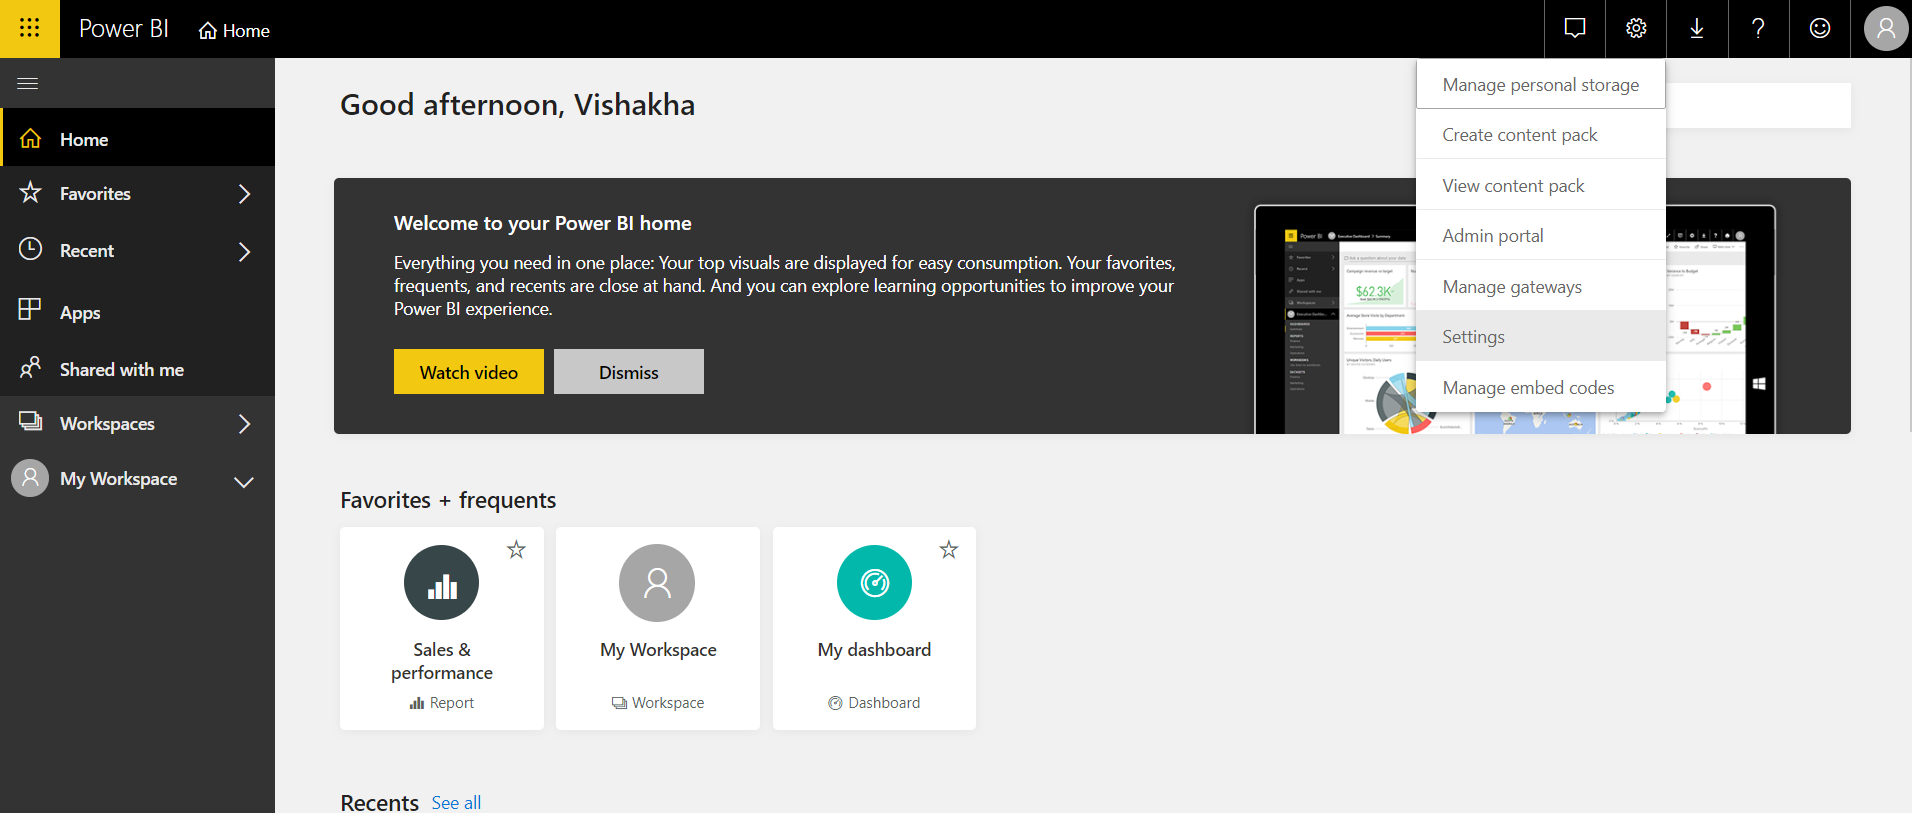
- Click on the settings icon and select Manage gateways.

- After this, click on a gateway name that you want to add a data source to. Then select ADD DATA SOURCE option. Paste the file path that you copied if your data source is an Excel file or some other similar file type. Fill in other options related to your data source and click on ADD.
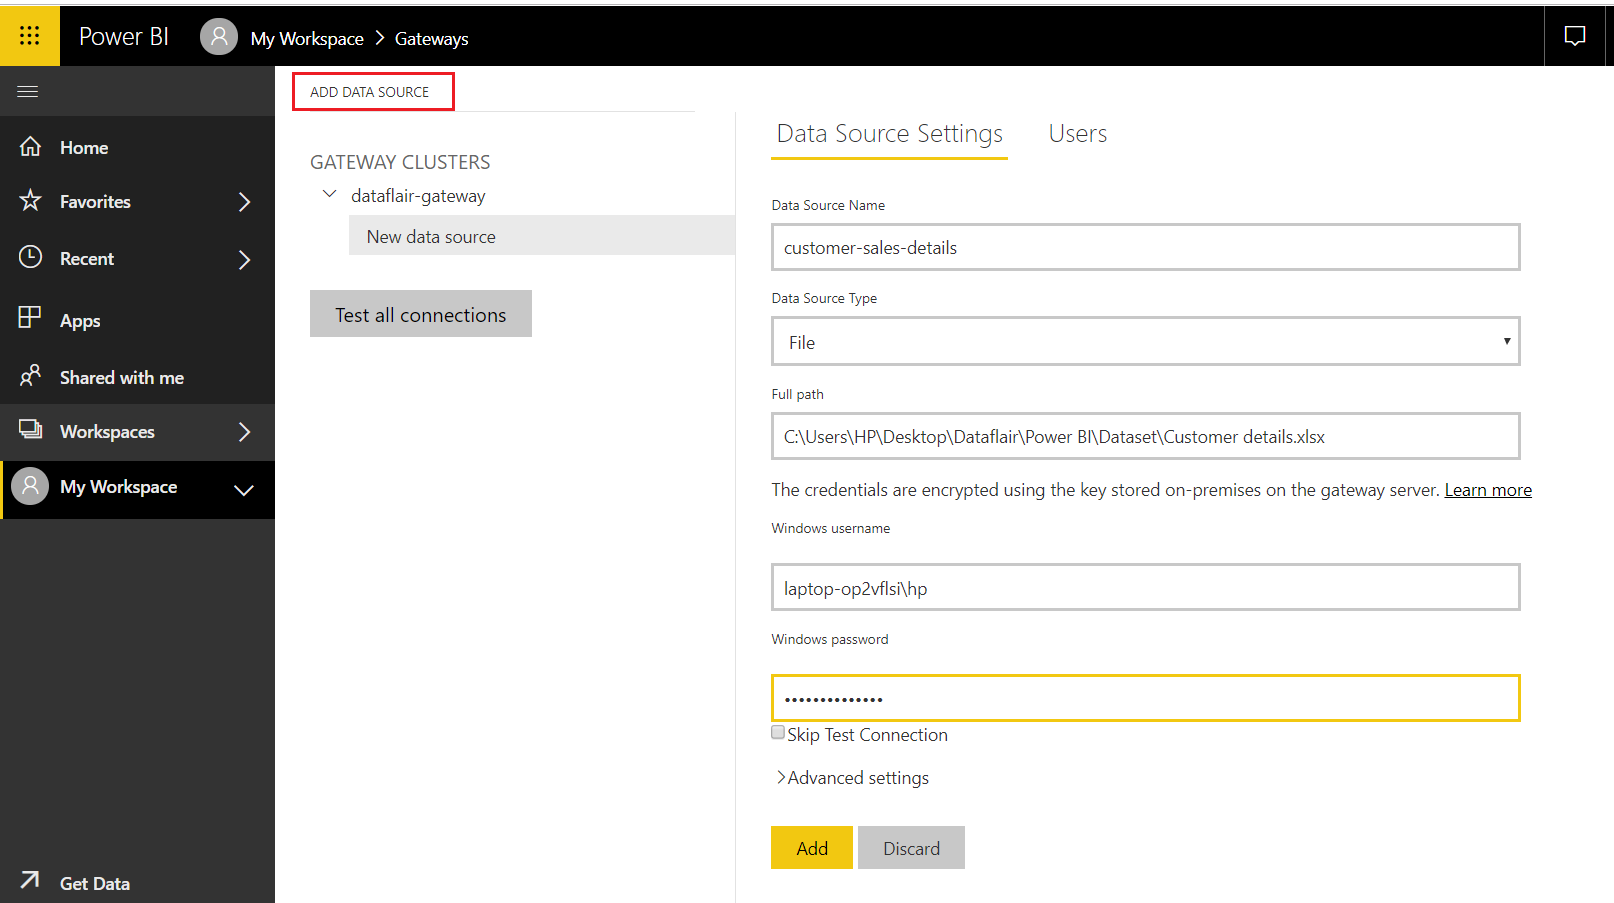
- If you have entered all the credentials correctly, you will get a confirmation message saying “Connection Successful”.
You can’t afford to miss the Power BI Data Sources Tutorial
Gateway Connection Set up to a Dataset
The next step after adding a data source to a gateway is establishing a connection. This connection will help a Power BI user to use datasets from the On-premises data source. The data source that you have added must be on your local device. Then only you can access it from Power BI Service.
- To set up a connection, open the Power BI Service/Workspace, go to Settings and click on the Settings option from the list.
- Click on Datasets tab and select a dataset from the list of available datasets given on the left. Next, click on the Gateway connection.

- If you have already added all the data sources to the gateway, select Use a data gateway. Then select your gateway and click on Apply. In this way, you will configure the dataset with your preferred gateway.
Troubleshooting of Power BI Gateway
There are some general issues that users usually face while creating gateway connections and doing other gateway related activities:
- If you are having issues related to a personal gateway, then refer to the link given below:
Troubleshoot Personal Gateway Issues
- If you are having issues related to an on-premises gateway, then refer to the link given below:
Troubleshoot On-premises Gateway Issues
- If you can’t find a gateway in your dataset setting, that might be due to not adding all the required data sources to your gateway. To fix this, you must first add all the data sources required to make a dataset and then configure the gateway with the dataset.
- If you are having issues related to the gateway, you can access the gateway logs from an on-premise data gateway. For this, you have to enable additional logging system for the gateways in Power BI.
This concludes our tutorial on Power BI Gateway. We hope you found the explanation helpful. Drop your suggestions and queries in the comment box below. We will be happy to help.
Now, it’s time to jump to the next tutorial – Filters in Power BI