

1. Install Hadoop on CentOS: Objective
This is steps by steps tutorial to install Hadoop on CentOS, configure and run Hadoop cluster on CentOS. This guide explains how to step by step install Hadoop on CentOS or we can say, deploy a single node cluster on CentOS, single node Hadoop cluster setup is also called as pseudo-distributed mode installation. Once the Cloudera installation is done you can play with Hadoop and its components like MapReduce for data processing and HDFS for data storage.
Learn how to install Cloudera Hadoop CDH5 on CentOS.
2. Steps to Install Cloudera Hadoop on CentOS
Follow the steps given below to install Hadoop on CentOS-
2.1. Install Java
Go to your home directory and download the Java using the below commands:
[php]cd ~
cd /home/saurabhpandey/Downloads
tar xzf jdk-8u101-linux-x64.tar.gz
mv /home/saurabhpandey/Downloads/jdk1.8.0_101 /home/saurabhpandey[/php]
I. Install Java with Alternatives
In order to install Java we will use alternatives command which is available in chkconfig package.
[php]cd ~
cd jdk1.8.0_101/
sudo alternatives –install /usr/bin/java java /home/saurabhpandey/jdk1.8.0_101/bin/java 2
[sudo] password for saurabhpandey:
sudo alternatives –config java
[sudo] password for saurabhpandey:[/php]
There are 3 programs which provide ‘java’.
Selection    Command
-----------------------------------------------
*+ 1       /usr/lib/jvm/java-1.8.0-openjdk-1.8.0.71-2.b15.el7_2.x86_64/jre/bin/java
2          /usr/lib/jvm/java-1.7.0-openjdk-1.7.0.95-2.6.4.0.el7_2.x86_64/jre/bin/java
3          /home/saurabhpandey/jdk1.8.0_101/bin/java
Type selection number: 3, Hence Java 8 gets successfully installed on your system.

Install Java alternatives to Install Hadoop on CentOS
II. Configuring Environment Variables
In order to configure Java environment variables we need to use the following commands:
a. Setup JAVA_HOME Variable
[php]export JAVA_HOME=/home/saurabhpandey/Downloads/jdk1.8.0_101[/php]
b. Setup JRE_HOME Variable
[php]export JRE_HOME=/home/saurabhpandey/Downloads/jdk1.8.0_101/jre[/php]
c. Setup PATH Variable
[php]export PATH=$PATH:/home/saurabhpandey/Downloads/jdk1.8.0_101/bin:/home/saurabhpandey/Downloads/jdk1.8.0_101/jre/bin[/php]
2.2. Install Hadoop on CentOS
I. Configure Password Less SSH
In order to set up key based ssh, we need to execute following commands:
[php]ssh-keygen -t rsa[/php]
Generating public/private rsa key pair.
Enter file in which to save the key (/home/hadoop/.ssh/id_rsa): “Press Enter”
Created directory '/home/hadoop/.ssh'.
Enter passphrase (empty for no passphrase):  “Press Enter”
Enter same passphrase again: “Press Enter”
[php]cat ~/.ssh/id_rsa.pub >> ~/.ssh/authorized_keys
chmod 0600 ~/.ssh/authorized_keys[/php]
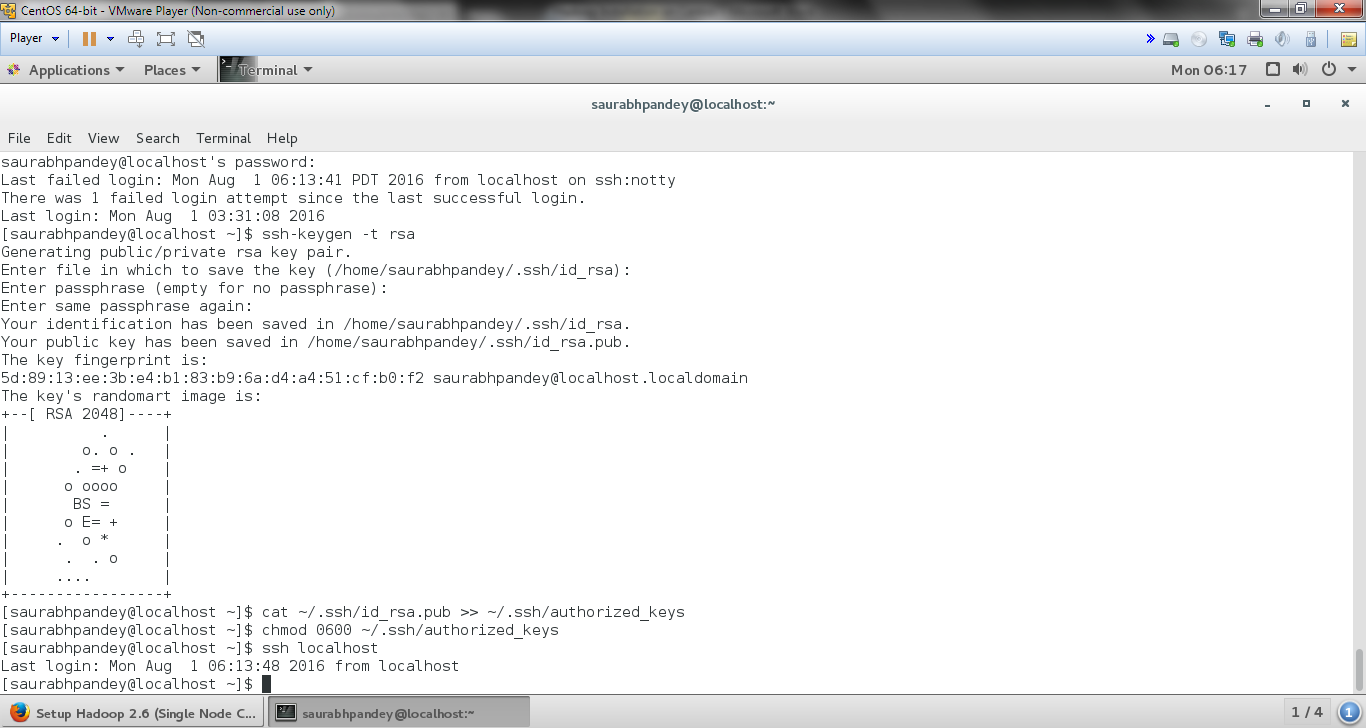
Install Hadoop on CentOS to Configure Password Less SSH
In order to verify key based login, we need to execute below command. But, it should not ask for a password.
[php]ssh localhost[/php]
II. Download Hadoop
http://archive.cloudera.com/cdh5/cdh/5/hadoop-2.6.0-cdh5.5.0.tar.gz
Now copy Hadoop to Home directory of your system once it gets downloaded.
III. Untar Hadoop File
All the contents of compressed Hadoop file package can be extracted using the below command:
[php]tar xzf hadoop-2.6.0-cdh5.5.0.tar.gz[/php]
IV. Setup Configuration Files
a. Edit .bashrc
Now makes changes in environment file “.bashrc” present in your system home directory. We can make changes in this file by executing: “$ nano -/.bashrc” command and there we need to insert following parameters at the end:
[php]export HADOOP_HOME=/home/saurabhpandey/hadoop-2.6.0-cdh5.5.0
export HADOOP_INSTALL=$HADOOP_HOME
export HADOOP_MAPRED_HOME=$HADOOP_HOME
export HADOOP_COMMON_HOME=$HADOOP_HOME
export HADOOP_HDFS_HOME=$HADOOP_HOME
export YARN_HOME=$HADOOP_HOME
export HADOOP_COMMON_LIB_NATIVE_DIR=$HADOOP_HOME/lib/native
export PATH=$PATH:$HADOOP_HOME/sbin:$HADOOP_HOME/bin[/php]
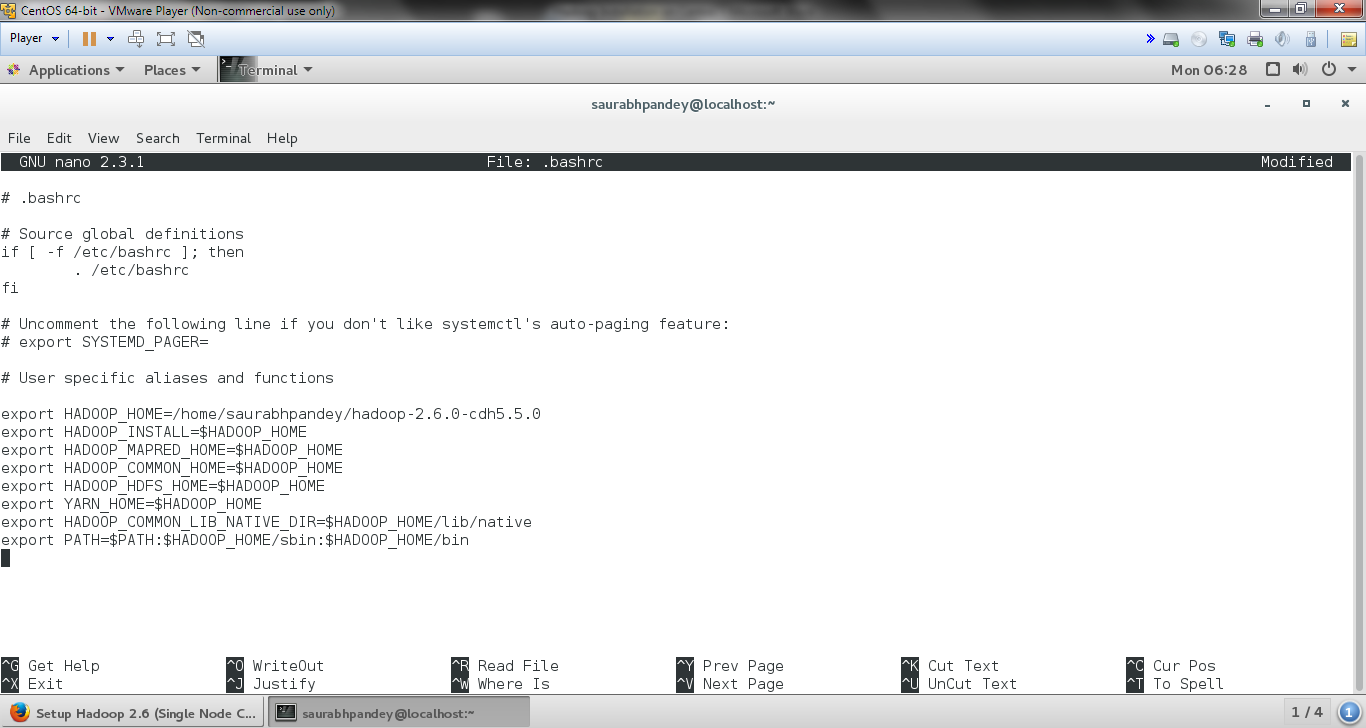
Setup configuration files to Install Hadoop on CentOS
Note: Don’t forget to take care of entering the correct path. “/home/saurabhpandey/hadoop-2.6.0-cdh5.5.0” this is the path of my home directory. You can get your path by using “$pwd” command.
After adding above parameters save this file. Press “Ctrl+X” on your keyboard.
In order to make environment variables effective we need to execute below command:
[php]source .bashrc[/php]
b. Edit hadoop-env.sh
Now makes changes in Hadoop configuration file “hadoop-env.sh” which is present in configuration directory (HADOOP_HOME/etc/hadoop) and in that file we need to set JAVA_HOME.
[php]cd hadoop-2.6.0-cdh5.5.0/
cd etc
cd hadoop
nano hadoop-env.sh[/php]
We need to change the path of JAVA_HOME on this file as:
[php]export JAVA_HOME=<path-to-the-root-of-your-Java-installation> (eg: /home/saurabhpandey/Downloads/jdk1.8.0_101/)[/php]
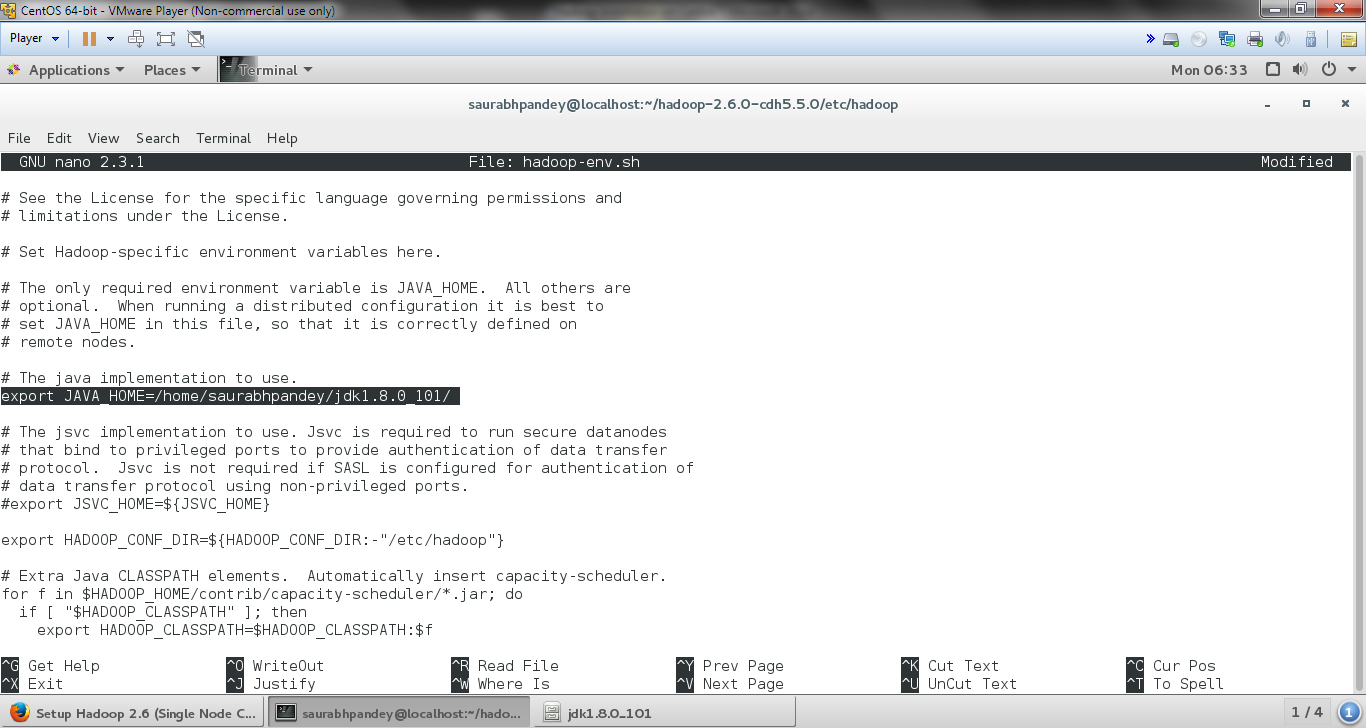
Install Hadoop on CentOS – Edit hadoop-env.sh
After changing the path of JAVA_HOME save this file. Press “Ctrl+X” on your keyboard.
Note: “/home/saurabhpandey/Downloads/jdk1.8.0_101/” is the path of Java on my system. Enter your path where your java file is present.
c. Edit core-site.xml
Now makes changes in Hadoop configuration file “core-site.xml” which is present in configuration directory (HADOOP_HOME/etc/hadoop) by executing the below command:
[php]nano core-site.xml[/php]
And inside it add the following entries between <configuration> </configuration> present at the end of this file:
[php]
<property>
<name>fs.default.name</name>
<value>hdfs://localhost:9000</value>
</property>
[/php]
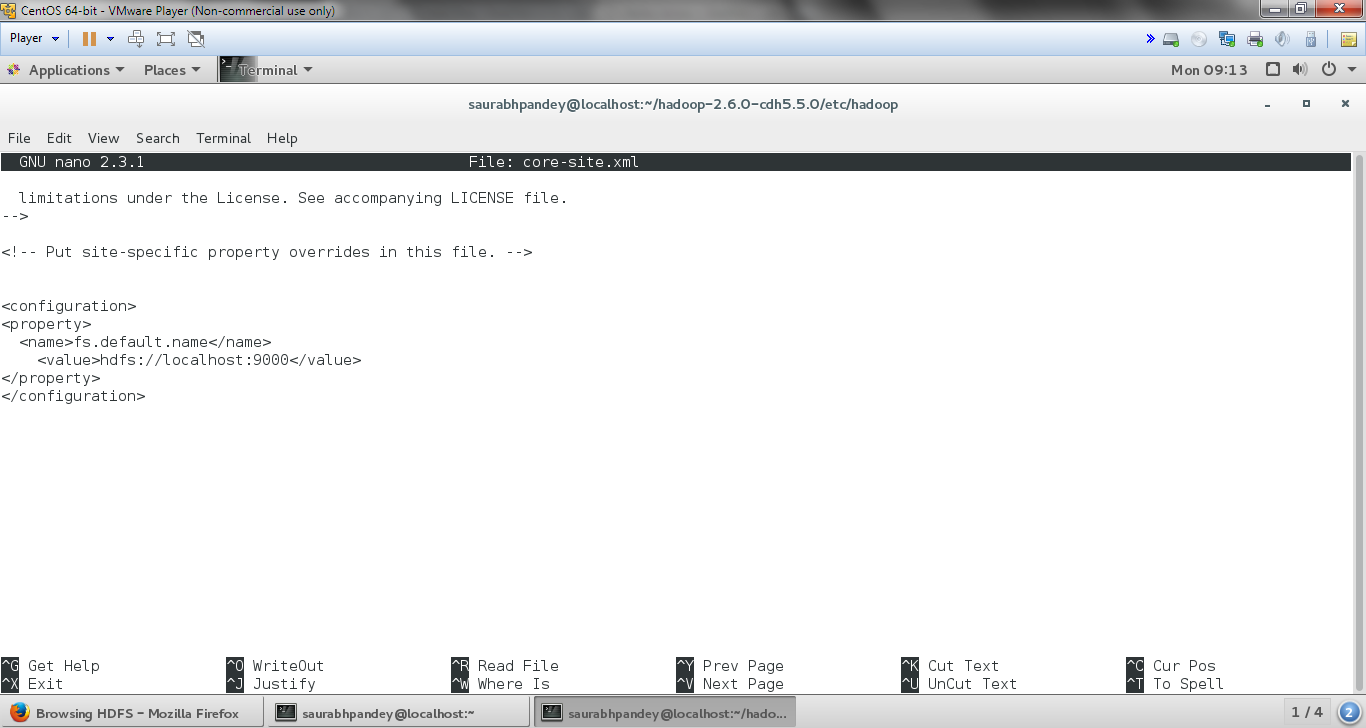
Install Hadoop on CentOS – Edit core-site
After adding above parameters save this file. Press “Ctrl+X” on your keyboard.
e. Edit hdfs-site.xml
Now we need to make changes in Hadoop configuration file hdfs-site.xml (which is located in HADOOP_HOME/etc/hadoop) by executing the below command:
[php]nano hdfs-site.xml[/php]
And inside it add the following entries between <configuration> </configuration> present at the end of this file:
[php]
<property>
<name>dfs.replication</name>
<value>1</value>
</property>[/php]
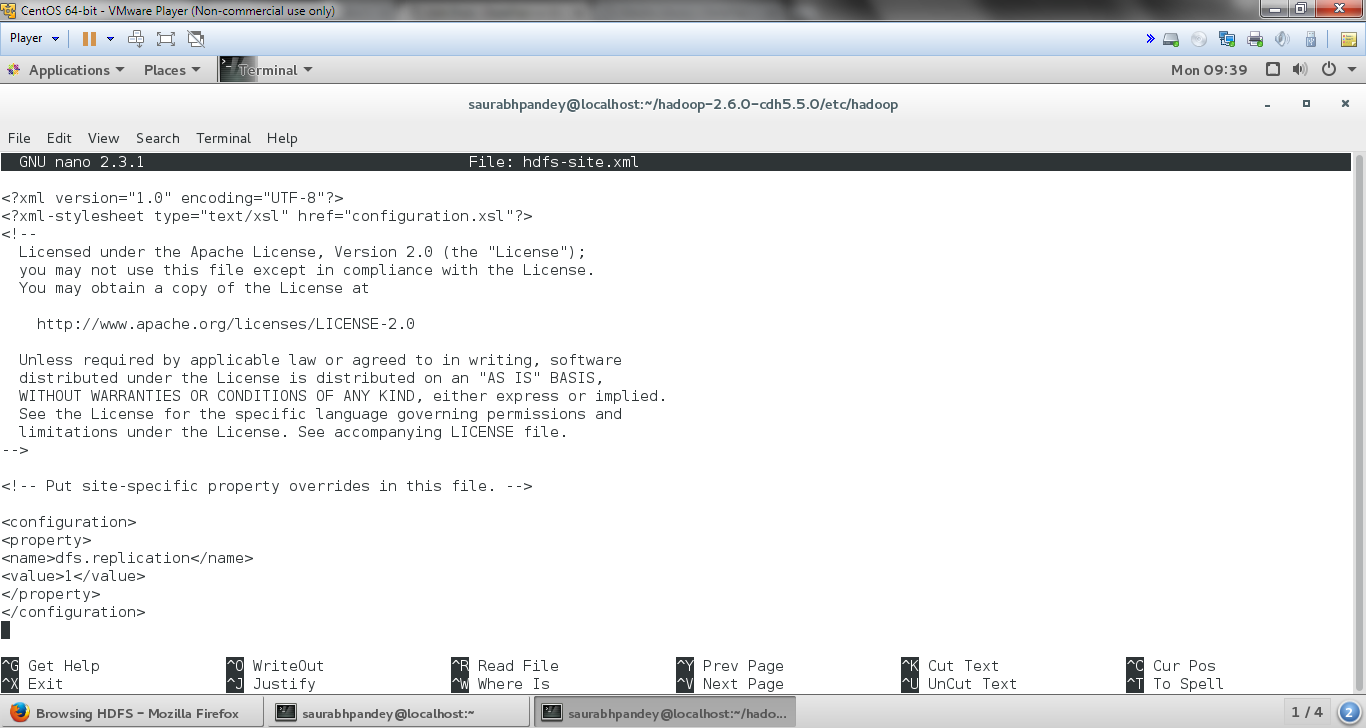
Install Hadoop on CentOS – Edit hdfs-site.xml
Here we are setting Replication factor to 1, as it is a single node cluster.
After adding above parameters save this file. Press “Ctrl+X” on your keyboard.
f. Edit mapred-site.xml
In order to edit mapred-site.xml file we need to first create a copy of file mapred-site.xml.template.
A copy of this file can be created using the following command:
[php]cp mapred-site.xml.template mapred-site.xml[/php]
We will edit the mapred-site.xml file by using the following command:
[php]nano mapred-site.xml[/php]
And inside it add the following entries between <configuration> </configuration> present at the end of this file:
[php]
<property>
<name>mapreduce.framework.name</name>
<value>yarn</value>
</property>[/php]
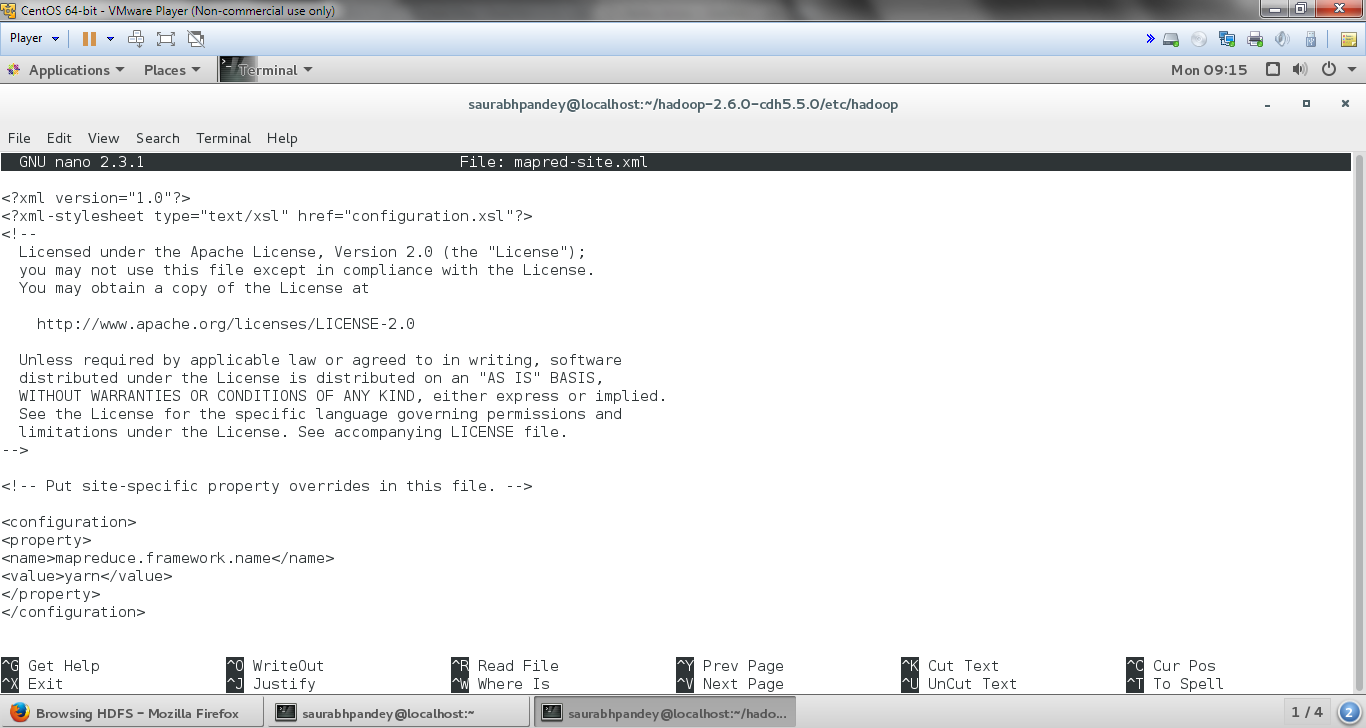
Install Hadoop on Cent OS – Edit mapred-site.xml
After adding above parameters save this file. Press “Ctrl+X” on your keyboard.
g. Edit yarn-site.xml
Now we need to make changes in Hadoop configuration file yarn-site.xml (which is located in HADOOP_HOME/etc/hadoop) by executing the below command:
[php]nano yarn-site.xml[/php]
And inside it add the following entries between <configuration> </configuration> present at the end of this file:
[php]
<property>
<name>yarn.nodemanager.aux-services</name>
<value>mapreduce_shuffle</value>
</property>
<property>
<name>yarn.nodemanager.aux-services.mapreduce.shuffle.class</name>
<value>org.apache.hadoop.mapred.ShuffleHandler</value>
</property>[/php]
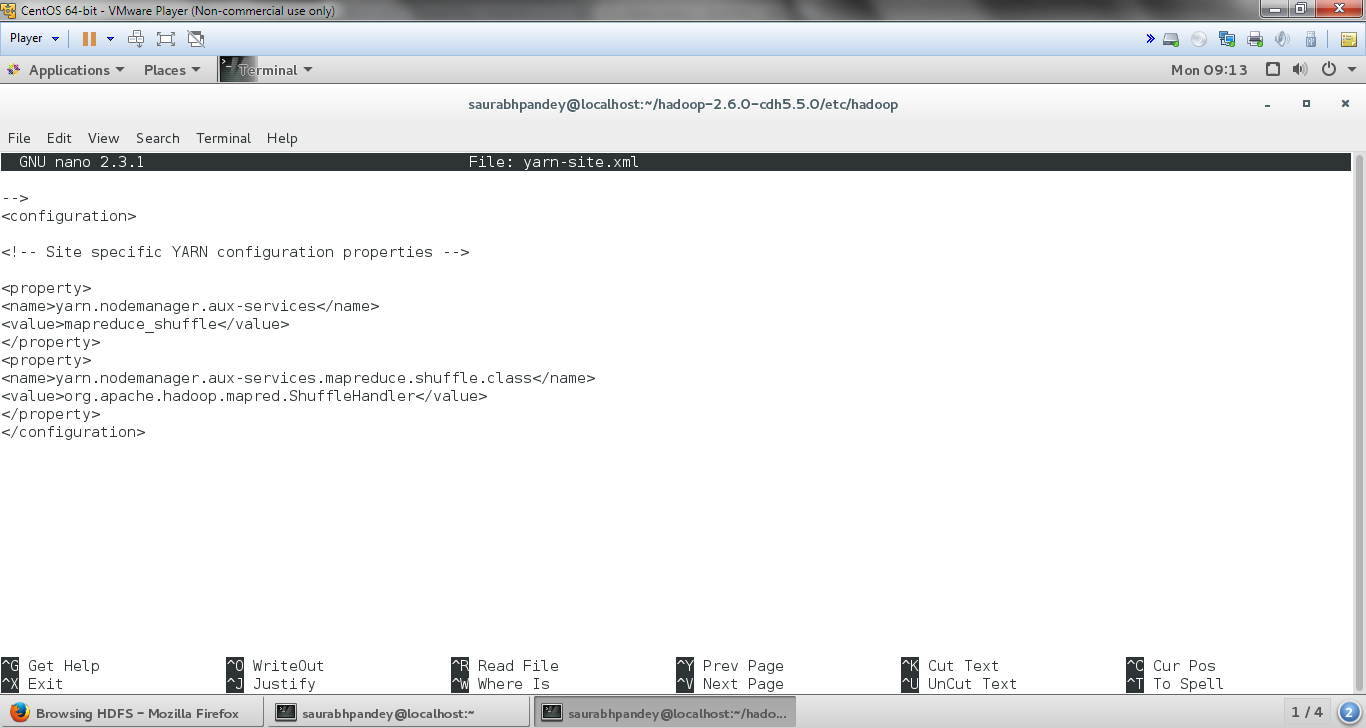
Hadoop installation Steps – Edit yarn-site.xml
After adding above parameters save this file. Press “Ctrl+X” on your keyboard.
V. Starting the Hadoop Cluster
a. NameNode Formatting
[php]hdfs namenode -format[/php]
Cloudera Hadoop Installation – NameNode formatting
NOTE: After we install hadoop on CentOS, we perform this activity only once otherwise all the data will get deleted and namenode would be assigned some other namespaceId. In case namenode and datanode Id’s doesn’t matches, then the datanode daemons will not start while starting the daemons.
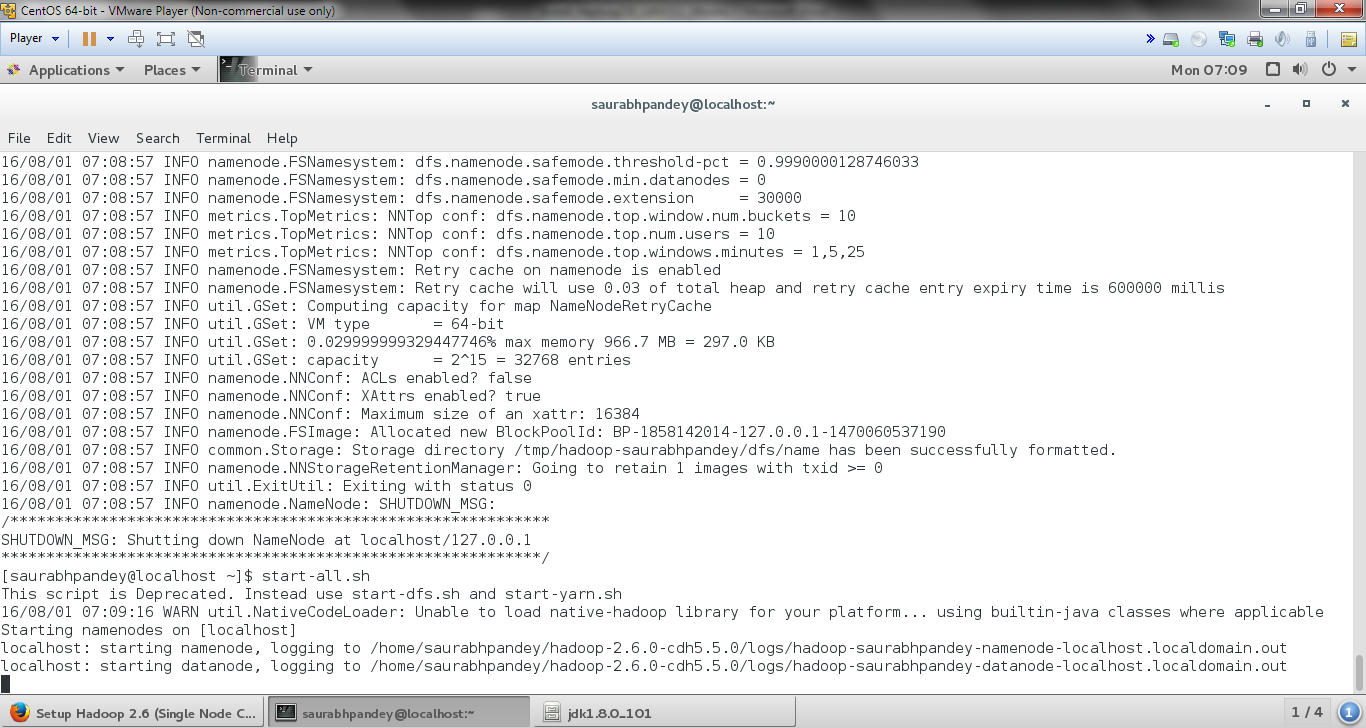
b. Start HDFS Daemons
[php]start-dfs.sh[/php]
c. Start YARN Daemons
[php]start-yarn.sh[/php]
2.3. Checking Installation
In order to check whether Hadoop is running successfully or not open the below address on any of your browsers:
http://localhost:50070
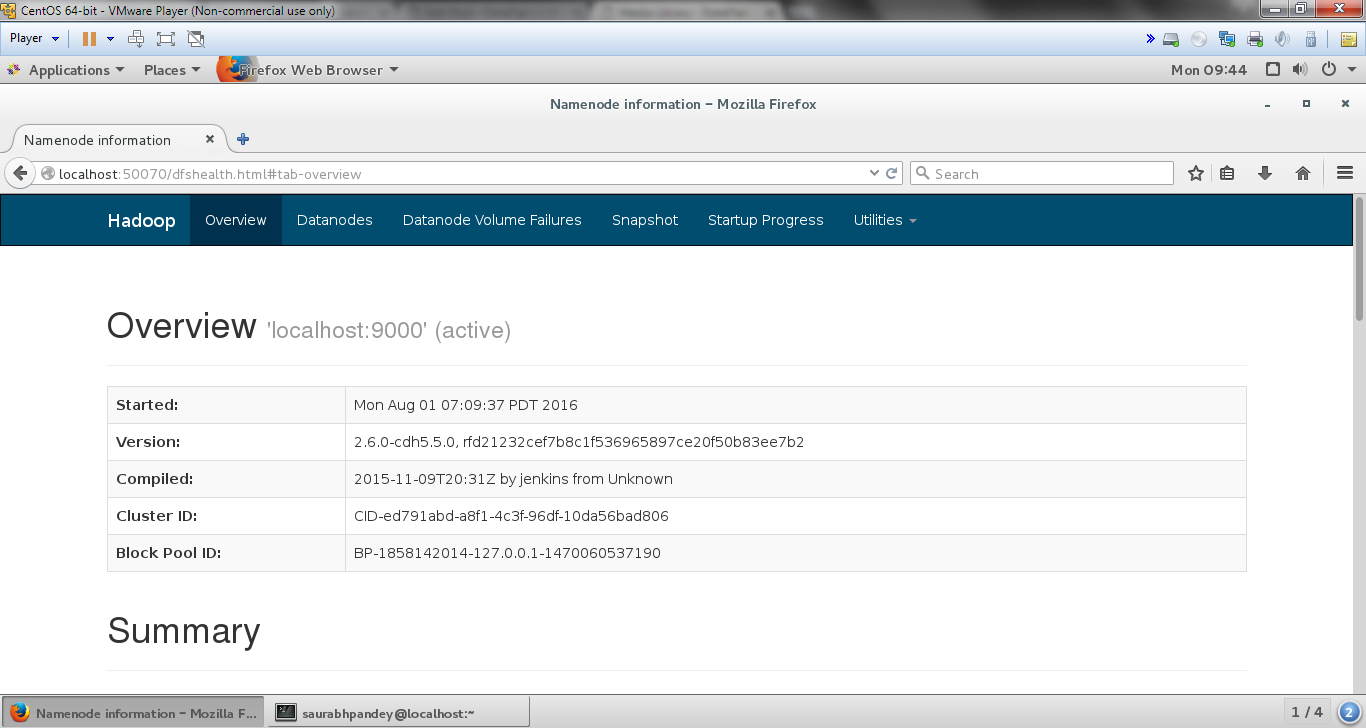
Checking Install Hadoop on CentOS
If this output appears means you have successfully installed Hadoop in CentOS. After Hadoop Installation studies this guide to learn how Hadoop works.
See Also-
- HDFS Commands
- HDFS Data read operation and Data write operation
- MapReduce internal Data Flow
- Yarn Resource Manager
Hope you This tutorial on Install Hadoop on CentOS was to you. If you have any queries on How to install Hadoop on CentOS drop a comment below and we will get back to you.