


Master Python with 70+ Hands-on Projects and Get Job-ready - Learn Python
Job-ready Online Courses: Knowledge Awaits – Click to Access!
We all have used social platforms like Instagram and Facebook. The one thing common in all is that users can upload images, videos on them. We upload our files on a server and then others view it. That is the whole concept of social media.
So, how Django upload a file? We will be answering the same question in this article. The contents of this article are:
- How to upload file in Django.
- Configuring settings.
- A User Profile Application.
So, let’s get started.
File Upload in Django – Working
File uploading is just like any input from the user. For example – On Facebook, when you update your profile picture. You select a file from your device and the file is then uploaded to the Facebook server. The server stores the file and is then served when anyone visits your profile.
You can say the file is the same as static content on your website. Now let’s learn how to upload file in Django.
File uploading and handling have many approaches in Django. We will use models to implement file upload in Django. We are using model forms in this example.
Configuring Settings
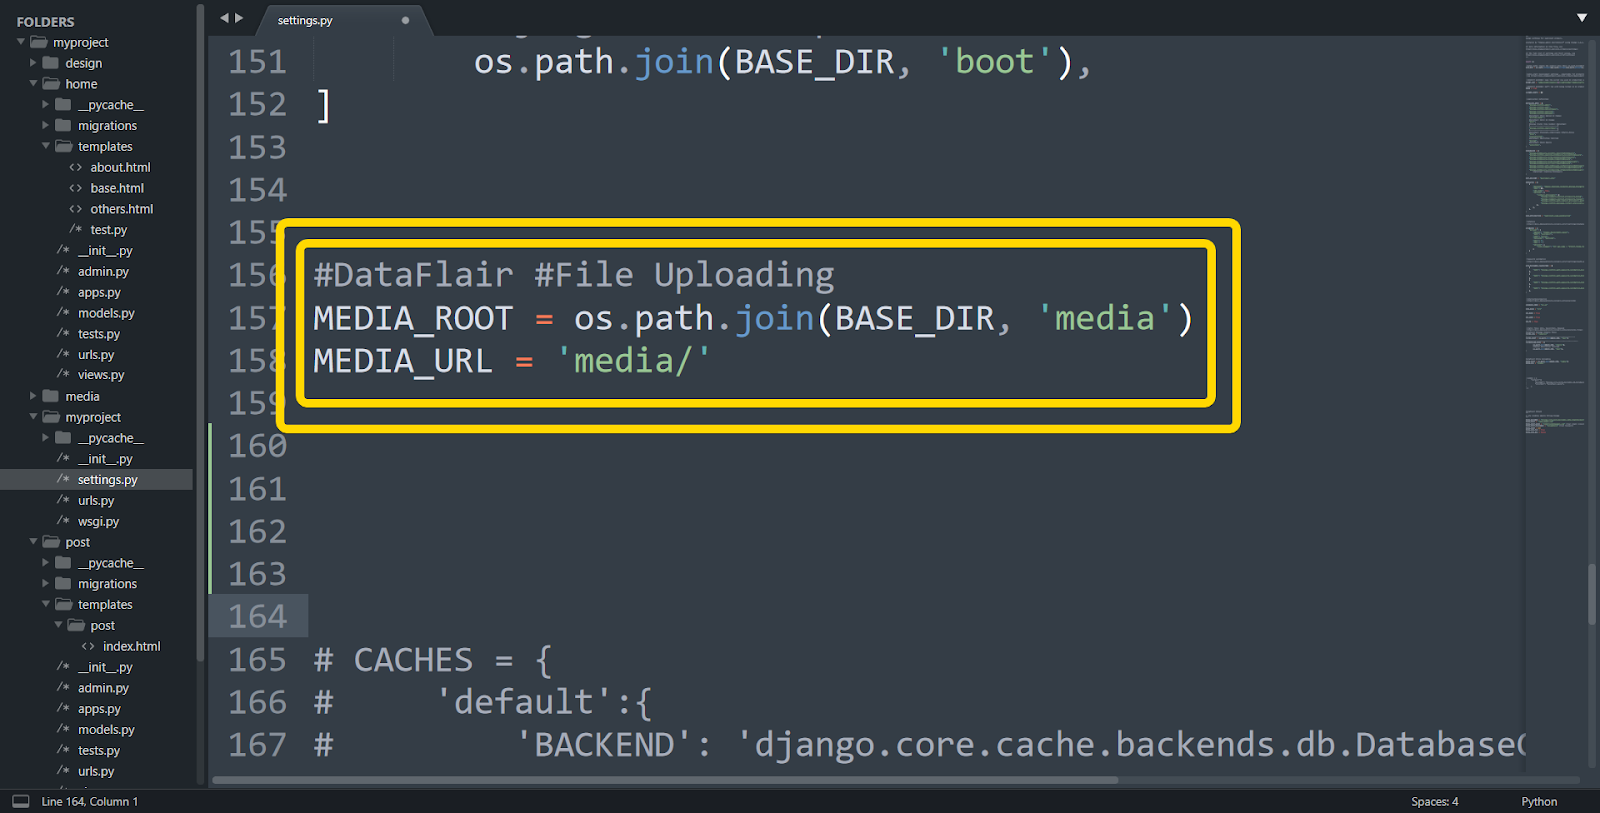
Before any file upload application, these settings are necessary. Open project’s settings.py file and add these lines below the STATIC FILES settings.
Code:
MEDIA_ROOT = os.path.join(BASE_DIR, 'media')
MEDIA_URL = 'media/'
Code Display:
Understanding the Settings
1. MEDIA_ROOT
MEDIA_ROOT is an empty string by default. It takes in the absolute file path of a directory. We have used the same join functions in Django static files tutorial that we have passed in the file path of media directory. This directory will store all the files a user uploads in Django.
Although you can directly give the path as a string in MEDIA_ROOT. It has its own problems. That approach will raise errors when you upload the file in the production environment. Always try to use dynamic URLs which are relative to the project directory. Like we used join method in the above setting.
2. MEDIA_URL
MEDIA_URL works the same way as STATIC_URL. This URL is used by Django instead of serving files with an absolute path. When Django will serve an uploaded file media it will be automatically added to the URL.
Remember MEDIA_ROOT & MEDIA_URL can have totally different values. The directory name is not required to be same. You can name MEDIA_URL anything.
Note:
MEDIA_URL & STATIC_URL should always have different values. Also, this goes for MEDIA_ROOT & STATIC_ROOT settings too. It was common in the past to use media root to all server static files. With the experiences of developers, this approach has some serious security implications.
It is mandatory to have different values for media settings and static settings.
Make a Directory named Media
Now, make a directory named media at the project level.
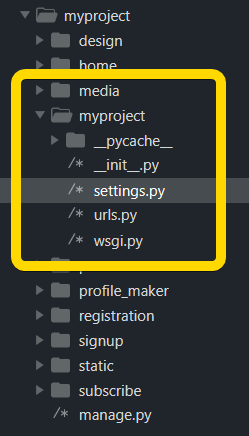
Media directory exists at the same level as manage.py file.
A User Profile Application
Now, we will make an application which can store a user’s profile in Django. This profile will have some basic information and a profile picture. We will also make a form to upload the picture. We will learn some important concepts of doing same in Django.
1. Make a New Application
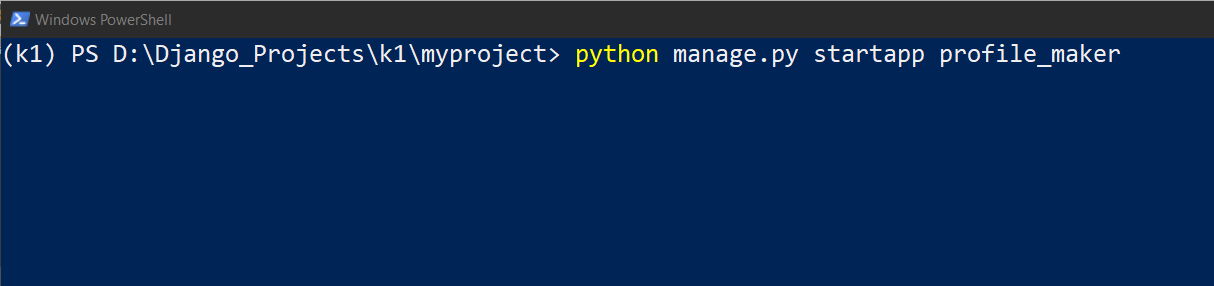
Now, from your terminal, execute the command to make a new application.
Code:
> python manage.py startapp profile_maker
Command Display:
Now, install the new application in settings.py file.
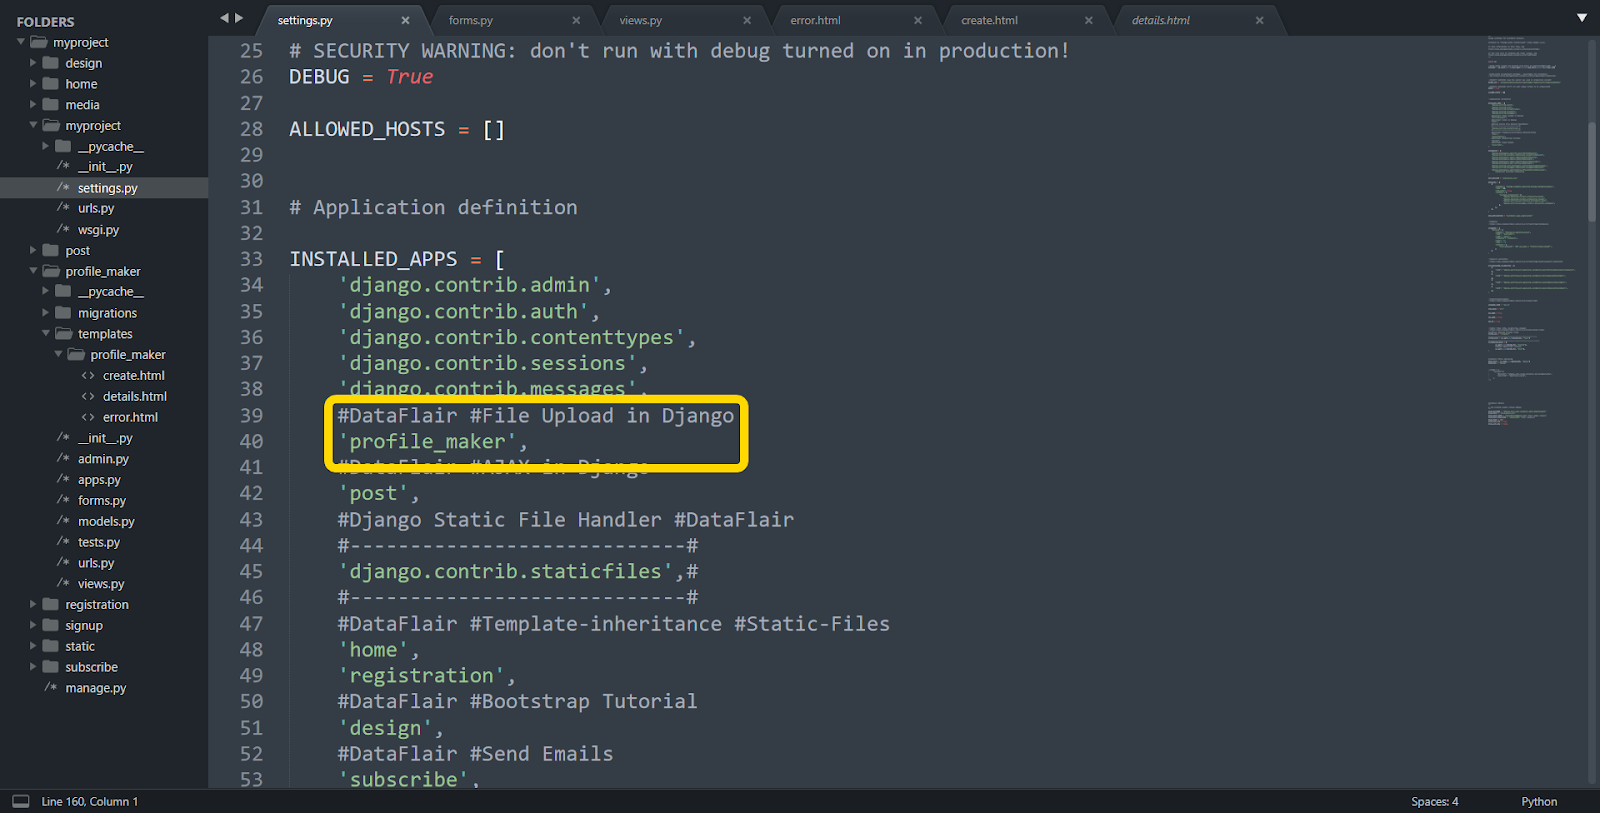
2. Make Models
Now, paste this code in profile_maker/models.py file.
Code:
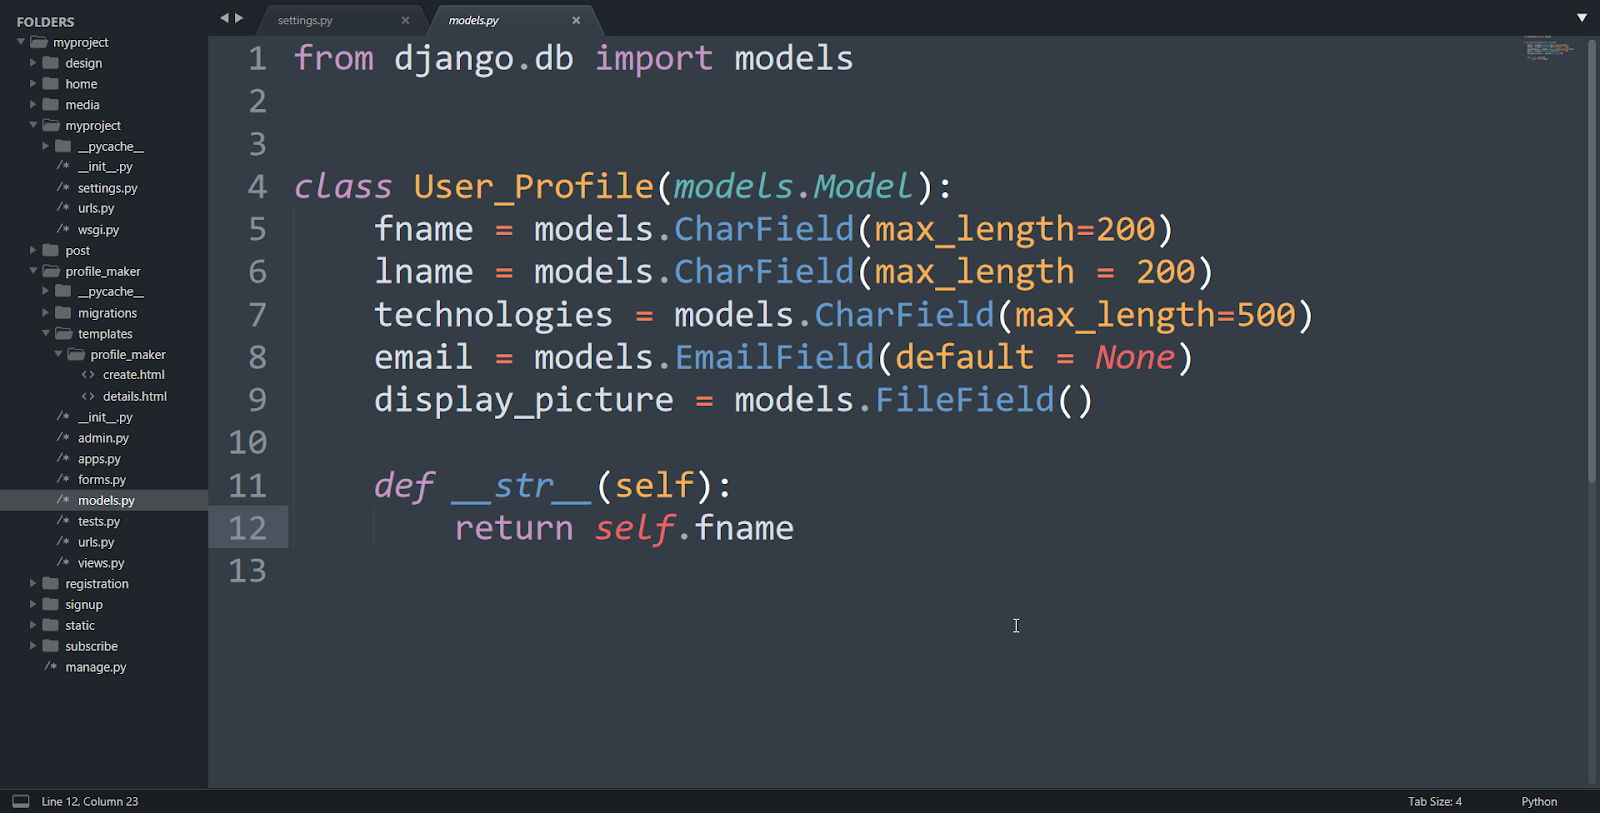
from django.db import models


class User_Profile(models.Model):
    fname = models.CharField(max_length=200)
    lname = models.CharField(max_length = 200)
    technologies = models.CharField(max_length=500)
    email = models.EmailField(default = None)
    display_picture = models.FileField()

    def __str__(self):
        return self.fname
Code Display:
Understanding the Code:
We have made a simple model for a user profile. It has fields like fname, lname, technologies, email, display_picture. We have also defined an __str__ function. This function will return the value of fname when we reference the object. The important field is display_picture field.
display_picture is a File Field. It should have been an image field. We use a file field to store files on the server. It will create a File object which has many built-in attributes and methods. When a user uploads a file in the file field, we are storing file object in database and store file in MEDIA_ROOT.
A file object is mainly to associate a file with an object or profile. We will learn more about file object in the upcoming section.
3. Make Forms
Make a new forms.py file in your application. Inside profile_maker/forms.py file, paste this code:
Code:
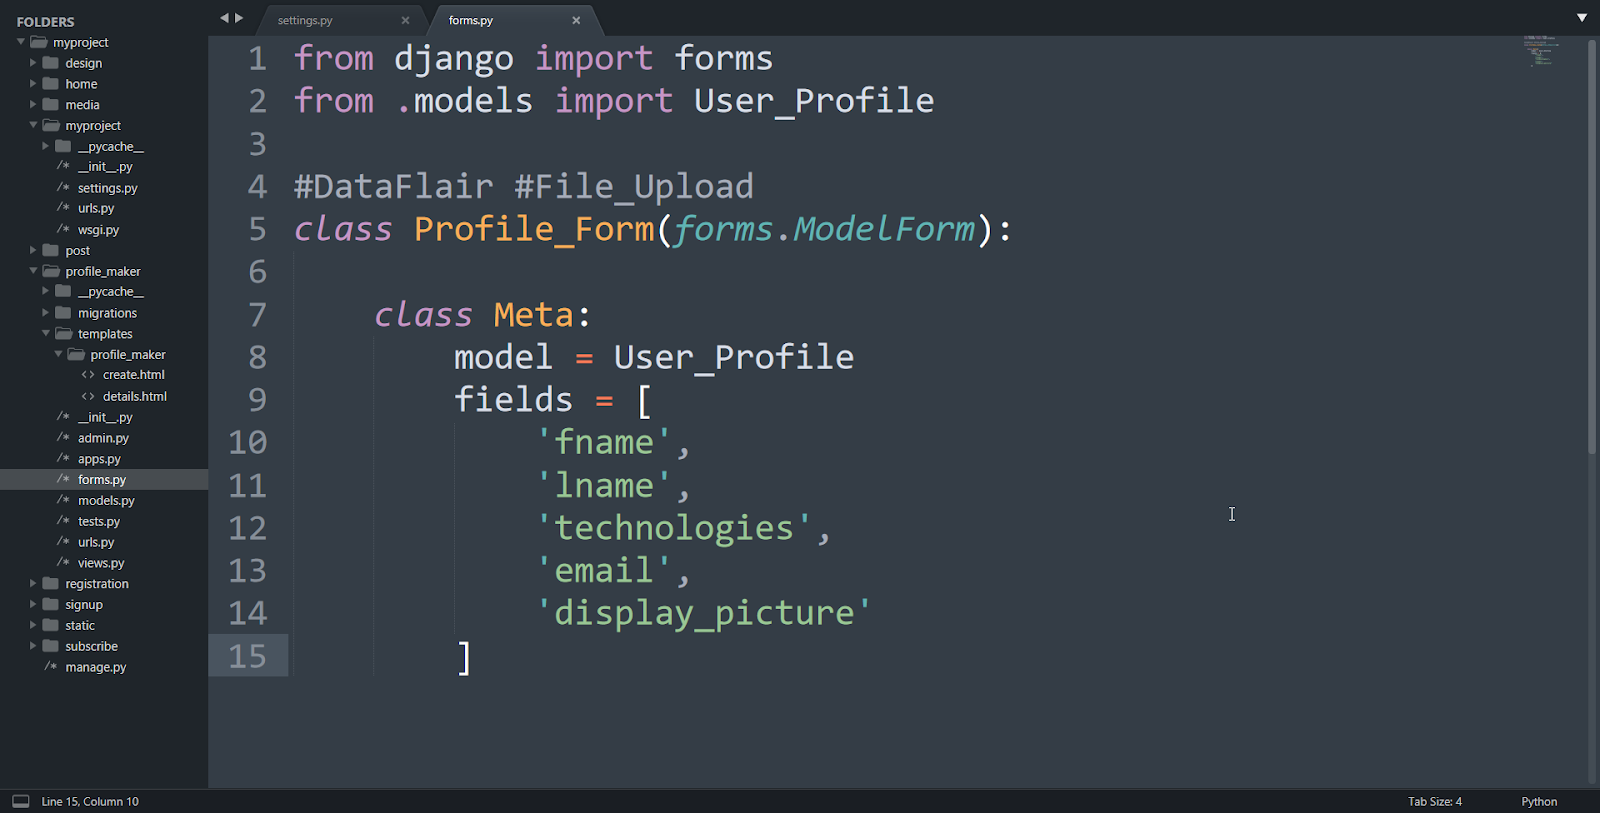
from django import forms
from .models import User_Profile

#DataFlair #File_Upload
class Profile_Form(forms.ModelForm):

    class Meta:
        model = User_Profile
        fields = [
        'fname',
        'lname',
        'technologies',
        'email',
        'display_picture'
        ]
Code Display:
Understanding the code:
Here we are using things called model forms. These forms are special and are very handy.
Model forms
The basic concept of model forms is that they derive their structure from models. Yes, that’s right, we don’t have to define a form and connect it with models. We can do that directly via model forms.
Models forms are a subclass of forms. When we make a form using ModelForm class, we use META class. In META, there are two attributes required, they are:
- model: It takes in the name of the model. We have to import the User_Profile model for this. This attribute defines the model to render a form. This form object is then used to save the user data to be stored directly in a database.
- fields: It is a list of strings. This list will take the name of the fields in the model. This field defines input fields for a form. We specify the fields from models in this list. All the fields mentioned in this list will be used to create a form.
That’s all the information on model forms, we require for this tutorial.
So basically, we will get a form with the fields defined in fields attribute of Form. It’s a very common practice to use model forms but is not necessary.
4. Make Views
Now, in profile_maker/views.py file, paste this.
Code:
from django.shortcuts import render
from .forms import Profile_Form
from .models import User_Profile

IMAGE_FILE_TYPES = ['png', 'jpg', 'jpeg']

def create_profile(request):
    form = Profile_Form()
    if request.method == 'POST':
        form = Profile_Form(request.POST, request.FILES)
        if form.is_valid():
            user_pr = form.save(commit=False)
            user_pr.display_picture = request.FILES['display_picture']
            file_type = user_pr.display_picture.url.split('.')[-1]
            file_type = file_type.lower()
            if file_type not in IMAGE_FILE_TYPES:
return render(request, 'profile_maker/error.html')
            user_pr.save()
            return render(request, 'profile_maker/details.html', {'user_pr': user_pr})
    context = {"form": form,}
    return render(request, 'profile_maker/create.html', context)
Code Display:
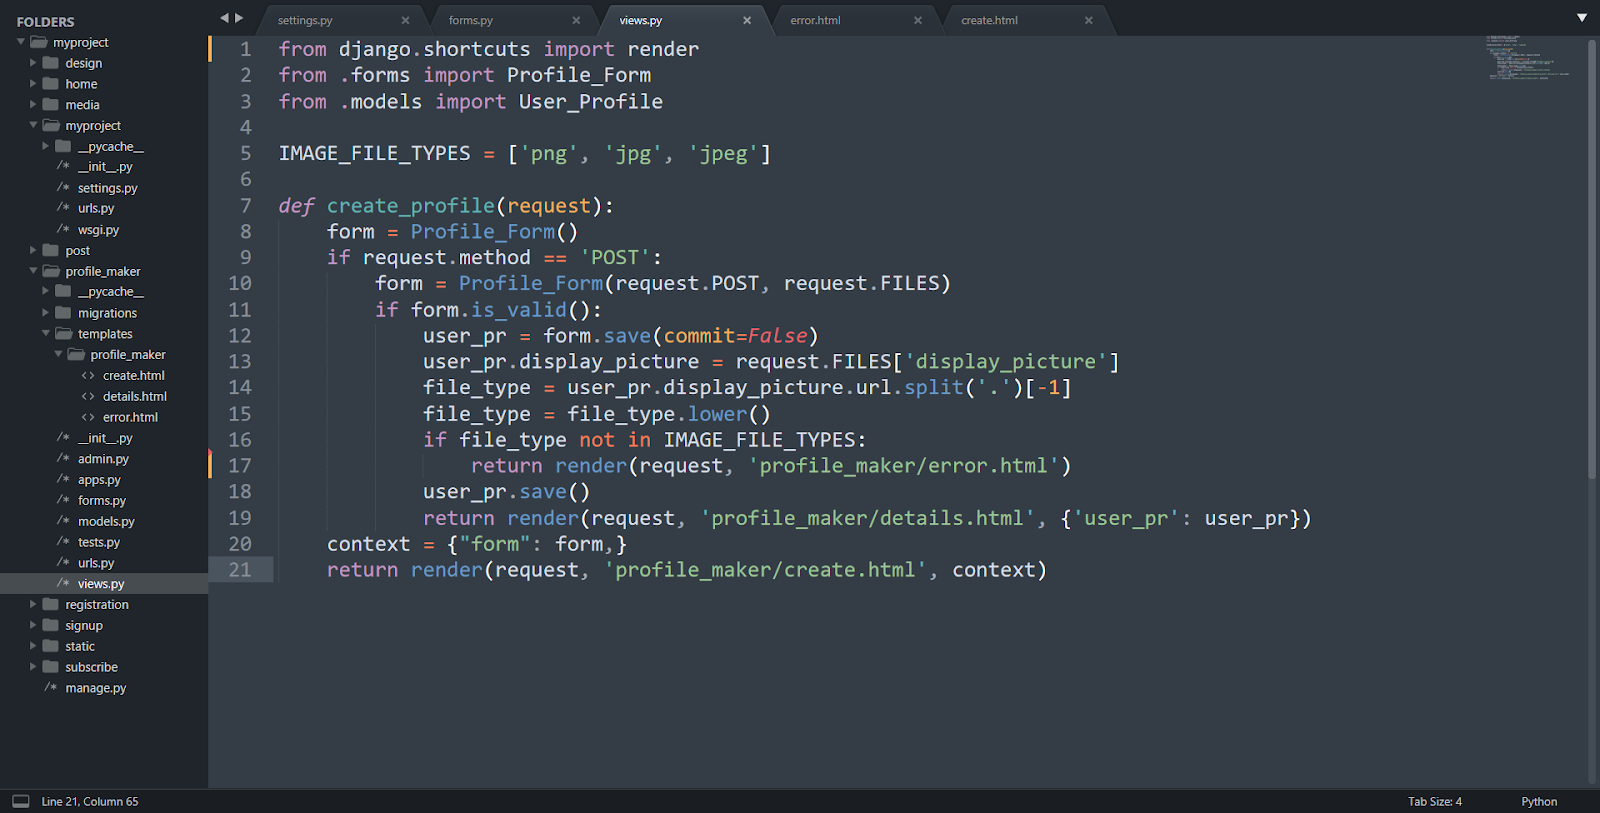
The views are simple to understand. We have imported the models and forms in this view file. Then we have defined a list IMAGE_FILE_TYPES. We use it to check the type of file.
Then our function definition starts.
In this function, we have defined a form object. It will render a form. Then we are using form validation to clean our form data. This function returns True or False. If the form has valid data, we can store the data locally. Then we are extracting the file type uploaded by the user.
Since we are using file field, we have multiple attributes. The file URL contains the filetype after the ‘.’. We have used a basic string function split() for this purpose.
The split() will split the string into parts where ‘.’ is present. You can get more on this in basic Python functions. In the next line, we are making it a lower type string. Then we are performing a check whether the file is an image file or not. We can skip this part if we use the image field.
So, if the file is not an image file, it will render error.html.
Otherwise, it will render details.html, showing the details we just filled. If the form is rendered for the first time, it will render create.html. Now, we understood the view function. Let’s make our templates.
5. Create Templates
Now, again make a templates folder. The directory pattern will be profile_maker/templates/profile_maker. Remember to make two directories. First is templates and then the profile_maker directory inside it.
Now, make a new file in profile_maker/templates/profile_maker named create.html.
Paste this code in create.html.
Code:
<!DOCTYPE html>
<html>
    <head>
        <title>Make Profile</title>
        <link rel="stylesheet" href="https://maxcdn.bootstrapcdn.com/bootstrap/3.3.7/css/bootstrap.min.css" integrity="sha384-BVYiiSIFeK1dGmJRAkycuHAHRg32OmUcww7on3RYdg4Va+PmSTsz/K68vbdEjh4u" crossorigin="anonymous">
    </head>
    <body>

        <center>
            <div class="jumbotron">
                <h1 class="display-4">DataFlair Django File Uploading</h1>
                        {% block replace %}
                <p class="lead">To make a user profile and upload the files fill this form</p>
                <hr class="my-4">
                <form method="POST" enctype="multipart/form-data">
                    <!-- Very Important csrf Token -->
                    {% csrf_token %}
                    <table>
                        {{ form.as_table }}
                    </table>
                    <input type="submit" class="btn btn-primary btn-lg" name="register">
            </div>
        </center>
        {% endblock %}
    </body>
</html>
Code Display:
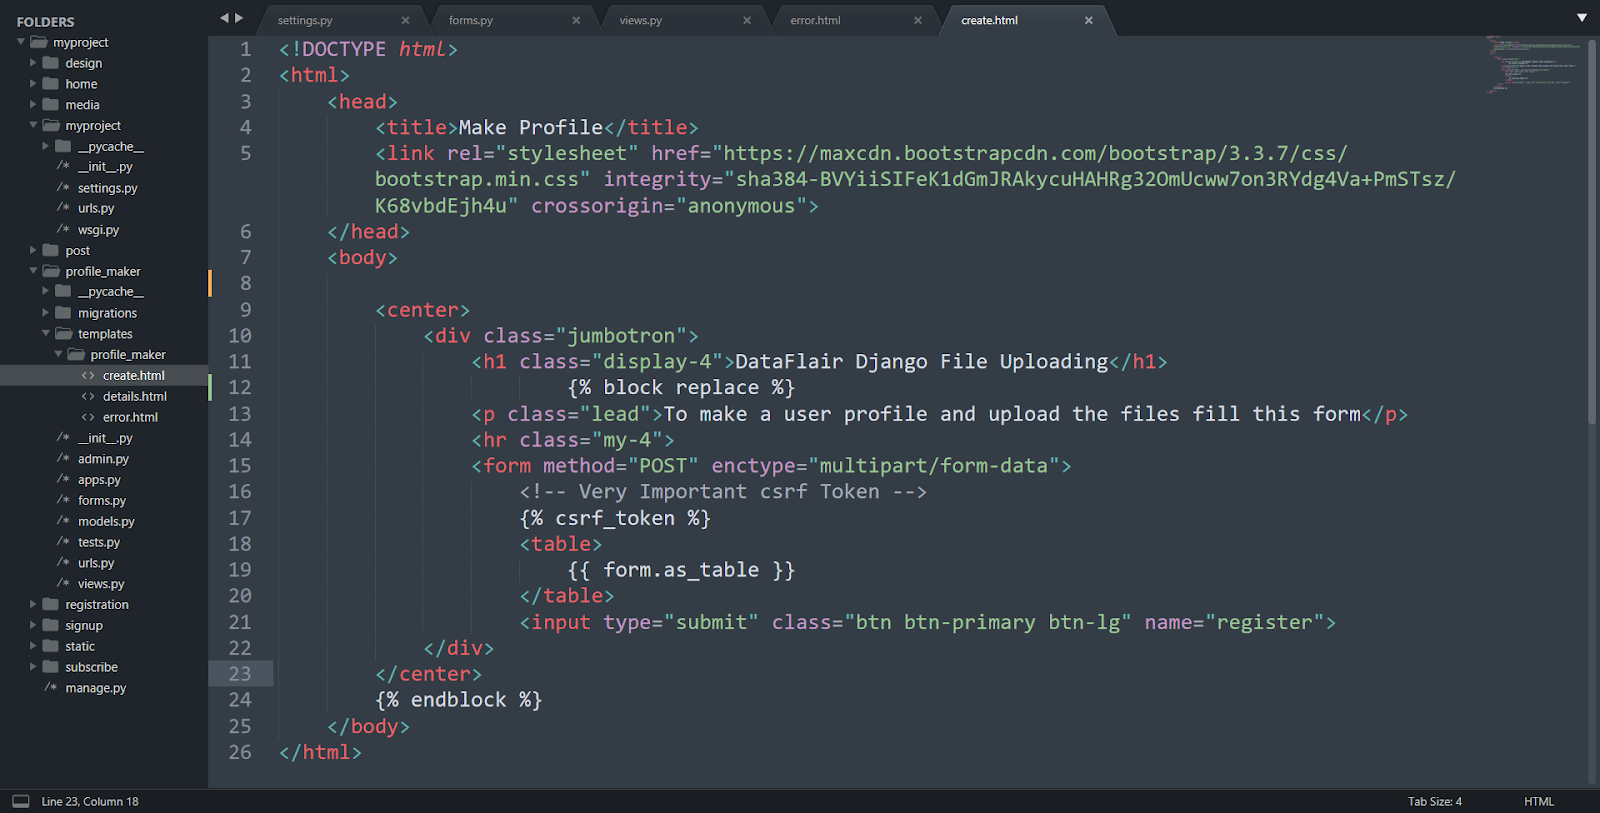
It’s a simple template rendering the form. We have also used some bootstrap. You can check out our Django bootstrap tutorial for the same. The important part is the form attribute enctype. This attribute allows us to send the files with our data.
request.FILES dictionary
When any file is uploaded in Django it becomes a part of the request object. More specifically, it can be accessed with the request.FILES object. It is a dictionary and has a key for each file uploaded. You can access data from the uploaded file via this dictionary.
Although, we have an image file and we have not used any API to access its data. Now, make a new file named details.html in the same directory. Paste this code in it.
Code:
{% extends 'profile_maker/create.html' %}
{% block replace %}
<CENTER>
<div class="jumbotron">
  <h1 class="display-4">Welcome to DataFlair<br>Hello {{ user_pr.fname }}</h1>
  <p class="lead">its an awesome profile picture</p>
  <hr class="my-4">
  <img src="{{ user_pr.display_picture.url }}" class="image_responsive" height="100px" width="100px">
  <p>
    {{ user_pr.display_picture.url }}<BR>
   You have learned some awesome technologies like {{ user_pr.technologies }}</p>
</div>
</CENTER>
{% endblock %}
Code Display:
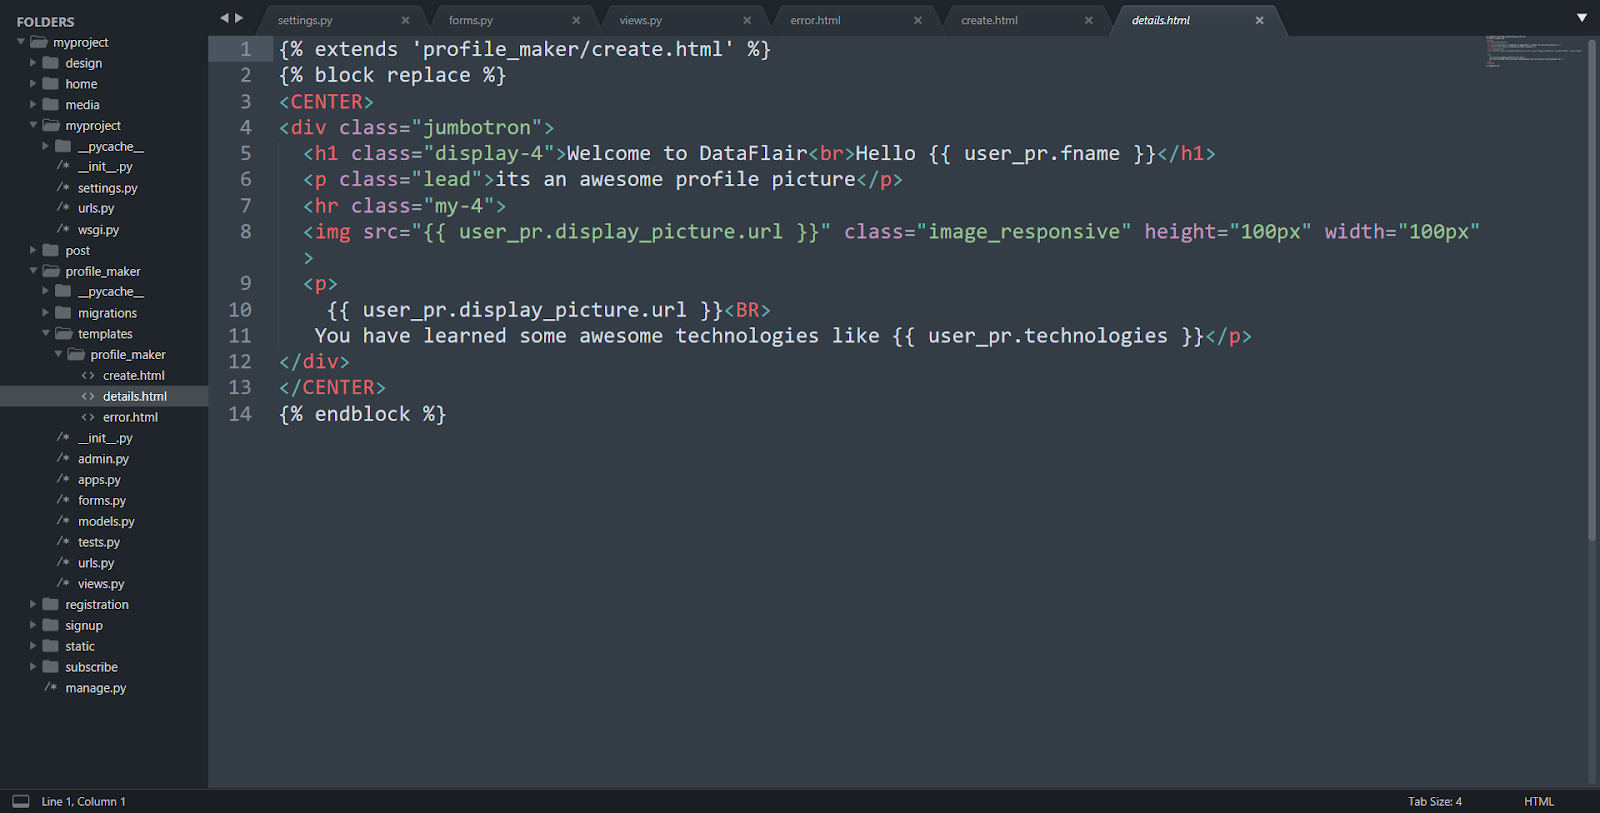
This template is used to display the image we just uploaded. We are using the {{ user_pr.display_picture.url }} in image src. Then make another file in the same directory. Its name is error.html. Paste this code in it.
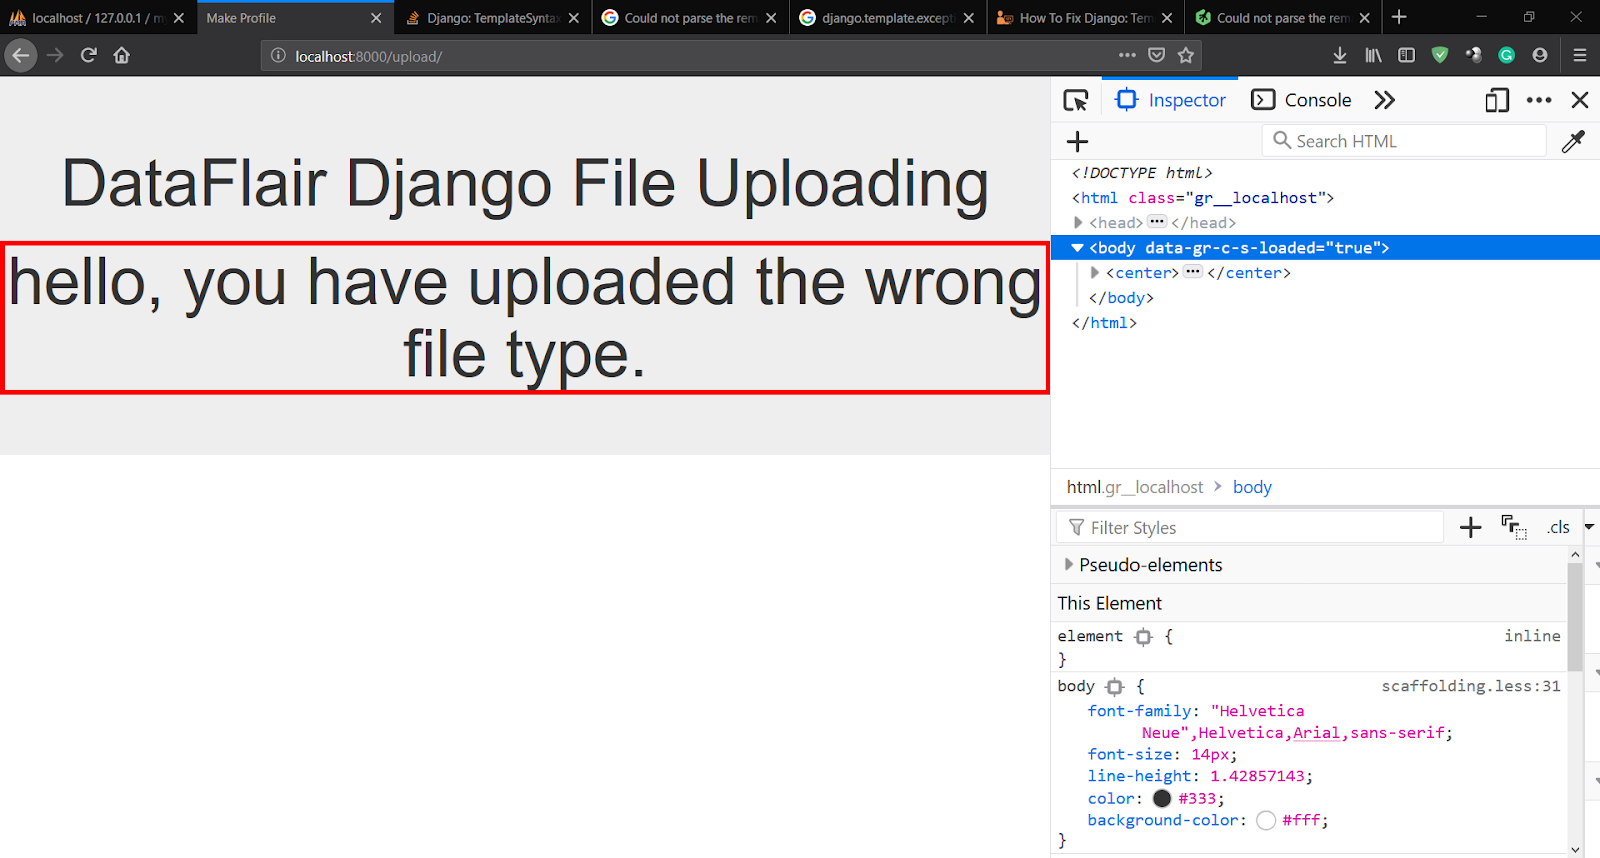
Code:
{% extends 'profile_maker/create.html' %}
{% block replace %}
<CENTER>
    <h1 style = 'border: 5px red solid;'> hello, you have uploaded the wrong file type.</h1>
</CENTER>
{% endblock %}
Code Display:
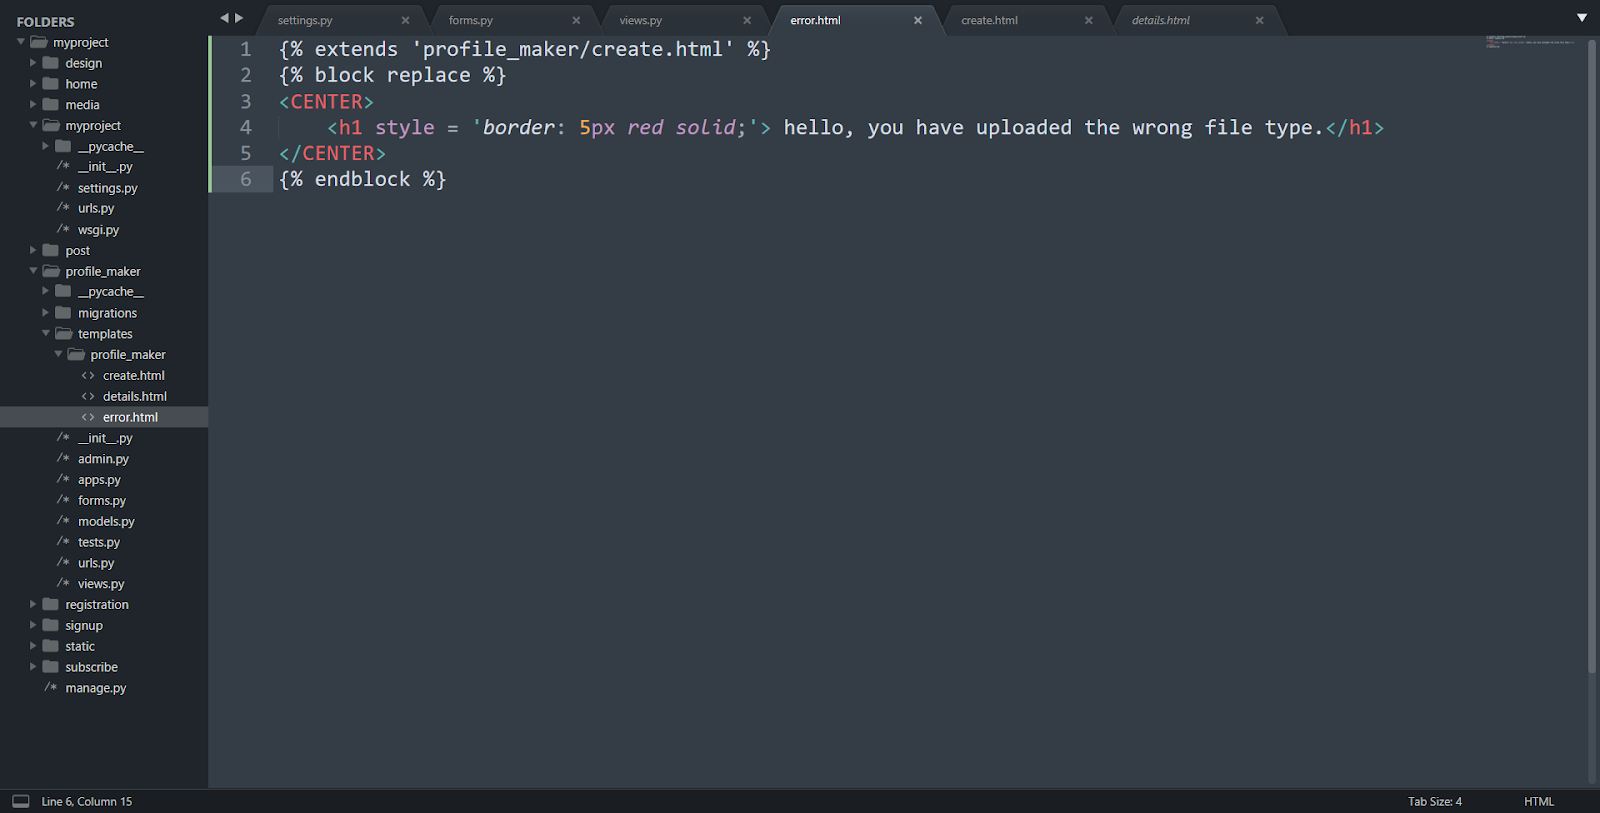
It will be rendered when the user uploaded a non-image file. It is defined in the view function.
6. Configure URLs
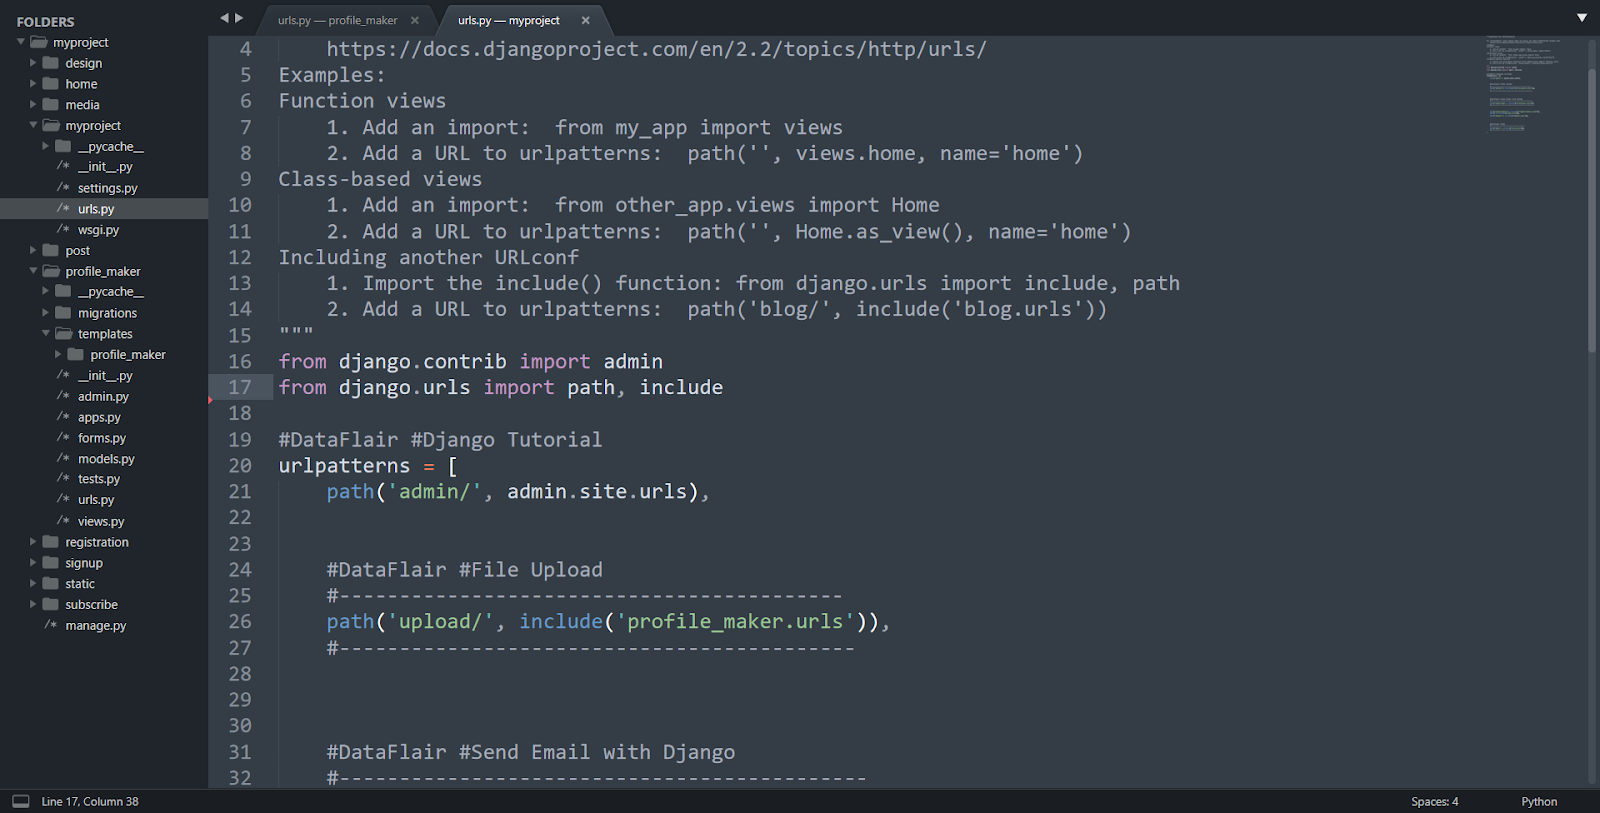
We have made all the files. Open your main urls.py file. In this file, paste this code:
from django.contrib import admin
from django.urls import path, include

urlpatterns = [
    path('admin/', admin.site.urls),
    path('upload/', include('profile_maker.urls')),
]
Code Display:
Then make a new file in profile_maker/ directory named urls.py. Paste this code in that profile_,maker/urls.py file.
Code:
from django.urls import path
from . import views
from myproject import settings
from django.conf.urls.static import static

urlpatterns = [
    path('', views.create_profile, name = 'create'),
]

if settings.DEBUG:
    urlpatterns += static(settings.STATIC_URL, document_root = settings.STATIC_ROOT)
    urlpatterns += static(settings.MEDIA_URL, document_root = settings.MEDIA_ROOT)
Code Display:
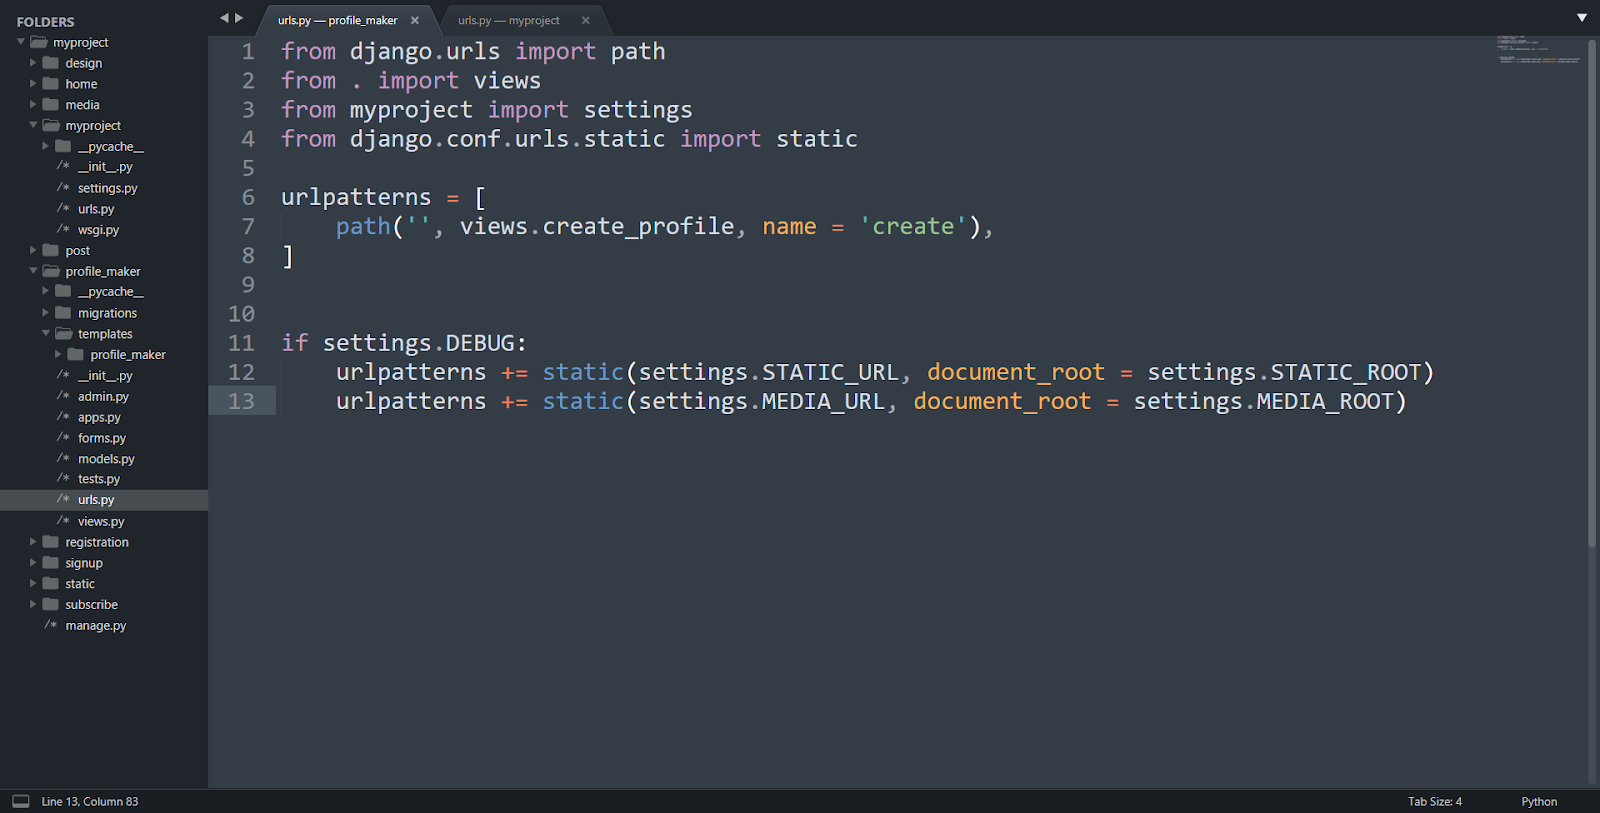
Concentrate on the if section. We are using these settings only when the project is in debug mode. Then we have added these patterns to the urlpatterns variable. These patterns are referred when a media file is requested. These settings are important when serving the file uploaded by the user.
Although, these are only used when you are developing a website. The server settings are different for servers.
7. Test the Application
Now, we are ready to test our app. Search in URL bar: localhost:8000/upload
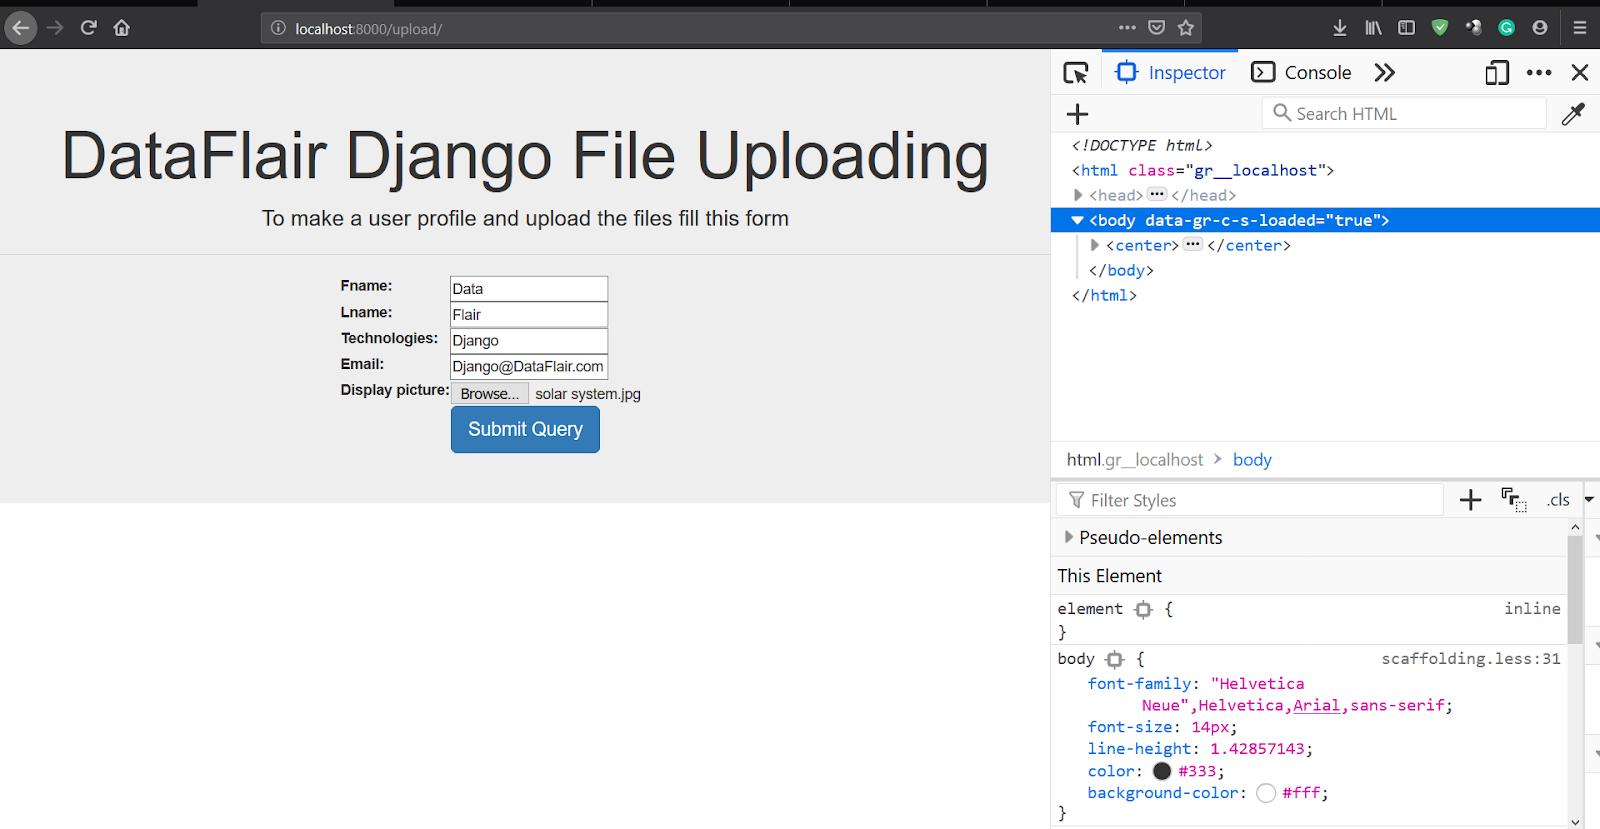
When you submit the form.
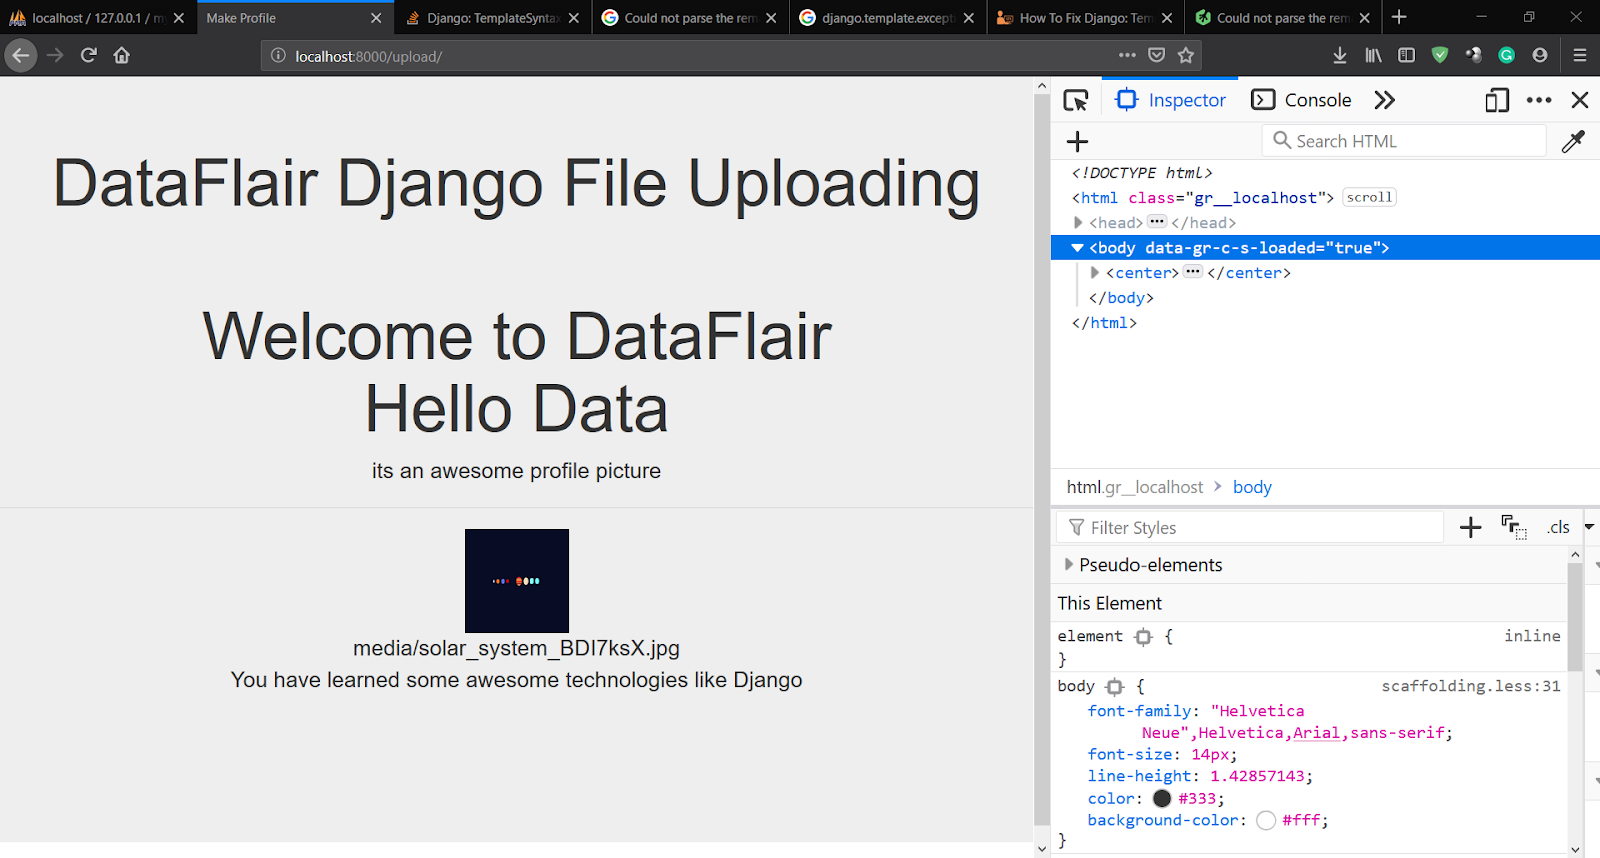
This is the details page. Since there was no error, we get this output. You can also see that file in the media folder.
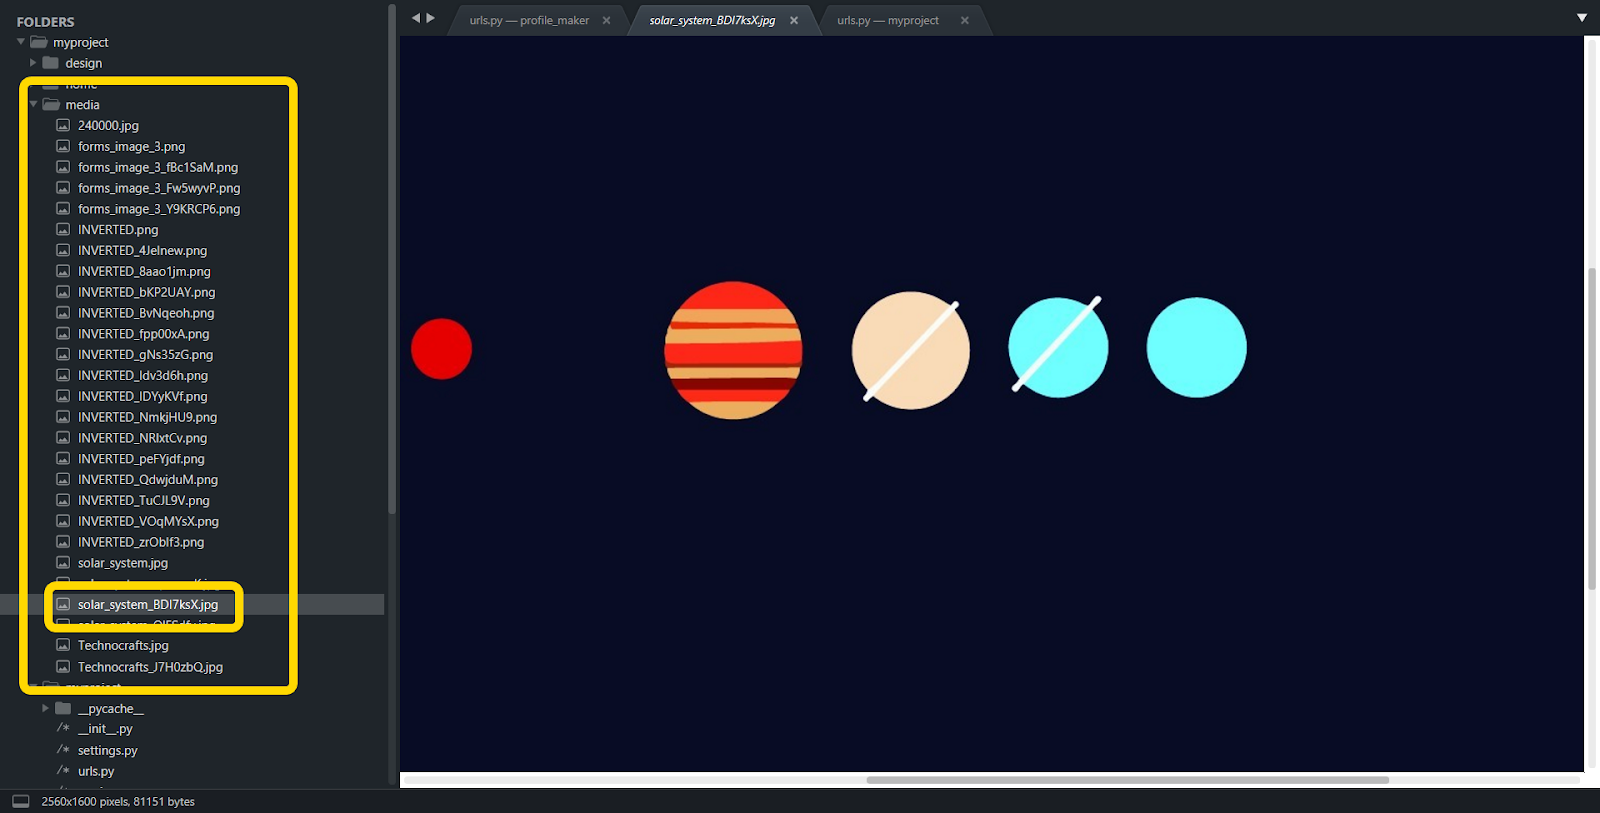
I have already uploaded some images.
Note:
You can upload image or files with the same name as we expect users to upload files with the same name. Django automatically generates a new name for the files uploaded. As you can see all the files have some code in their name. that is automatically generated by Django.
If you upload any other file, it will generate this error page.
Summary
Here we conclude our tutorial on how to upload file in Django. Files are handled in many possible ways in Django. This is what makes Django an awesome framework. It enables us to read files and apply machine learning or any backend process.
Files have their own properties. What we discussed is one of the ways we can upload files in Django and render them. The process works fine for most but you can modify it according to the use case.
Hope you liked our article. Ask your queries and clear your doubts through the comment section.