


We offer you a brighter future with industry-ready online courses - Start Now!!
Welcome to this project on creating a Job Portal app using SwiftUI, a powerful framework for building user interfaces across Apple platforms. In this project, we will guide you through the process of creating an app that enables users to search for jobs based on job titles and locations. We will leverage the job search API from indeed.com, provided by rapidAPI.com.
By the end of this project, you will have a Job Portal app that you can customize and extend to suit your specific requirements.
About Swift Job Portal App Project
The objective of this project is to provide you with a step-by-step guide on creating a Job Portal app using SwiftUI.
You’ll learn how to integrate an API into your app, handle networking requests, and display the retrieved job data in a list format.
Prerequisites for Job Portal App Using Swift
In order to participate in this project, you will require the following:
- Xcode is installed on your Mac.
- Basic knowledge of Swift programming language.
- Familiarity with SwiftUI concepts.
Now, let’s get started with the step-by-step implementation.
Download Swift Job Portal App Project
Please download the source code of the Swift Job Portal App Project from the following link: Swift Job Portal App Project Code.
Steps to Create Job Portal App Using Swift
Following are the steps for developing the Swift Job Portal App :
Step 1: Create a new SwiftUI project in Xcode.
Step 2: Creating the Job Model
Step 3: Implementing the JobViewModel
Step 4: Designing the JobListView
Step 5: Connecting Views in ContentView
Step 1: Create a new SwiftUI project in Xcode.
a. Open Xcode and Click on “Create a new Xcode Project” option.

b. Now select platform as “iOS” and application type as “App”.

c. Now, Enter the name of the app and organization identifier, and select SwiftUI interface for building the UI of the app. Also, select Swift as the language for creating the app.

d. Select the folder where you want to save the app and click on Create.

e. Now your project is ready for development, and you will see something like below.
Step 2: Creating the Job Model
a. Create a new Swift file called “Job.swift” in your project.
b. Define the Job struct with properties that represent the attributes of a job listing, such as companyLogoUrl, companyName, companyRating, and more. The attributes should be according to the JSON response we will get from the API.
Simple Demo of the job search API from the RapidApi.com
Request Code provided by the RapidApi for Swift

JSON Response of the API Call

Now the Code will for “Job.swift” file will look like this
import Foundation
struct Job: Codable {
    let companyLogoUrl: String
    let companyName: String
    let companyRating: String
    let companyReviewLink: String
    let companyReviews: Int
    let date: String
    let jobLocation: String
    let jobTitle: String
    let jobUrl: String
    let multipleHiring: String
    let nextPage: String
    let pageNumber: Int
    let position: Int
    let salary: String
    let urgentlyHiring: String

    enum CodingKeys: String, CodingKey {
        case companyLogoUrl = "company_logo_url"
        case companyName = "company_name"
        case companyRating = "company_rating"
        case companyReviewLink = "company_review_link"
        case companyReviews = "company_reviews"
        case date
        case jobLocation = "job_location"
        case jobTitle = "job_title"
        case jobUrl = "job_url"
        case multipleHiring = "multiple_hiring"
        case nextPage = "next_page"
        case pageNumber = "page_number"
        case position
        case salary
        case urgentlyHiring = "urgently_hiring"
    }
}
Step 3: Implementing the JobViewModel
a. Create another Swift file named “JobViewModel.swift” in your project.
b. Define a class called JobViewModel that conforms to the ObservableObject protocol.
c. Inside the JobViewModel class, add a @Published property named jobs of type [Job] to hold the retrieved job listings.
d. Create the searchJobs(title: String, location: String) function, responsible for managing the network request to retrieve job information from the API.
import Foundation
import SwiftUI


class JobViewModel: ObservableObject {
    @Published var jobs = [Job]()
    func searchJobs(title: String, location: String) {
        let headers = [
            "X-RapidAPI-Key": "2fa31b37a0msh156408bf35b2224p17c6dbjsnce5bc66dda99",
            "X-RapidAPI-Host": "indeed-jobs-api.p.rapidapi.com"
        ]
        let titleEncoded = title.addingPercentEncoding(withAllowedCharacters: .urlHostAllowed)!
        let locationEncoded = location.addingPercentEncoding(withAllowedCharacters: .urlHostAllowed)!
        let urlString = "https://indeed-jobs-api.p.rapidapi.com/indeed-us/?offset=0&keyword=\(titleEncoded)&location=\(locationEncoded)"
        guard let url = URL(string: urlString) else { return }
        var request = URLRequest(url: url)
        request.httpMethod = "GET"
        request.allHTTPHeaderFields = headers
        URLSession.shared.dataTask(with: request) { data, response, error in
            guard let data = data else { return }
            do {
                let jobs = try JSONDecoder().decode([Job].self, from: data)
                DispatchQueue.main.async {
                    self.jobs = jobs
                }
            } catch let error {
                print(error)
            }
        }.resume()
    }
}
Step 4: Designing the JobListView
a. Create a new Swift file called “JobListView.swift” in your project.
b. Define a SwiftUI view named JobListView.
c. Inside the JobListView view, create an instance of the JobViewModel and store it using the @ObservedObject property wrapper.
d. Add @State variables called title and location to store the user’s input values from the text fields.
e. Build the UI for the JobListView, including a search bar with text fields for job title and location, a “Search” button, and a listview to display the retrieved job listings.
import foundation
import SwiftUI


struct JobListView: View {
    @ObservedObject var viewModel = JobViewModel()
    @State private var title = ""
    @State private var location = ""

    var body: some View {
        VStack {
            HStack {
                TextField("Job Title", text: $title)
                    .textFieldStyle(RoundedBorderTextFieldStyle())
                TextField("Job Location", text: $location)
                    .textFieldStyle(RoundedBorderTextFieldStyle())
                Button(action: {
                    viewModel.searchJobs(title: title, location: location)
                }) {
                    Text("Search")
                }
            }
            .padding()

            List(viewModel.jobs, id: \.jobTitle) { job in
                VStack(alignment: .leading) {
                    Text(job.jobTitle)
                        .font(.headline)
                    Text(job.companyName)
                        .font(.subheadline)
                    Text(job.jobLocation)
                        .font(.subheadline)
                }
            }
        }
    }
}
Step 5: Connect Views in ContentView
a. Open the “ContentView.swift” file.
b. Replace the default implementation of the ContentView struct with a new implementation that returns an instance of the JobListView view.
import SwiftUI
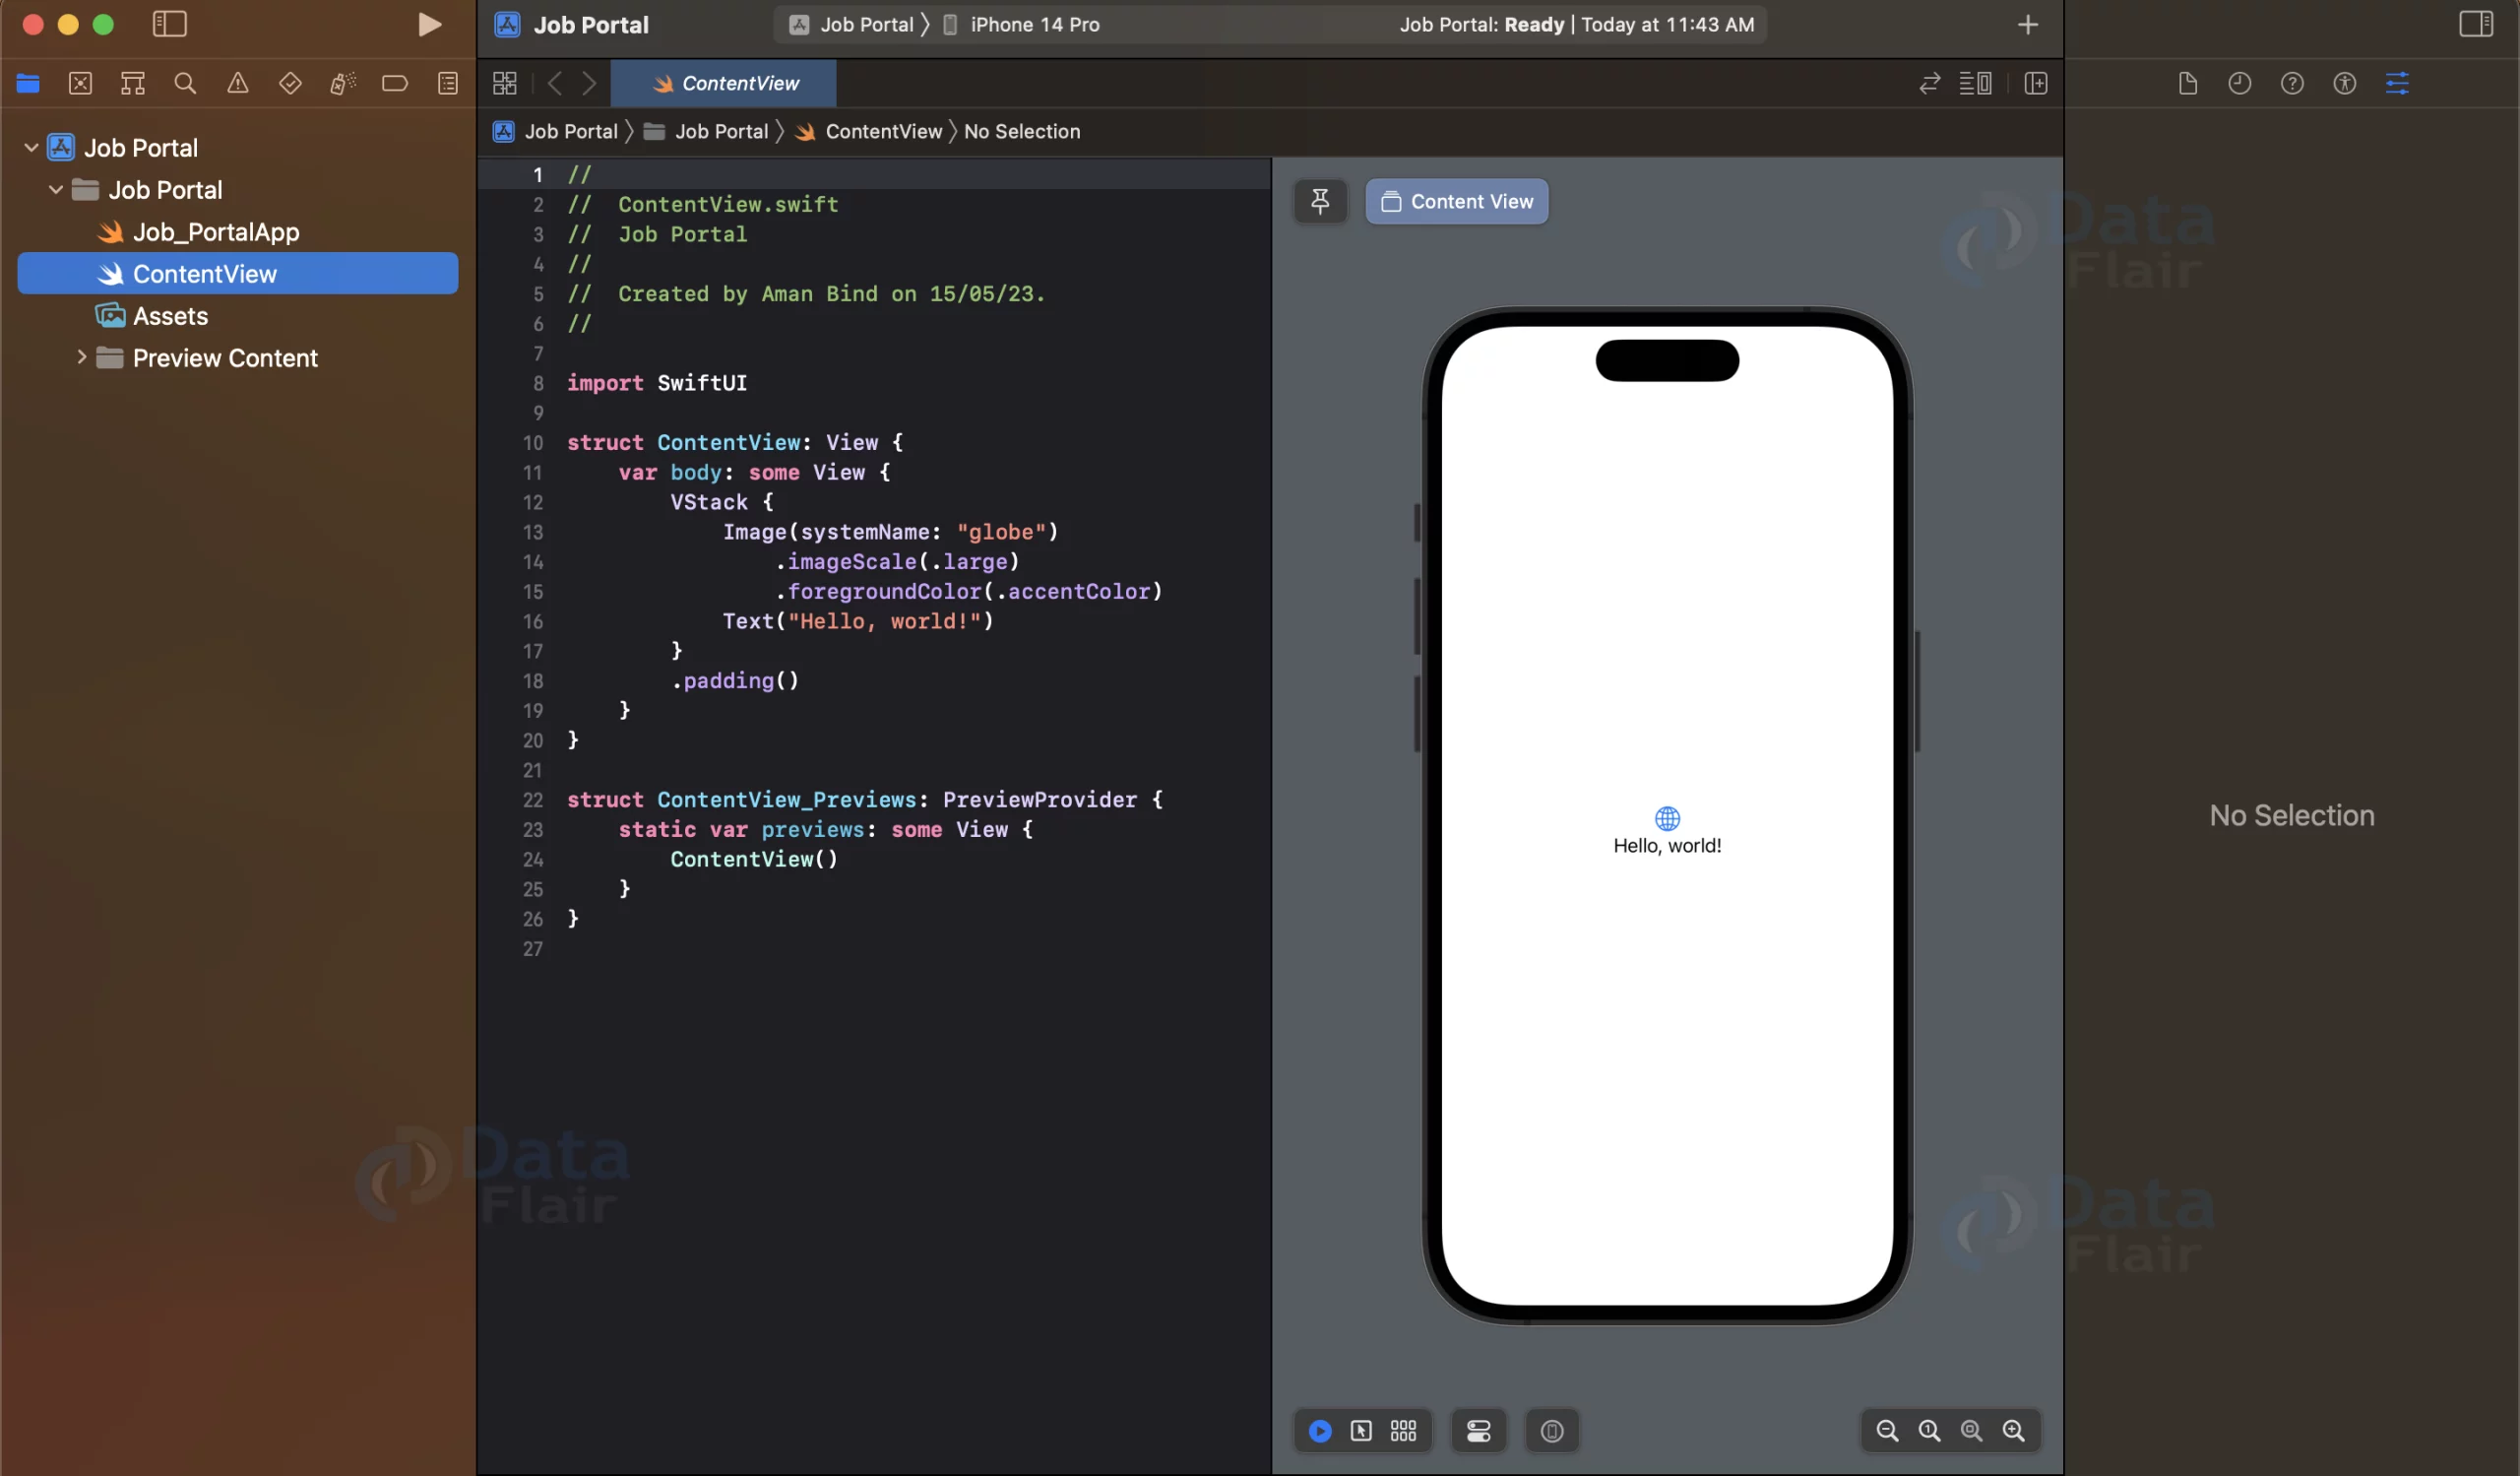
struct ContentView: View {
var body: some View {
JobListView()
}
}
struct ContentView_Previews: PreviewProvider {
static var previews: some View {
ContentView()
}
}

Now the app is ready to help you land your next job.
Swift Job Portal App Output

Summary
Congratulations! You have successfully created a Job Portal app using SwiftUI. You can now run your app on the iOS Simulator or a physical device to see it in action. Enter a job title and location, click the “Search” button, and the app will display a list of relevant jobs.