


Placement-ready Courses: Enroll Now, Thank us Later!
After Qlikview Backup and Restore options, let us move towards a new topic, QlikView Workbench. In our lesson, we will start by discussing what is QlikView Workbench, installation process and how to use it.
So, let’s start it without further ado.
What is QlikView Workbench?
QlikView Workbench is an integration and development toolbox or platform which enable users to develop solutions and extensions. The workbench offers an integrated development environment using Microsoft® Visual Studio® and QlikView APIs (QlikView AJAX client).
It provides a complete toolkit with templates and controls to easily develop websites and extensions using drag and drop functionalities. Thus, it is a platform which enables easy integration of QlikView analytics with other web-platforms or apps.
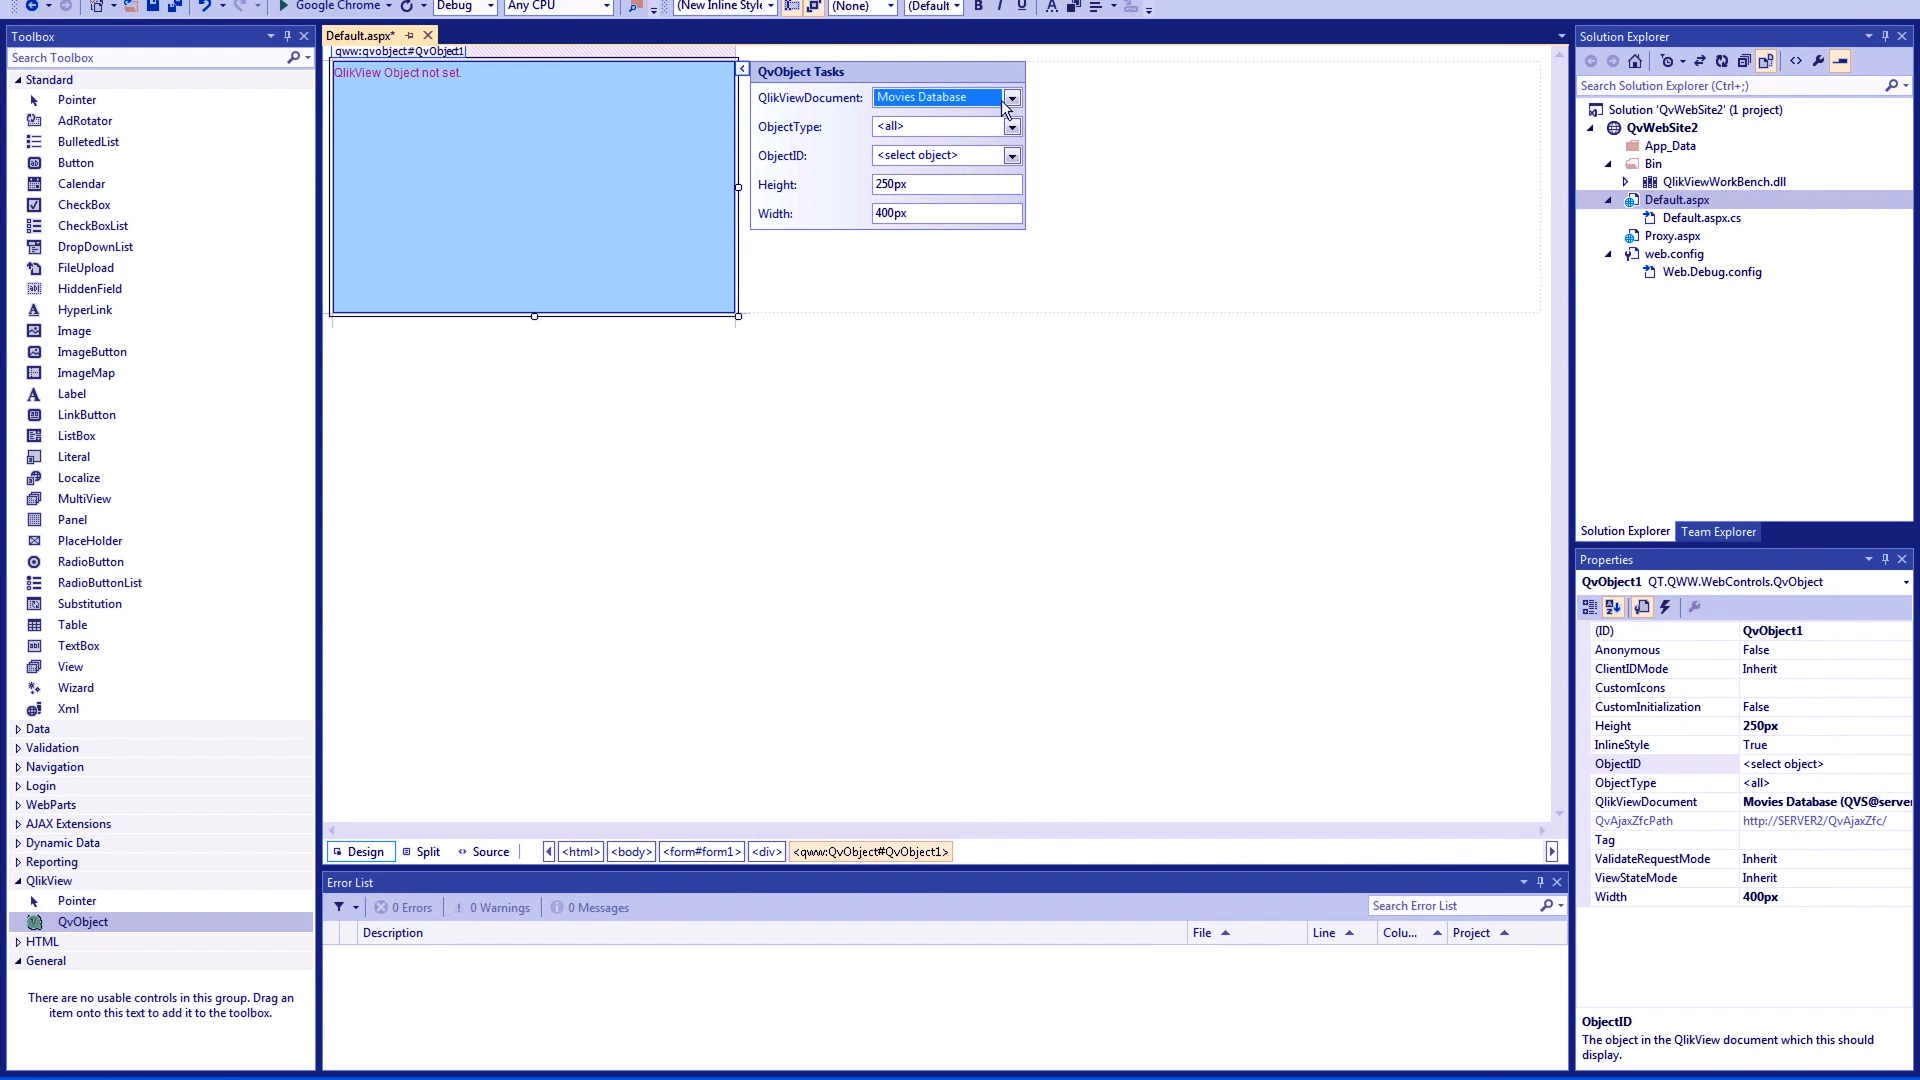
Given here is a snapshot of a typical QlikView Workbench.
How to Install QlikView Workbench?
We hope that from our previous section, the idea of QlikView Workbench is clear to you. Now let us move on to understanding how we install it on our systems with QlikView.
Workbench Installation Pre-requisites
Before we get into the process of installation, let us first know the system requirements:
- In the License Enabler File (LEF) for QlikView Server, the Workbench tag must be present.
- We require .NET version 3.5 or later.
- Microsoft® Visual Studio® version 2010, 2012 or 2013 is suggested. Also, QlikView Workbench must only be installed on a device having/using Microsoft® Visual Studio®.
- Before starting the installation process, make sure QlikView Server and AccessPoint are active and running.
Steps to install workbench in your system
The process to install QlikView Workbench on your machine is given below.
1. Start installation program using the setup files
(QlikViewWorkbench_x64Setup.exe or QlikViewWorkbench_x86Setup.exe.)
2. Files are unpacked and the required storage space is calculated.
3. Click Next on the Welcome screen displayed.
4. Select the language of preference for installation and click Next.
5. Read the software license agreement. Check on I accept the terms in the license agreement and click Next to continue.
6. Enter the User Name and name of the Organization. Click on Next.
7. Select the setup type from two available choices, Complete (installs all program features) and Custom (you can choose the program features, which plan to install). Click Next.
8. (If you have selected Custom setup type, you can omit a selected feature from the context menu)
9. The default installation path displays, which is C:\Program Files\QlikView\Workbench You can also select a different file path from Change… option.
10. Enter and save the file path to QvAjaxZfc virtual directory.
11. It is saved either on QlikView Web Server or Microsoft IIS. The default path is saved as http://<mycomputer>/QvAjaxZfc/
12. To confirm the path, click on Test URL. Click Next on successful testing.
13. Your software is ready for installation. Click Install to proceed with Workbench installation.
14. Click on Finish to complete the installation.
Post-installation info
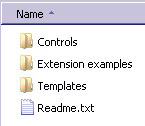
- We can install and save some important Workbench at the path C:\Program Files\QlikView\Workbench\Templates: We can save these templates in the Visual Studio template directory so that a user can use them during website creation.
- At the installation path, you find several files and folders as shown in the image below.
QlikView Workbench Toolkit
Upon successful installation, QlikView Workbench comes with a complete toolkit required for development and integration. Three main elements of the toolkit are:
1. Templates for website projects: Similar to the templates in Qlik Sense Mashups, QlikView Workbench provides predesigned templates to develop your websites on. While using, it generates ASP.NET web site project having a proxy page. With the help of the proxy page, there are no cross-site scripting issues.
2. Templates for extension objects: It enables you to create extension objects and set their properties using an extension wizard. You can also manipulate object features for packaging and deploying the objects on the QlikView Server.
3. QvControl: It is an easy-to-use, drag and drops development interface where you can work with QlikView objects and create a website without indulging into extensive coding. You can also set common tasks and object properties using the graphical interface.
Conclusion
Hence, this was the explanation of QlikView Workbench with the installation process. Furthermore, we discussed workbench toolkit and its elements. In case of any queries or suggestions, do leave us a comment below.