


Master Python with 70+ Hands-on Projects and Get Job-ready - Learn Python
Placement-ready Courses: Enroll Now, Thank us Later!
Pin Your Notes is a user-friendly project that simplifies note-taking and organization. It offers a virtual pinboard where you can create, categorize, and customize notes based on your needs. The interactive interface allows for easy editing, rearranging, and searching, ensuring efficient access to information. With collaborative features and seamless syncing across devices, it’s a versatile tool for individuals and teams to stay organized and boost productivity.
Overall, Pin Your Notes provides a visually appealing and intuitive platform for managing and retrieving important information.
About Python Django Pin Your Notes
The Python Django Pin Your Notes project’s objective is to facilitate easy note-taking, organization, and retrieval, ultimately helping individuals and teams stay organized, remember important information, boost overall productivity and get exposure to various features of the project.
Prerequisite for Pin Your Notes Project using Python Django
- A solid understanding of the Python programming language and the Django web framework is necessary.
- A strong understanding of HTML, CSS, and JavaScript is required to develop the project’s user interface.
- Relational Database: You will need to have a good understanding of relational databases, such as SQLite, MySQL, or PostgreSQL, to create and manage the database for the pin your notes project.
Download Python Django Pin Your Notes Project.
Please download the source code of Python Django Pin Your Notes Project from the following link: Python Django Pin Your Notes Project Code.
Python Django Pin Your Notes Project Setup
Minimum system configuration:
- The operating system requirements include Windows 7 or later, macOS 10.11 or later, or a modern operating system.
- Linux distribution.
- Processor: Intel Core i3 or equivalent.
- RAM: 4 GB or more
- Disk Space: 5 GB or more.
- Browsers such as Google Chrome, Mozilla Firefox, or Microsoft Edge can be used.
Visual Studio Code can be downloaded from the official website.
On the download page, you can select the suitable installer for your operating system (Windows, macOS, or Linux). After downloading the installer, run it and proceed with the installation instructions to install VS Code on your computer.
Here’s a brief explanation of each step, along with the commands to execute:
1. Python should be installed: Download and install the latest version of Python from the official website, following the installation instructions for your operating system.
2. Install pip: Download the get-pip.py script and run python get-pip.py to install pip.
3. Create a virtual environment: Run python -m venv myenv to create a new virtual environment named ‘myenv’.
4. Activate the virtual environment: Run source myenv/bin/activate on Linux/Mac or myenv\Scripts\activate on Windows to activate the virtual environment.
5. Install Django: Run pip install django to install the latest stable version of Django.
6. Verify installation: Run python -m django –version to verify that Django is installed correctly.
7. Create a new Django project: Run django-admin startproject myproject to create a new Django project named ‘myproject’.
8. Start the development server: Run python manage.py runserver to start the development server.
That’s it! A working installation of Django should now be in place, and you should be ready to start building your web application.
Steps to Create “Pin your notes” Project – Let’s Move ahead with this amazing project.
1. Open the terminal from the folder where we want to create the project.
Right click on mouse -> open in terminal -> write “code .” (space is mandatory between code and “.”)
2. Then go to the project folder -> urls.py and inside urls.py of project, do this -> add “include” in import as shown in the code below and add “path(“”,include(“app.urls”))”
3. Create urls.py in the app of Pin your notes project(urls.py is mandatory in both the project and app).
4. In setting.py, add the ‘app name”.
5. Now runserver to check, if everything is working or not. If you see the below image, then we are done with the installation part. To runserver, run command in terminal as follows “py manage.py runserver”.
6. Now, create the models.py using the ORM technique as follows.
To create the above field in the database, run the following commands as follows:
- Py manage.py makemigrations
- Py manage.py migrate
The file structure will look like this for our project:
App(main) -> Templates -> app(folder inside app) -> index.html, show.html, update.html.
Now, execute the project step by step with code as follows:
1. Create the fields in models.py (in the app) as per the below mentioned code, using the ORM technique, and include the three fields: date, title, and notes.
from django.db import models

# Create your models here.
class NoteDB(models.Model):
    date = models.DateField(null=True, blank=True)
    title = models.CharField(max_length=50)
    Notes = models.TextField(max_length=100, null=False, blank=False)
After creating the above fields inside the class, Use the command “python manage.py makemigrations” (to get ready) and “python manage.py migrate”(to commit or reflect in the database).
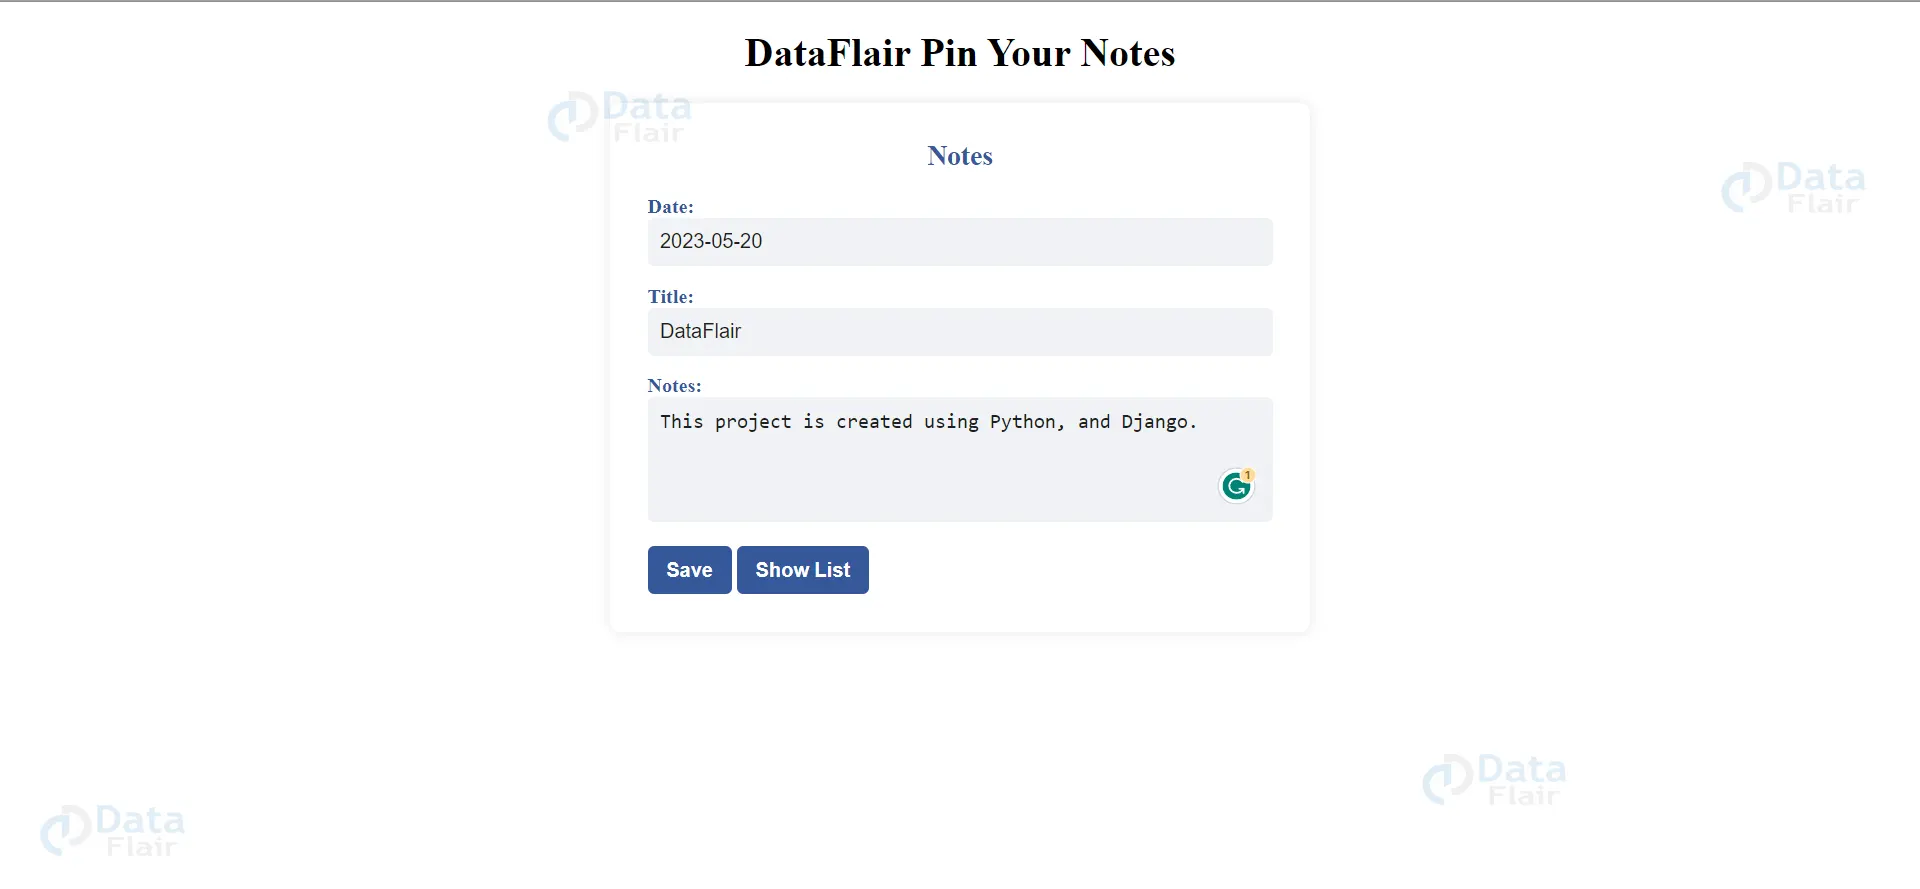
1. We will now create a template for inserting data in the database and views.py logic for inserting.
<center><h1>DataFlair Pin Your Notes</h1></center>

<form method="post" action="{% url 'create-data' %}">
        {% csrf_token %}
        <div class="container">
            {% if messages %}
            <ul class="messages">
                {% for message in messages %}
                <li{% if message.tags %} style="list-style: none;color: tomato;" class="{{ message.tags }}" {% endif %}>{{ message }}</li>
                    {% endfor %}
            </ul>
            {% endif %}
            <h2>Notes</h2>
            <div class="form-group">
                <label for="datepicker">Date:</label>
                <input type="text" id="datepicker" name="datepicker">

            </div>
            <div class="form-group">
                <label for="title">Title:</label>
                <input type="text" id="title" name="title">
            </div>
            <div class="form-group">
                <label for="notes">Notes:</label>
                <textarea id="notes" name="notes"></textarea>
            </div>
            <div class="button-group">
                <button id="save-btn">Save</button>
                <button id="show-list-btn"><a href="{% url 'show' %}" style="text-decoration: none;color: #fff;">Show List</a></button>
            </div>
        </div>
    </form>
Views.py
def Insert(request):
    if request.method == "POST":
        date = request.POST['datepicker']
        title = request.POST['title']
        Notes = request.POST['notes']

        if date == "":
            messages.error(request, "date should not be null,or format must be yyyy-mm-dd")
            return render(request, "app/index.html")
        else:
            new_data = NoteDB.objects.create(date = date, title = title, Notes = Notes)
        return redirect("show")
Urls.py
path("insert", Insert, name="create-data"),
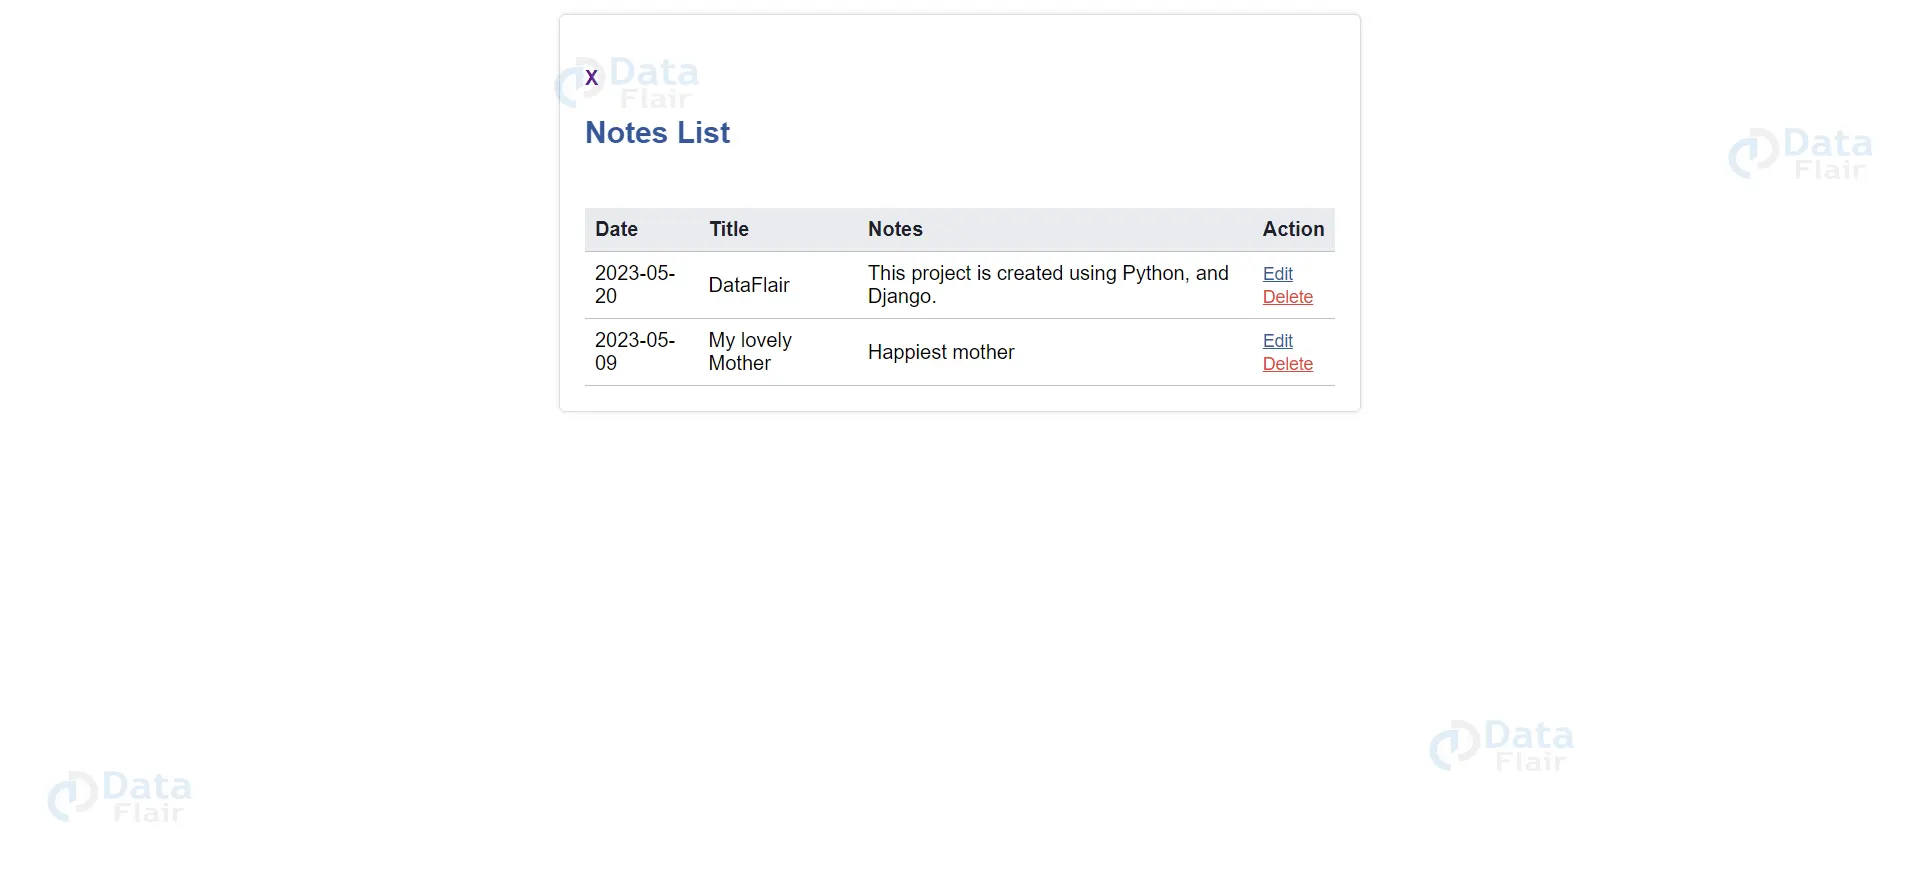
2. Now we will create a show template and views.py
<div class="container">
        <h4><a href="{% url 'index' %}" style="text-decoration: none;">X</a></h4>
        <h2 style="position: fixed;">Notes List</h2>
        <br><br><br><br>
        <table id="notes-table">
            <thead>
                <tr>
                    <th>Date</th>
                    <th>Title</th>
                    <th>Notes</th>
                    <th>Action</th>
                </tr>
            </thead>
            {% if show_data %}
            <tbody>
                {% for item in show_data reversed %}
                <tr>
                    <td>{{ item.date | date:"Y-m-d"}}</td>
                    <td>{{ item.title }}</td>
                    <td>{{ item.Notes }}</td>
                    <td>
                        <form method="post" action="{% url 'updatepage' pk=item.pk %}">
                            {% csrf_token %}
                            <button class="edit-btn">Edit</button>
                        </form>
                        <form method="post" action="{% url 'delete' pk=item.pk %}">
                            {% csrf_token %}
                            <button type="submit" onclick="delfunc()" class="delete-btn">Delete</button>
                        </form>
                    </td>
                </tr>
                {% endfor %}

            </tbody>
            {% endif %}
        </table>
    </div>
Views.py
def show(request):
    show_data = NoteDB.objects.all()
    return render(request, "app/show.html", {"show_data": show_data})
Urls.py
path("show", show, name="show"),
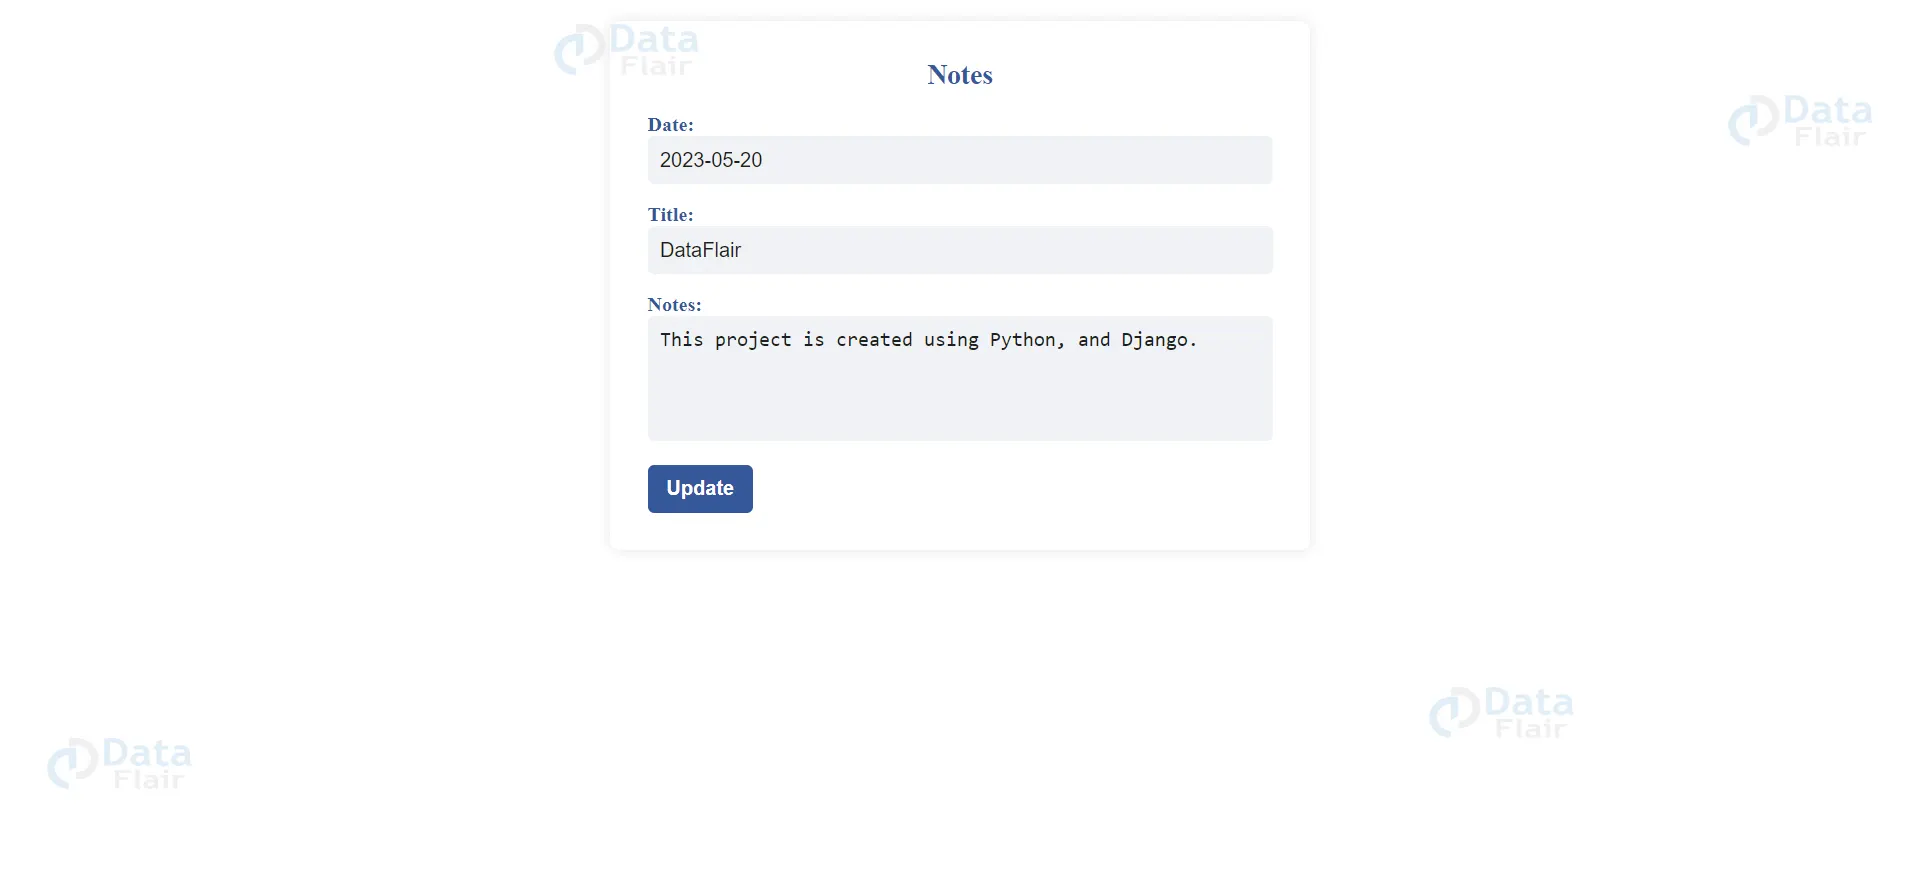
3. Now create an updated template and views.py
{% if getupdate %}
    <form method="post" action="{% url 'update' pk=getupdate.pk %}">
        {% csrf_token %}
        <div class="container">
            <h2>Notes</h2>
            <div class="form-group">
                <label for="datepicker">Date:</label>
                <input type="text" id="datepicker" name="date" value="{{getupdate.date | date:"Y-m-d"}}">
            </div>
            <div class="form-group">
                <label for="title">Title:</label>
                <input type="text" id="title" name="title" value="{{getupdate.title}}">
            </div>
            <div class="form-group">
                <label for="notes">Notes:</label>
                <textarea id="notes" name="Notes">{{getupdate.Notes}}</textarea>
            </div>
            <div class="button-group">
                    <button type="submit" id="update-btn" onclick="updatealert()">Update</button>
            </div>
        </div>
    </form>
    {% endif %}
Views.py
# to get user id at the update page
def getupdatepage(request, pk):
    getupdate = get_object_or_404(NoteDB, pk=pk)
    return render(request, "app/update.html", {"getupdate": getupdate})

# to get the update the value in the id
def Update(request, pk):
    obje = get_object_or_404(NoteDB, pk=pk)
    if request.method == "POST":
        obje.date = request.POST.get('date')
        obje.title = request.POST.get('title')
        obje.Notes = request.POST.get('Notes')
        obje.save()
    return redirect('show')
Urls.py
path("updatepage/<int:pk>/", getupdatepage, name="updatepage"),
    path("update/<int:pk>", Update, name="update")
4. Now, the last part of the project is to delete.
def Delete(request, pk):
    obj = get_object_or_404(NoteDB, pk=pk)
    if request.method == "POST":
        obj.delete()
        return redirect('show')
    return redirect('show')
Urls.py
path("delete/<int:pk>/", Delete, name="delete"),
Explanations:
Sure! Let’s go through each view and their corresponding paths:
1. Index View:
- Path: “” (empty string)
- Name: “index”
- Description: This view renders the index.html template and is associated with the root URL of the application. It serves as the landing page for the app.
2. Insert View:
- Path: “insert”
- Name: “create-data”
- Description: This view handles the insertion of new data into the database. It expects a POST request and retrieves the datepicker, title, and notes from the request’s POST data. It performs validation on the datepicker field and creates a new NoteDB object if the validation passes. If the date is empty or has an invalid format, an error message is displayed, and the index.html template is rendered again. After successfully creating the new object, it redirects the user to the show view.
3. show View:
- Path: “show”
- Name: “show”
- Description: This view retrieves all the data from the NoteDB model and passes it to the show.html template. It renders the template, displaying the data to the user.
4. getupdatepage View:
- Path: “updatepage/<int:pk>”
- Name: “updatepage”
- Description: This view retrieves a specific NoteDB object based on the given pk (primary key). It renders the update.html template and passes the object as getupdate to the template.
5. Update View:
- Path: “update/<int:pk>”
- Name: “update”
- Description: This view updates the values of a specific NoteDB object identified by the provided pk. It expects a POST request and retrieves the new values for date, title, and notes from the request’s POST data. It updates the object with the new values and saves it to the database. Afterwards, it redirects the user to the show view.
6. Delete View:
- Path: “delete/<int:pk>”
- Name: “delete”
- Description: This view deletes a specific NoteDB object identified by the provided pk. It expects a POST request and deletes the object from the database. Afterwards, it redirects the user to the show view.
Make sure to include these paths in your urls.py file to map the views to their respective URLs in your Django application.
Python Django Pin Your Notes Output
Summary:
Pin Your Notes is a Django project that aims to assist users in staying organized by offering a virtual pinboard to manage and access notes. The Python Django Pin Your Notes project includes features such as creating, categorizing, and customizing notes, as well as setting reminders and due dates. Users can collaborate and sync their notes across devices, ensuring seamless access from anywhere.
The project utilizes Django’s web framework to handle user authentication, data storage, and routing. With an intuitive user interface and interactive functionalities, Pin Your Notes simplifies note-taking and organization, enhancing productivity and efficiency.