


Job-ready Online Courses: Click for Success - Start Now!
In this tutorial, we’ll be learning about Lock Objects in ABAP.
We will learn about what they mean, what their function is, how to create them, and technical details about them.
What are Lock Objects in ABAP?
- Lock Objects in ABAP are part of the Data Dictionary which are primarily used for synchronisation tasks.
- When more than one program tries to access the same data, it requires a lock over the data so that there is no inconsistency in the final saved data.
- Whenever someone tries to modify or update data, ABAP needs to make sure that data remains integrated across all users or programs.
- Hence, we need to define lock objects for tables – their data along with key fields.
- Lock objects are global, reusable and important for synchronisation to generate function modules across multiple programs and users.
Types of SAP ABAP Lock Objects
1. Read/Shared Lock in ABAP
- This lock allows read-only access to the object shared
- It allows programs and users to read the data or object but not write/modify/update the same
- Thus it protects ‘read’ access to data or object
2. Write/Exclusive Lock
- This lock allows neither read nor write access to shared objects by other transactions or users
- Thus it protects ‘write’ access to data or object
3. Enhanced/Exclusive without Cumulating Lock
- This lock works similarly to write/exclusive lock
- Enhanced lock includes additional features like protecting the object or data from further access attempted by same program, transaction or user
SAP ABAP Lock Mechanism
The main purpose or goals of a lock mechanism in SAP ABAP are as follows –
- A lock allows a user or program to convey to other users or programs that it is currently accessing some data or object and for them to prevent modifying it at the same time.
- It also avoids the program itself from reading or modifying the object that another program is currently accessing.
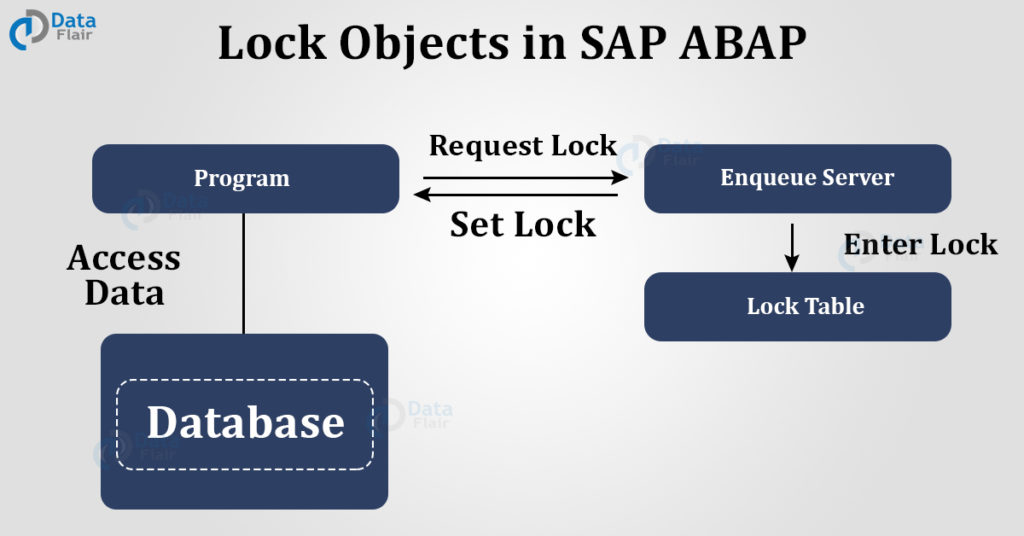
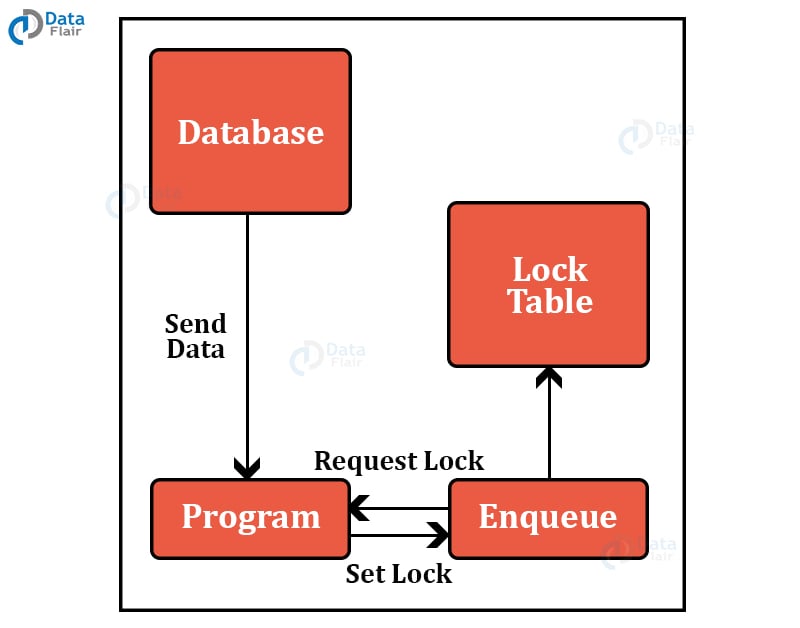
ABAP Lock mechanism is as follows –
- First, the program generates a lock request.
- This lock request goes to the ‘ENQUEUE’ server .
- The server creates a lock in the table.
- Now, the ‘ENQUEUE’ server sets the lock, which gives the program ‘read’ or ‘write’ or ‘exclusive’ access, etc.
- This lock mechanism is automatically followed by a program with statements like ‘INSERT’, ‘UPDATE’, ‘DELETE’.
- However, the locks are useful only for the current statement. If you want a lock for multiple statements, you will have to create this multiple times.
Structure of SAP ABAP Lock Object
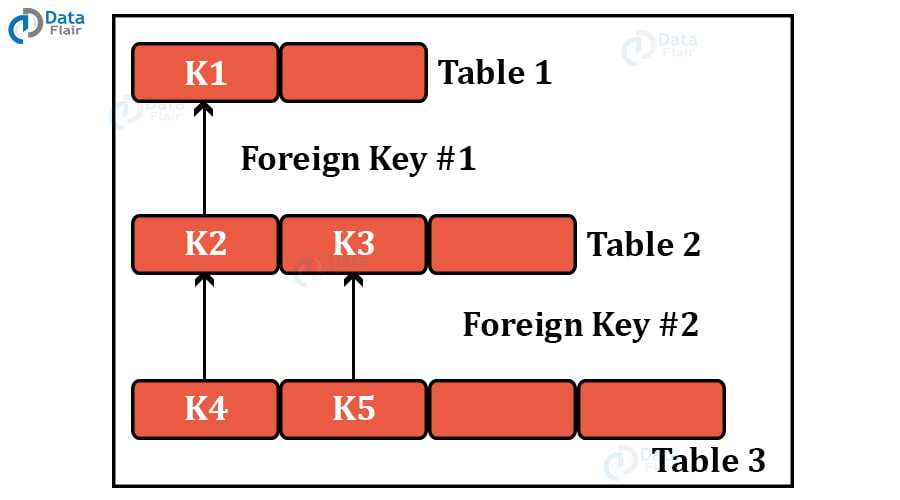
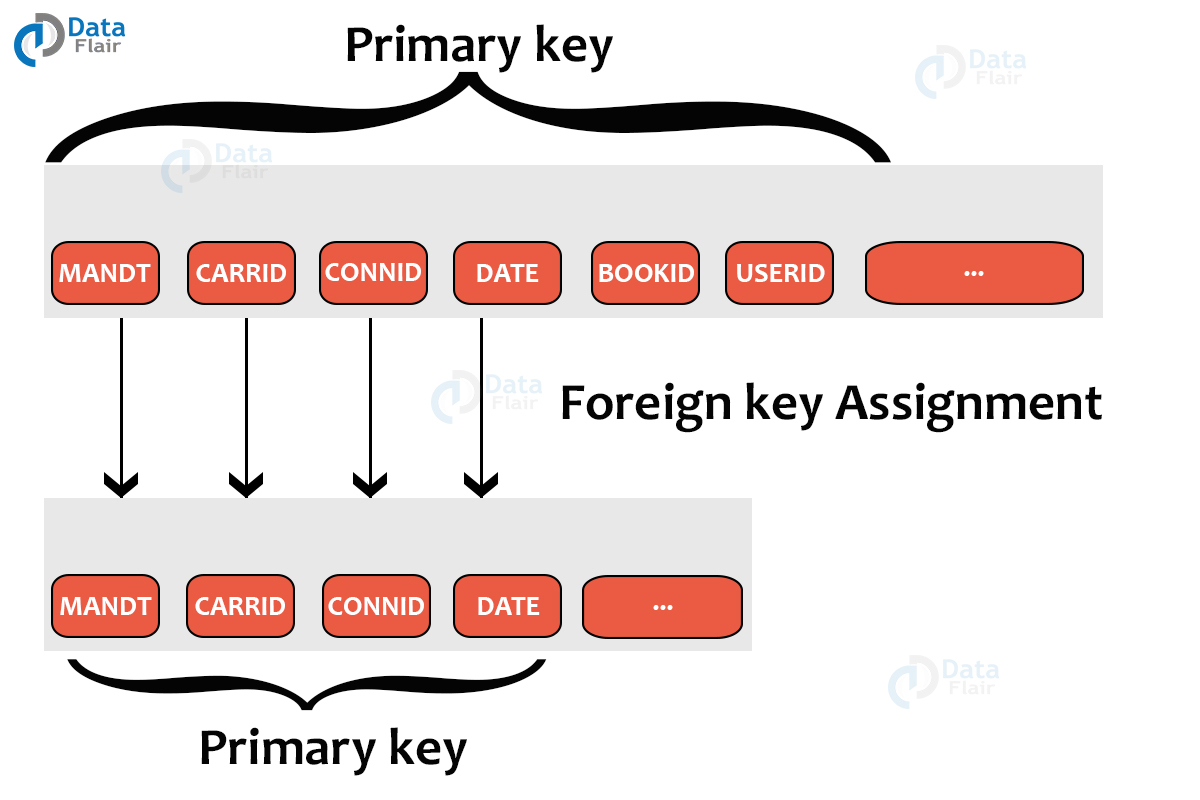
- A lock object defines the table or data along with its key fields.
- The primary table to be locked is considered with its key field.
- If you want to include multiple (secondary) tables, you can include them using foreign keys.
Function Modules used for Lock Objects
1. ENQUEUE
Syntax: ENQUEUE <lock_object_name>
This function module sets the lock for the object. We use it to insert the object into a queue
2. DEQUEUE
Syntax: DEQUEUE <lock_object_name>
This function module releases the lock for the object. We use it to remove the object from a queue
Example of Lock Objects in ABAP
Let’s take the example of booking tickets for a movie screening.
A movie theatre, as we know, has limited capacity. Hence we must prevent overbooking when multiple patrons are attempting to book tickets online.

How to create Lock Objects in ABAP
Let’s look at the steps to create lock objects in SAP ABAP –
1. Open the SAP System.
2. In transaction code input, enter ‘SE11’ to go to the Data Dictionary.
3. Select ‘Lock Object’ from the radio button options.
4. Now since we are creating a new one, enter a name for the object (beginning with ‘E’).

5. Select button ‘Create’.
6. Enter a ‘Short Description’ for the lock object.

7. Select the tab called ‘Tables’.
8. Now enter the name of the table on which the lock is to be performed.
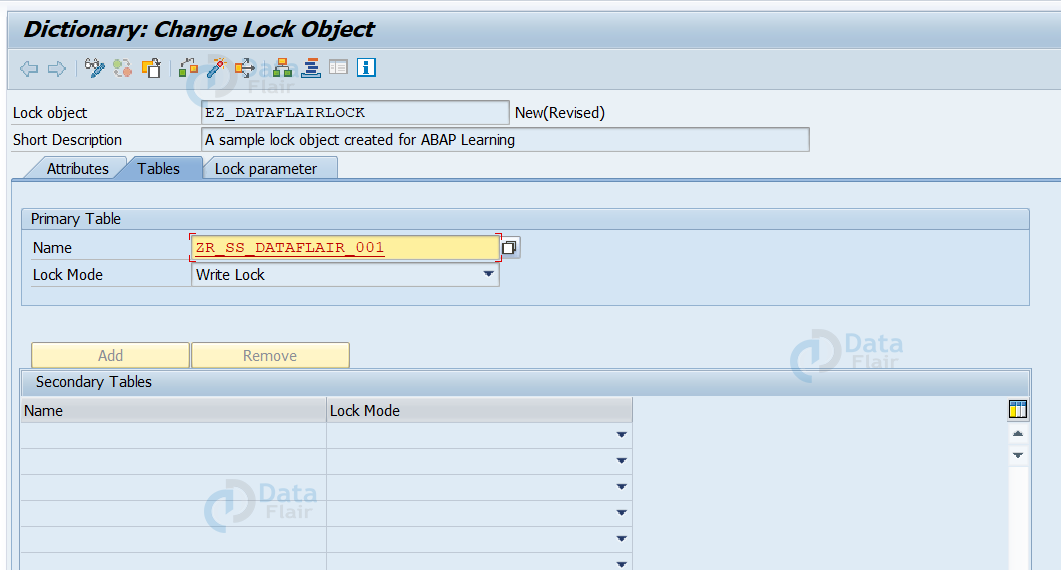
9. Select what kind of lock you want to have.
10. Save and activate this (Ctrl+S, then Ctrl+F2).
11. Select Lock Modules and you will have created the lock object successfully.
Uses & Advantages of ABAP Lock Objects
1. Lock objects in ABAP promote synchronisation of objects.
2. They protect the integrity and uniformity of data across objects.
3. They prevent collision of data, and display of the same data in different versions to different users or transactions.
4. The Lock Objects notify other transactions that a shared object is currently being used by one particular transaction or user.
Summary
Thus, in this tutorial, we learnt about locks and lock objects in ABAP. We learnt its importance, how to create one, and how to use a lock object.