


Machine Learning courses with 110+ Real-time projects Start Now!!
Step into a world where images defy their boundaries and pixels dance to a new rhythm. Welcome to the captivating realm of ‘Geometric Transformations Using OpenCV.’
In this journey, we’ll unveil the magic of reshaping reality, where images bend, twist, and evolve with the touch of a code. From elegant translations to captivating rotations, we’ll unlock the artistry of OpenCV, giving you the power to sculpt visual narratives that transcend the ordinary.
Through affine translation, rotation, and scaling, you’ll reshape reality itself. But that’s not all – we’ll also explore the vibrant realm of color maps, adding hues and tones that breathe life into every pixel. Get ready to wield the OpenCV wand and craft visual wonders that stretch the boundaries of imagination.
Affine Transformation in OpenCV: Bridging Reality and Imagination
An affine transformation in OpenCV is a geometric manipulation applied to an image that includes translation (shifting), rotation, scaling, and shearing while preserving parallel lines. It’s represented by a transformation matrix that defines how each pixel’s position is altered. This transformation maintains the linearity of points and angles, allowing for accurate adjustments of an image’s shape and orientation. Affine transformations are widely employed in tasks like image alignment, distortion correction, and object transformation within computer vision and image processing.
Within the realm of image manipulation, the concept of “Affine Transformation” stands as a potent tool to reshape reality while preserving the integrity of lines and angles. OpenCV empowers this process through its cv2.getPerspectiveTransform() function, allowing the transformation of images from one perspective to another. In this section, we delve into the essence of cv2.getPerspectiveTransform(), breaking down its syntax, parameters, and accompanying code.
Syntax :
cv2.getPerspectiveTransform(src_points, dst_points)
Parameters :
- Src_points: A set of four source points in the input image.
- Dst_points: The corresponding destination points in the output image.
Code with Explanation :
import cv2
import numpy as np

# Load the source image
src_image = cv2.imread(r"C:\Users\satchit\OneDrive\Desktop\OpenCV Data Flair\Geometric transformations using openCV\skiing-pic.jpg")

# Define the source and destination points
src_points = np.float32([[100, 100], [200, 100], [100, 200], [200, 200]])  # Replace these with your actual coordinates
dst_points = np.float32([[0, 0], [300, 0], [0, 400], [300, 400]])         # Replace these with your desired destination coordinates

# Calculate the perspective transformation matrix
matrix = cv2.getPerspectiveTransform(src_points, dst_points)

# Apply the perspective transformation using cv2.warpPerspective()
result_image = cv2.warpPerspective(src_image, matrix, (600, 700))  # Replace 300 and 400 with your desired output dimensions

# Display the original and transformed images
cv2.imshow('Original Image', src_image)
cv2.imshow('Transformed Image', result_image)
cv2.waitKey(0)
cv2.destroyAllWindows()
Original Image :
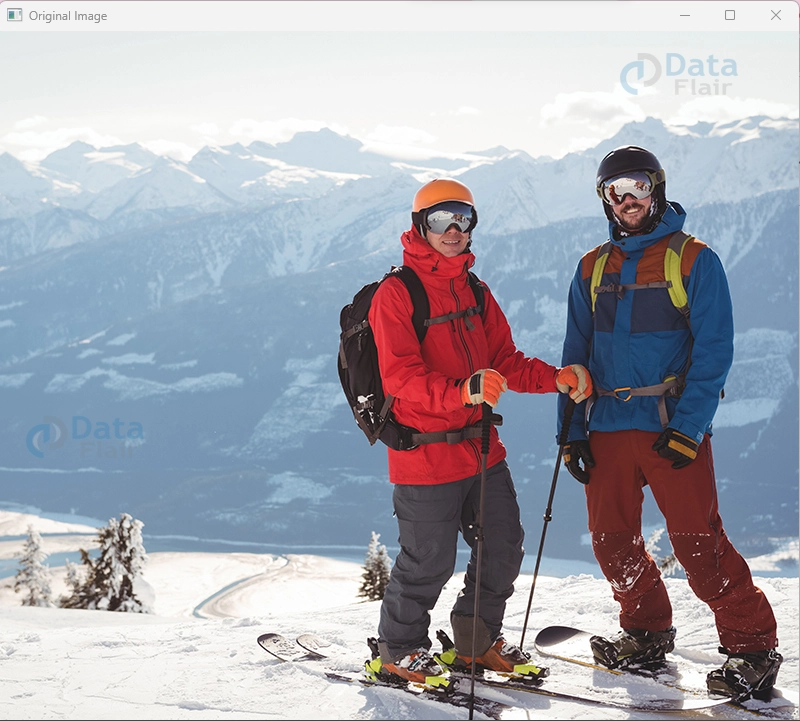
Transformed Image :

Explanation :
1. Load the source image using cv2.imread().
2. Define the source and destination points, where src_points represent the coordinates of points in the source image, and dst_points are the corresponding points in the desired output image.
3. Calculate the perspective transformation matrix using cv2.getPerspectiveTransform(), based on the source and destination points.
4. Apply the perspective transformation using cv2.warpPerspective(), using the calculated matrix.
5. Use cv2.imshow() to display both the original and transformed images.
The cv2.getPerspectiveTransform() function facilitates the creation of a transformation matrix, enabling the conversion of images from one perspective to another. This operation is particularly useful for tasks like rectifying skewed images or mapping flat surfaces to a desired perspective. Adjust the source and destination points to control the transformation effect, opening up a world of possibilities for altering image viewpoints with precision.
Rotation and Scaling in OpenCV: Reshaping Reality with Precision
The transformation matrix of the type allows a picture to be rotated given an angle θ.
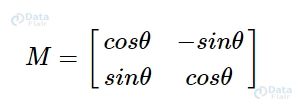
However, OpenCV offers scaled rotation with a centre of rotation that is customizable, allowing you to rotate in any direction you like. The updated transformation matrices are provided below,
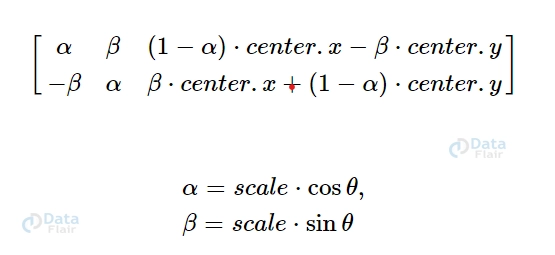
Prepare to enter the realm of image transformation as we unravel the artistry of “Rotation and Scaling” techniques using OpenCV. These tools empower you to twist the axis of perception and resize the canvas of imagination. In this segment, we’ll delve into the elegance of `cv2.rotate()` and `cv2.resize()`, unveiling their syntax, parameters, and accompanying code.
cv2.rotate() :
Syntax :
cv2.rotate(src, rotateCode)
Parameters :
- Src: The source image.
- rotateCode: Specifies the rotation type. Options are,
- cv2.ROTATE_90_CLOCKWISE,
- cv2.ROTATE_90_COUNTERCLOCKWISE, and
- cv2.ROTATE_180.
Code with Explanation :
import cv2
import numpy as np

# Load the source image
src_image = cv2.imread(r"C:\Users\satchit\OneDrive\Desktop\OpenCV Data Flair\Geometric transformations using openCV\skiing-pic.jpg")

# Apply 90-degree clockwise rotation using cv2.rotate()
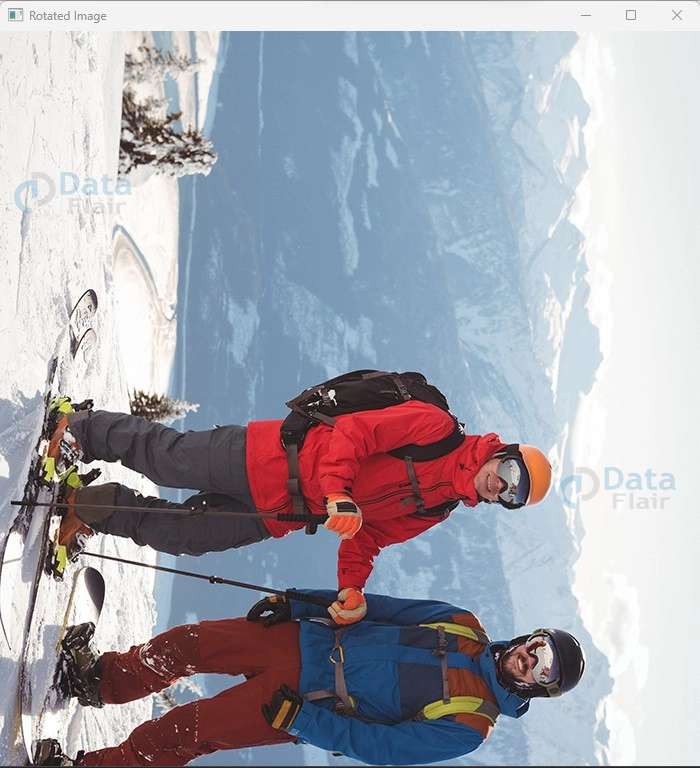
rotated_image = cv2.rotate(src_image, cv2.ROTATE_90_CLOCKWISE)

# Display the original and rotated images
cv2.imshow('Original Image', src_image)
cv2.imshow('Rotated Image', rotated_image)
cv2.waitKey(0)
cv2.destroyAllWindows()
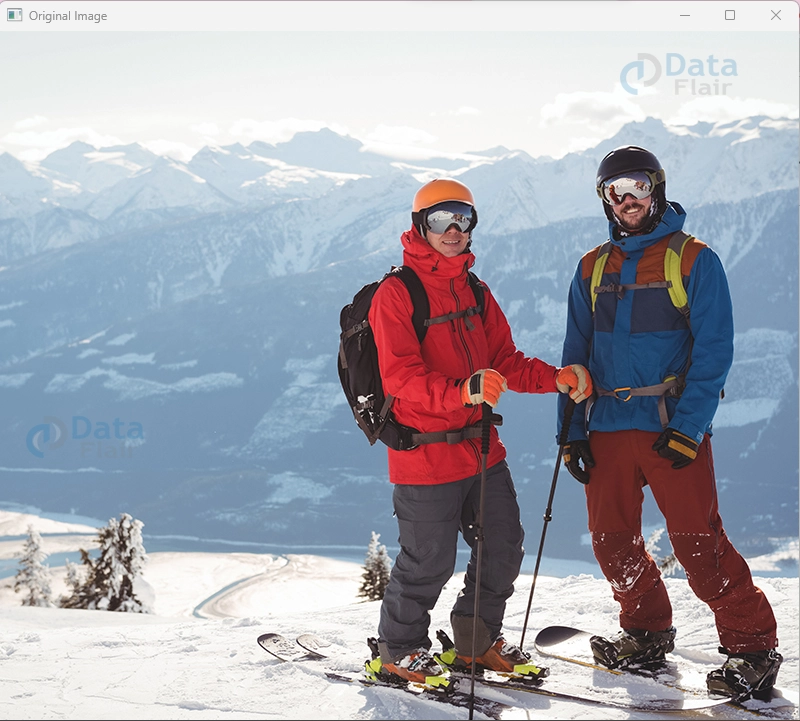
Original Image :
Rotated Image :
Explanation :
1. Load the source image using cv2.imread().
2. Apply a 90-degree clockwise rotation using cv2.rotate() with the cv2.ROTATE_90_CLOCKWISE option.
3. Display both the original and rotated images using cv2.imshow().
cv2.resize() :
Syntax :
cv2.resize(src, dsize, dst, fx, fy, interpolation)
Parameters :
- Src: The source image.
- Dsize: The desired size of the output image.
- Fx, fy Scaling factors along the x and y axes (optional).
- Interpolation: Specifies the interpolation method (default is cv2.INTER_LINEAR).
Code with Explanation :
import cv2
import numpy as np

# Load the source image
src_image = cv2.imread(r"C:\Users\satchit\OneDrive\Desktop\OpenCV Data Flair\Geometric transformations using openCV\skiing-pic.jpg")

# Define the new dimensions
new_width = 640
new_height = 480

# Apply resizing using cv2.resize()
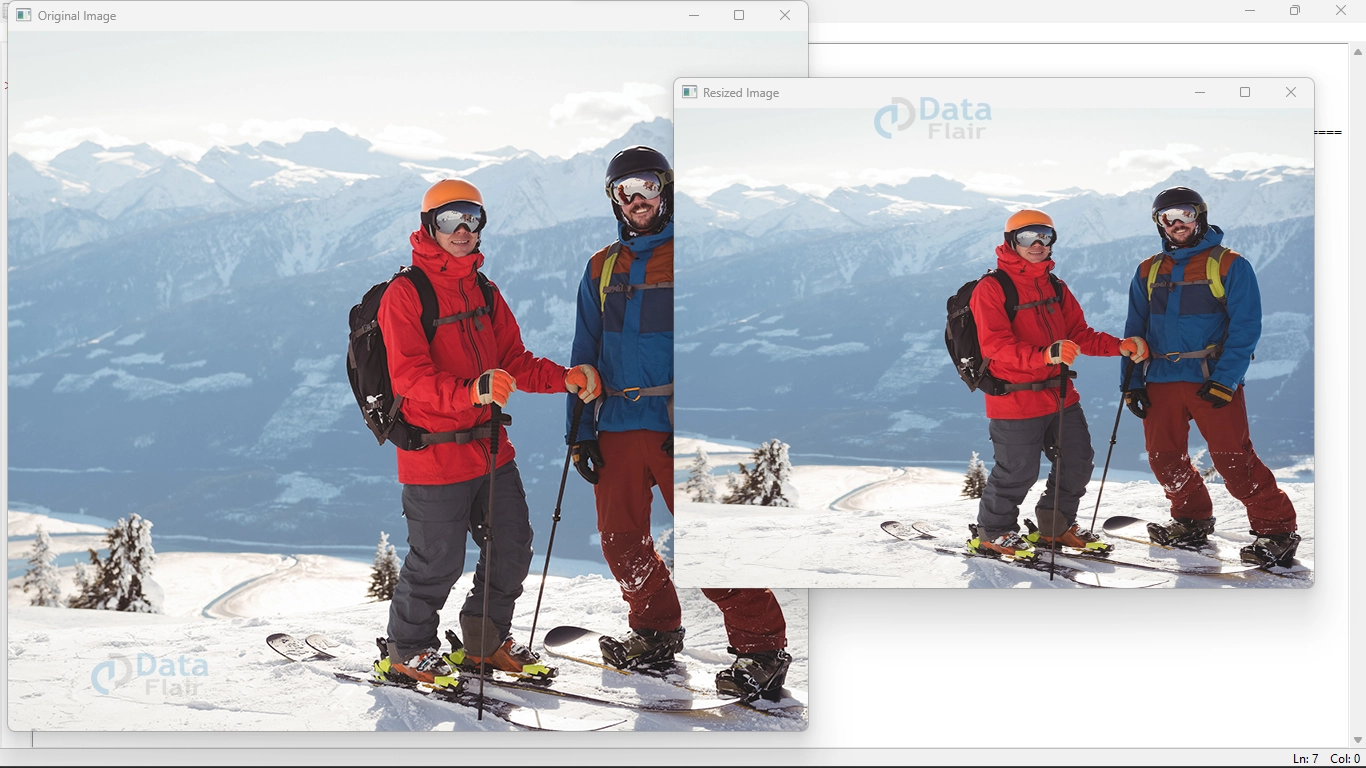
resized_image = cv2.resize(src_image, (new_width, new_height))

# Display the original and resized images
cv2.imshow('Original Image', src_image)
cv2.imshow('Resized Image', resized_image)
Resized Image :
Explanation :
1. Load the source image using cv2.imread().
2. Define the new dimensions for the resized image.
3. Apply resizing using cv2.resize() with the specified dimensions.
4. Display both the original and resized images using cv2.imshow().
Rotation and Scaling in OpenCV demonstrates how these functions empower you to manipulate images’ orientations and sizes with precision. Whether you’re fine-tuning an image’s perspective or resizing it to fit a new context, OpenCV’s capabilities offer the means to seamlessly reshape your visual narratives.
Image Reflection in OpenCV: Mirroring Realities
In the world of computer vision, images are the portals through which we glimpse reality. Yet, reality often comes in dualities, where reflection is a powerful tool to unravel hidden patterns.
OpenCV empowers us to explore this world of reflection, where images can be mirrored to reveal new perspectives. In this journey of Image Reflection in OpenCV, we’ll dive into the syntax, parameters, and code of cv2.warpAffine(), uncovering how to create visual reflections that echo the intricacies of the real world.
cv2.warpAffine() – Syntax and Parameters :
cv2.warpAffine(image, M, (width, height))
image: The input image to be transformed.
M: The transformation matrix.
(width, height): Dimensions of the output image.
Code Example – Image Reflection :
import cv2
import numpy as np

# Load an image
image = cv2.imread(r"C:\Users\satchit\OneDrive\DataFlair\skiing-pic.jpg")

# Create a reflection matrix
reflection_matrix = np.array([[-1, 0, image.shape[1]],
                              [0, 1, 0]], dtype=np.float32)

# Apply the reflection using warpAffine
reflected_image = cv2.warpAffine(image, reflection_matrix, (image.shape[1], image.shape[0]))

# Display the original and reflected images
cv2.imshow('Original Image', image)
cv2.imshow('Reflected Image', reflected_image)
cv2.waitKey(0)
cv2.destroyAllWindows()

Reflected Image:

In this code example, we begin by loading an input image using cv2.imread(). We then create a reflection matrix (reflection_matrix) to perform the mirroring transformation. This matrix flips the image horizontally around the y-axis, effectively creating a mirror reflection.
Using cv2.warpAffine(), we apply the reflection matrix to the input image, generating a reflected version. The dimensions of the reflected image remain the same as the original.
Finally, we use cv2.imshow() to display both the original and reflected images side by side. By comparing the two, the effect of the reflection becomes evident, shedding light on hidden symmetries and patterns.
Image reflection in OpenCV takes us beyond mere pixels, unravelling the dualities hidden within visual content. Through the magic of cv2.warpAffine(), we can transform images to reveal mirrored realities that echo the intricacies of the real world. As we delve into this journey of visual transformation, we gain a deeper appreciation for the ways in which images can be transformed, revealing new perspectives and enriching our understanding of the visual realm.
Color Maps in OpenCV: Painting Images with Emotions
Prepare to embark on a journey of visual expression with the enchanting world of “Color Maps” in OpenCV. Like an artist’s palette, color maps breathe life into grayscale images, infusing them with vibrant hues and emotional tones. In this segment, we’ll unveil the syntax, parameters, and accompanying code for color maps, where grayscale metamorphoses into a symphony of colors.
Syntax :
colored_image = cv2.applyColorMap(src_image, colormap)
Parameters :
- src_image: The grayscale source image.
- colormap: The chosen color map, such as cv2.COLORMAP_JET, cv2.COLORMAP_HOT, cv2.COLORMAP_COOL, and more.
Code with Explanation :
import cv2
import numpy as np

# Load the source image
src_image = cv2.imread(r"C:\Users\satchit\OneDrive\Desktop\OpenCV Data Flair\Geometric transformations using openCV\skiing-pic.jpg", cv2.IMREAD_GRAYSCALE)

# Apply the Jet color map using cv2.applyColorMap()
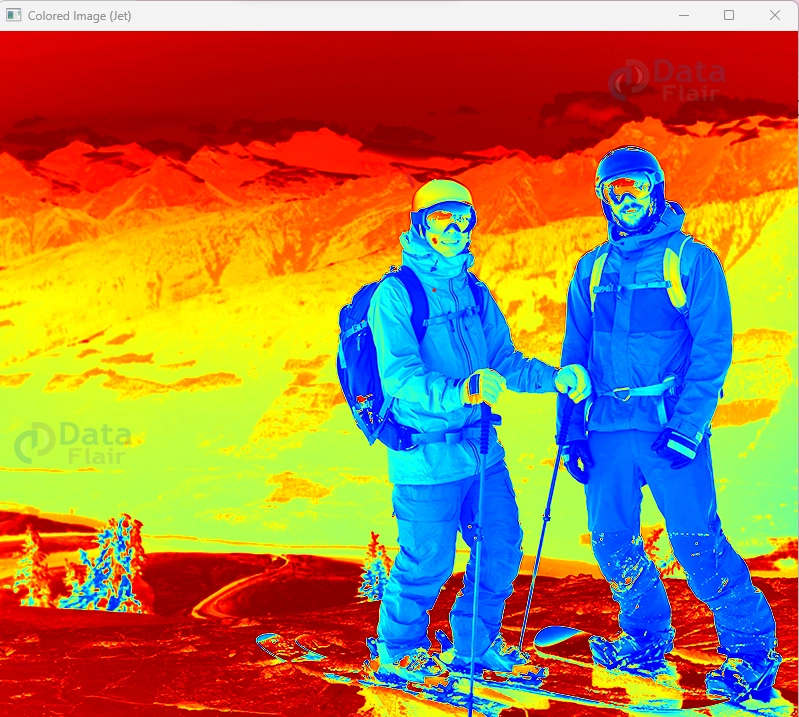
colored_image_jet = cv2.applyColorMap(src_image, cv2.COLORMAP_JET)

# Display the grayscale and colored images
cv2.imshow('Grayscale Image', src_image)
cv2.imshow('Colored Image (Jet)', colored_image_jet)
cv2.waitKey(0)
cv2.destroyAllWindows()
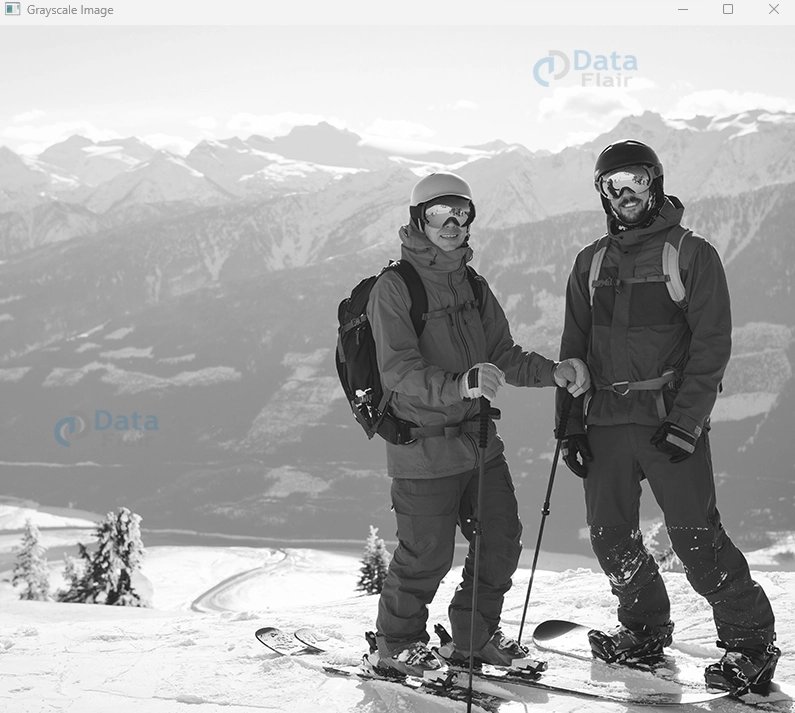
Original Image :
Color mapped image :

Explanation :
1. Load the grayscale source image using cv2.imread() with the cv2.IMREAD_GRAYSCALE flag.
2. Apply the desired color map (in this case, Jet) using cv2.applyColorMap().
3. Display both the original grayscale image and the colored image using cv2.imshow().
Color maps act as a prism, transforming grayscale images into a spectrum of emotions. By choosing the right color map, you can evoke specific feelings or emphasize patterns in your data. OpenCV’s treasure trove of color maps beckons you to explore the world of visual storytelling with every shade and tint.
Summary
In the realm of OpenCV’s image transformation, we’ve journeyed from reshaping reality to infusing emotions into grayscale canvases. Our toolkit encompassed geometric marvels like rotation and scaling, while color maps turned grayscale gradients into vivid emotional stories.
Through code and creativity, we’ve harnessed the power of pixels to craft narratives that transcend the ordinary. As we conclude this exploration, remember that every line of code is a brushstroke on the canvas of imagination, turning data into visual symphonies that resonate far beyond the screen.
OpenCV has opened doors to a realm where technology and art merge, leaving us with endless possibilities to explore. So, go forth, weave your own pixel stories, and let the transformation begin anew.