


Job-ready Online Courses: Knowledge Awaits – Click to Access!
In this tutorial, let’s see what fill handle does and how fill handle works.
What is Fill handle in Excel?
Fill handle automatically identifies the format and fills it as per the sequence. Fill handle works by dragging the mouse. This helps the user in saving a lot more time.
Let’s now look at the ways for using the fill handle in MS-Excel
- Using the + symbol for autofill.
- Choose and drag the cells.
- Click on the + symbol.
- Drag the + symbol until which the cells should fill.
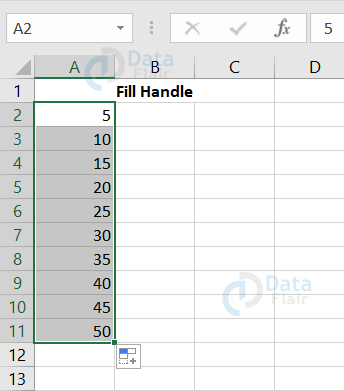
Let’s look at a sample:
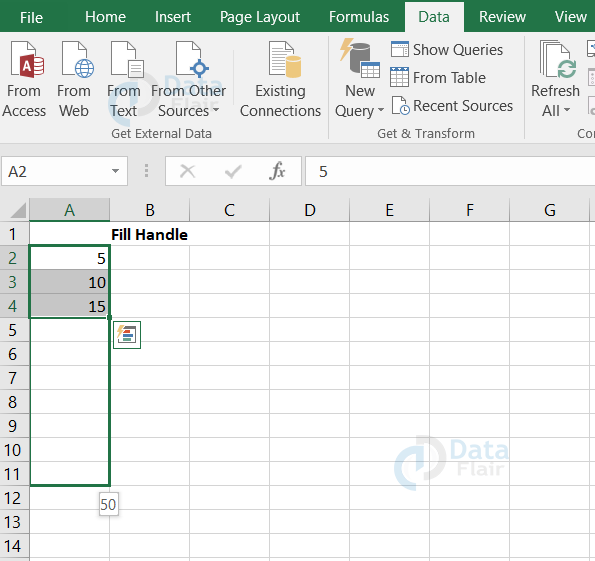
Click on the + symbol and drag until which the autofill should work. In this sample, we are filling until cell number 11 which stops with the value of 50.
1. Auto-fill in Excel
Auto-fill does not work only on the whole numbers, but also for all types like:
- Date
- Day
- Number sequences
The only requirement in the auto fill is that the pattern should be recognizable.
In this sample, we will look at how dates and days format in the autofill.
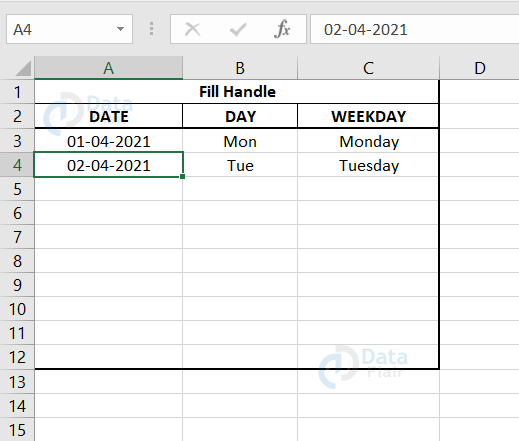
In this, we have filled two rows for each heading i.e., the 3rd and 4th row of the spreadsheet.
Select the cells from the 3rd row so that it can recognize the patterns.
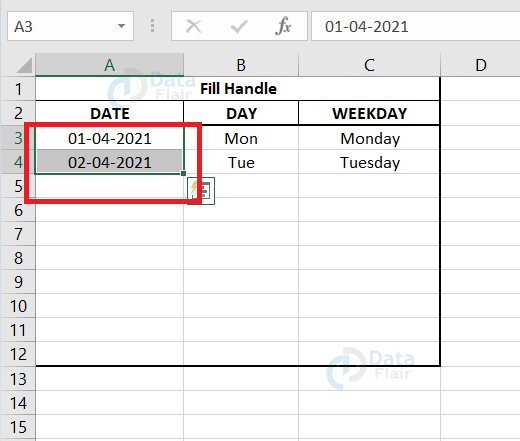
Look at the red box here. It depicts the selection of two cells in the date column i.e., A column cell.
After selecting, just drag the cells until where you wanted to auto-fill.
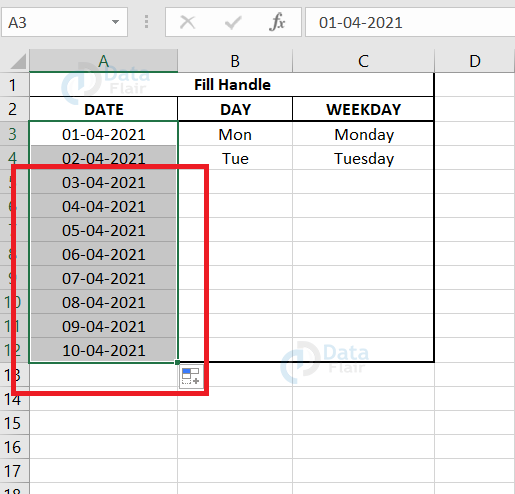
Here, we are filing it until A12. It saves much of the user time.
Let’s look at the day and weekday sample:
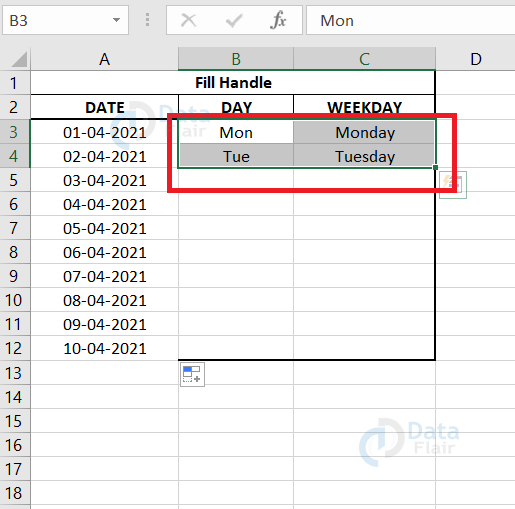
Hope you noticed that the cells are being selected and then just drag the cells until where you wanted to auto-fill.
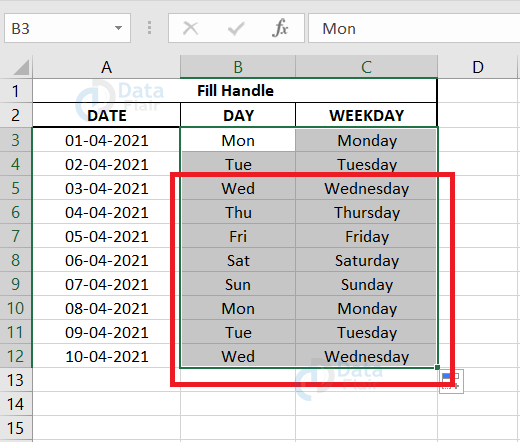
Here, we are filling it until cell row number 12. Notice the name format in both the cells, when the user enters it as mon, tue.. then the auto fill also fills it up as such and once the user enters it as a full name like monday, tuesday.. then the auto fill automatically fills the columns as such.
Other Options
Now, let’s look at the other options available in the icon beside the right edge of the cell.
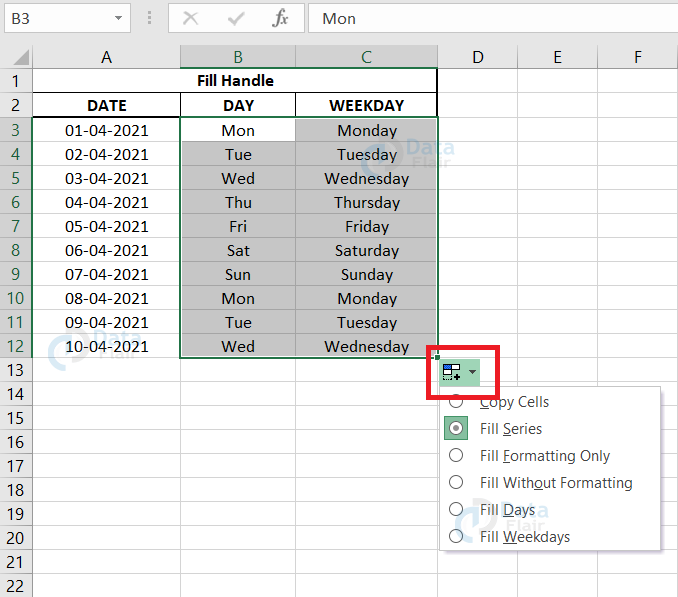
When you click on the icon, you can see various other options like:
1. Copy cells in Excel
It copies the value as such and pastes it repeatedly.
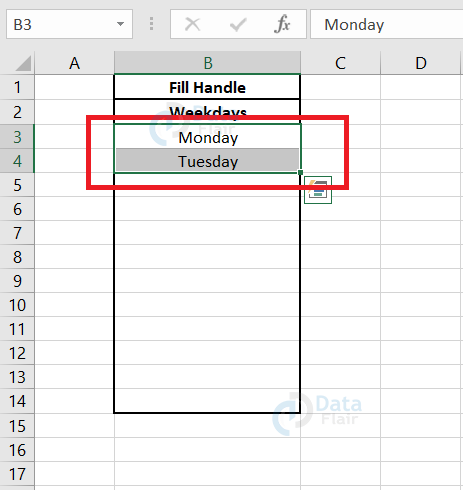
In this sample, we have only monday and tuesday in the cells. Just click on it and drag it until where you want.
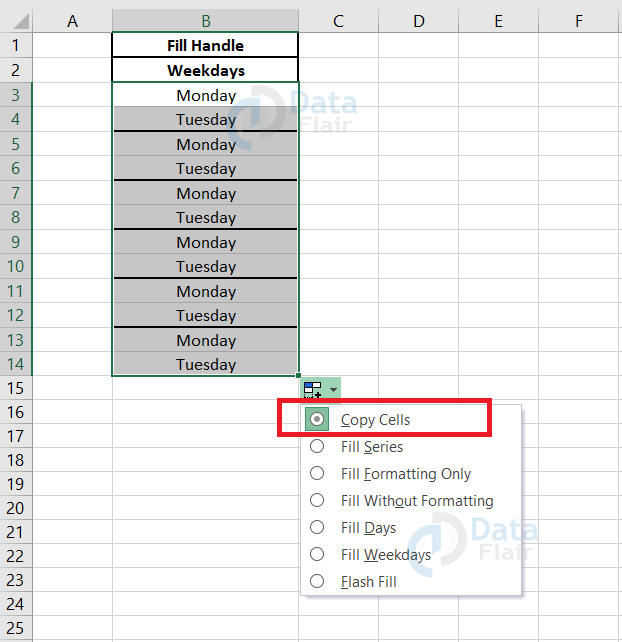
Once you drag, click on the icon and choose copy cells. It copies and pastes only the values the user has entered.
2. Fill series in Excel
Fill series auto fills as per the sequence. Let’s look at a sample
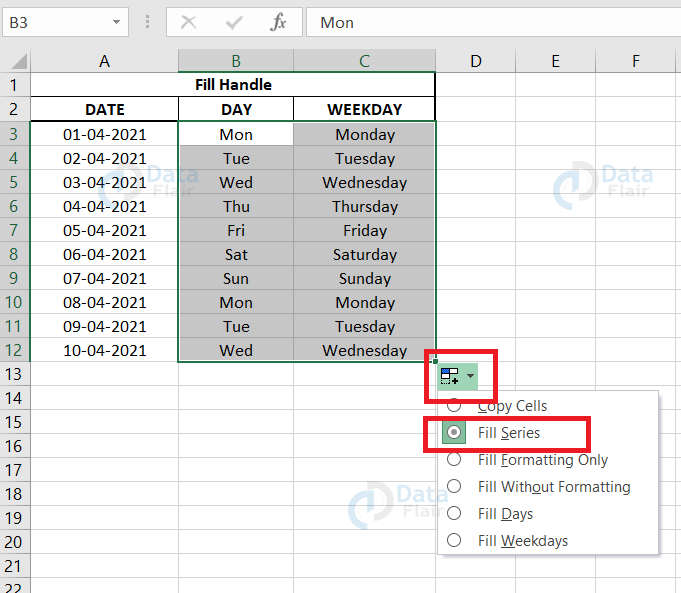
From the above sample, we can understand that the cells are filled as per the sequence using the option fill series.
In the B column cells, it is filled as mon, tue, wed, etc. In the C column cells, it is filled as monday, tuesday, wednesday, thursday..
3. Fill formatting only in Excel
In this option, it fills only the formatting but not the values.
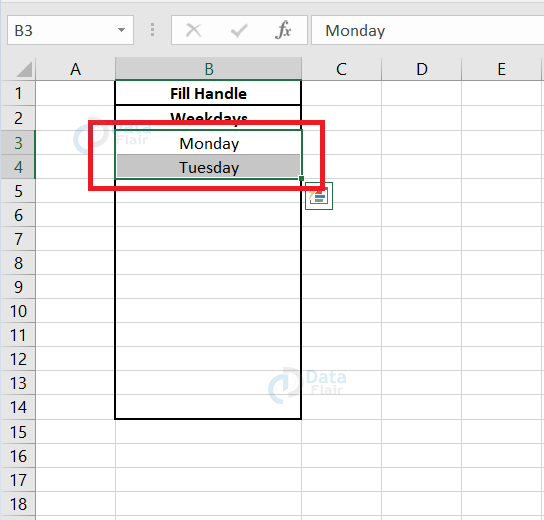
Here, we are just going to copy the format alone from the B3 and B4 cells.
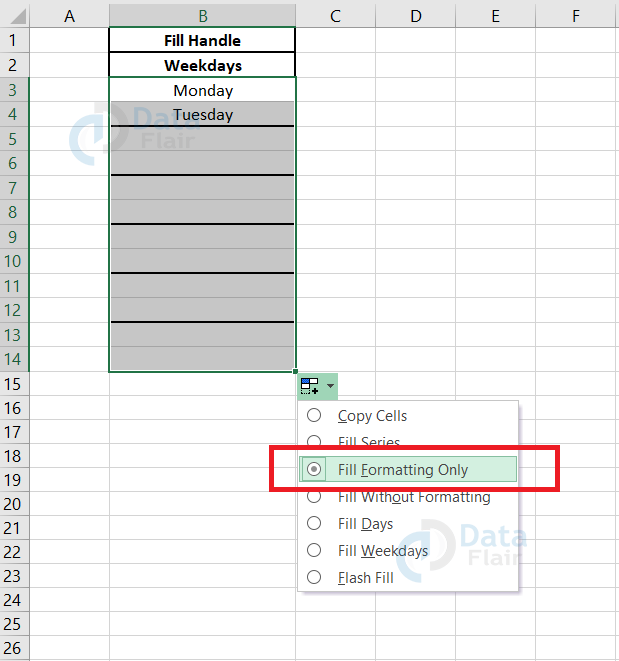
From the above sample, we can understand that only the format in the cells are being copied and filled.
4. Fill without formatting in Excel
In this option, it fills the values but it doesn’t keep up with the formatting.
Let’s look at a sample:
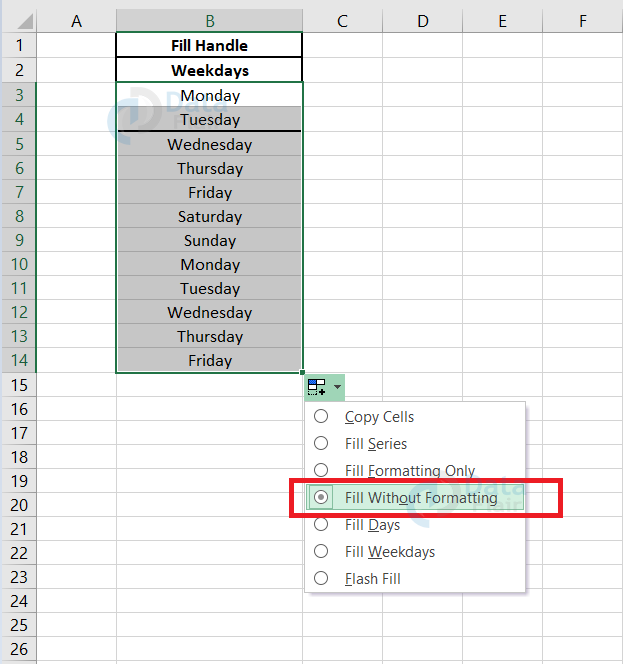
From the above sample, we can understand that only the values in the cells are being formatted. The borderline after every two rows is not visible in the filled cells, it’s because the cells are being filled without formatting.
5. Fill Days in Excel
This option is available only for the days format. When you choose this option, it fills all the days as per the order.
Let’s look at a sample below:

From the above sample, we can notice that the days are just filled as per we provide. If it’s mon then it is followed by tue, if it’s monday then it’s followed by tuesday.
6. Fill Weekdays in Excel
This option is also available only for the days format. It keeps filling the cells only with the weekdays which means it skips the weekends.
Let’s look at a sample:
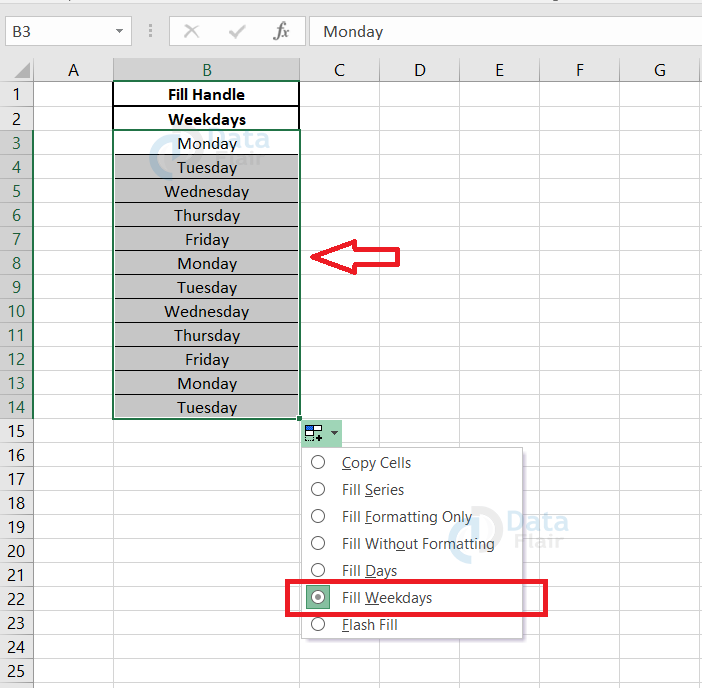
From the sample, we can observe that the saturday, sunday are being skipped since we have chosen the fill weekdays option.
7. Number Sequence in Excel
In auto-fill, the values in the cells are first analyzed and then auto-filled accordingly.
It helps in filling the serial numbers, multiples of a number, odd numbers, even numbers, increment by 1, decrement by 1.
Let’s look at a sample.
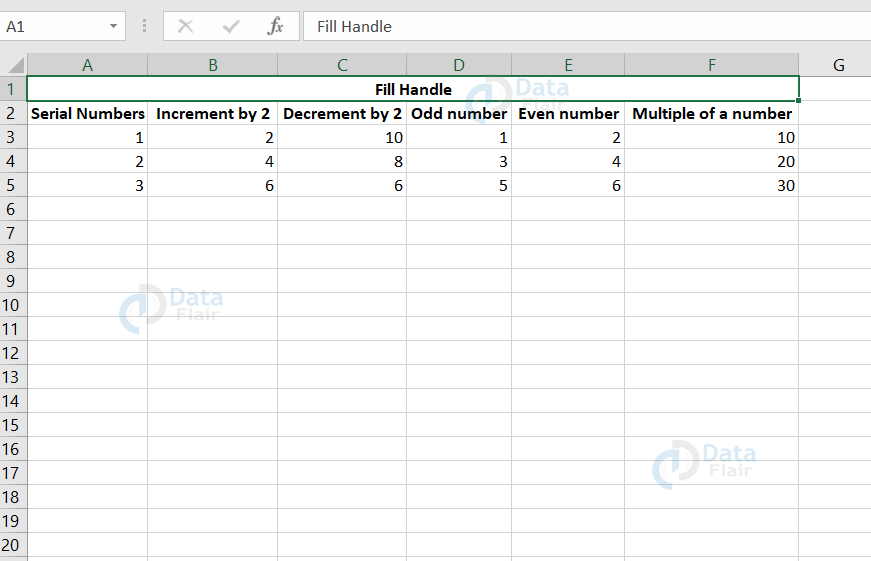
In this sample, we have just entered three input values for each headings. These 3 input values help the excel to understand the sequence it follows.
Now, let’s look at the sample once it’s dragged until the required cell.
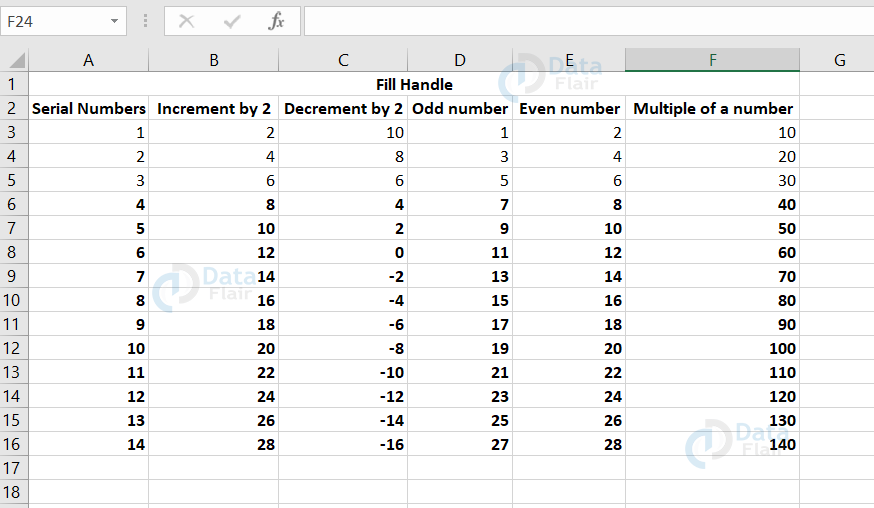
From the sample, we can see that-
- In the first column of serial numbers, the values are just incremented by 1 as that’s the sequence for a serial number.
- In the second column of Increment by 2, the values are being incremented by 2 once it’s moved to the next cell.
- In the third column of Decrement by 2, the values are being decremented by 2 once it’s moved to the next cell.
- In the fourth column of odd numbers, the cells are just filled with odd values.
- In the fifth column of even numbers, the cells are just filled with even values.
- In the sixth column of multiples of a number, the cells are just filled with multiples of 10 since its sequence follows it.
8. Multiple Excel Fill Handle in Excel
It is not that the excel fill handle works only on one set at a time. It can also work on multiple cells with multiple sequences at a time.
Let’s look at a sample:
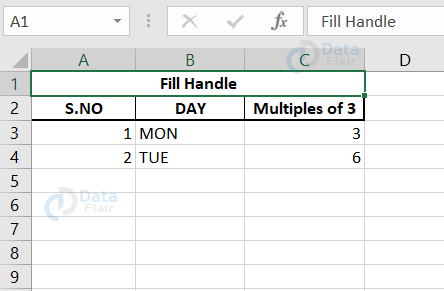
In this sample, we will have to fill the A column cells with the serial numbers i.e., 1, 2, 3, 4, 5…
In the B column cells, we have to fill it with the day names such as mon, tue, wed..
In the C column cells, we have to fill it with multiples of 3 like 3, 6, 9, 12, 15, 18..
Until now, we used to fill it by filling one by one series. But now, we are going to select all the cells and drag it until where we want to fill the sequence.
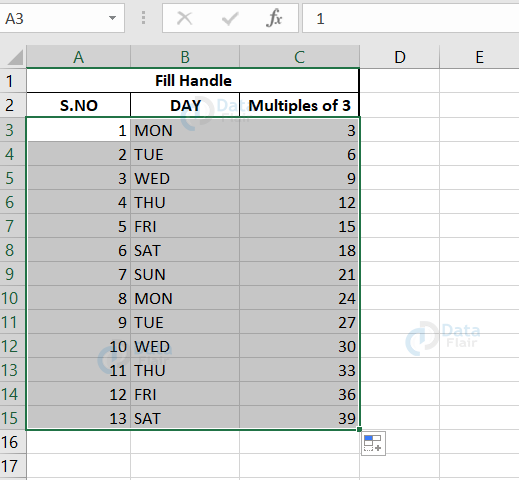
So, in the above sample, we have chosen all 3 columns together and dragged it until where the cells should maintain the sequence.
9. Fill Handle usage in Formulas in Excel
Now, let’s look at how the fill handle helps while using it with a formula. If the cells are sequential and adjacently available, then it’s very much easy for the fill handle to perform its task.
Let’s look at a sample:
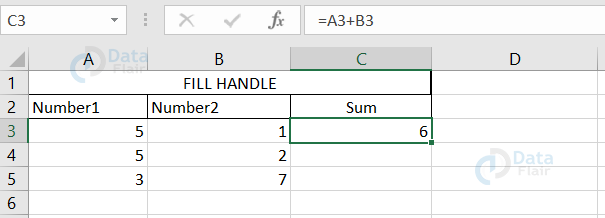
In the above sample, C3 represents the sum of A3 and B3.
Now without applying the formula for C4 and C5, we are going to calculate the sum.
In this case, we are just going to drag the cursor until which the formula should apply.
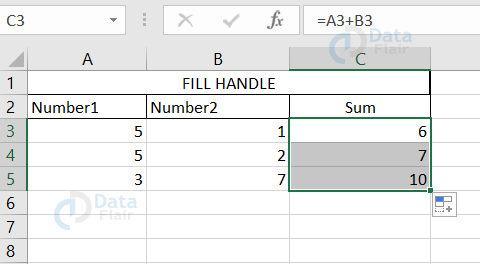
From the above sample, we can observe that the C4 and C5 cells are the sum values. But this time, we didn’t enter the formula for each and every cell, instead the cells are dragged from the above cell i.e., from the C3 cell. The main advantage in this is we don’t have to type the formula each time, just a drag could help us finish it.
10. Custom Auto-fill in Excel
Though, we have so many extra features in auto-fill. There is also a way where we can customize the auto-fill list.
To do so, follow the below steps:
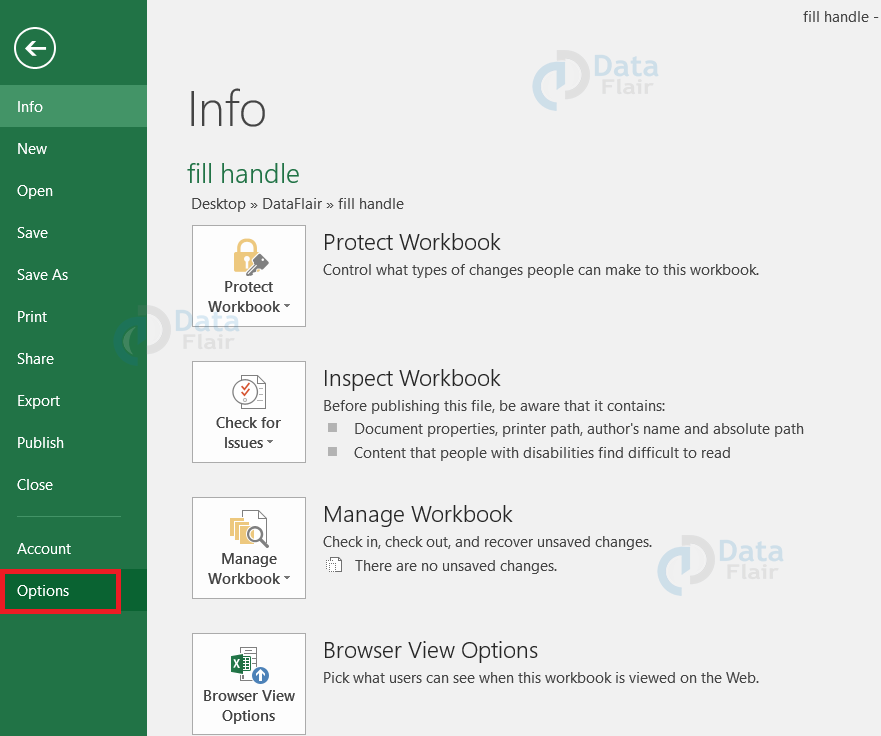
1: Click on the File tab.

2: Choose options from the available menu.
3: Click on the advanced options.

4: Go to edit the custom list button under the heading of general.
5: Click on it.
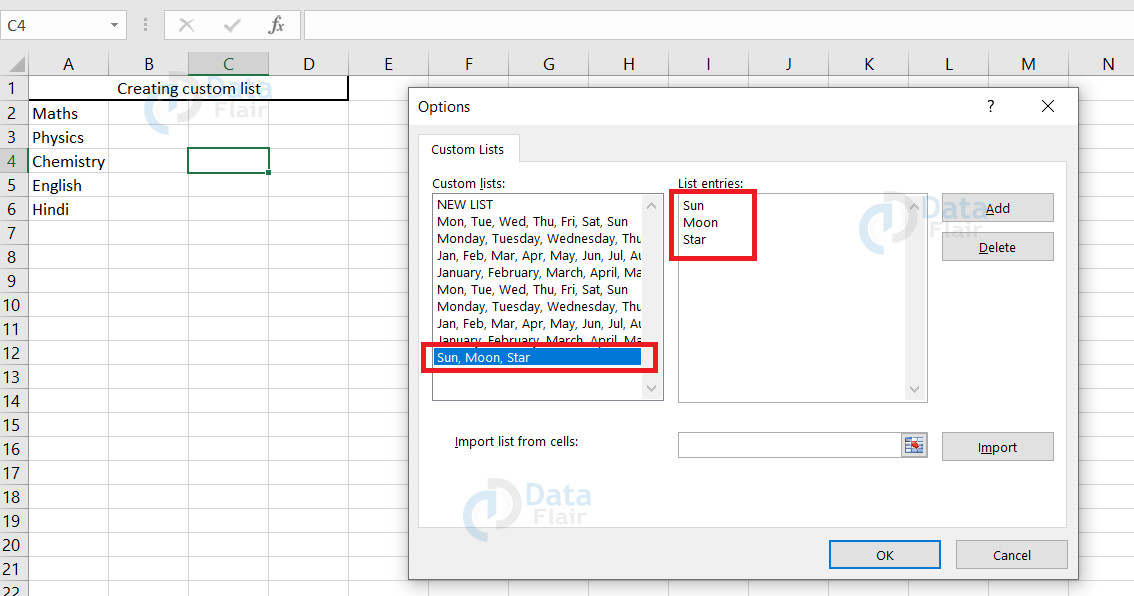
A box appears with a place to enter the new list entries.
Here, in the above sample, we have updated the list with entering the list values.
6: After updating the list, click on the add button.
Then, that list will also be updated in the custom lists and hereafter, it can be accessed anytime.
7: Finally, press ok.
Note: You can also update the list by entering it as a cell value. After the box appears, click on the import list from the cells label. Drag the cells which all should be added in the list. Click import and press ok.
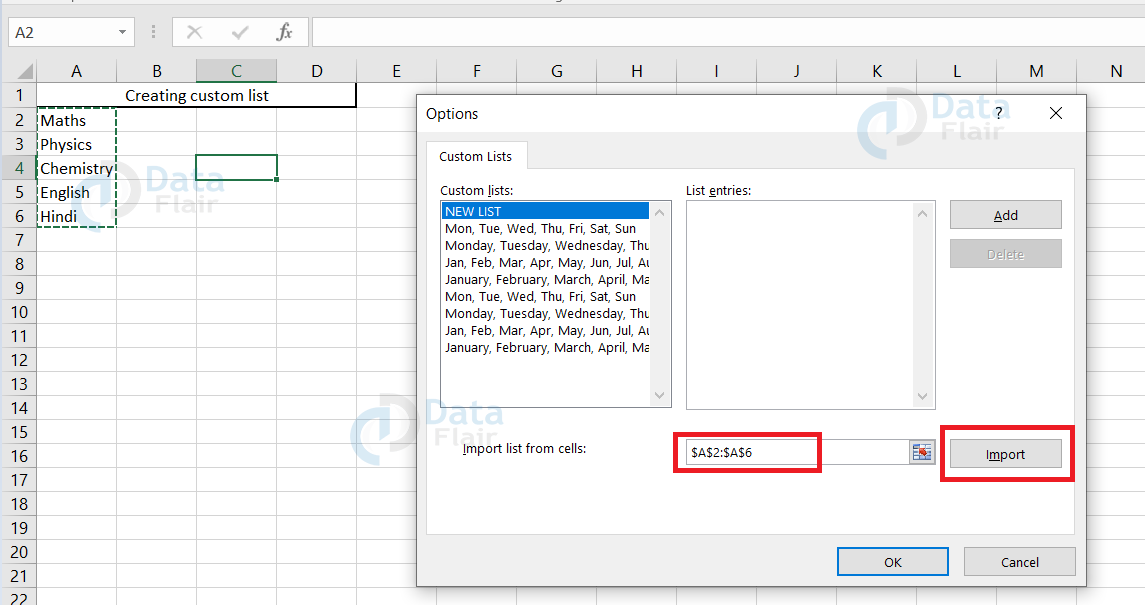
In this sample, we are importing the cells from A2 to A6 as the list that should be added to the custom lists.
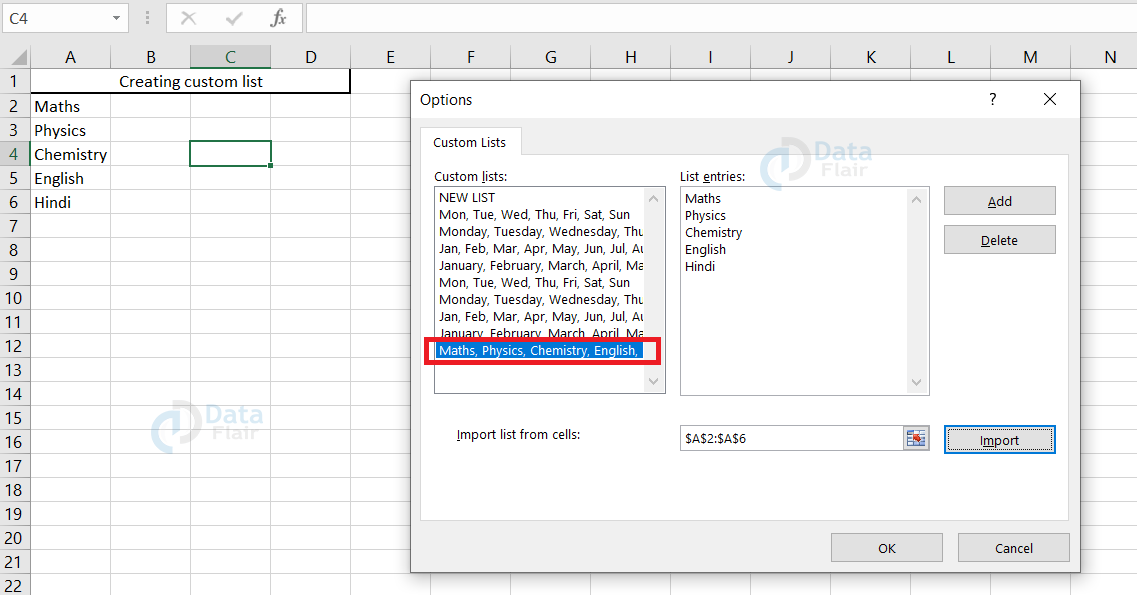
Hope you can observe that the list is inserted in the custom lists. Hence, we can access that list also in the auto fill.
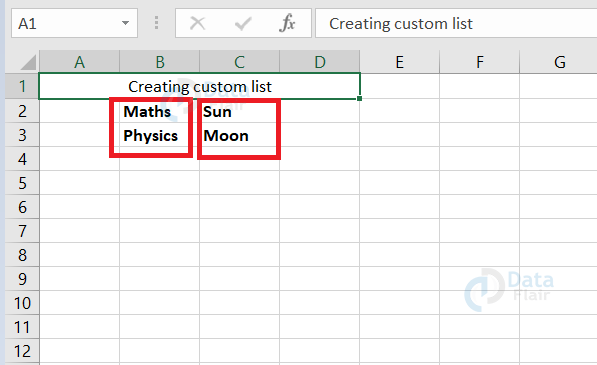
These two are the lists we have updated in the custom list entries. So, let’s have a look at how it auto-fills.
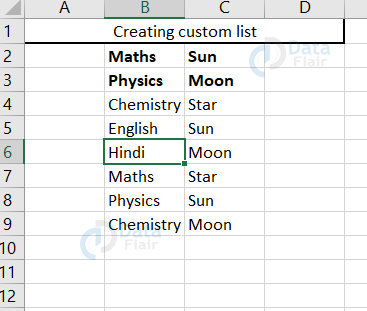
Hope, you can observe that the values are being filled as per the sequence we provided.
11. FLASH FILL in Excel
Flash fill helps in filling out the data automatically. If once the pattern is analysed then the preview will be shown in a box. It can also merge the cell values and auto fill the other cells and it can also separate a value from a cell itself.
Let’s look at a sample,
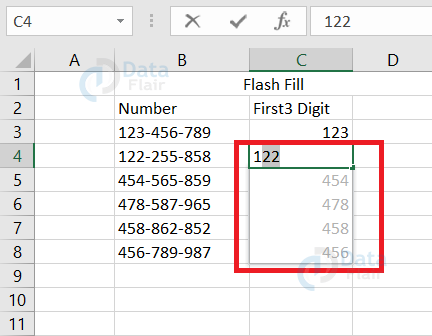
In the C column cells, the value is said to be as the first 3 digit number of a number. The value is first fed to the excel sheet in the c3 cell, then once we start typing in the c4 cell, the values are automatically analysed and shown in a box.
Press enter if you wanted those values in the cells.
Let’s look at another sample:
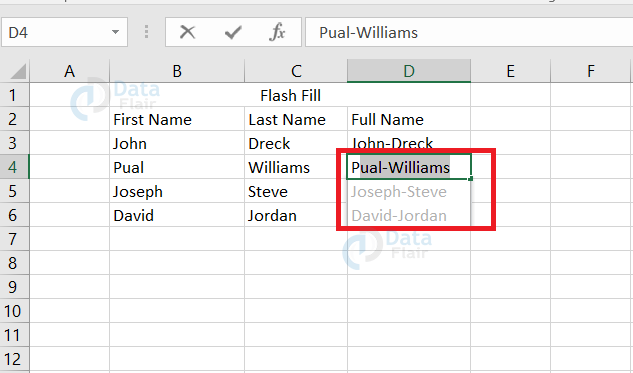
From the sample, we can observe that the D cells are filled by the ‘first name – last name’. The D3 cell is typed manually to make the excel sheet understand. Then, once we start typing the D4 cell, it automatically shows the list that should be entered in the cells. This is how auto-fill works.
If you don’t see the box in your excel sheet, then just check whether your autofill box is checked in.
To check whether Flash fill box is checked:
1: Click on the File tab.
2: Choose options from the available menu.
3: Click on the advanced in the box.
4: Look for the checkbox of auto-fill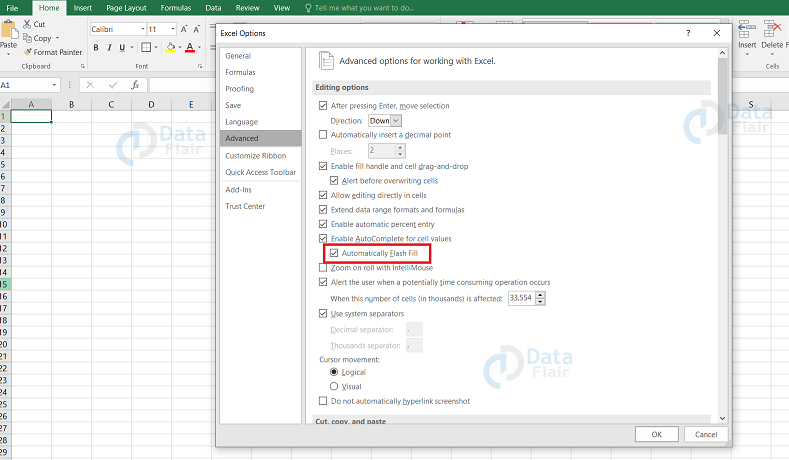
If it’s not checked, then check the box and press ok. Thus, automatically flash fill starts working on your excel.
Summary
In this tutorial, we have understood how the fill handle and flash fill works and how time saving those features are. Fill handle is a very small tool but it has many impressive and time saving techniques.
Learning to use this feature will help you to be extra productive at your work.