


Machine Learning courses with 110+ Real-time projects Start Now!!
In the captivating realm of computer vision, the art of visual expression knows no bounds. A universe of imaginative possibilities is accessible thanks to OpenCV, the formidable image processing library.
In this article, we set out on an exciting quest to learn how to use OpenCV to create polylines, convex polylines, and arrowed lines. Join us as we delve into the realm of shapes and lines, discovering how these fundamental tools can add depth, clarity, and impact to your computer vision projects.
Let’s Draw some Complex shapes Using OpenCV.
Polylines consist of multiple line segments that connect a series of points in a continuous manner, creating a path that can be opened or closed. They are commonly used to represent complex shapes, contours, or outlines in computer graphics and image processing.
Regular lines, on the other hand, are simple straight paths that connect two points in space. They are represented by their two endpoints and are used for basic point-to-point connections. Polylines offer greater versatility by connecting multiple points to form more intricate shapes, while regular lines are limited to connecting just two points in a straight line.
Unleashing the Artistry of Polylines with OpenCV’s cv2.polylines()
In the enthralling world of computer vision, one of the essential techniques for shaping visual narratives is the use of polylines. These versatile and expressive constructs enable us to connect a sequence of points, creating intricate paths and outlines that can add structure and meaning to our images.
OpenCV, the eminent library for image processing, empowers us with the cv2.polylines() function, a powerful tool that allows us to effortlessly draw polylines on images. With its intuitive syntax and customizable parameters, cv2.polylines() opens up a world of artistic possibilities.
Let’s take a closer look at the syntax and parameters of cv2.polylines() to understand how to wield this artistic instrument :
Syntax :
cv2.polylines(img, pts, isClosed, color, thickness[, lineType[, shift]])
Parameters :
- img: The image on which to draw the polylines.
- pts: A list of arrays, each containing the coordinates of the points that make up the polyline.
- isClosed: A boolean parameter that indicates whether the polyline should be closed (forming a shape) or open (a sequence of connected lines).
- Color: The color of the polyline in BGR format (e.g., `(255, 0, 0)` for blue).
- Thickness: The thickness of the polyline.
- lineType: An optional parameter that specifies the type of line to be drawn. It defaults to 8-connected lines.
- Shift: An optional parameter representing the number of fractional bits in the coordinates. It defaults to 0.
Let’s illustrate the power of cv2.polylines() with a simple example. Suppose we have an image `img` and want to draw a blue square with a thickness of 2 pixels:
import cv2
import numpy as np

# Create a blank black image
img = np.zeros((400, 400, 3), dtype=np.uint8)

# Define the coordinates of the square
pts = np.array([[100, 100], [300, 100], [300, 300], [100, 300]], np.int32)

# Reshape the points to be a list of polylines
pts = pts.reshape((-1, 1, 2))

# Draw the blue square on the image
cv2.polylines(img, [pts], isClosed=True, color=(255, 0, 0), thickness=2)

# Display the image
cv2.imshow('Image with Blue Square', img)
cv2.waitKey(0)
cv2.destroyAllWindows()
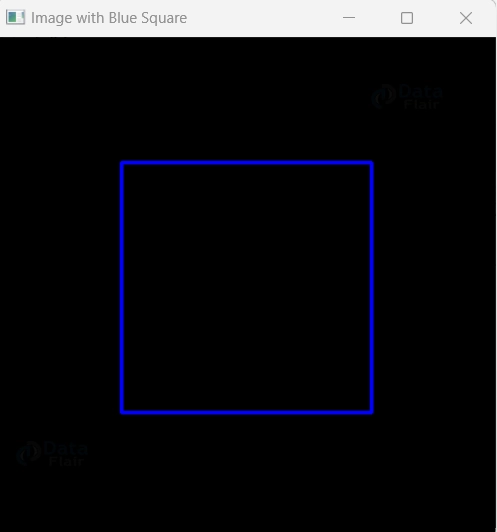
- In this example, we’ve created a black canvas and used cv2.polylines() to draw a blue square on it.
- You can easily modify the coordinates, color, thickness, and other parameters to create an endless variety of artistic shapes.
- With cv2.polylines() at our fingertips, we can channel our creativity and breathe life into our images, crafting visual masterpieces that captivate the eye and tell compelling stories.
- As you investigate the limitless options provided by this captivating function, let your creativity soar.
- In this introduction, I’ve provided a brief overview of cv2.polylines(), explaining its syntax and parameters. Additionally, I’ve included a simple code example to demonstrate its usage in drawing a blue square.
Unleashing the Power of Filled Convex Polylines with OpenCV’s cv2.fillConvexPoly()
- In the enthralling realm of computer vision and image processing, the concept of drawing filled convex polylines takes center stage, offering a compelling and versatile technique.
- OpenCV, the eminent library in this domain, equips us with a remarkable tool – cv2.fillConvexPoly() – that enables us to effortlessly create solid shapes with convex outlines.
- The cv2.fillConvexPoly() function is your gateway to drawing filled convex polylines on images, defining shapes that connect a sequence of points in a continuous manner.
- Its simple syntax and customizable parameters open up a world of artistic possibilities, allowing us to craft captivating visual compositions with ease.
Let’s delve into the magic of cv2.fillConvexPoly() with a glimpse into its syntax and essential parameters:
Syntax:
cv2.fillConvexPoly(img, points, color[, lineType[, shift]])
Parameters:
- Img: The image on which to draw the filled convex polyline.
- Points: A list of tuples or an array of shape `(n, 2)` containing the coordinates of the points forming the convex shape.
- Color: The color of the filled convex polyline in BGR format.
- lineType: An optional parameter specifying the type of line to be drawn, with the default being 8-connected lines.
- Shift: An optional parameter representing the number of fractional bits in the coordinates.
- Let’s embark on an artistic journey by exploring a captivating example of cv2.fillConvexPoly().
import cv2
import numpy as np

# Create a blank black image
width, height = 400, 400
img = np.zeros((height, width, 3), dtype=np.uint8)

# Define the vertices of the filled polygon
vertices = np.array([[100, 100], [300, 100], [300, 300], [200, 350], [100, 300]], np.int32)

# Reshape the vertices to be a 1x5 array
vertices = vertices.reshape((-1, 1, 2))

# Draw the filled polygon in red color (BGR format)
cv2.fillConvexPoly(img, vertices, color=(0, 0, 255))

# Display the image
cv2.imshow('Filled Polygon', img)
cv2.waitKey(0)
cv2.destroyAllWindows()
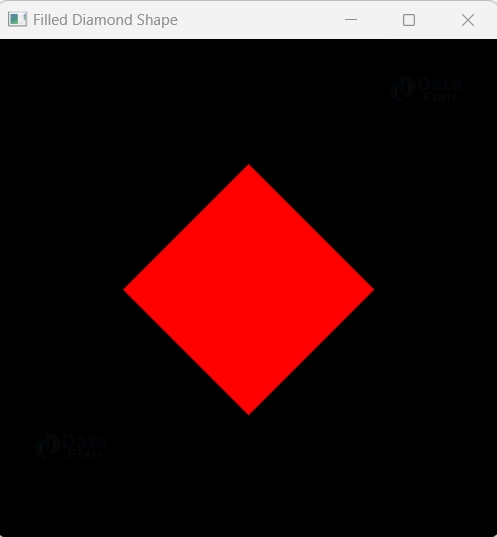
- In this captivating example, we’ve created a blank white canvas and used cv2.fillConvexPoly() to draw a filled polygon in red color.
- The function ensures that the shape is filled and has a convex outline, resulting in a visually striking composition.
- With cv2.fillConvexPoly() at your disposal, you can effortlessly infuse your computer vision projects with elegance and creativity, painting vibrant solid shapes that leave a lasting impact.”
- In this introduction, I’ve provided a concise overview of cv2.fillConvexPoly(), explaining its syntax and parameters.
- Additionally, I’ve included a captivating code example to demonstrate its usage in drawing a filled Polygon.
Let’s check out some cool OpenCV marker types
#include <opencv2/imgproc.hpp>
A possible set of marker types used for the cv::drawMarker function
| Enumerator | |
| MARKER_CROSS
Python: cv.MARKER_CROSS |
A crosshair marker shape. |
| MARKER_TILTED_CROSS
Python: cv.MARKER_TILTED_CROSS |
A 45 degree tilted crosshair marker shape. |
| MARKER_STAR
Python: cv.MARKER_STAR |
A star marker shape, combination of cross and tilted cross. |
| MARKER_DIAMOND
Python: cv.MARKER_DIAMOND |
A diamond marker shape. |
| MARKER_SQUARE
Python: cv.MARKER_SQUARE |
A square marker shape. |
| MARKER_TRIANGLE_UP
Python: cv.MARKER_TRIANGLE_UP |
An upwards pointing triangle marker shape. |
| MARKER_TRIANGLE_DOWN
Python: cv.MARKER_TRIANGLE_DOWN |
A downwards pointing triangle marker shape. |
Mastering the Art of Drawing Arrowed Lines with OpenCV’s cv2.arrowedLine()
In the captivating realm of computer vision and image processing, the skill of drawing arrowed lines takes center stage, offering a powerful and visually expressive technique.
OpenCV, the esteemed library in this domain, equips us with a remarkable tool – cv2.arrowedLine() – that empowers us to effortlessly create arrows with precision and style.
The cv2.arrowedLine() function is your gateway to drawing arrowed lines on images, providing a clear and dynamic way to highlight directions and relationships.
With its simple syntax and customizable parameters, this function unlocks a world of possibilities, allowing us to craft visually engaging compositions with ease.
Let’s explore the magic of cv2.arrowedLine() with a glimpse into its syntax and essential parameters:
Syntax:
cv2.arrowedLine(img, pt1, pt2, color, thickness[, line_type[, tipLength]])
Parameters:
- Img: The image on which to draw the arrowed line.
- Pt1: The starting point (x, y) of the arrow.
- Pt2: The ending point (x, y) of the arrow.
- Color: The color of the arrowed line in BGR format.
- Thickness: The thickness of the arrowed line.
- Line_type: An optional parameter specifying the type of line to be drawn, with the default being 8-connected lines.
- tipLength: An optional parameter representing the length of the arrowhead tip relative to the arrowed line’s length.
Let’s embark on an artistic journey with a captivating example of cv2.arrowedLine(). Picture creating a dynamic arrow to indicate direction on a blank canvas:
import cv2
import numpy as np

# Create a blank white image
width, height = 400, 400
img = np.ones((height, width, 3), dtype=np.uint8) * 255

# Define the starting and ending points of the arrow
start_point = (100, 200)
end_point = (300, 200)

# Draw the arrowed line on the image in blue color with a thickness of 2 pixels and a tipLength of 0.3
cv2.arrowedLine(img, start_point, end_point, color=(255, 0, 0), thickness=2, tipLength=0.3)

# Display the image
cv2.imshow('Dynamic Arrow', img)
cv2.waitKey(0)
cv2.destroyAllWindows()
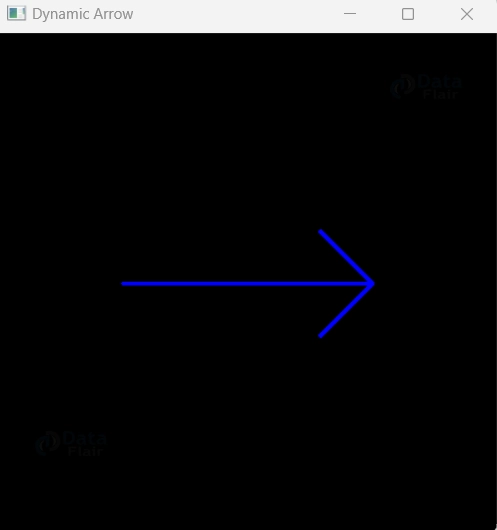
- In this captivating example, we’ve created a blank white canvas and used cv2.arrowedLine() to draw a dynamic arrow from one point to another in blue color. The arrow’s direction and style provide a clear and engaging visual cue.
- With cv2.arrowedLine() as your artistic tool, you can effortlessly infuse your computer vision projects with clear visual communication, guiding the eye with precision and creativity.”
- In this introduction, I’ve provided a concise overview of cv2.arrowedLine(), explaining its syntax and parameters. Additionally, I’ve included a captivating code example to demonstrate its usage in drawing a dynamic arrowed line.
Summary
In this captivating journey through computer vision, we’ve explored the artistic wonders of OpenCV’s drawing capabilities. From crafting intricate polylines to elegant convex shapes and guiding the eye with dynamic arrowed lines, we’ve harnessed the power of visual expression.
With OpenCV’s cv2.polylines(), we shaped mesmerizing paths and contours, opening doors to endless possibilities.cv2.fillConvexPoly() enriched our canvas with solid shapes and captivating outlines, adding depth to our creations. Through cv2.arrowedLine(), we directed attention with precision, bringing clarity and focus to our visual narratives.
As you continue your creative adventure, let your imagination soar and paint your visions onto the canvas of computer vision. With OpenCV’s artistic tools at your fingertips, the possibilities are as vast as your imagination.
May your future creations be filled with elegance, flair, and the magic that only visual storytelling can convey. Happy drawing, and may your visual masterpieces inspire and captivate all who behold them!”