


Machine Learning courses with 110+ Real-time projects Start Now!!
Get ready to create your own document scanner using OpenCV and Python! This project will walk you through the important stages of scanning, from capturing document images to enhancing their quality.
In this OpenCV Document Scanner Project, we’ll cover document detection and perspective correction. With the power of OpenCV and Python, you’ll develop a reliable document scanner. Let’s dive in and unlock the potential of document scanning using OpenCV and Python.
Perspective Transform
Perspective transformation is a method used in document scanning to correct distortion and obtain rectangular representation of the document. It adjusts the image perspective, making it appear as if the document is viewed from a straight-on angle. By applying geometric transformations, such as rotation and scaling, perspective transformation ensures accurate and visually appealing scanned documents. We are importing this perspective_transform from transform.py script.
Prerequisites For Document Scanner Using OpenCV
Understanding of the Python programming language and knowledge of the OpenCV library is required. Apart from this, the following system requirements are needed.
1. Python 3.7 and above
2. Any Python editor (VS code, Pycharm, etc.)
Download OpenCV Document Scanner Project
Please download the source code of OpenCV Document Scanner Project: OpenCV Document Scanner Project Code.
Installation
Open windows cmd as administrator
1. Run the following command to install the opencv library.
pip install opencv-python
Let’s Implement It
To make your document scanner follow the below steps.
1. First import all the libraries and perspective_transform from transform.
import cv2
import numpy as np
from transform import perspective_transform
2. Define the function scan_document which will take window size as a parameter.
def Scan_Document(window_size, file_path=None):
3. This will open the camera. Here I am using an external webcam. If you want to use an integrated camera then replace 1 by 0.
if file_path is None:
        cap = cv2.VideoCapture(1)
 else:
        cap = cv2.VideoCapture(file_path)
4. Here we are initializing some flag variables.
save_image = False
scan_document = None
save_counter = 1
5. Start while loop.
while True:
6. Here we are reading camera input. ret variable stores whether frames are successfully captured or not. Captured frames are stored in frame variable.
ret, frame = cap.read()
7. It checks whether frames are captured successfully.
if ret:
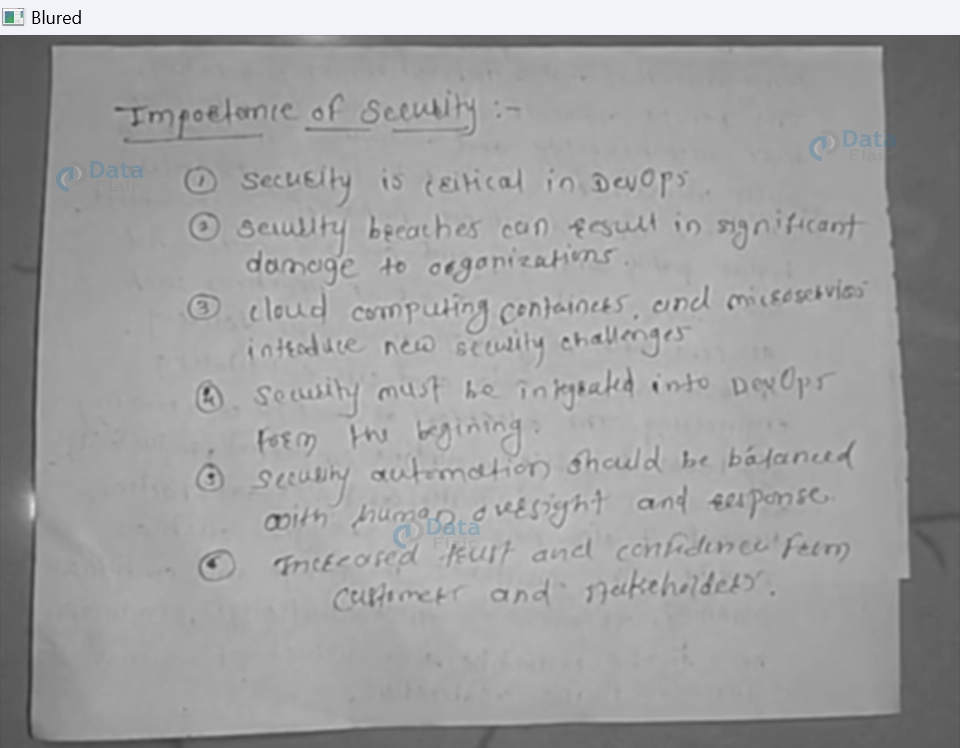
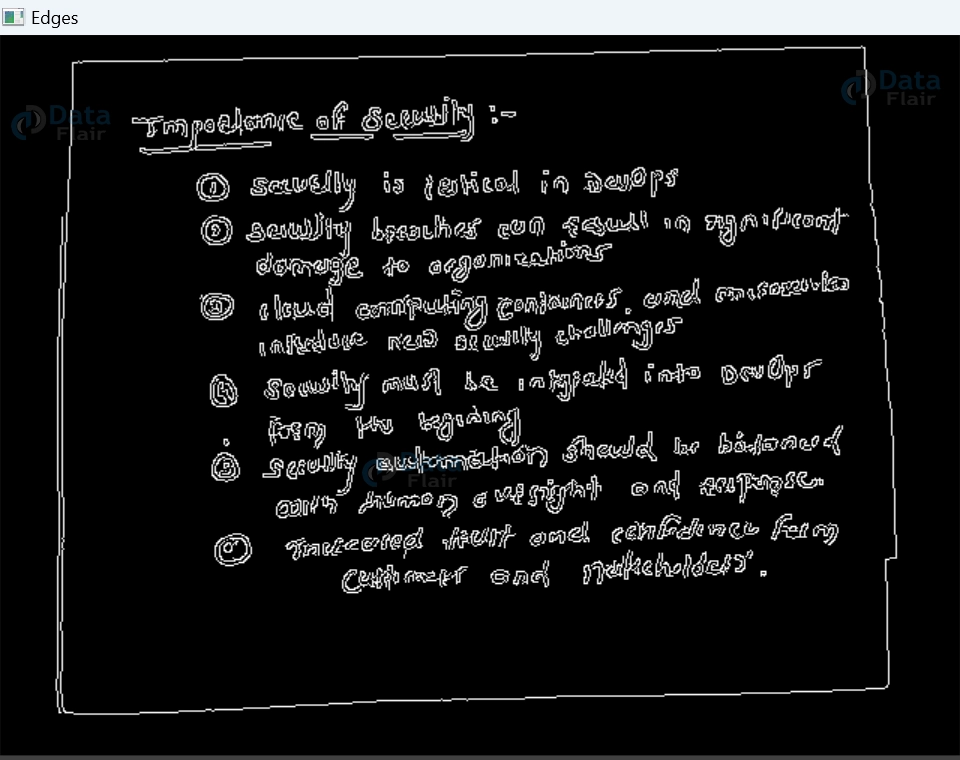
8. It converts the image to Gray, blurs it, detects edges to highlight shape boundaries, identifies shapes through contours, selects the five largest contours based on size, and sets a variable called “scan_document” to None.
Gray = cv2.cvtColor(frame, cv2.COLOR_BGR2GRAY)
Blurred = cv2.GaussianBlur(Gray, (5, 5), 0)
Edges = cv2.Canny(Blurred, 50, 150)
contours, _ = cv2.findContours(Edges.copy(), cv2.RETR_EXTERNAL, cv2.CHAIN_APPROX_SIMPLE)
contours = sorted(contours, key=cv2.contourArea, reverse=True)[:5]
scan_document = None
Output of this step

9. It checks each contour found in the previous step, calculates the perimeter of each contour and approximates it with a simpler polygon. If an approximated polygon has four sides (a quadrilateral), it assigns it to the variable “scan_document” and stops further iteration.
for contour in contours:
                perimeter = cv2.arcLength(contour, True)
                approx = cv2.approxPolyDP(contour, 0.02 * perimeter, closed=True)
                if len(approx) == 4:
                    scan_document = approx
                    break
10. If a quadrilateral shape is found, the code adjusts the shape into a 4*2 matrix. It then transforms the original image based on this shape, resulting in a modified image called “wrap.” Furthermore, the code generates two resized versions of the modified and original images using a specific window size.
if scan_document is not None:
                scan_document = scan_document.reshape(4, 2)
                wrap= perspective_transform(frame, scan_document)
                resized1 = cv2.resize(wrap, window_size)
                resized2 = cv2.resize(frame, window_size)
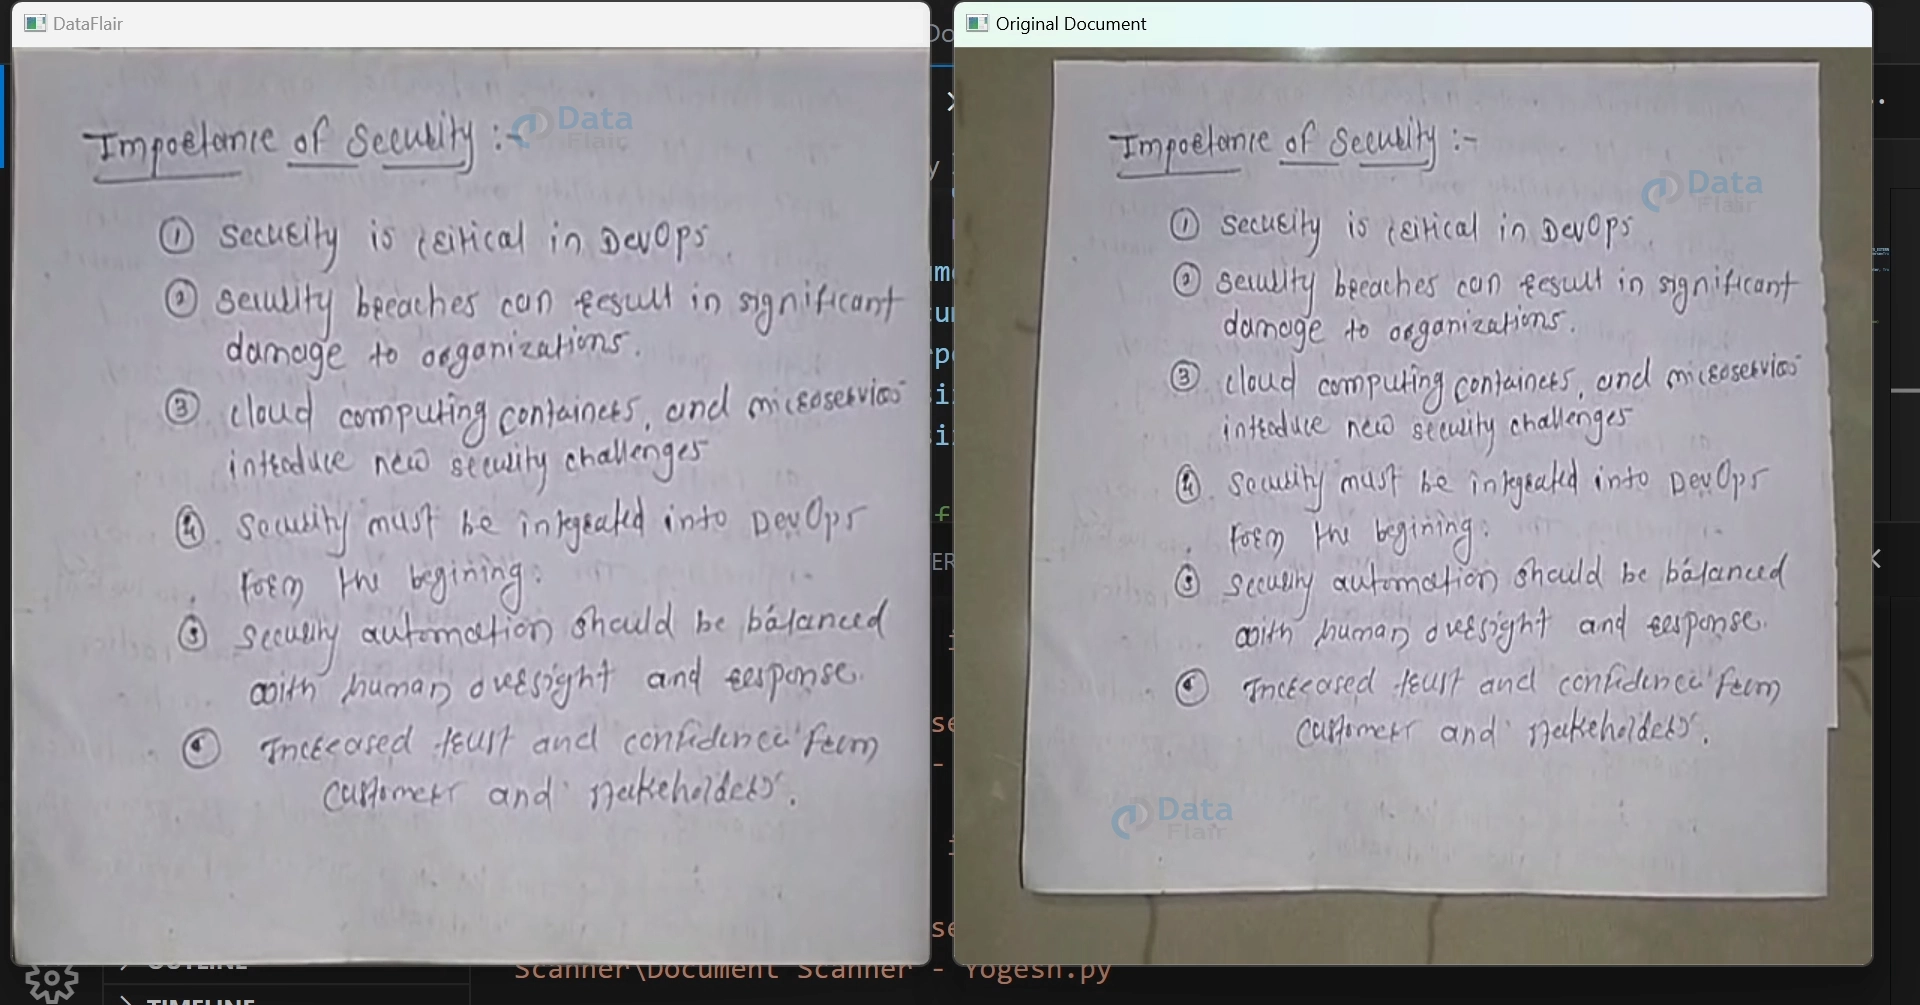
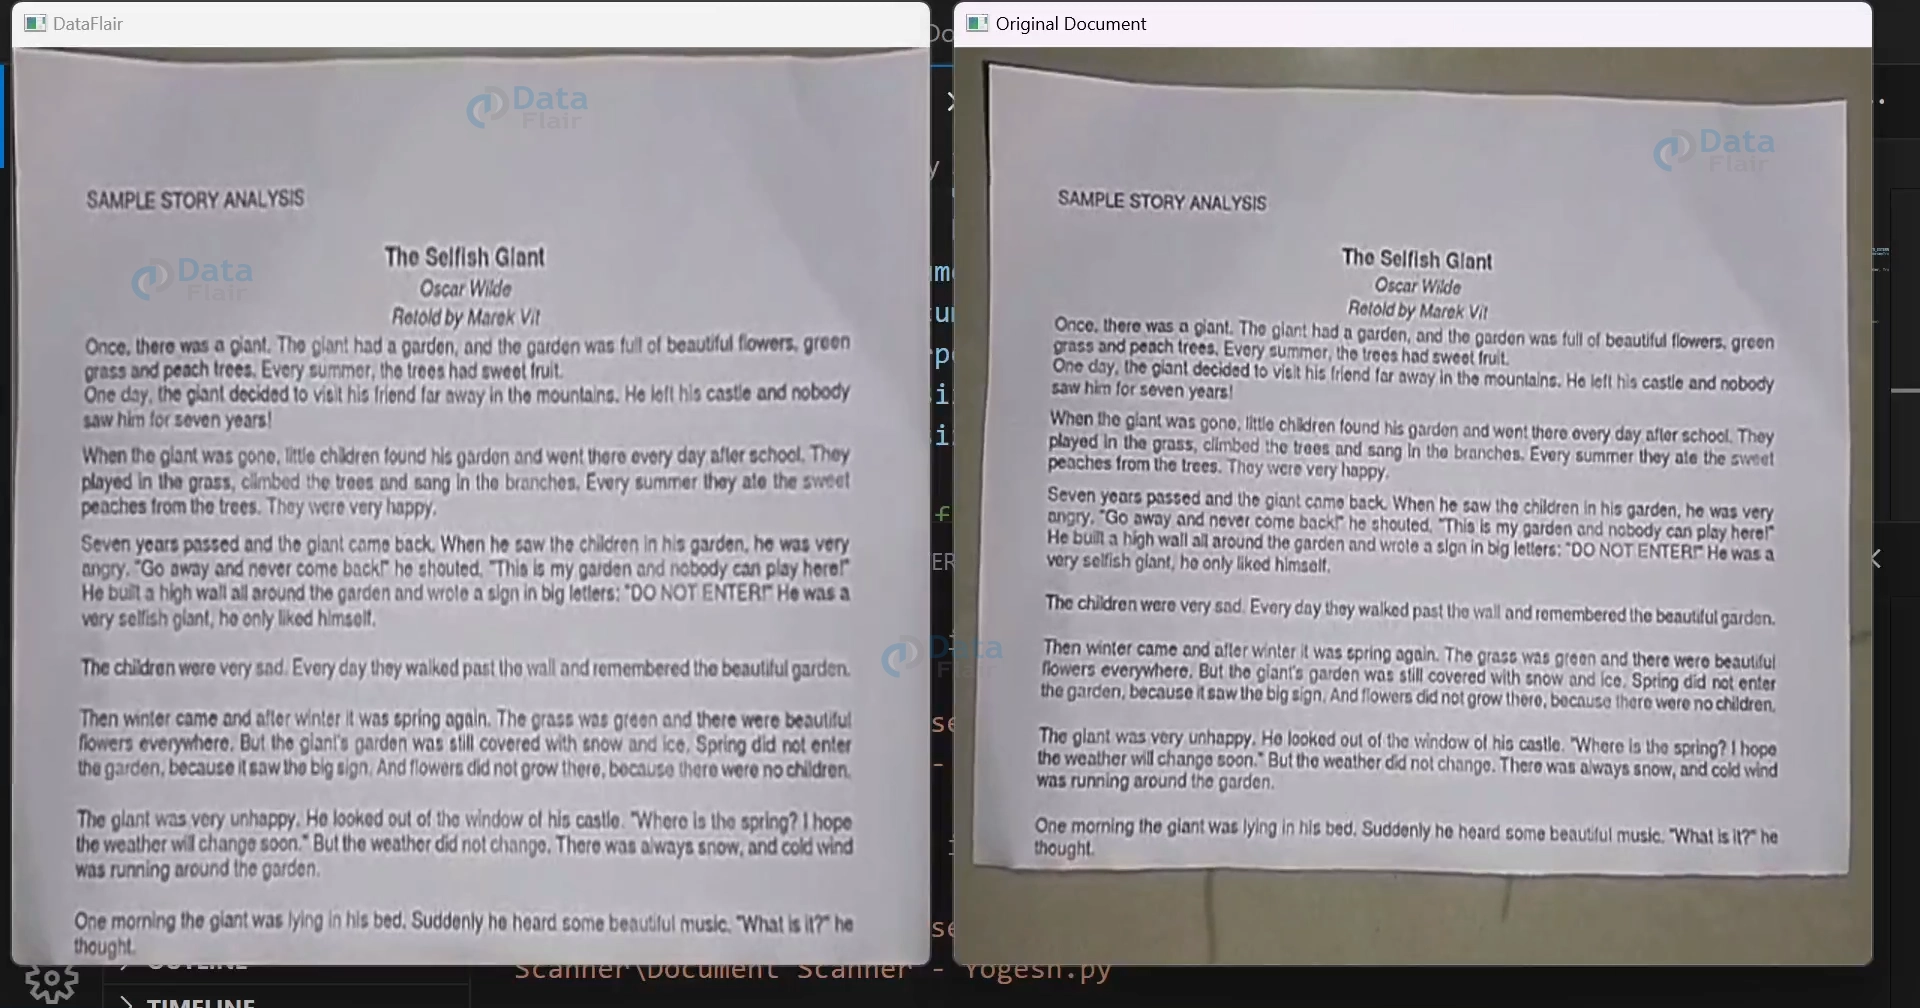
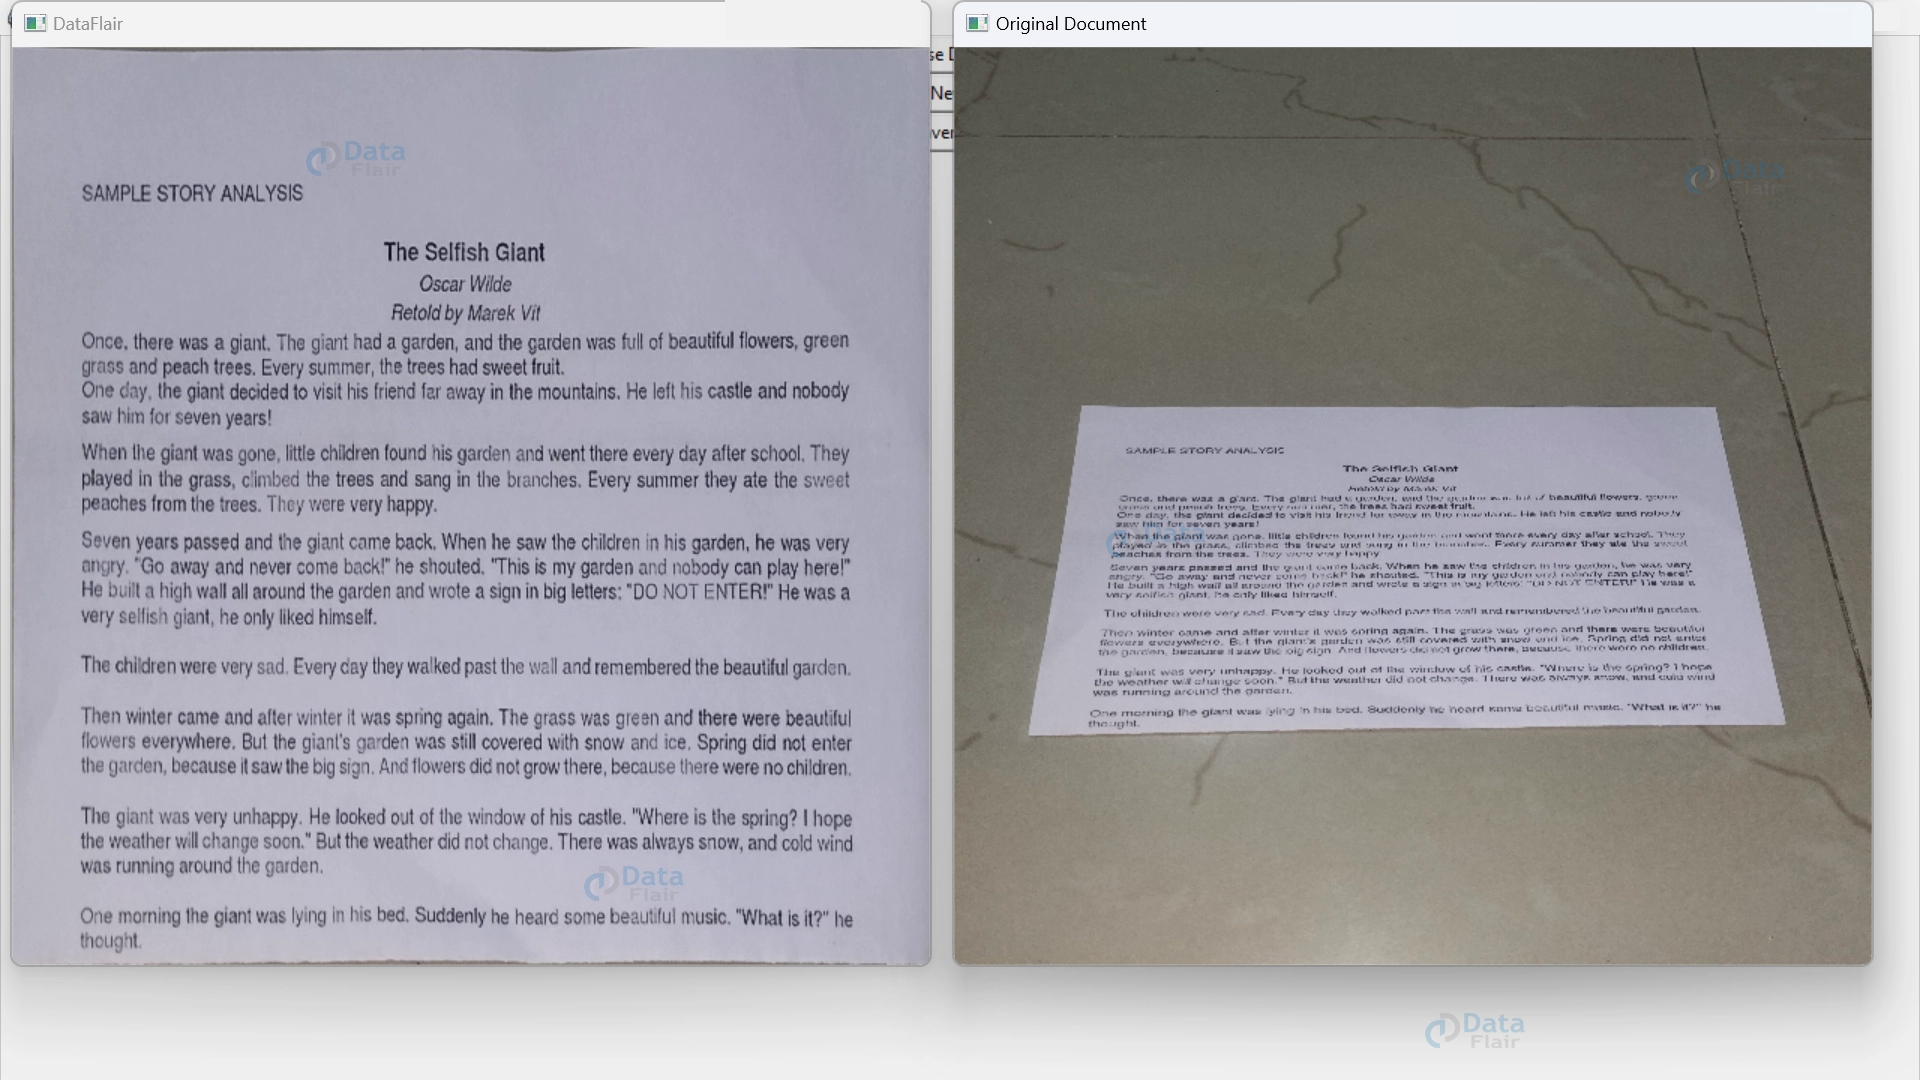
11. It shows the scanned document in the “DataFlair” window and original document in the “Original Document” window.
cv2.imshow("DataFlair", resized1)
cv2.imshow("Original Document", resized2)
12. It saves the scanned document as an image file. When the save_image flag is set to True, the code generates a unique file name for the document and saves the transformed image as a JPEG file. It then increments a counter for future saves, displays a message confirming the save, and resets variables to continue scanning. This feature allows users to save the document.
if save_image:
       file_name = f"scanned_document_{save_counter}.jpg"
       cv2.imwrite(file_name, warped)
       print(f"Scanned document {save_counter} saved as {file_name}")
       save_counter += 1
       save_image = False
       scan_document = None
13. If the user presses key ‘q’, the program will stop executing and if the user presses ‘s’ key then the scanned document will be saved in the folder.
if cv2.waitKey(1) == ord('q'):
           break
elif cv2.waitKey(1) == ord('s'):
            save_image = True
14. Once the program stops, it releases all the resources occupied by the program and closes all the windows.
cap.release()
cv2.destroyAllWindows()
OpenCV Document Scanner Output
Morphological Operations in Document Scanner
Morphological operations in image processing are like digital tools that help shape and refine the objects in a picture. They smooth the image to reduce noise and highlight important edges and boundaries.
This document scanner incorporates various morphological operations such as gray color conversion, Gaussian blur, and edge detection. These operations help to enhance image quality and reduce noise. These operations play a crucial role in transforming the document into a clear, readable form by refining its structure and eliminating unwanted artefacts.
1. Gray color scale conversion.
Gray = cv2.cvtColor(frame, cv2.COLOR_BGR2GRAY)
Output of this step

2. Blurring the image.
Blurred = cv2.GaussianBlur(Gray, (5, 5), 0)
Output of this step

3. Extracting edges from an image.
Edges = cv2.Canny(Blurred, 50, 150)
Output of this step

How to make an app for document scanner?
For making an app for document scanner we are making two files.
1. Document_scanner.py
2. App.py
Note:- Both files must be in the same folder.
In App.py we are importing Document_scanner.py file. The purpose behind importing files is to make code readable and small to make execution fast. Let’s see the implementation.
import tkinter as tk
from tkinter import filedialog
from document_scanner import Scan_Document
import img2pdf
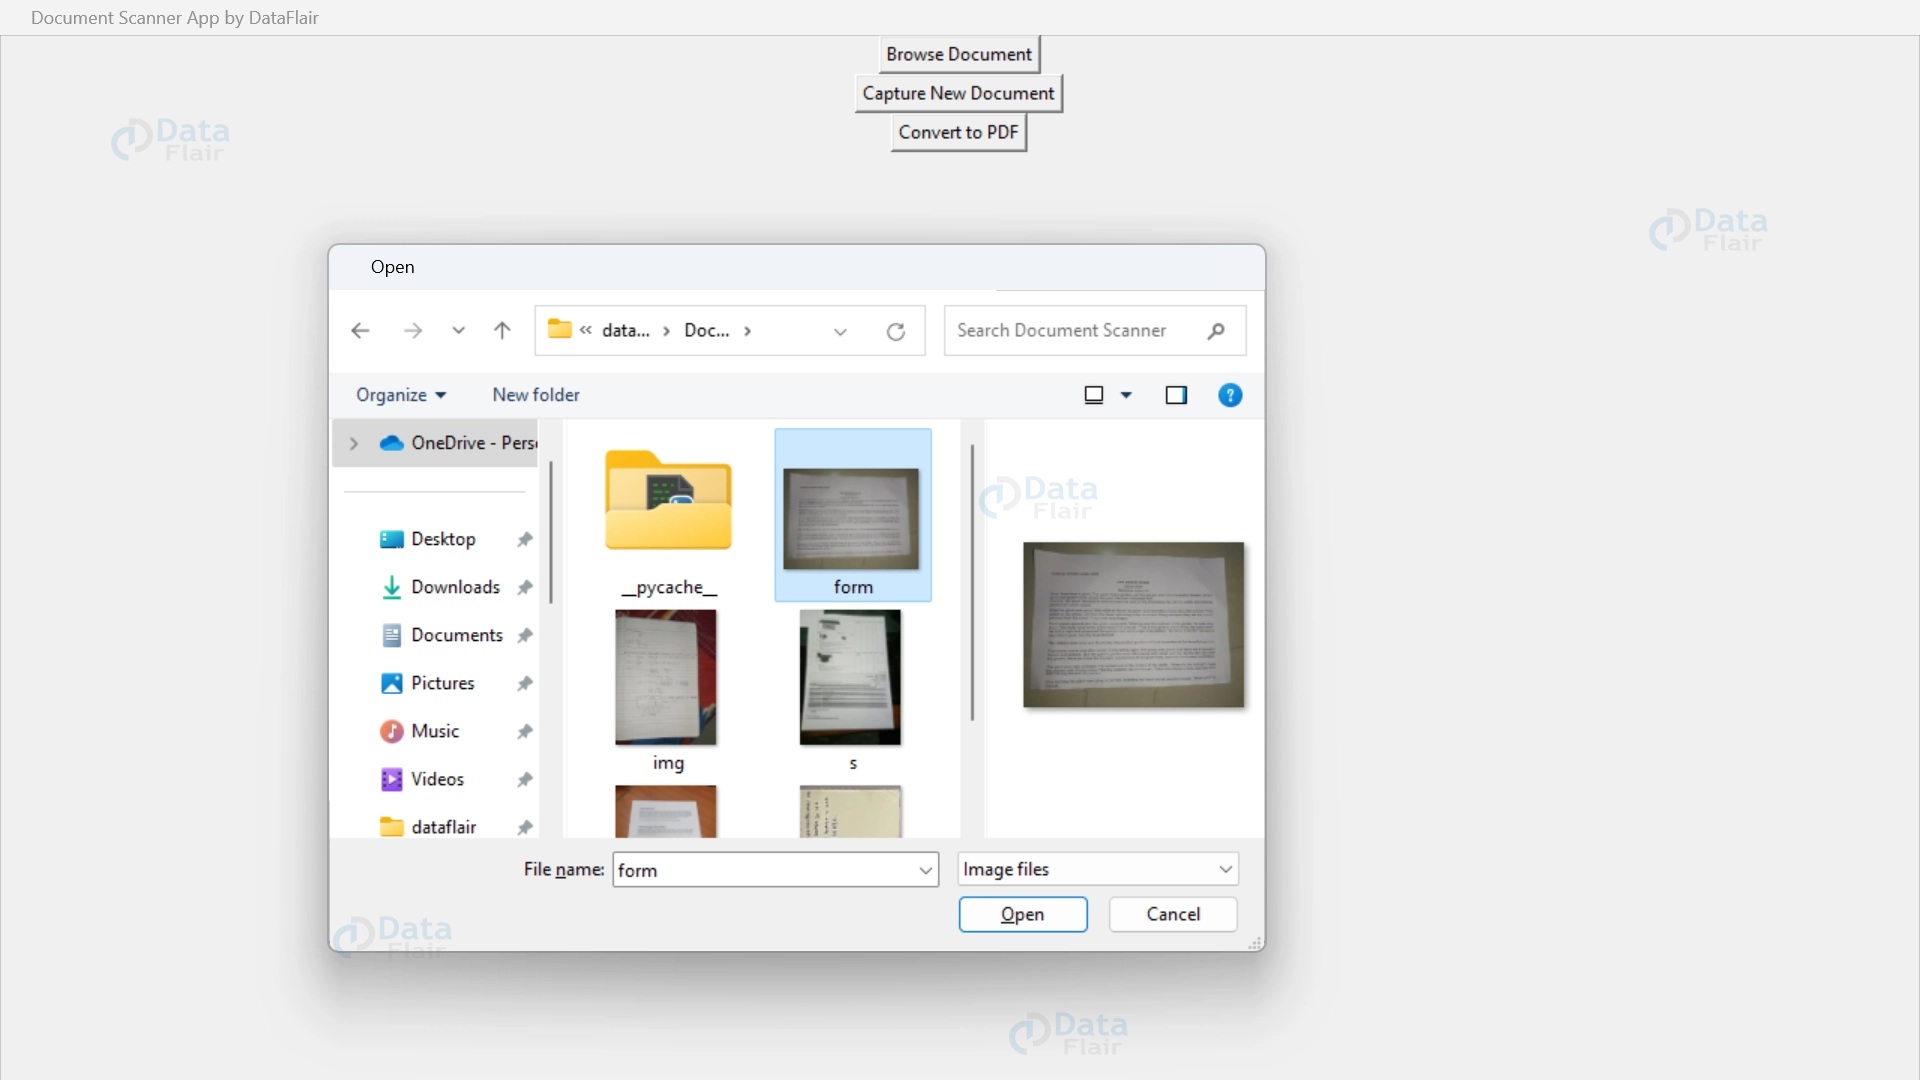
def Browse_doc():
file_path = filedialog.askopenfilename(filetypes=[("Image files", "*.jpg;*.jpeg;*.png"), ("Word files", "*.doc;*.docx"), ("PowerPoint files", "*.ppt;*.pptx")])
if file_path:
window_size = (612, 612)
Scan_Document(window_size, file_path)
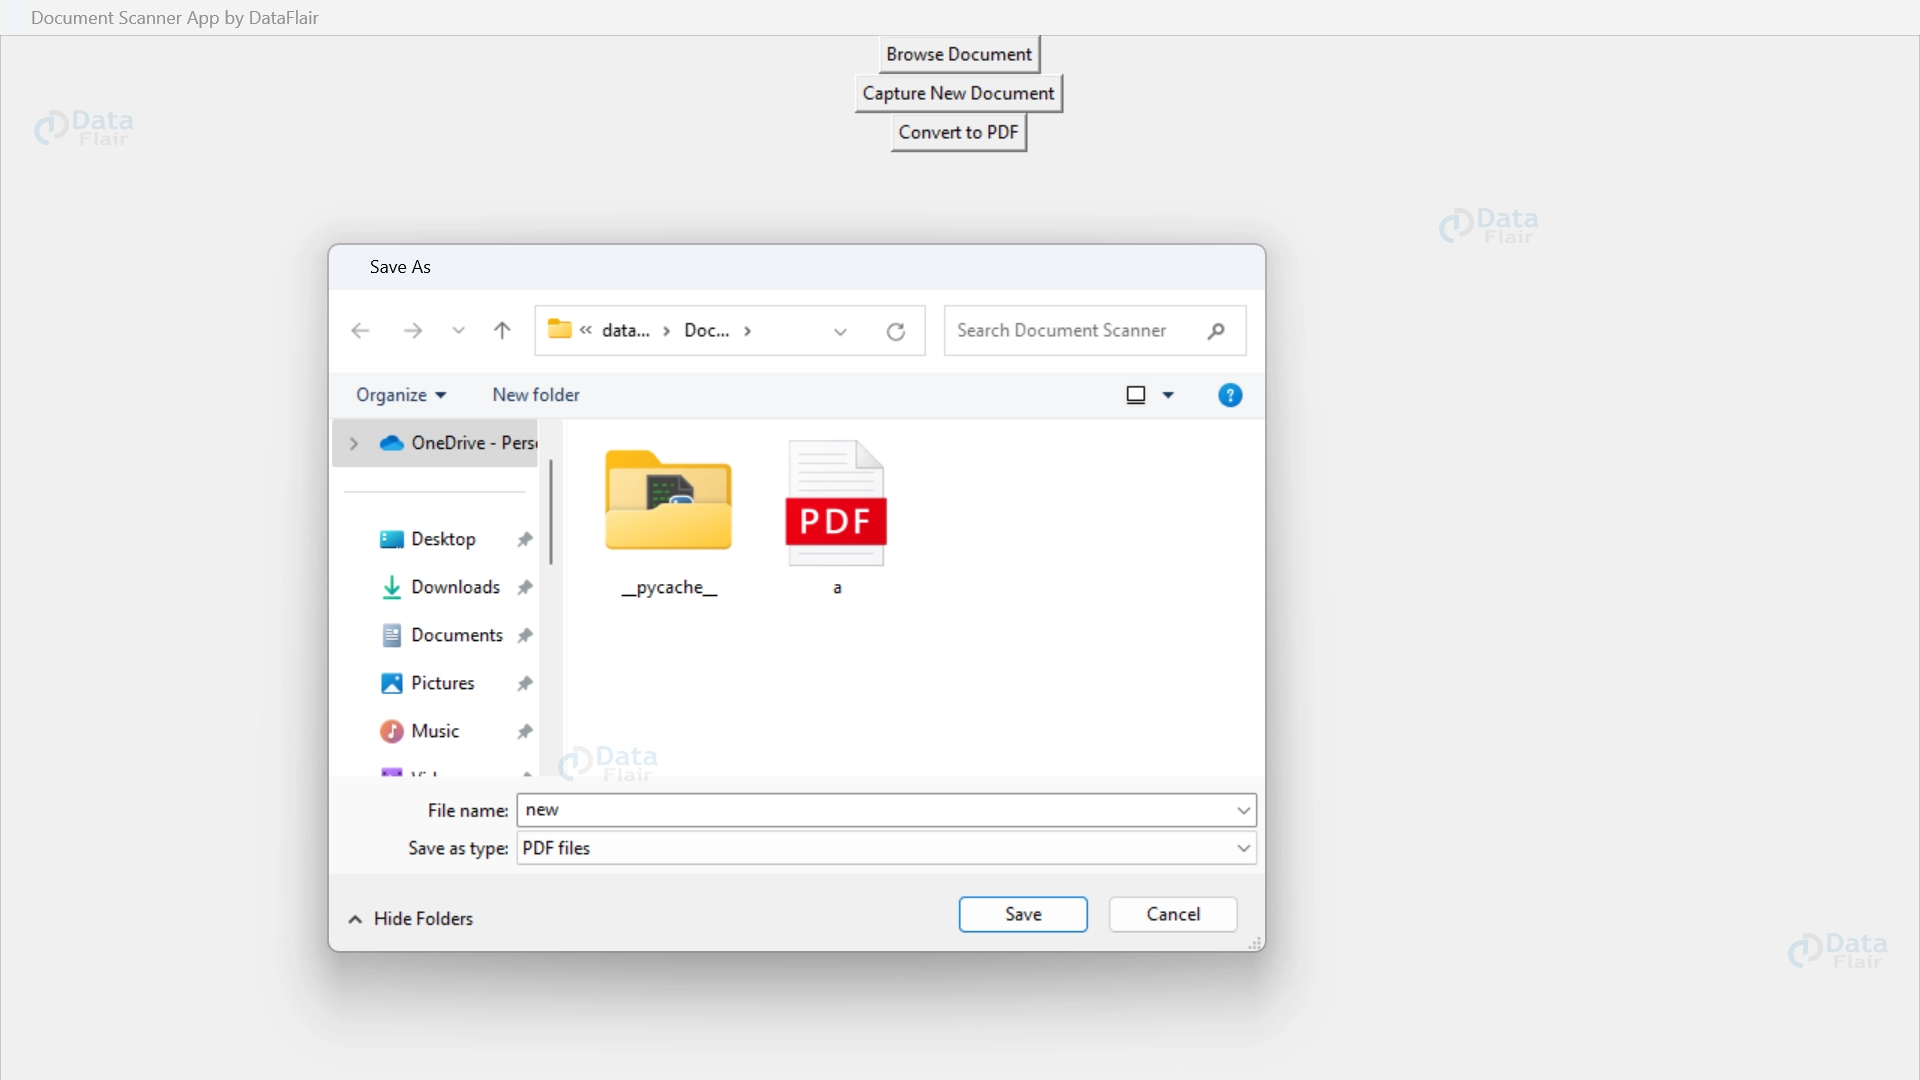
def To_pdf():
file_path = filedialog.askopenfilename(filetypes=[("Image files", "*.jpg;*.jpeg;*.png"), ("Word files", "*.doc;*.docx"), ("PowerPoint files", "*.ppt;*.pptx")])
if file_path:
save_path = filedialog.asksaveasfilename(defaultextension=".pdf", filetypes=[("PDF files", "*.pdf")])
if save_path:
with open(save_path, "wb") as f:
f.write(img2pdf.convert(file_path))
def Capture_doc():
window_size = (612, 612)
Scan_Document(window_size)
root = tk.Tk()
root.title("Document Scanner App by DataFlair")
browse_button = tk.Button(root, text="Browse Document", command=Browse_doc)
browse_button.pack()
scan_button = tk.Button(root, text="Capture New Document", command=Capture_doc)
scan_button.pack()
convert_button = tk.Button(root, text="Convert to PDF", command=To_pdf)
convert_button.pack()
root.mainloop()
It creates a user-friendly graphical user interface for document scanner. It has three buttons: “Browse Document” which is used for selecting an image file to scan and display, “Capture New Document” which is used to capture a fresh document using the camera and display and “Convert to PDF” which is used to convert an image or document file to PDF format and save it at a chosen location.

Capture New Document

Convert to Pdf
Browse Document

Conclusion
This document scanner built with OpenCV and Python, processes images to extract important shapes. It converts images to grayscale, enhances smoothness, detects edges, identifies contours, and selects the largest ones. If a quadrilateral shape is found, the code transforms the image based on that shape. It also creates resized versions of the transformed and original images. This document scanner is a valuable tool for extracting and working with document-like shapes from images.