

Master Python with 70+ Hands-on Projects and Get Job-ready - Learn Python
Are you looking to build a solid career in Python? If Yes, you have to work on projects. DataFlair is devoted to make you a successful Python Developer. After tons of tutorials, practicals, interview questions, we are coming with a series of projects from beginner to advanced level.
In this tutorial, we are going to build an exciting python project through which you can convert currencies. For a user interface, we are going to use the tkinter library
Currency Converter in Python
Prerequisites
The currency converter project in python requires you to have basic knowledge of python programming and the pygame library.
- tkinter – For User Interface (UI)
- requests – to get url
To install the tkinter and requests library, type the following code in your terminal:
pip install tkinter
pip install requests
Download Project Code
Before proceeding ahead, please download source code of project: Currency Converter Project Code
Steps to Build the Python Project on Currency Converter
- Real-time Exchange rates
- Import required Libraries
- CurrencyConverter Class
- UI for CurrencyConverter
- Main Function
1. Real-time Exchange rates
To get real-time exchange rates, we will use: https://api.exchangerate-api.com/v4/latest/USD
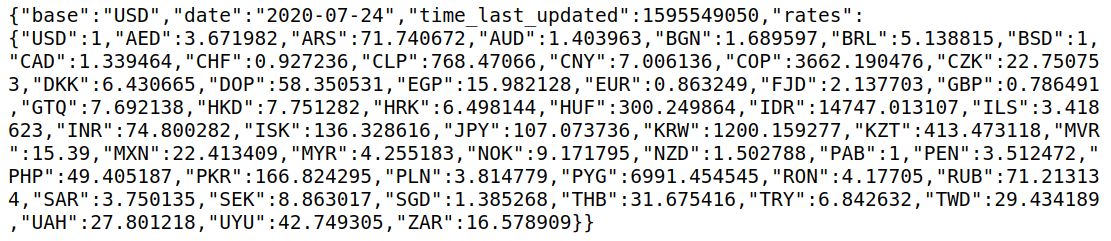
Here, we can see the data in JSON format, with the following details:
Base – USD: It means we have our base currency USD. which means to convert any currency we have to first convert it to USD then from USD, we will convert it in whichever currency we want.
Date and time: It shows the last updated date and time.
Rates: It is the exchange rate of currencies with base currency USD.
2. Import the libraries:
For this project based on Python, we are using the tkinter and requests library. So we need to import the library.
import requests
from tkinter import *
import tkinter as tk
from tkinter import ttk
3. Create the CurrencyConverter class:
Now we will create the CurrencyConverter class which will get the real-time exchange rate and convert the currency and return the converted amount.
3.1. Let’s create the constructor of class.
class RealTimeCurrencyConverter():
    def __init__(self,url):
        self.data= requests.get(url).json()
        self.currencies = self.data['rates']
requests.get(url) load the page in our python program and then .json() will convert the page into the json file. We store it in a data variable.
3.2. Convert() method:
def convert(self, from_currency, to_currency, amount):
    initial_amount = amount
    #first convert it into USD if it is not in USD.
    # because our base currency is USD
    if from_currency != 'USD' :
        amount = amount / self.currencies[from_currency]

    # limiting the precision to 4 decimal places
    amount = round(amount * self.currencies[to_currency], 4)
    return amount
This method takes following arguments:
From_currency: currency from which you want to convert.
to _currency: currency in which you want to convert.
Amount: how much amount you want to convert.
And returns the converted amount.
Example:
url = 'https://api.exchangerate-api.com/v4/latest/USD'
converter = RealTimeCurrencyConverter(url)
print(converter.convert('INR','USD',100))
OUTPUT: 1.33
100 Indian rupees = 1.33 US dollars
4. Now let’s create a UI for the currency converter
To Create UI we will create a class CurrencyConverterUI
def __init__(self, converter):
    tk.Tk.__init__(self)
    self.title = 'Currency Converter'
    self.currency_converter = converter
Converter: Currency Converter object which we will use to convert currencies. Above code will create a Frame.
Let’s Create the Converter
self.geometry("500x200")

#Label
self.intro_label = Label(self, text = 'Welcome to Real Time Currency Convertor',  fg = 'blue', relief = tk.RAISED, borderwidth = 3)
self.intro_label.config(font = ('Courier',15,'bold'))

self.date_label = Label(self, text = f"1 Indian Rupee equals = {self.currency_converter.convert('INR','USD',1)} USD \n Date : {self.currency_converter.data['date']}", relief = tk.GROOVE, borderwidth = 5)

self.intro_label.place(x = 10 , y = 5)
self.date_label.place(x = 170, y= 50)
NOTE: This Code part of __init__ method.
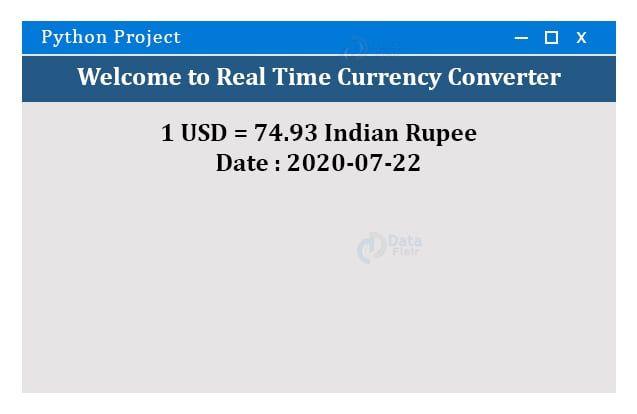
First, we set up the frame and add some info in it. After the execution of this part of code, our frame looks like something.
Now let’s create the entry box for the amount and options of currency in the frame. So That users can enter the amount and choose among currencies.
# Entry box
valid = (self.register(self.restrictNumberOnly), '%d', '%P')
# restricNumberOnly function will restrict thes user to enter invavalid number in Amount field. We will define it later in code
self.amount_field = Entry(self,bd = 3, relief = tk.RIDGE, justify = tk.CENTER,validate='key', validatecommand=valid)
self.converted_amount_field_label = Label(self, text = '', fg = 'black', bg = 'white', relief = tk.RIDGE, justify = tk.CENTER, width = 17, borderwidth = 3)

# dropdown
self.from_currency_variable = StringVar(self)
self.from_currency_variable.set("INR") # default value
self.to_currency_variable = StringVar(self)
self.to_currency_variable.set("USD") # default value

font = ("Courier", 12, "bold")
self.option_add('*TCombobox*Listbox.font', font)
self.from_currency_dropdown = ttk.Combobox(self, textvariable=self.from_currency_variable,values=list(self.currency_converter.currencies.keys()), font = font, state = 'readonly', width = 12, justify = tk.CENTER)
self.to_currency_dropdown = ttk.Combobox(self, textvariable=self.to_currency_variable,values=list(self.currency_converter.currencies.keys()), font = font, state = 'readonly', width = 12, justify = tk.CENTER)

# placing
self.from_currency_dropdown.place(x = 30, y= 120)
self.amount_field.place(x = 36, y = 150)
self.to_currency_dropdown.place(x = 340, y= 120)
#self.converted_amount_field.place(x = 346, y = 150)
self.converted_amount_field_label.place(x = 346, y = 150)
NOTE: This code is part of __init__
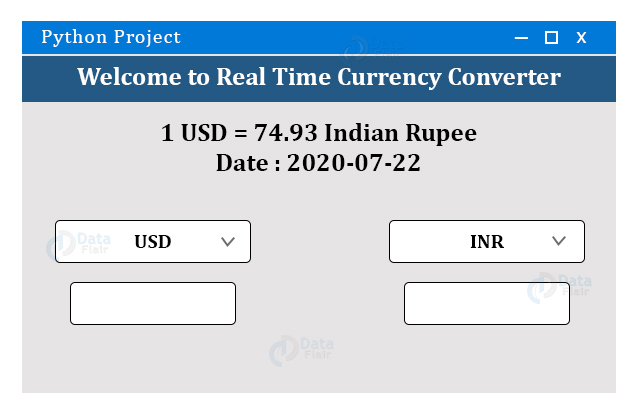
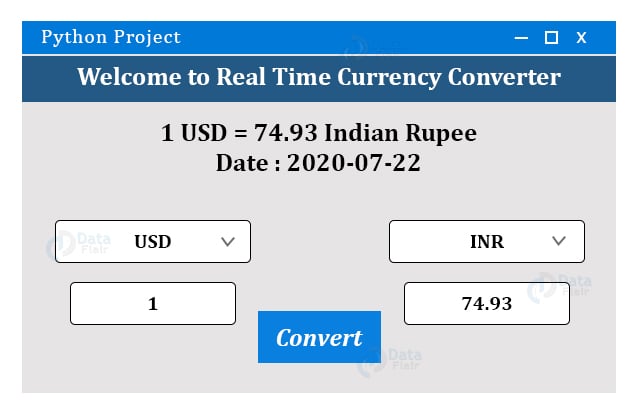
After the successful Execution of code till now. We will get below screen:
Now Let’s add the CONVERT button which will call the perform function.
 # Convert button
self.convert_button = Button(self, text = "Convert", fg = "black", command = self.perform)
self.convert_button.config(font=('Courier', 10, 'bold'))
self.convert_button.place(x = 225, y = 135)
Command = self.perform – It means on click it will call perform().
perform() method:
The perform method will take the user input and convert the amount into the desired currency and display it on the converted_amount entry box.
def perform(self,):
        amount = float(self.amount_field.get())
        from_curr = self.from_currency_variable.get()
        to_curr = self.to_currency_variable.get()

        converted_amount= self.currency_converter.convert(from_curr,to_curr,amount)
        converted_amount = round(converted_amount, 2)

        self.converted_amount_field_label.config(text = str(converted_amount))
NOTE: this function is a part of App class.
RestrictNumberOnly() method:
Now let’s create a restriction in our entry box. So that user can enter only a number in Amount Field. We have discussed earlier that this will be done by our RrestricNumberOnly method.
def restrictNumberOnly(self, action, string):
        regex = re.compile(r"[0-9,]*?(\.)?[0-9,]*$")
        result = regex.match(string)
        return (string == "" or (string.count('.') <= 1 and result is not None))
NOTE: This function is a part of App class.
5. Let’s create the main function.
First, we will create the Converter. Second, Create the UI for Converter
if __name__ == '__main__':
    url = 'https://api.exchangerate-api.com/v4/latest/USD'
    converter = RealTimeCurrencyConverter(url)

    App(converter)
    mainloop()
Summary
Finally in this Python project by DataFlair, we have learnt how to build currency converter project using python and its libraries like Tkinter.
Hope you enjoyed making the project. Feel free to share with your friends.