


Expert-led Courses: Transform Your Career – Enroll Now
Android GridView layout is one of the very important layouts that we have. It helps us show the data in the form of a grid so that we can show many images or icons at a time. We use this in application to show audios, videos or images from the gallery.
A grid basically shows the list of Items in a 2-Dimensional View. 2-Dimensional View of the list of icons or images is shown in the form of Rows and Columns as in the following Diagram.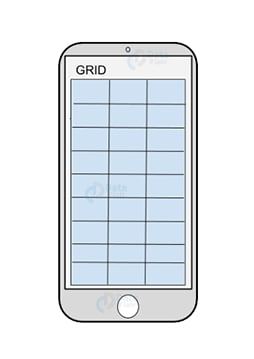
If the list of item is not fitting in the screen, it automatically becomes scrollable, we don’t need a Scroll view or something with it. Grid is created with the help of Android GridView that is present in Containers. A grid can be dragged from the list of Containers and dropped on the Screen. To fill the layout with icons or images we need to use Adapter. An Adapter simply inserts the data in the GridViewby taking the content from the source.
Check out how to access data items in android using Android Adapters.
Attributes of Android GridView
While we define an Android Gridview, we can also customize it according to our needs and wish. To customize the Grid Layout we use the following attributes:
- android: id – A Grid needs to be uniquely identified to choose it in case of requirement. For this purpose, id is defined for each grid using this attribute.
- android: gravity – This attribute sets the alignment of the GridView. We can align a Grid using, left, right, below, etc.
- android: columnWidth – This attribute is used to set the width of the Column to a fixed size using dp, sp, px, in or mm.
- android: stretchMode – stretchMode attribute is used to stretch and fill the empty space in a cell if any. The values that it may hold are – none, spacingWidth, columnWidth, spacingwidthUniform.
- android: horizontalSpacing – This attribute defines the spacing between the columns. The spacing could be in dp, sp, px, in or mm.
- android: numColumns – This attribute defines the number of icons or images that can be arranged in a column.
- android: height – This attribute sets the height of the Android GridView in dp, sp, px, in or mm.
- android: width – This attribute sets the width of the GridView in dp, sp, px, in or mm.
- android: verticalSpacing – This attribute defines the spacing between the rows. The spacing could be in dp, sp, px, in or mm.
How to Implement GridView in Android?
Now it is the time to implement an Android GridView example to see how we can arrange the images in Grid form. Lets us begin with the following step by step process.
Step 1: First of all we will create a new project and name it. Then we will define the Android GridView in activiy_main.xml file as follow:
<?xml version="1.0" encoding="utf-8"?>
<GridView xmlns:android="http://schemas.android.com/apk/res/android"
   android:id="@+id/mygrid"
   android:layout_width="match_parent"
   android:layout_height="match_parent"
   android:columnWidth="110dp"
   android:numColumns="auto_fit"
   android:stretchMode="columnWidth"
   android:verticalSpacing="15dp"
   android:horizontalSpacing="15dp"
   android:gravity="center" />
Step 2: After this, we will now create a file named, SetImageAdapter.java file. We will create it in the same folder, where we have MainActivity.java file. Now, we will write the following code in SetImageAdapter.java file:
package com.DataFlair.mycats;

import android.content.Context;
import android.view.View;
import android.view.ViewGroup;
import android.widget.BaseAdapter;
import android.widget.GridView;
import android.widget.ImageView;

public class SetImageAdapter extends BaseAdapter {
   public Integer[] thumbImages = {
           R.drawable.img1, R.drawable.img2,
           R.drawable.img11, R.drawable.img12,
           R.drawable.img3, R.drawable.img13,
           R.drawable.img4, R.drawable.img9,
           R.drawable.img5, R.drawable.img8,
           R.drawable.img1, R.drawable.img1,
           R.drawable.img6, R.drawable.img7,
           R.drawable.img11, R.drawable.img10,
           R.drawable.img1, R.drawable.img2,
           R.drawable.img5, R.drawable.img8,
           R.drawable.img1, R.drawable.img1,
           R.drawable.img6, R.drawable.img7,
           R.drawable.img11, R.drawable.img10,
           R.drawable.img1, R.drawable.img2,
           R.drawable.img11, R.drawable.img12,
           R.drawable.img3, R.drawable.img13,
           R.drawable.img4, R.drawable.img9,
           R.drawable.img5, R.drawable.img8,
           R.drawable.img1, R.drawable.img1,
           R.drawable.img6, R.drawable.img7
   };
   private Context Cont;

   public SetImageAdapter(Context c) {
       Cont = c;
   }

   public int getCount() {
       return thumbImages.length;
   }

   public Object getItem(int position) {
       return null;
   }

   public long getItemId(int position) {
       return 0;
   }

   public View getView(int position, View convertView, ViewGroup parent) {
       ImageView imgview = new ImageView(Cont);
       imgview.setLayoutParams(new GridView.LayoutParams(370, 250));
       imgview.setScaleType(ImageView.ScaleType.CENTER_CROP);
       imgview.setPadding(10,10,10, 10);
       imgview.setImageResource(thumbImages[position]);
       return imgview;
   }
}
Step 3: Now we will write the following code in the MainActivity.java file:
package com.DataFlair.mycats;

import android.os.Bundle;
import android.widget.GridView;

import androidx.appcompat.app.AppCompatActivity;


public class MainActivity extends AppCompatActivity {
   @Override
   protected void onCreate(Bundle savedInstanceState) {
       super.onCreate(savedInstanceState);
       setContentView(R.layout.activity_main);
       GridView gv = findViewById(R.id.mygrid);
       gv.setAdapter(new SetImageAdapter(this));

   }
}
Step 4: After that, we will run the app following would be shown on the Screen:
i) This is the GridView.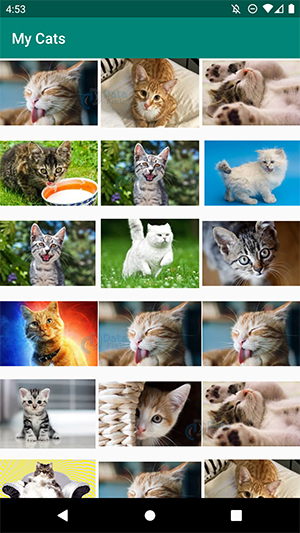
ii) Here I have added many images to show you how it becomes scrollable. To see that consider the following video:
Summary
In this article, we saw the concept of Android Grid View and how important it is to arrange and show the icons in a systematic way. We also saw how we can define Android GridView and customize it. In the end, we have also implemented an example of Android GridView. So we will meet in the next article.
If you liked DataFlair’s Android GridView article, do rate us on Google.
Happy Learning😃