JavaScript Project – Creating a Photo Gallery with HTML, CSS & JS Code
Free Web development courses with real-time projects Start Now!!
Now, in the DataFlair’s JavaScript tutorial series, it’s time for exploring the JavaScript projects. In this tutorial, we will create a JavaScript project on photo gallery with the help of all the concepts we’ve learned so far. We will use HTML, CSS and JavaScript codes to create a simple photo gallery of our liking. I will provide you with step-by-step guidance to help you with the code. It is necessary that you learned all the concepts of JavaScript in the previous tutorials and practiced them with me. This project will seem like a piece of cake if you did, otherwise, you might like to go through the topics as you need.
Don’t worry, you can revise the topics from the JavaScript Tutorial Library
JavaScript Project – Photo Gallery
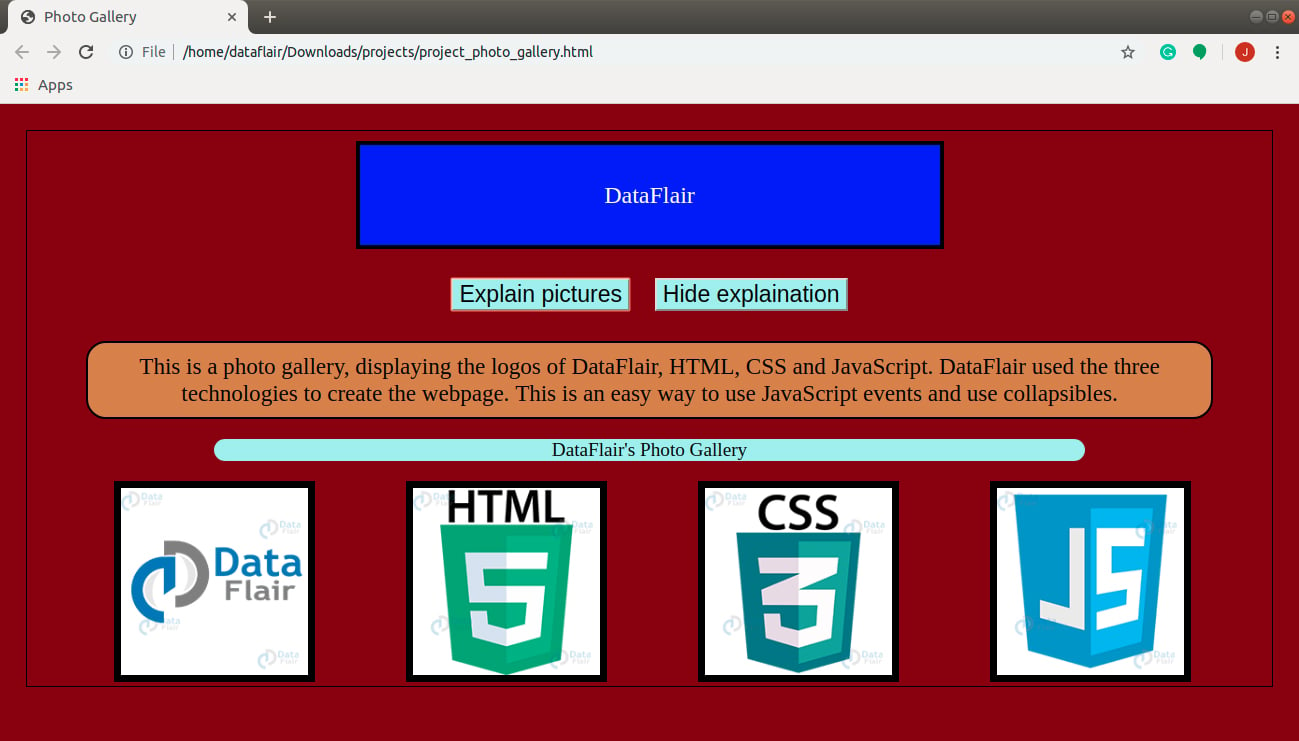
In this JavaScript project, we will create a photo frame, containing three images. The project will use HTML, CSS, and JavaScript to create a beautiful photo gallery in your browser. The page consists of a box that changes the containing text and two buttons. On click, the buttons show and hide a paragraph. Lastly, it contains four images displaying logos. The different page elements have numerous styles and colors, creating an attractive webpage.
You can download the images used in this JavaScript project from – Photo Gallery
1. How to implement the HTML code?
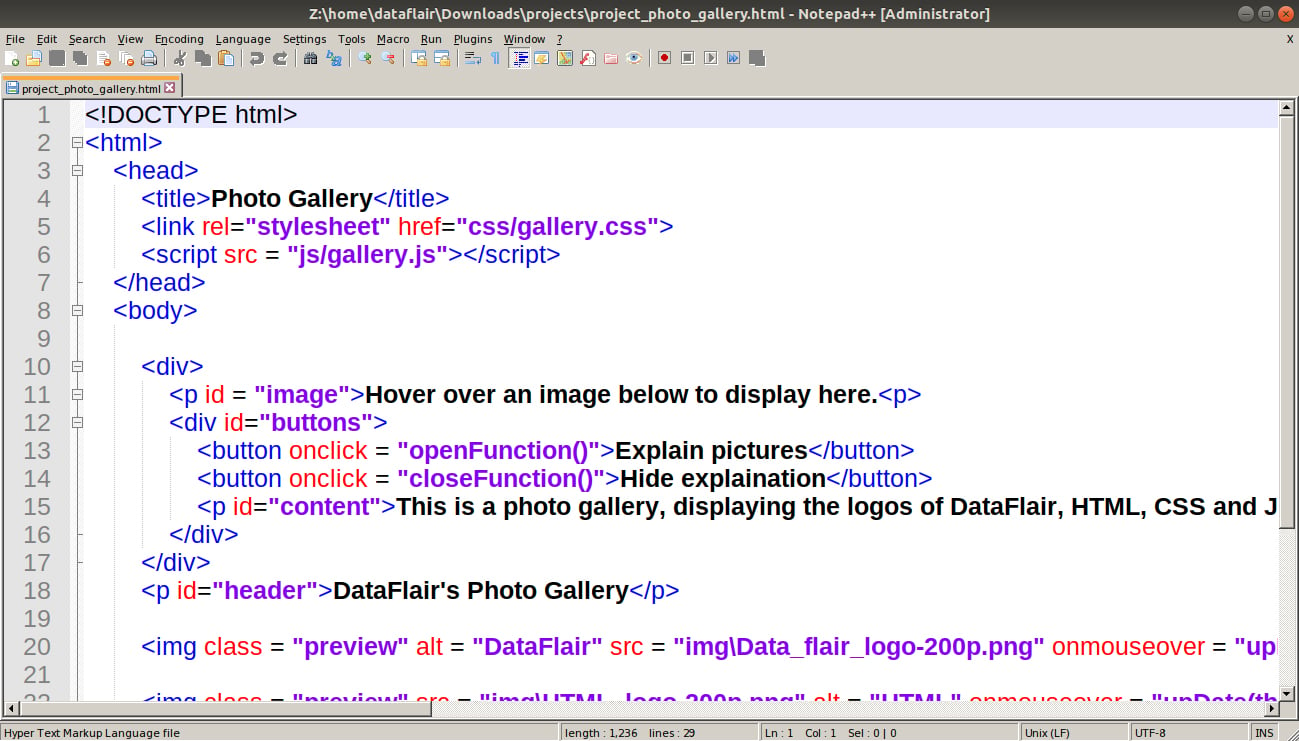
The very first thing you need to do to create a webpage is to decide how your page is going to look. According to that, you add the HTML code. Determine what elements you need to add in the program and where to put them. After everything, the HTML code looks something like this.
Code:
<!DOCTYPE html>
<html>
  <head>
    <title>Photo Gallery</title>
    <link rel="stylesheet" href="css/gallery.css">
    <script src = "js/gallery.js"></script>
  </head>
  <body>

    <div>
        <p id = "image">Hover over an image below to display here.<p>
      <div id="buttons">
        <button onclick = "openFunction()">Explain pictures</button>
        <button onclick = "closeFunction()">Hide explaination</button>
        <p id="content">This is a photo gallery, displaying the logos of DataFlair, HTML, CSS and JavaScript. DataFlair used the three technologies to create the webpage. This is an easy way to use JavaScript events and use collapsibles.</p>
      </div>
    </div>
    <p id="header">DataFlair's Photo Gallery</p>

    <img class = "preview" alt = "DataFlair" src = "img\Data_flair_logo-200p.png" onmouseover = "upDate(this)" onmouseout = "unDo()">

    <img class = "preview" src = "img\HTML_logo-200p.png" alt = "HTML" onmouseover = "upDate(this)" onmouseout = "unDo()">

    <img class = "preview" src = "img\CSS_logo-200p.png" alt = "CSS" onmouseover = "upDate(this)" onmouseout = "unDo()">

    <img class = "preview" alt = "JavaScript" src = "img\js_logo-200p.png" onmouseover = "upDate(this)" onmouseout = "unDo()">

  </body>
</html>
Output:
Note: While adding external files (images, CSS and JavaScript), be careful with the relative URLs in your code. If you provide incorrect locations, the browser won’t be able to search for them, causing errors.
Notice that the code contains a reference to a CSS and JavaScript file too. We will add them as we go. We also decided at the beginning where we want events to happen. These mouse events (onclick, mouseover and mouseout) tell the browser what to do when these events fire. This is how the code looks like in the browser.
Output:

Not very organized, is it? This is where we add CSS to the HTML program.
2. Sprinkle some CSS
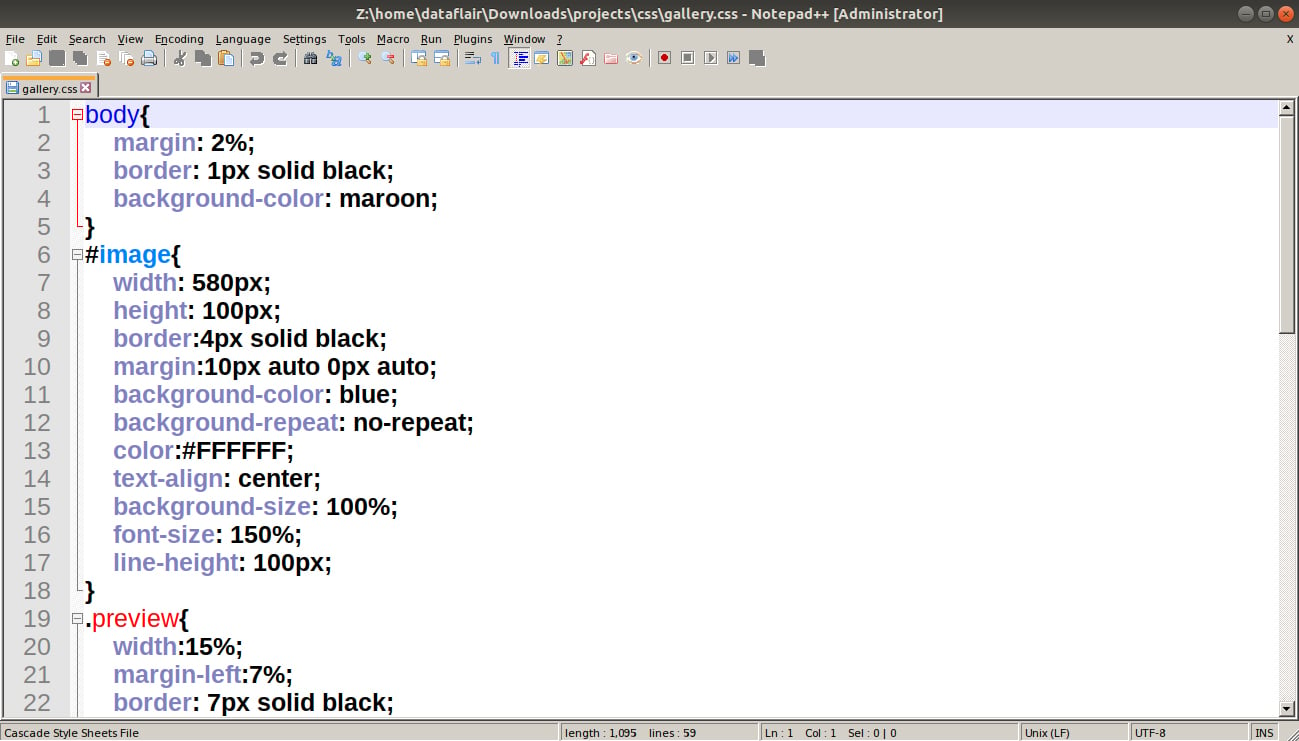
You can edit the CSS as per your liking. For this JavaScript project, we will work with the code below.
Code:
body{
  margin: 2%;
  border: 1px solid black;
  background-color: maroon;
}
#image{
    width: 580px;
    height: 100px;
    border:4px solid black;
    margin:10px auto 0px auto;
    background-color: blue;
    background-repeat: no-repeat;
    color:#FFFFFF;
    text-align: center;
    background-size: 100%;
    font-size: 150%;
    line-height: 100px;
}
.preview{
    width:15%;
    margin-left:7%;
    border: 7px solid black;
    background-color: white;

}
p{
    font-size: larger;
    text-align: center;
    background-color: paleturquoise;
    color: black;
}
button{
    font-size: larger;
    text-align: center;
    background-color: paleturquoise;
    color: black;
    margin: 10px 10px 30px 10px;
}
#content{
    padding: 0 18px;
    background-color: peru;
    width: 90%;
    margin: auto;
    padding: 10px 10px 10px 10px;
    border: 2px solid black;
    border-radius: 20px
}
#buttons{
    font-size: larger;
    text-align: center;
    color: black;
    margin: 10px 10px 10px 10px;
    cursor: pointer;
}
#header{
    border-radius: 20px;
    width: 70%;
    margin: 20px auto;
}
Screenshot:
After adding CSS, the webpage looks like this.
Output:
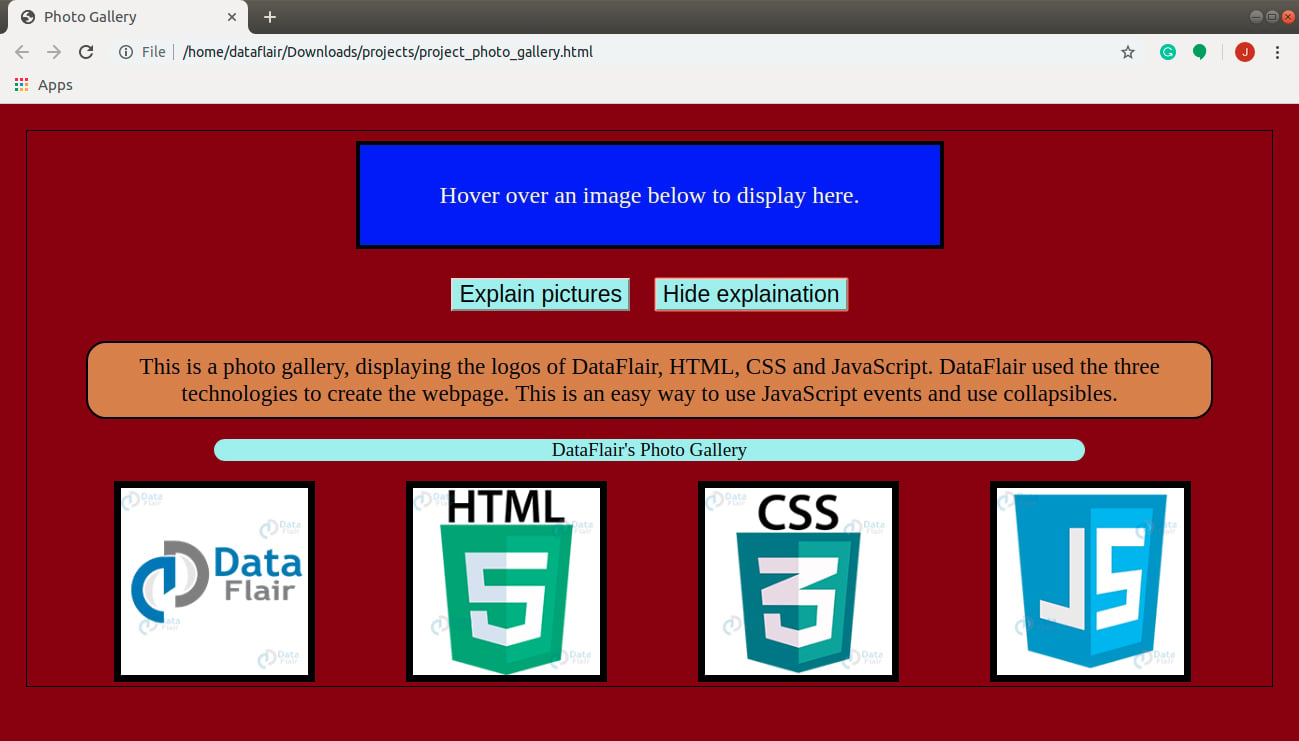
This is more like it! Nice, we have a colorful page with the elements positioned as we wanted. You can change the positions, colors, and sizes as you like. There are no limitations regarding that.
Wait! Do you know about the Top JavaScript Operators
3. The magic of JavaScript to make the webpage dynamic
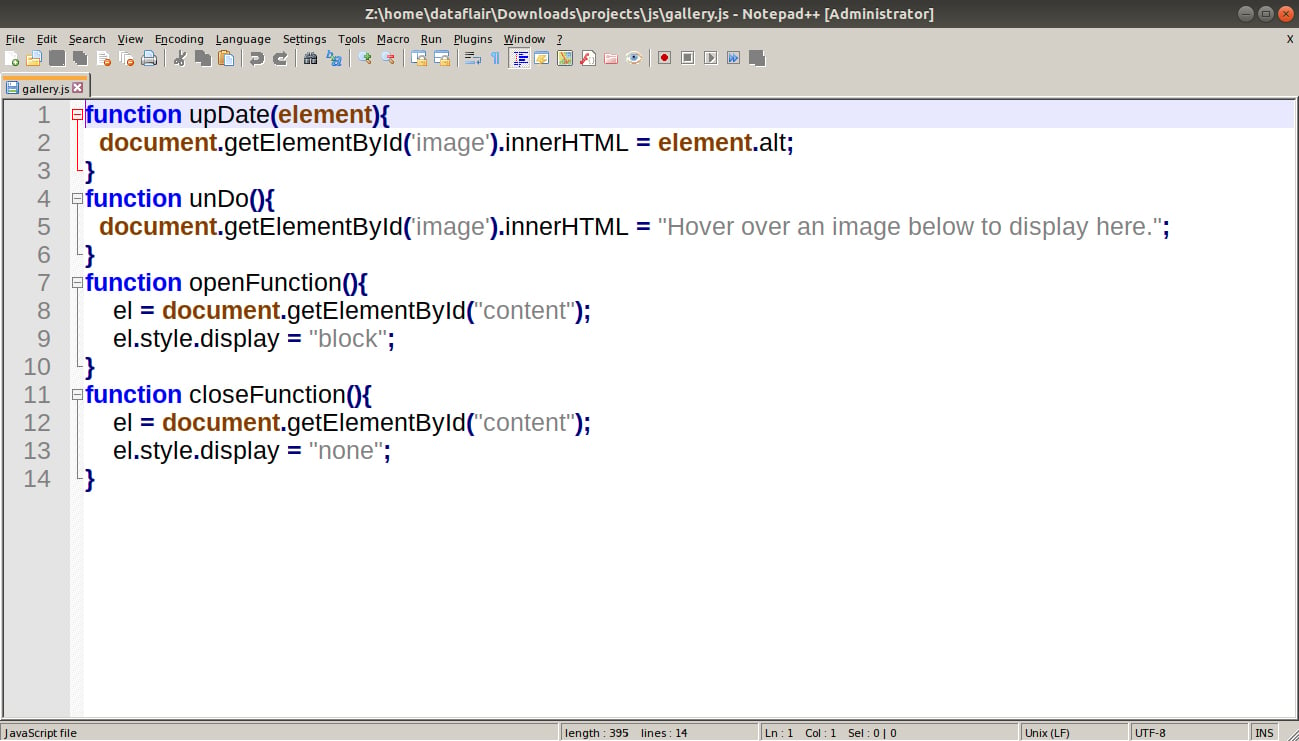
But the buttons still don’t work, do they? Neither is the text in the blue box changing. That is the task of the JavaScript code. Add the JavaScript code mentioned below and you’ll have the webpage you wanted. And with all the functions you were working on.
Code:
function upDate(element){
  document.getElementById('image').innerHTML = element.alt;
}
function unDo(){
  document.getElementById('image').innerHTML = "Hover over an image below to display here.";
}
function openFunction(){
  el = document.getElementById("content");
  el.style.display = "block";
}
function closeFunction(){
  el = document.getElementById("content");
  el.style.display = "none";
}
Screenshot:
Run the webpage again and see what you get. Isn’t it amazing? With a few lines of JavaScript code, we added interactivity to the webpage. The screenshot below is what we get on my screen if I hover my cursor over the first image.
Output:
Also, this code improves the efficiency of the code. Imagine trying to do this by only using HTML and CSS. Scary, right?
What exactly happened?
Let’s understand what happened in the above JavaScript code and how it worked. We won’t cover the HTML and CSS code here since I assume that you already have a good understanding of HTML and CSS before working on this project. Let’s begin.
The first thing we did was create an external JavaScript file and add it to the HTML file with the help of a <script> tag. Next, we added JavaScript events to the HTML elements that are linked to the JavaScript functions. The functions trigger whenever these events occur and perform specified actions.
The functions upDate(element) and unDo() alter the text shown in the blue box. The text in the box is either a predefined line or the alt text of the image the user hovers over. The functions openFunction() and closeFunction() show and hide the text box respectively. You can decide whether you want the explanation about the images or not.
We used the document’s built-in method getElementById() to access the elements we wanted to get. You can easily use querySelector() in your program. Just be careful of the compatibility rules of the method in various browsers.
Summary
In this JavaScript project, we created a beautiful photo gallery. If we choose, we can add other images in it, but we now understand how to do that. We used HTML, CSS, and JavaScript to accomplish the task.
You have successfully completed the 1st JavaScript project designed by DataFlair. If you faced any issues while implementing the project, share them in the comment section.
Wondering, what next? Here is the JavaScript Project on Countdown Timer
Your opinion matters
Please write your valuable feedback about DataFlair on Google


yp it is gud
Thanks for the feedback. You can also refer to other interesting JavaScript projects from the sidebar.
nyc